In the previous article "Teach you step-by-step how to use PS to convert ordinary pictures into colorful backgrounds (Summary)", I introduced you to a little PS trick on how to turn pictures into colorful backgrounds. colorful background. The following article will introduce to you how to add a knitting effect to pictures in PS. Come and take a look, friends.
The knitting effect picture is as follows
1. Open ps, import the material picture and copy two layers.
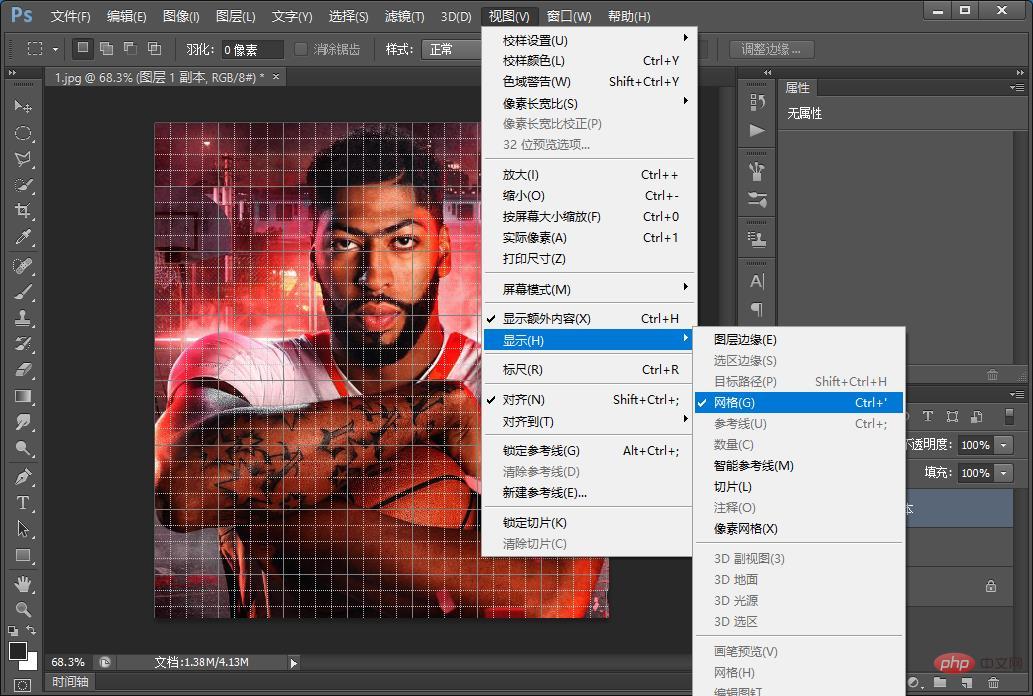
2. Open [View]-[Display]-[Network]

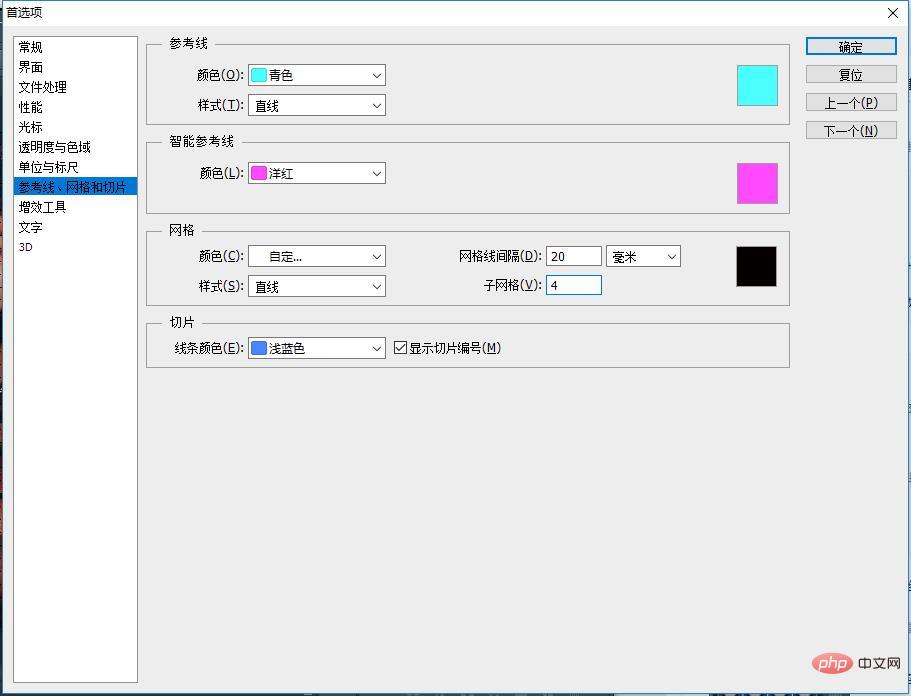
3. Open [Edit]-[Preferences]-[Reference Lines, Networks and Slices] The parameter diagram is as follows

4. Here the characters in your screen will be displayed in a grid. , select the [Rectangular Marquee Tool], and perform vertical selection operations every four cells on the screen. When selecting, hold down the Shift key to increase the selection. There is a selection for every four cells, with an empty space in the middle.
5. [Ctrl E] Merge layers.
6. [Layer 2 Copy 8] Ctrl left-click to create a selection and then [Layer 1] add a mask.
#7. Right-click to pop up and select [Rotate 90 degrees]
8. The method mentioned above remains unchanged.
9. Click the [Layer 1]-[Layer 1 copy] Ctrl shift alt chain.
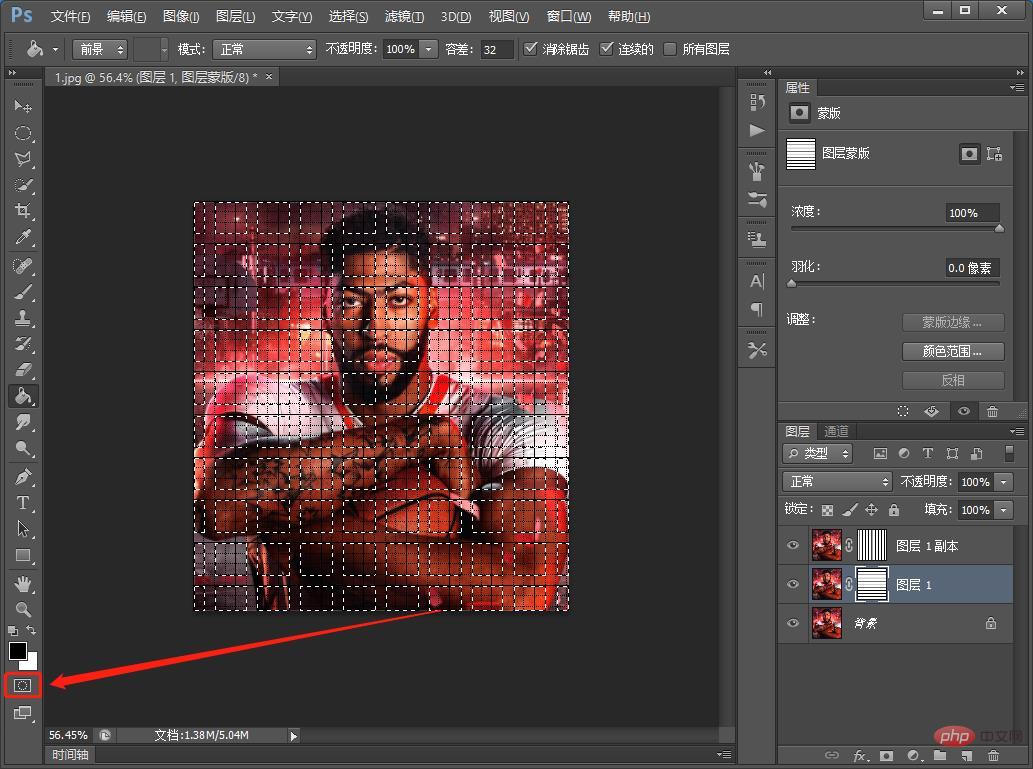
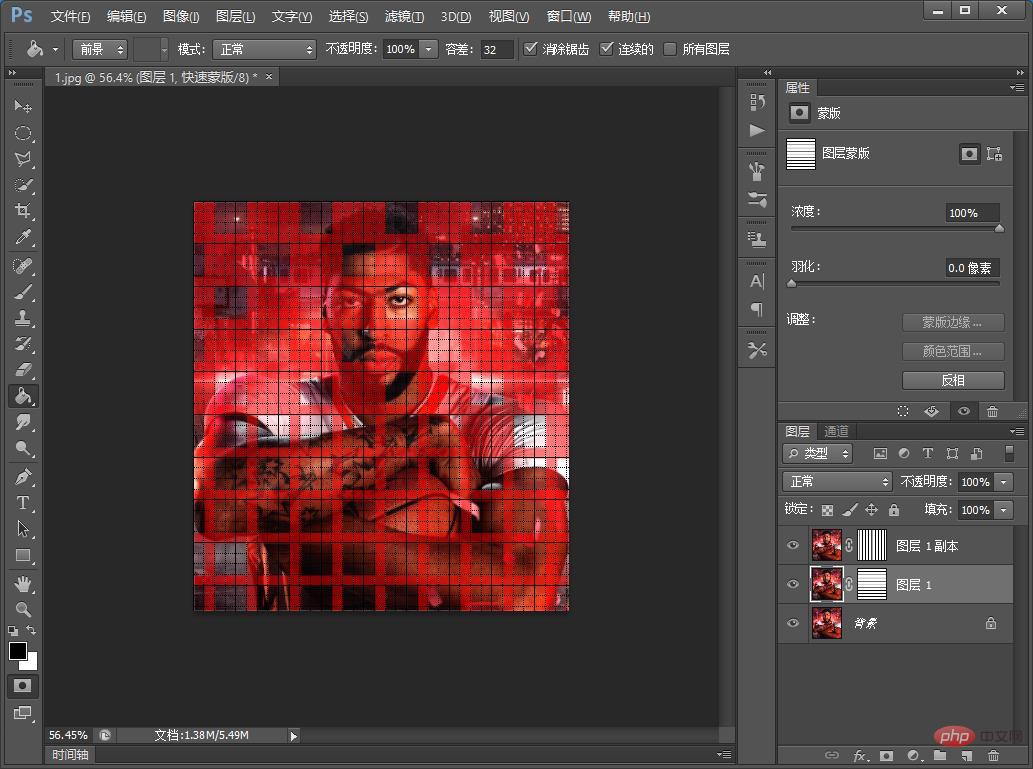
10. After Ctrl shift alt chain click, start [Quickly Add Mask].

#11. Use the [Paint Bucket Tool] to set the foreground color to black, and fill in the grids on the canvas alternately.

12. Click to exit Quick Mask, get the following selection, and then copy a layer as follows
13. Same method as above.
14. Click [Layer 2], right-click the blending option.
15. Enter the layer style-[Projection] and set the parameters as follows.
#16. After the settings are completed, copy [Layer 2] and hold down Alt and drag it to [Layer 3] and create a new layer and fill it with black.
17. The effect is completed.
Recommended learning: PS video tutorial
The above is the detailed content of PS Tutorial: How to add a knitting effect to pictures (share). For more information, please follow other related articles on the PHP Chinese website!