In the eyes of most people, tab stops are almost never used when using Word. For example, when typesetting a document, it is often necessary to quickly align the text in the document. People often type infinite spaces to align, instead of automatically aligning through tab stops (pressing the [Tab] key).
Therefore, today I will give you a detailed introduction to the use of Word tab stops, including: where the Word tab stops are and how to set the tab stop positions, etc., to help you typeset documents easily and quickly.
1. How to use tab stops in Word
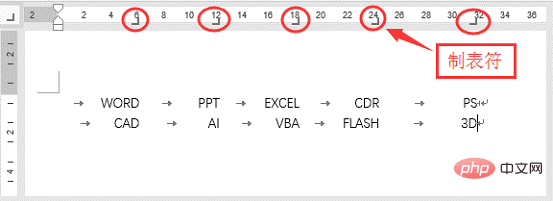
By default, every time we press the [Tab] key in a Word document , the insertion point will automatically move 2 characters to the right and be positioned at a new position. This position is called a tab stop. Simply put, the position specified by the tab character is called a tab stop.
What is the tab character mentioned here?
The production symbol refers to a symbol displayed on the horizontal ruler of Word. This symbol is the mark of the tab stop location. Its function is to standardize the position of each character or text entered in the document.

2. How to set the tab stop?
There are two ways to set tab stops in Word, one is to set it on the ruler, and the other is to set it in the "Tab Stop" dialog box.
(1) Set the tab stop on the ruler
Click [View]-[Display] group, check the "Ruler" checkbox, and the interface will The horizontal and vertical rulers are displayed.

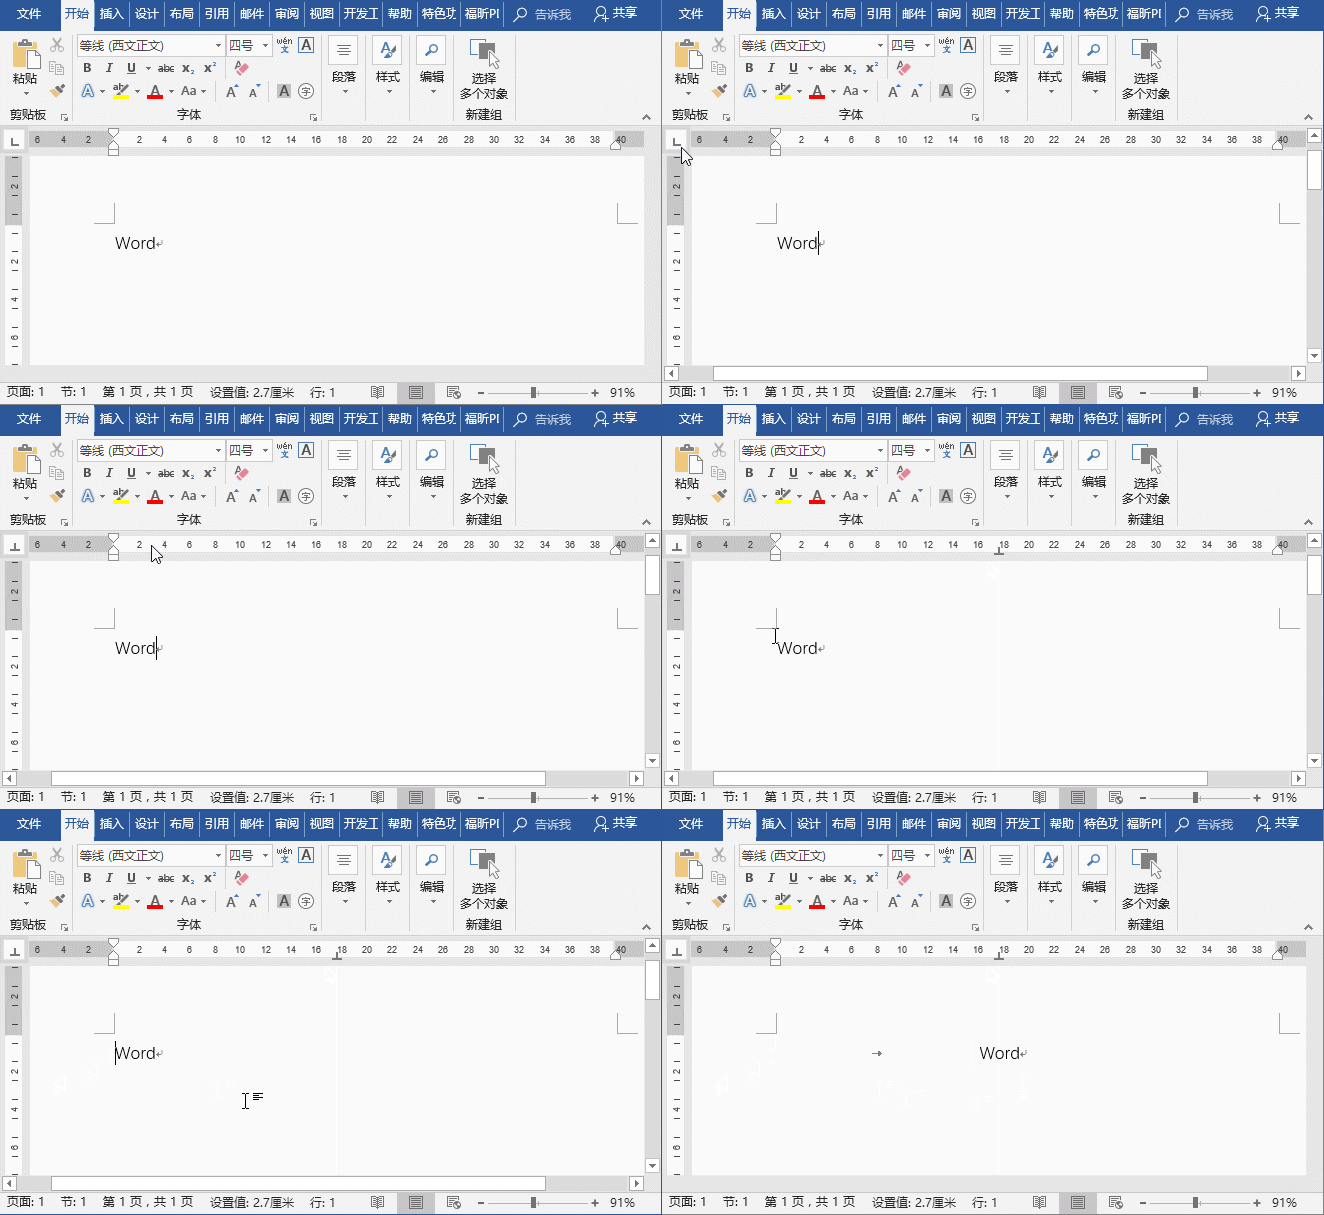
At this point, you can see the "right-aligned tab" mark on the far left side of the ruler, which contains 5 types of tab characters, namely: Left-aligned tab characters, center-aligned tab characters, right-aligned tab characters, decimal point-aligned tab characters, and vertical line-aligned tab characters are all used to specify the alignment of text.
When setting the tab stop, click the tab mark on the far left of the ruler to switch to the desired tab alignment type, and then directly click a position on the ruler to create a tab character, and position and set the tab stop, as shown in the figure.

(2) Set
in the "Tab Stop" dialog box. If you want to set the tab stop accurately, We can set it in the "Tab Stop" dialog box. The method is:
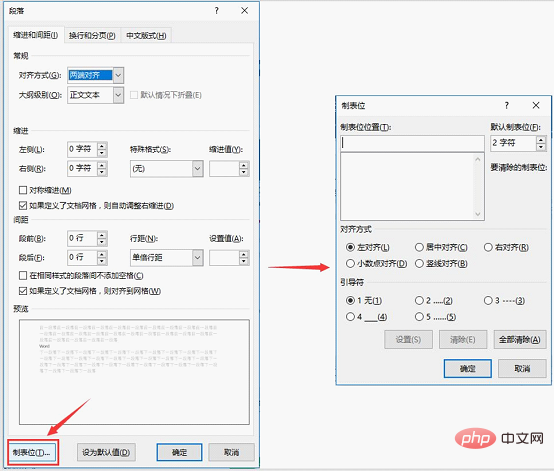
Click the "Paragraph Dialog Launcher" button in the lower right corner of the [Start]-[Paragraph] group to open the "Paragraph" dialog box, and then click the "Tab Stop" button to open Tab Stops dialog box.

In the "Tab stop position" text box, you can enter a specific value to determine the production stop position. In the "Alignment" column, you can select the alignment of the tab stops. In the "Leader" column, you can select a symbol to fill the blank distance between the tab stops, and then click the "Settings" and "OK" buttons. Tab stop setting is completed.
3. Word tab stop case demonstration
Let’s take the use of tab stops to create a simple manual directory as an example to introduce the production Bit setting method.
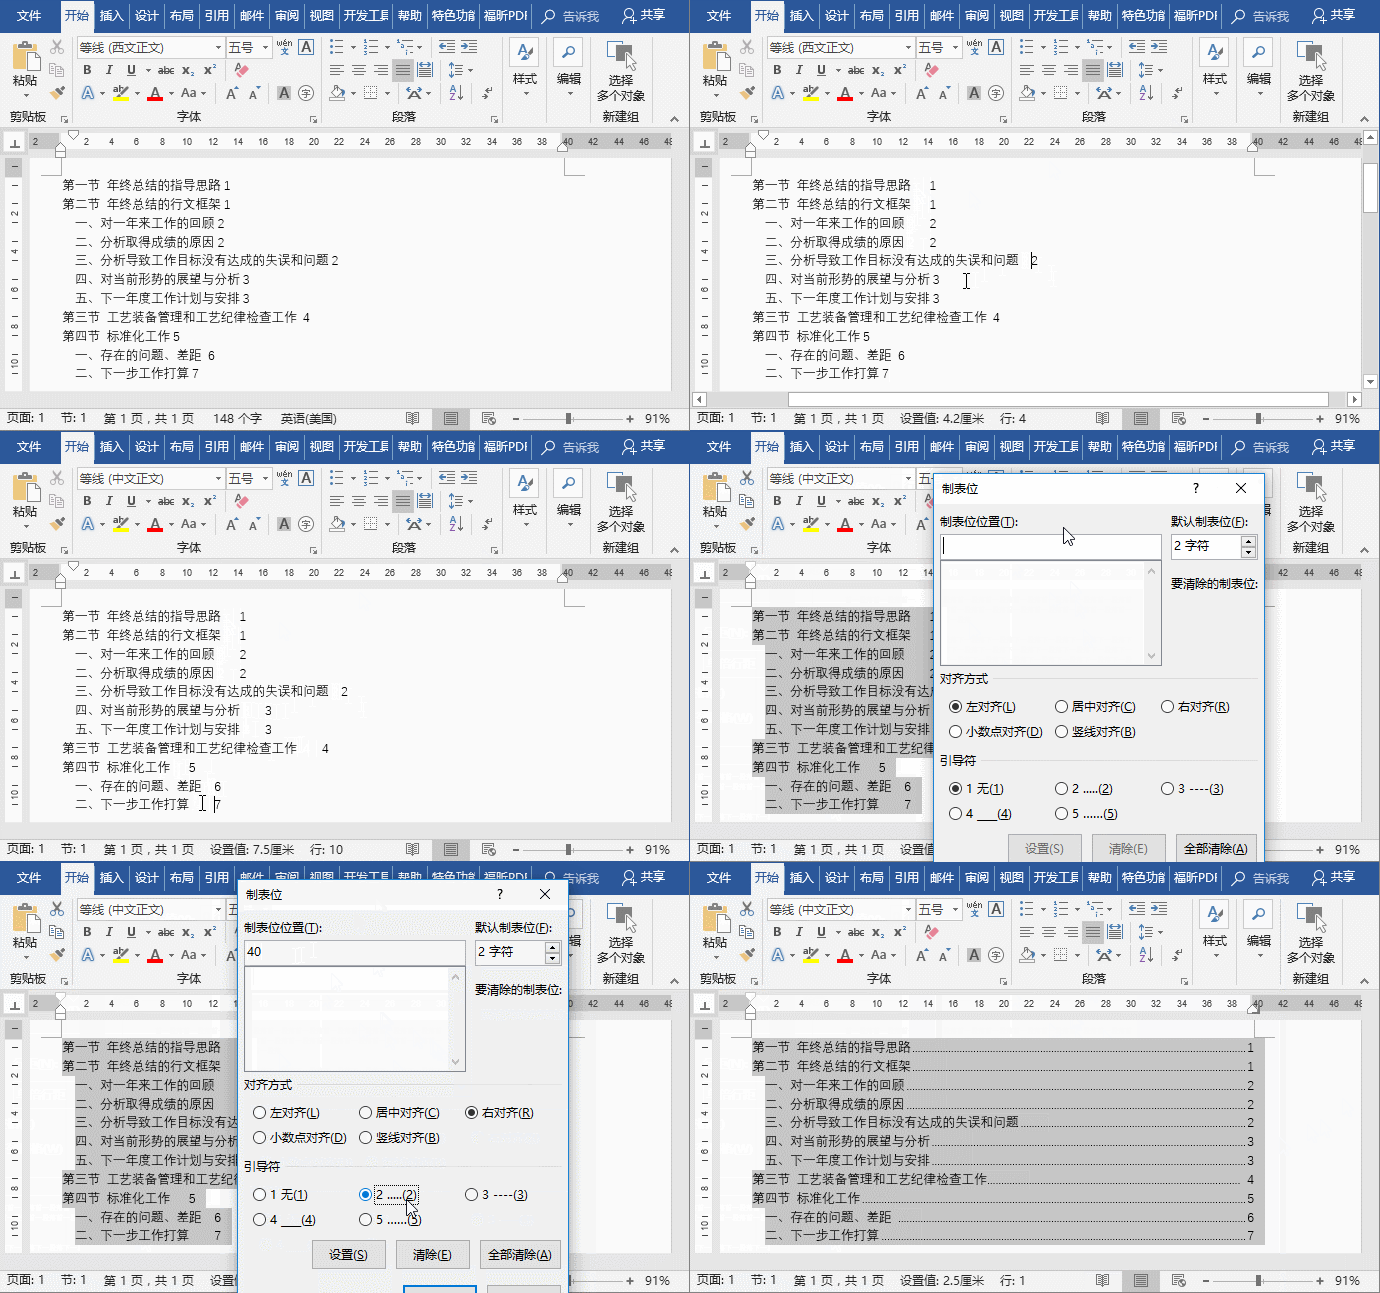
(1) First, position the cursor between the table of contents title and the page number, press the [Tab] key, and insert a tab character between the table of contents title and the page number.
(2) Then select the entire directory with the [Ctrl A] key, click the "Paragraph Dialog Launcher" button in the lower right corner of the [Start]-[Paragraph] group, open the "Paragraph" dialog box, and then click "Tab Stop" button opens the "Tab Stop" dialog box.
(3) Enter "40" in the "Tab Stop Position" text box as the tab stop position; select "Align Right" for "Alignment", and select "2... ...(2)" and click the "OK" button.
(4) At this point, you will get the style of the directory!

# This operation is very convenient. You don’t need to manually set it up one by one. It can easily help you get the manual directory.
Recommended tutorial: "Word Tutorial"
The above is the detailed content of Word skills sharing: Detailed explanation of how to use 'tab stops'. For more information, please follow other related articles on the PHP Chinese website!
 How to change word background color to white
 How to delete the last blank page in word
 Why can't I delete the last blank page in word?
 Word single page changes paper orientation
 word to ppt
 Word page number starts from the third page as 1 tutorial
 Tutorial on merging multiple words into one word
 word insert table