
As front-end development pays more and more attention to efficiency: fast loading and rendering through the use of selectors and simplified code. When preprocessors like Less and SCSS work, they need to take a long detour, and using CSS directly will be faster.
Here covers 20 CSS tips to help you reduce duplication of rules and duplication, and standardize the style process in layout, which will not only help you create your own framework efficiently, but also solve many common problems.
1. Use CSS reset (reset)
css reset libraries such as normalize.css have been used for many years. They can provide styles for your website. A clearer standard to ensure consistency across browsers.
Most projects don't need all the rules contained in these libraries. A simple rule can be applied to all elements in the layout, removing all margin, paddingChange the browser's default box model.
*{
     box-sizing:border-box;
     margin:0;
     padding:0
}The declaration using box-sizing is optional and can be skipped if you are using the box model form inherited below.
2. Inherit the box model
Let the box model inherit from html:
html {
    box-sizing: border-box;
}
*, *:before, *:after {
    box-sizing: inherit;
}3. Use flexbox layout to avoid margin problems (Get Rid of Margin hacks width Flexbox)
How many times have you tried to design a grid layout such as a portfolio or picture gallery, and if you use floats, then you need to clear the floats and resize them. Set margins to break it into the required number of lines. To avoid nth-, first-, last-child problems, you can use space-between of flexbox attribute value.
.flex-container{
  display:flex;
  justify-content:space-between;
}
.flex-container .item{
  flex-basis:23%;
}4. Use: not() to solve the problem of lists borders
In web design, we usually use: last-child nth-child selector to override the style originally declared to be on the parent selector. For example, for a navigation menu, use borders to create a separator for each link Link, and then add a rule to remove the border of the last link
.nav li {
    border-right: 1px solid #666;
}
.nav li:last-child {
    border-right: none;
}This is a very confusing way of not only forcing the browser to render one way, but then undoing it via a specific selector. Overriding styles like this is unavoidable. Most importantly, however, we can use only one style on the element you want to declare by using: notpseudo-class (pseudo-class):
.nav li:not(:last-child) {
    border-right: 1px solid #666;
}The above is that, except the last li, all .nav li are added with the border style, isn’t it very simple!
Of course, you can also use .nav li li or .nav li:first-child ~li , but : not is more Semantic and easy to understand.
5. Add line-height styles to the body
One thing that leads to inefficient stylesheets is constant repeated declarations. It is best to make project planning and combination rules so that CSS will flow more smoothly. To achieve this, we need to understand cascade and how styles written in universal selectors can be inherited in other places.
Line spacing (line-height) can be used as a property set for your entire project. It can not only reduce the amount of code, but also give your website a standard style. Appearance
body {
    line-height: 1.5;
}Please note that the declaration here has no units. We just tell the browser to render the line height 1.5 times the rendering font size
6. Vertical centering Any element (vertical-center anything)
When you are not planning to use CSSGrid layout, setting global rules for vertical center layout is a good way to layout content elegantly. Lay a foundation
html, body {
    height: 100%;
    margin: 0;
}
body {
    -webkit-align-items: center;
    -ms-flex-align: center;
    align-items: center;
    display: -webkit-flex;
    display: flex;
}7. Use SVG icons
SVG is used for all resolution classes and is supported by all browsers. Therefore, files such as .png .jpg .gif can be discarded. FontAwsome5 also provides SVG icon fonts. Setting the format of SVG is the same as other image types:
.logo {
    background: url("logo.svg");
}Warm reminder: If SVG is used on interactive elements such as buttons, SVG will cause problems with loading. You can use the following rule to ensure that SVG can be accessed (make sure the appropriate aria attribute is set in HTML)
.no-svg .icon-only:after {
    content: attr(aria-label);
}8. Use the "OWL selector"
Using universal selectors * and adjacent sibling selectors can provide a powerful CSS feature for following documents within other elements. Set uniform rules for all elements in the flow
* + * {
    margin-top: 1.5rem;
} This is a great technique that can help you create more even type and spacing. In the example above, elements that follow other elements, such as H4 after H3, or a paragraph after a paragraph, should have at least 1.5rems of space between them (approximately 30px )
9. Consistent Vertical Rhythm
一致的垂直节奏提供了一种视觉美学,使内容更具可读性。如果owl选择器过于通用,请在元素内使用通用选择器(*)为布局的特定部分创建一致的垂直节奏:
.intro > * {
   margin-bottom: 1.25rem;
}10、对更漂亮的换行文本使用 box-decoration-break
假设您希望对换行到多行的长文本行应用统一的间距、边距、突出显示或背景色,但不希望整个段落或标题看起来像一个大块。Box Decoration Break属性允许您仅对文本应用样式,同时保持填充和页边距的完整性。
如果要在悬停时应用突出显示,或在滑块中设置子文本样式以具有突出显示的外观,则此功能尤其有用:
.p {
  display: inline-block;
  box-decoration-break: clone;
  -o-box-decoration-break: clone;
  -webkit-box-decoration-break: clone;
}内联块声明允许将颜色、背景、页边距和填充应用于每行文本,而不是整个元素,克隆声明确保将这些样式均匀地应用于每行。
11、等宽表格单元格
表格可能很难处理,所以尝试使用table-layout:fixed来保持单元格相等宽度:
.calendar {
    table-layout: fixed;
}12、强制使用属性选择器显示空链接
这对于通过CMS插入的链接特别有用,CMS通常不具有类属性,并帮助您在不影响级联的情况下对其进行特定样式设置。例如,<a>元素没有文本值,但href属性有一个链接:
a[href^="http"]:empty::before {
    content: attr(href);
}13、样式“默认”链接
说到链接样式,您可以在几乎每个样式表中找到一个通用的A样式。这迫使您为子元素中的任何链接编写额外的覆盖和样式规则,并且在使用像WordPress这样的CMS时,可能会导致您的主链接样式比按钮文本颜色更容易出现问题。
尝试这种较少干扰的方式为“默认”链接添加样式:
a[href]:not([class]) {
    color: #999;
    text-decoration: none;
    transition: all ease-in-out .3s;
}14、比率框
要创建具有固有比率的框,您需要做的就是将顶部或底部填充应用于div:
.container {
    height: 0;
    padding-bottom: 20%;
    position: relative;
}
.container div {
    border: 2px dashed #ddd;
    height: 100%;
    left: 0;
    position: absolute;
    top: 0;
    width: 100%;
}使用20%进行填充使得框的高度等于其宽度的20%。无论视口的宽度如何,子div都将保持其纵横比(100%/ 20%= 5:1)。
15、风格破碎的图像
这个技巧不是关于代码缩减,而是关于细化设计细节的。破碎的图像发生的原因有很多,要么不雅观,要么导致混乱(只是一个空元素)。用这个小小的CSS创建更美观的效果:
img {
    display: block;
    font-family: Helvetica, Arial, sans-serif;
    font-weight: 300;
    height: auto;
    line-height: 2;
    position: relative;
    text-align: center;
    width: 100%;
}
img:before {
    content: "We're sorry, the image below is missing :(";
    display: block;
    margin-bottom: 10px;
}
img:after {
    content: "(url: " attr(src) ")";
    display: block;
    font-size: 12px;
}16、使用rem进行全局大小调整;使用em进行局部大小调整
在设置根目录的基本字体大小后,例如html字体大小:15px;,可以将包含元素的字体大小设置为rem:
article {
    font-size: 1.25rem;
}
aside {
    font-size: .9rem;
}然后将文本元素的字体大小设置为em
h2 {
    font-size: 2em;
}
p {
    font-size: 1em;
}现在,每个包含的元素都变得分区化,更易于样式化、更易于维护和灵活。
17、隐藏未静音的自动播放视频
当您处理无法从源代码轻松控制的内容时,这对于自定义用户样式表来说是一个很好的技巧。这个技巧将帮助您避免在加载页面时自动播放视频中的声音干扰访问者,并再次提供了精彩的:not()伪选择器:
video[autoplay]:not([muted]) {
    display: none;
}18、灵活运用root类型
响应布局中的字体大小应该能够自动调整到视区,从而保存编写媒体查询的工作,以处理字体大小。可以使用:not和视区单位,根据视区高度和宽度计算字体大小:
:root {
    font-size: calc(1vw + 1vh + .5vmin);
}现在,您可以使用根em单位,该单位基于:not:
body {
    font: 1rem/1.6 sans-serif;
}结合上面的rem/em技巧以获得更好的控制。
19、在表单元素上设置字体大小,以获得更好的移动体验
为了避免移动浏览器(iOS Safari等)在点击<select>下拉列表时放大HTML表单元素,请在添加font-size样式:
input[type="text"],
input[type="number"],
select,
textarea {
    font-size: 16px;
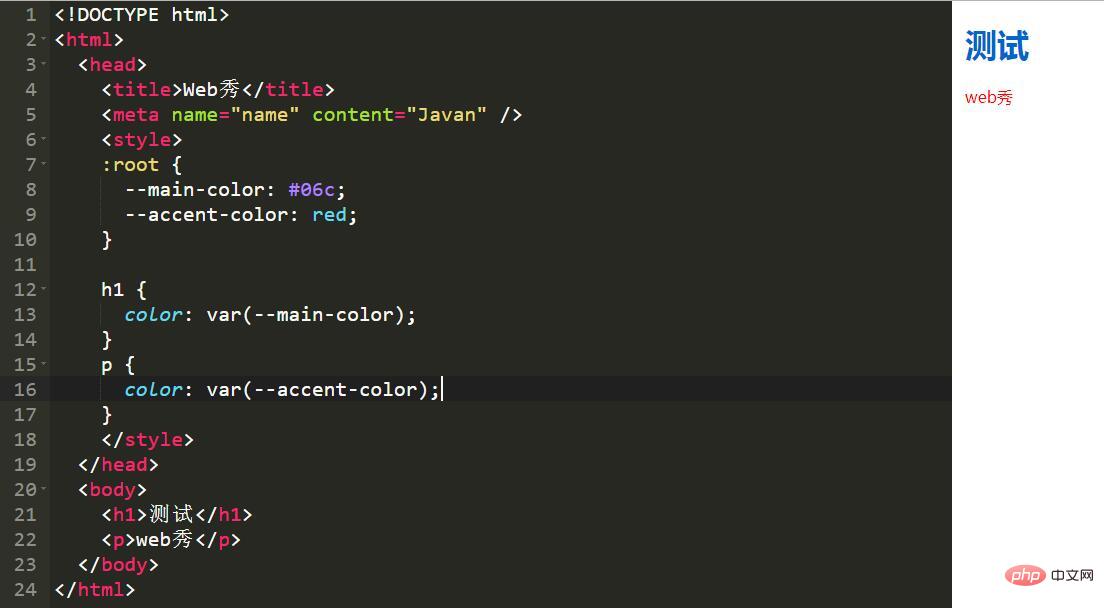
}20、CSS变量
最后,最强大的CSS级别来自于CSS变量,它允许您声明一组公共属性值,这些值可以通过样式表中任何位置的关键字重用。你可能有一套颜色在整个项目中使用,以保持一致性。
在CSS中反复重复这些颜色值不仅是件烦人的事情,而且还容易出错。如果某个颜色在某个时刻需要改变,你就不得不去寻找和替换,这是不可靠或不快速的,当为最终用户构建产品时,变量使得定制变得容易得多。例如:

:root {
  --main-color: #06c;
  --accent-color: #999;
}

h1, h2, h3 {
  color: var(--main-color);
}
a[href]:not([class]),
p,
footer span{
 color: var(--accent-color);
}更多编程相关知识,请访问:编程视频!!
The above is the detailed content of 20 CSS Tips to Improve Your CSS Skills. For more information, please follow other related articles on the PHP Chinese website!