php editor Xigua will introduce to you how to solve DNS errors in Win10 system. When using Windows 10, you sometimes encounter DNS resolution errors that cause network connection issues. This problem can be solved by adjusting network settings, refreshing the DNS cache, or changing the DNS server. The following will introduce in detail several effective solutions to help you successfully solve the DNS error in Win10 system and restore the stability of the network connection.
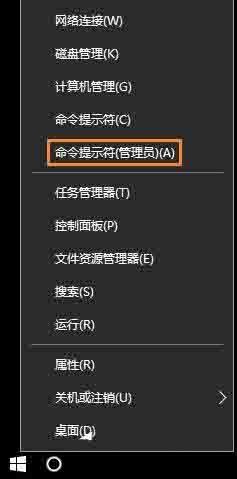
1. Right-click [Start] in the lower left corner of the system desktop, and click [Command Prompt (Administrator)] in the right-click menu of Start; as shown in the figure:

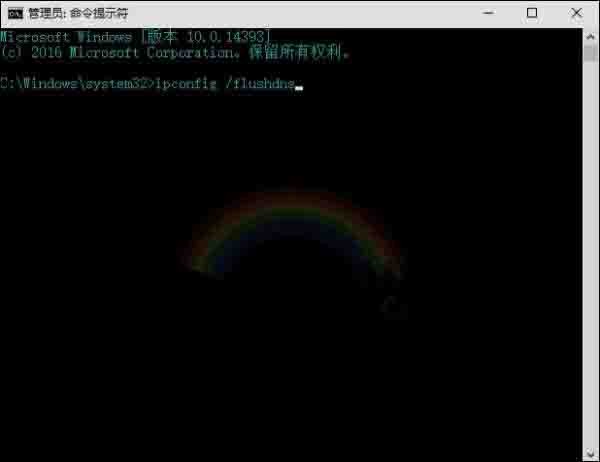
2. Copy the ipconfig /flushdns command. In the opened administrator command prompt window, right-click on the blank space and paste the ipconfig /flushdns command into the window; as shown in the figure:

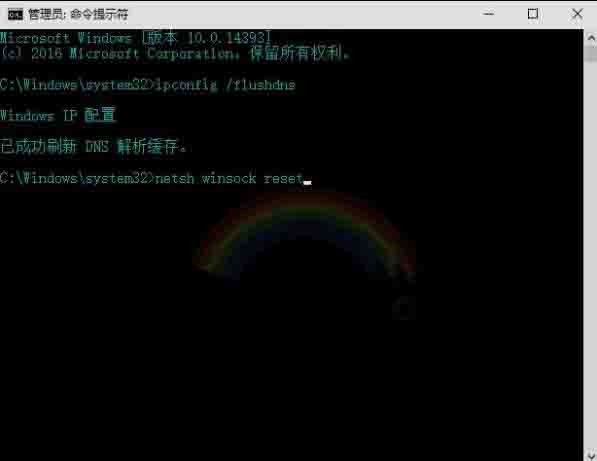
3. After the ipconfig /flushdns command is pasted, we press the Enter key (Entel) on the keyboard, and it displays: Windows IP configuration, DNS resolution cache has been successfully refreshed. As shown in the figure:

Step 2: Use the netsh winsock reset command to reset the Winsock directory.
1. Copy the netsh winsock reset command, continue to right-click the blank space in the administrator command prompt window, and paste the netsh winsock reset command into the window; as shown in the figure:

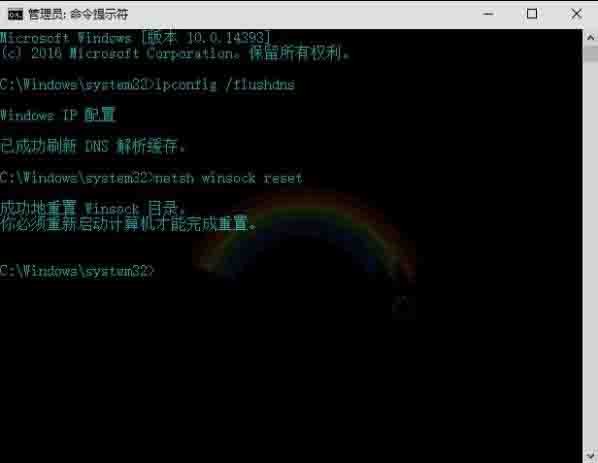
2. After the netsh winsock reset command is pasted, we press the Enter key (Entel) on the keyboard and it will display:

The Winsock directory has been successfully reset.
You must restart your computer to complete the reset.
Exit the administrator command prompt window.
Note: The netsh winsock reset command is to reset the Winsock directory. If there is a problem with the computer's Winsock protocol configuration, it will cause problems with the network connection. You need to use the netsh winsock reset command to reset the Winsock directory to restore the network. This command can reinitialize the network environment to solve parameter errors caused by software conflicts, viruses, etc. As shown in the picture:
Step 3: Use the method to automatically obtain the DNS server address
1. Right-click the network icon on the taskbar and click [Network and Sharing Center]; as shown in the picture:

2. In the opened Network and Sharing Center window, we left-click [Ethernet], and in the Ethernet status window, click [Properties] in the lower left corner; as shown in the figure Display:

3. In the Ethernet properties window, we click: Internet Protocol Version 4 (TCP/Pv4)-Properties; as shown in the figure:
The above is the detailed content of Solution to dns error in win10 system. For more information, please follow other related articles on the PHP Chinese website!
 win10 bluetooth switch is missing
 Why do all the icons in the lower right corner of win10 show up?
 The difference between win10 sleep and hibernation
 Win10 pauses updates
 What to do if the Bluetooth switch is missing in Windows 10
 win10 connect to shared printer
 Clean up junk in win10
 How to share printer in win10


