
php editor Strawberry will introduce to you how to solve the problem of failure to add a printer in win7. When using the win7 system, sometimes we encounter the situation that the printer cannot be successfully added, which brings inconvenience to our work and life. But, don’t worry, there are some simple solutions we can adopt to fix this problem. Next, I will explain some common solutions to help you add a printer smoothly.
Win7 cannot add a printer Solution:
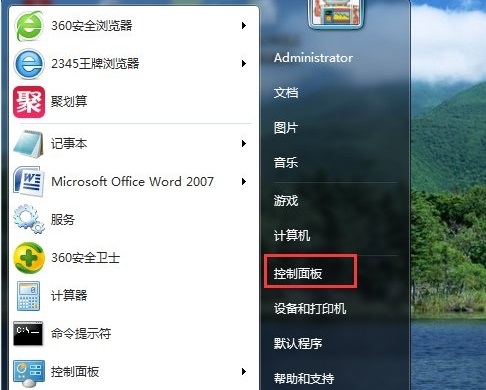
1. Open the "Start" menu of the computer and click to select "Control Panel".
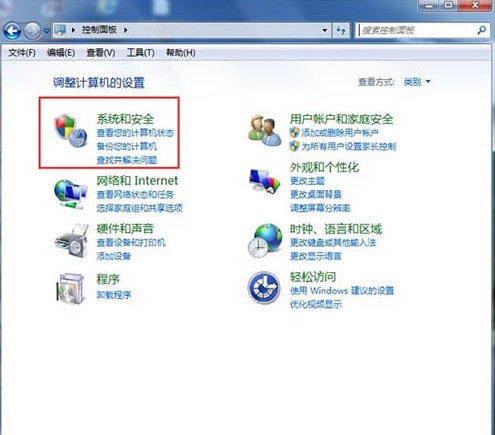
#2. In the control panel interface, "Open System and Security".
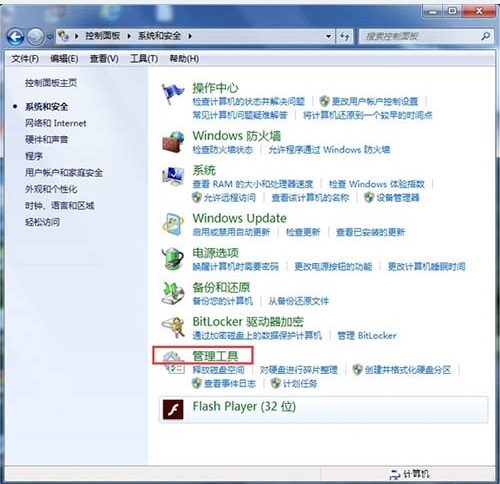
#3. Then open the "Management Tools" at the bottom of the interface.
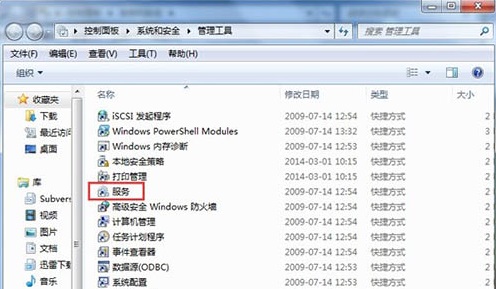
#4. Find "Service" in the middle of the management tool interface and click on it.
#5. There are a series of programs on the right side of the interface. Find "Print Spooler" and click to select it. There will be a "Start" service in the upper left corner, click to start it.
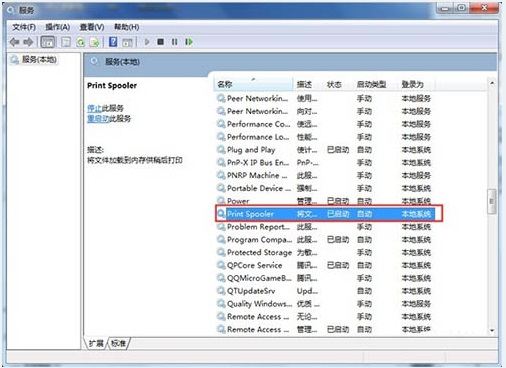
#6. After finding the program we want to start, double-click to open it, and a window will pop up. Click "Start".
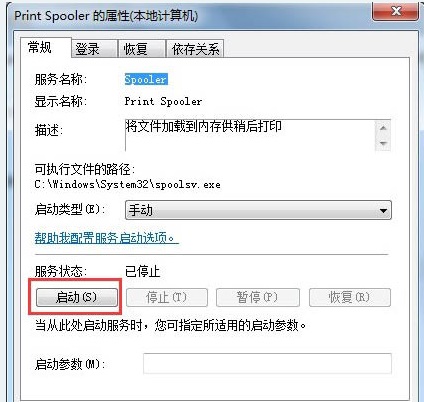
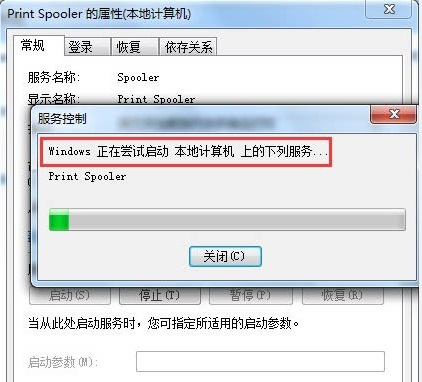
#7. After going through the startup process, we found that the "Service Status" displayed above changed to "Started", click "OK", and everything is completed. .
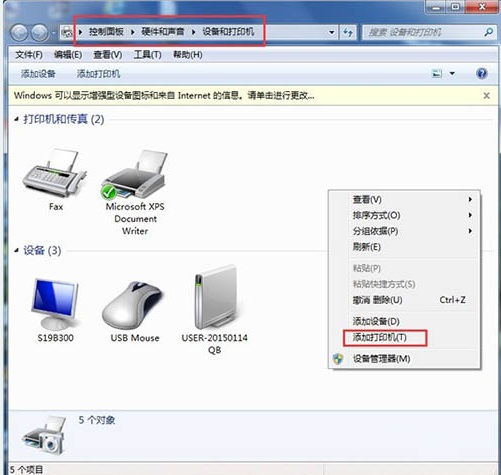
8. Finally, open "Control Panel"--"Hardware and Sound"--"Devices and Printers", then right-click in the blank space--"Add Printer" and check the result. There will no longer be a prompt that "Add Printer" cannot be opened.
The above is the detailed content of What should I do if win7 fails to add a printer? Win7 cannot add printer solution. For more information, please follow other related articles on the PHP Chinese website!
 How to create virtual wifi in win7
 How to change file type in win7
 How to set up hibernation in Win7 system
 How to open Windows 7 Explorer
 How to solve the problem of not being able to create a new folder in Win7
 Solution to Win7 folder properties not sharing tab page
 Win7 prompts that application data cannot be accessed. Solution
 Introduction to screenshot shortcut keys in Windows 7 system


