Home > Web Front-end > PS Tutorial > Teach you step by step how to use PS to create water pattern special effect fonts (Collection)

Teach you step by step how to use PS to create water pattern special effect fonts (Collection)

奋力向前
Release: 2021-08-06 14:31:58
Original
5901 people have browsed it

In the previous article "PS Beginner's Article: How to Add Perspective Effect to Pictures (Sharing)", I introduced you to a little trick to quickly create perspective effects on clothes in PS. The following article will introduce to you how to use PS to create watermark special effect fonts. It has certain reference value. Friends in need can refer to it. I hope it will be helpful to you.

Teach you step by step how to use PS to create water pattern special effect fonts (Collection)

The water pattern special effect font picture is as follows

Teach you step by step how to use PS to create water pattern special effect fonts (Collection)

ps method of making water pattern special effect font

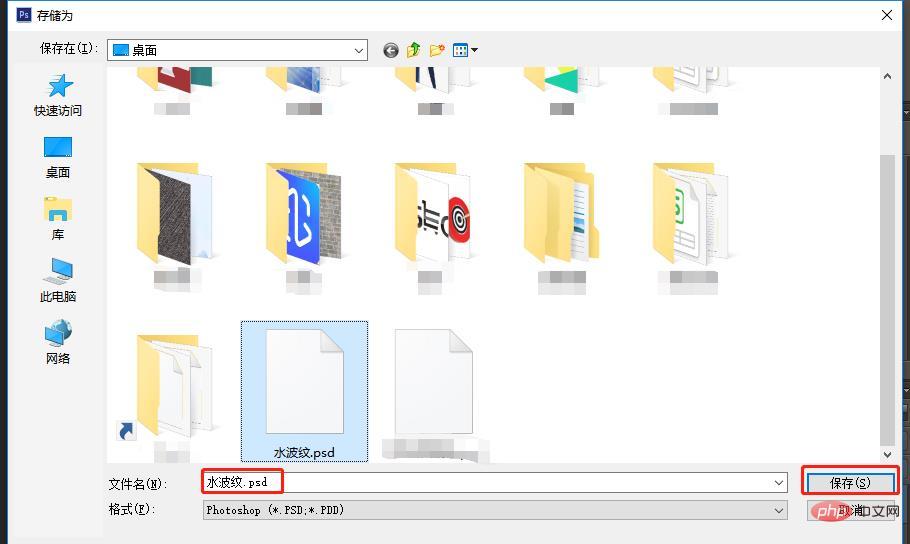
1. Open ps. After importing a water ripple background, save the file as click the file name "water ripple" psd and click save.
Teach you step by step how to use PS to create water pattern special effect fonts (Collection)

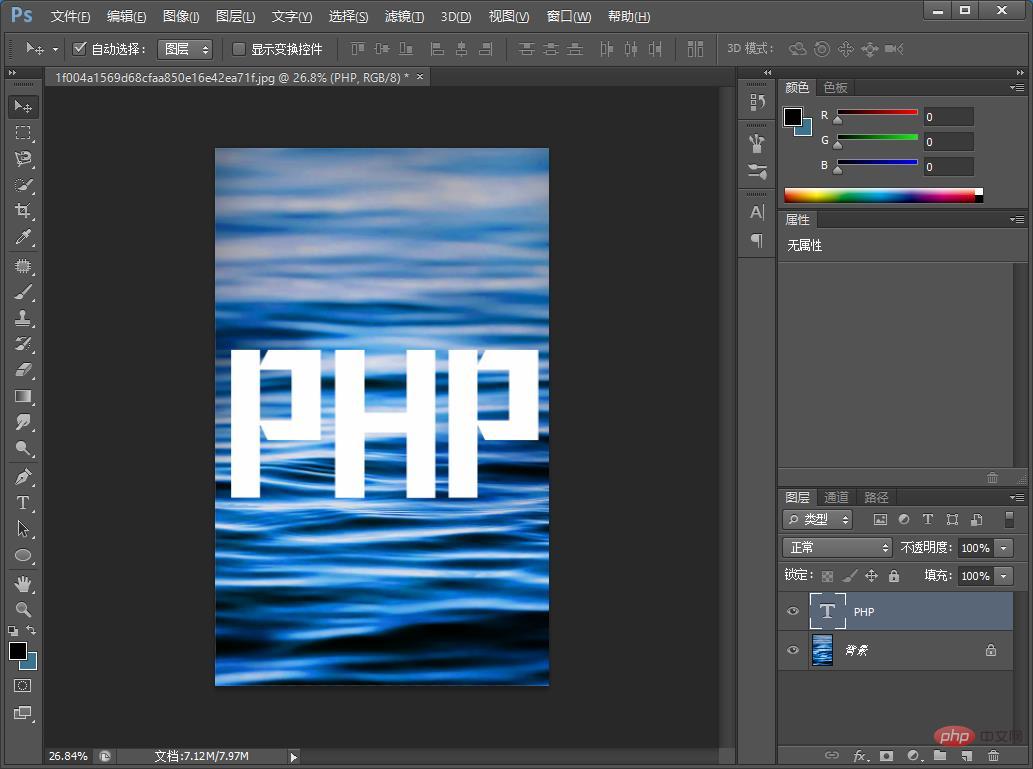
#2. Add your LOGO or text image.

Teach you step by step how to use PS to create water pattern special effect fonts (Collection)

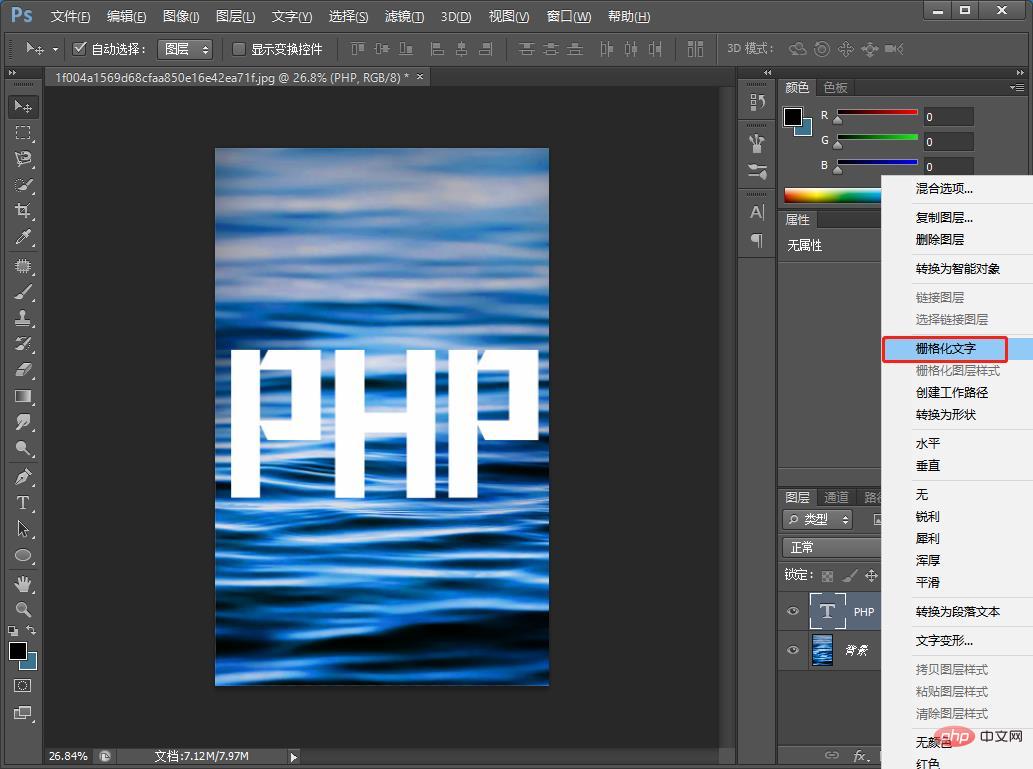
3. Right-click the text layer to pop up and select [Gridded Text]
Teach you step by step how to use PS to create water pattern special effect fonts (Collection)

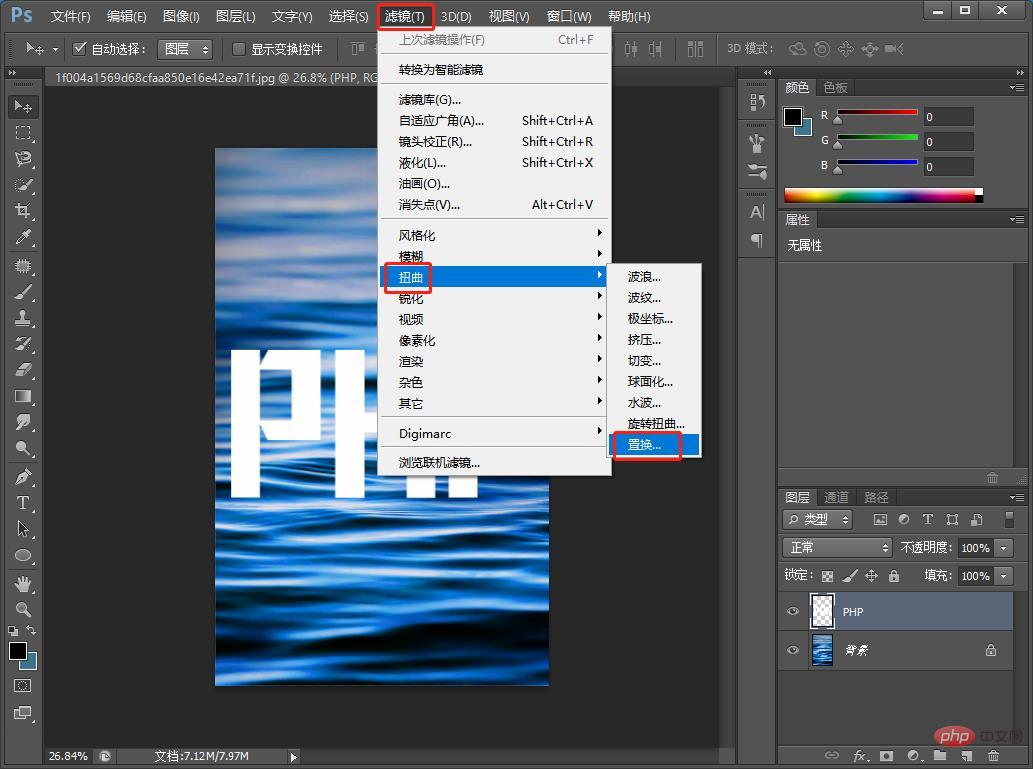
4. Click [ Filter]-[Distortion]-[Displacement]
Teach you step by step how to use PS to create water pattern special effect fonts (Collection)

5. The displacement number parameters are as follows

Teach you step by step how to use PS to create water pattern special effect fonts (Collection)

6. Click to replace the previously saved source file.
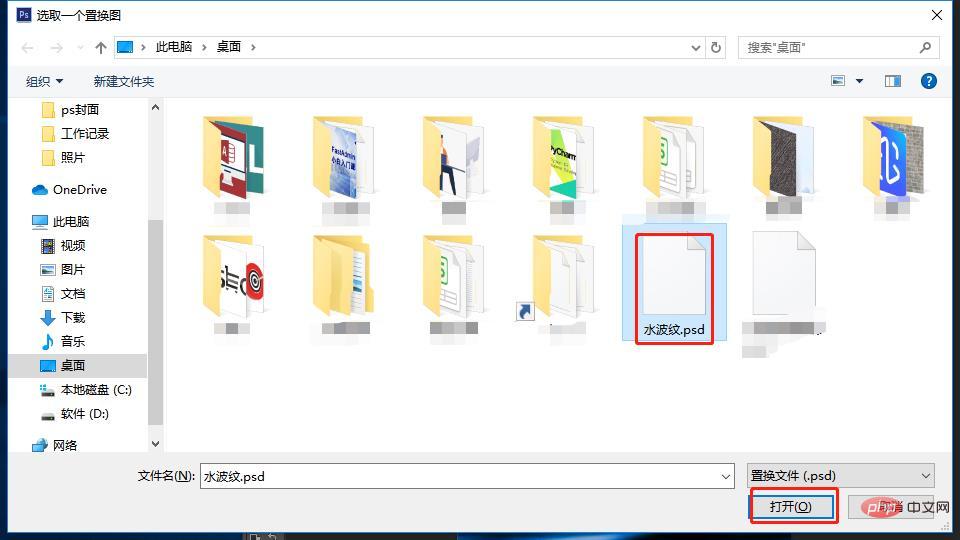
Teach you step by step how to use PS to create water pattern special effect fonts (Collection)

7. Click [Filter]-[Blur]-[Gaussian Blur] in sequence.
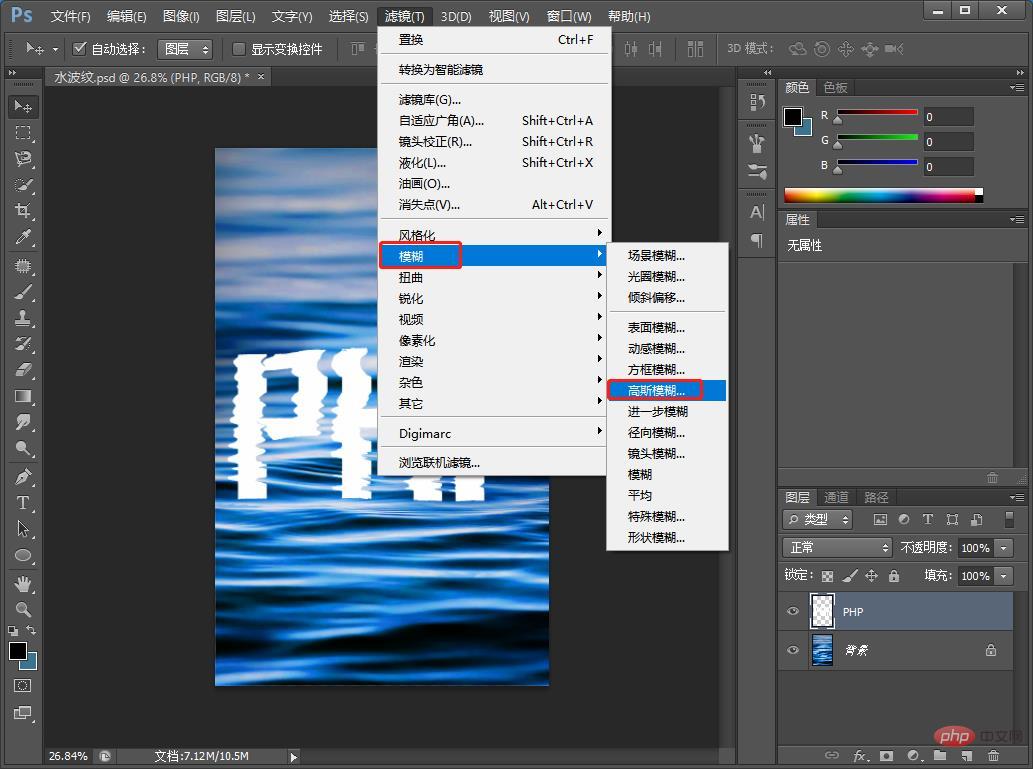
Teach you step by step how to use PS to create water pattern special effect fonts (Collection)

#8. The value settings are as follows.
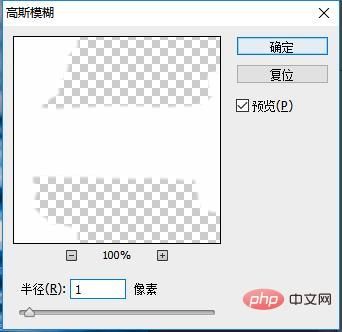
Teach you step by step how to use PS to create water pattern special effect fonts (Collection)

9. Duplicate the water ripple layer and put it on top, change the blending mode to [Overlay]
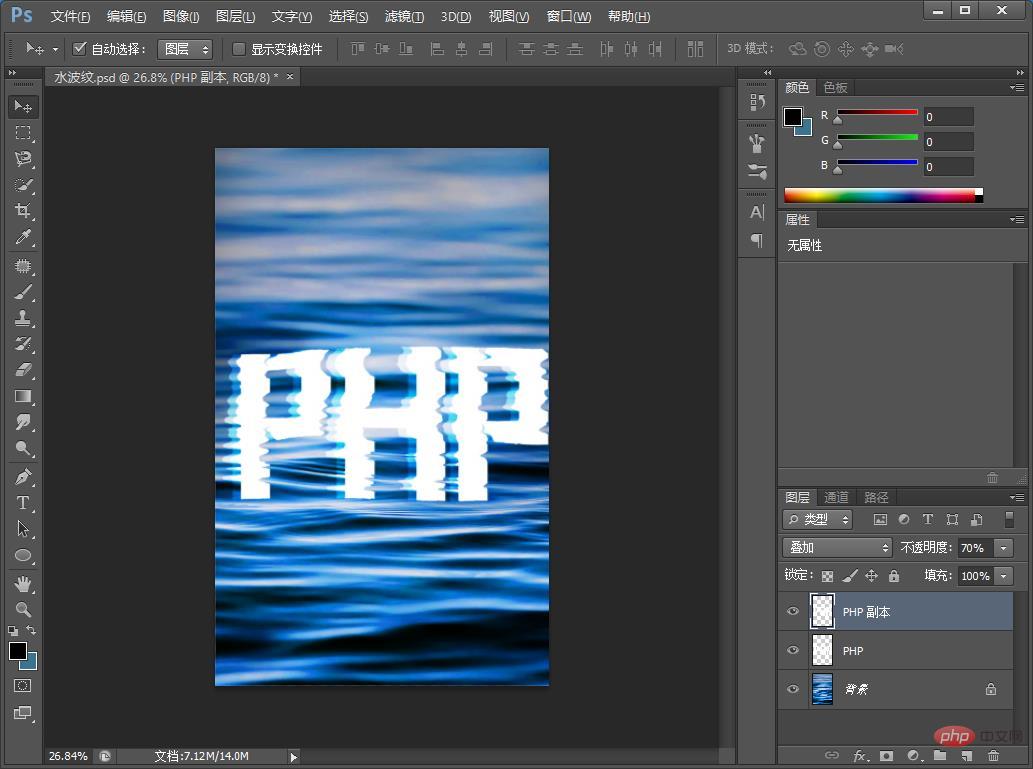
Teach you step by step how to use PS to create water pattern special effect fonts (Collection)

10. Finally, use the [Brush Tool] or [Rectangle Tool] to reverse fill with black, change the blending mode to [Multiply], and then paint with a white soft-edged brush. This is the effect.

Teach you step by step how to use PS to create water pattern special effect fonts (Collection)

Recommended learning: PS video tutorial

The above is the detailed content of Teach you step by step how to use PS to create water pattern special effect fonts (Collection). For more information, please follow other related articles on the PHP Chinese website!

Related labels:
ps
source:php.cn
Statement of this Website
The content of this article is voluntarily contributed by netizens, and the copyright belongs to the original author. This site does not assume corresponding legal responsibility. If you find any content suspected of plagiarism or infringement, please contact admin@php.cn
Latest Articles by Author
Popular Tutorials
More>
Latest Downloads
More>
Web Effects
Website Source Code
Website Materials
Front End Template