Home > Web Front-end > PS Tutorial > Teach you step by step how to create a small 2-inch photo using PS (detailed steps)

Teach you step by step how to create a small 2-inch photo using PS (detailed steps)

奋力向前
Release: 2022-04-02 14:03:32
Original
63731 people have browsed it

In the previous article "PS Skills Sharing: Using Polar Coordinates to Create Cool Special Effects (Detailed Pictures and Texts)", a new PS photo method was introduced, which can make the photos look great. The cool round ball, the professional name is polar coordinates. The following article will introduce you to a small PS skill and see how to use PS to create small 2-inch photos.
Teach you step by step how to create a small 2-inch photo using PS (detailed steps)

ID photos are often used in our daily lives. After learning the PS course, we can easily complete the production of small two-inch ID photos. No more running to the photo studio, saving time and effort!

Specific operation method for making a small two-inch ID photo in PS

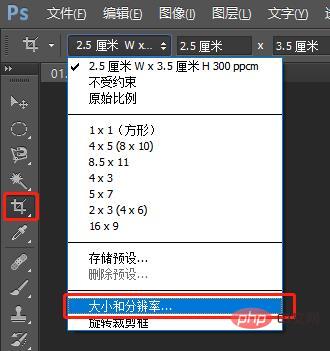
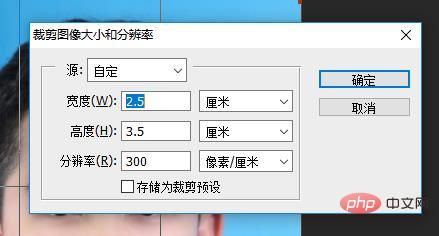
1. Use PS to open the ID photo material photo, select the cropping tool, and set the properties through the tool property bar: Open In the Size and Resolution dialog box, set width: 2.5 cm, height: 3.5 cm, resolution: 300 pixels/cm, adjust the crop edge line, and try to align the eye with the first line of the three-point line.

Teach you step by step how to create a small 2-inch photo using PS (detailed steps)Teach you step by step how to create a small 2-inch photo using PS (detailed steps)

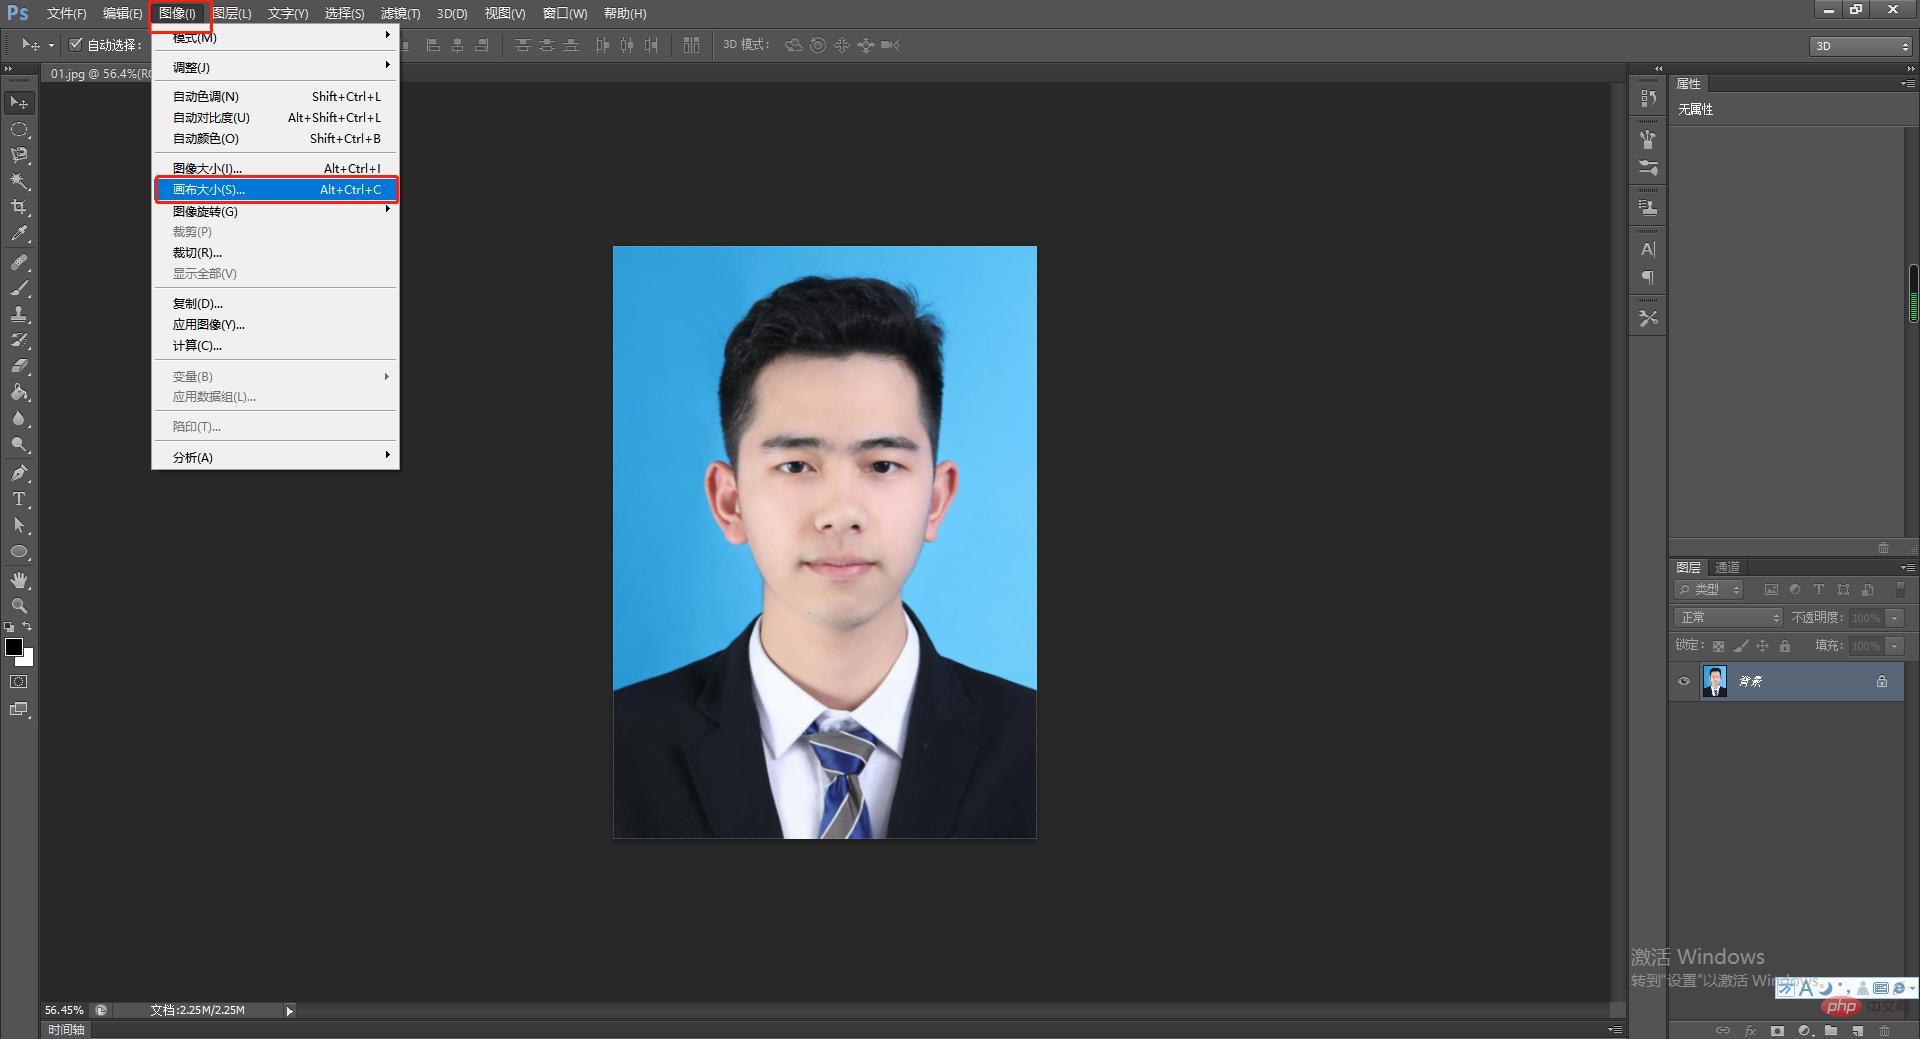
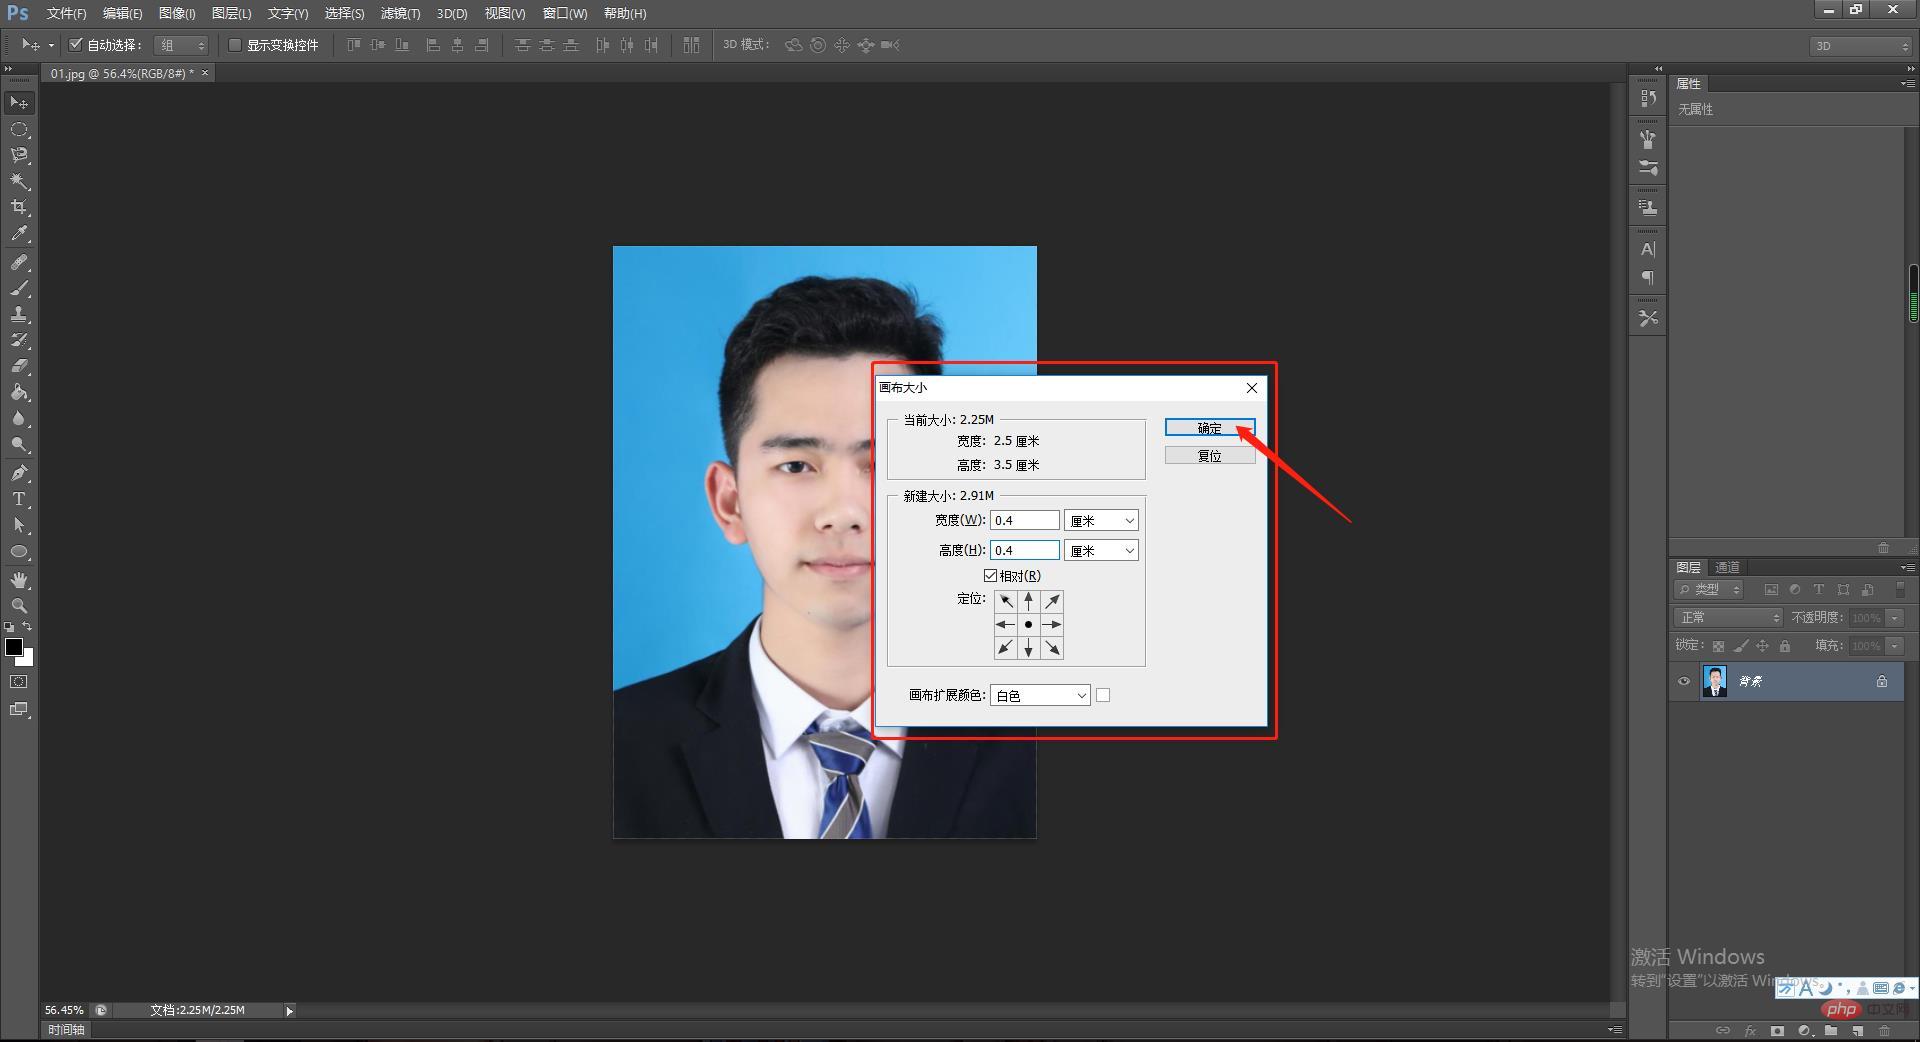
##2. Select->Canvas Size, adjust the canvas size, width and height each 0.4 cm (bleed, used for cropping), mark "relative" Select and position: from the center to the surroundings, the canvas expansion color is: white

Teach you step by step how to create a small 2-inch photo using PS (detailed steps)

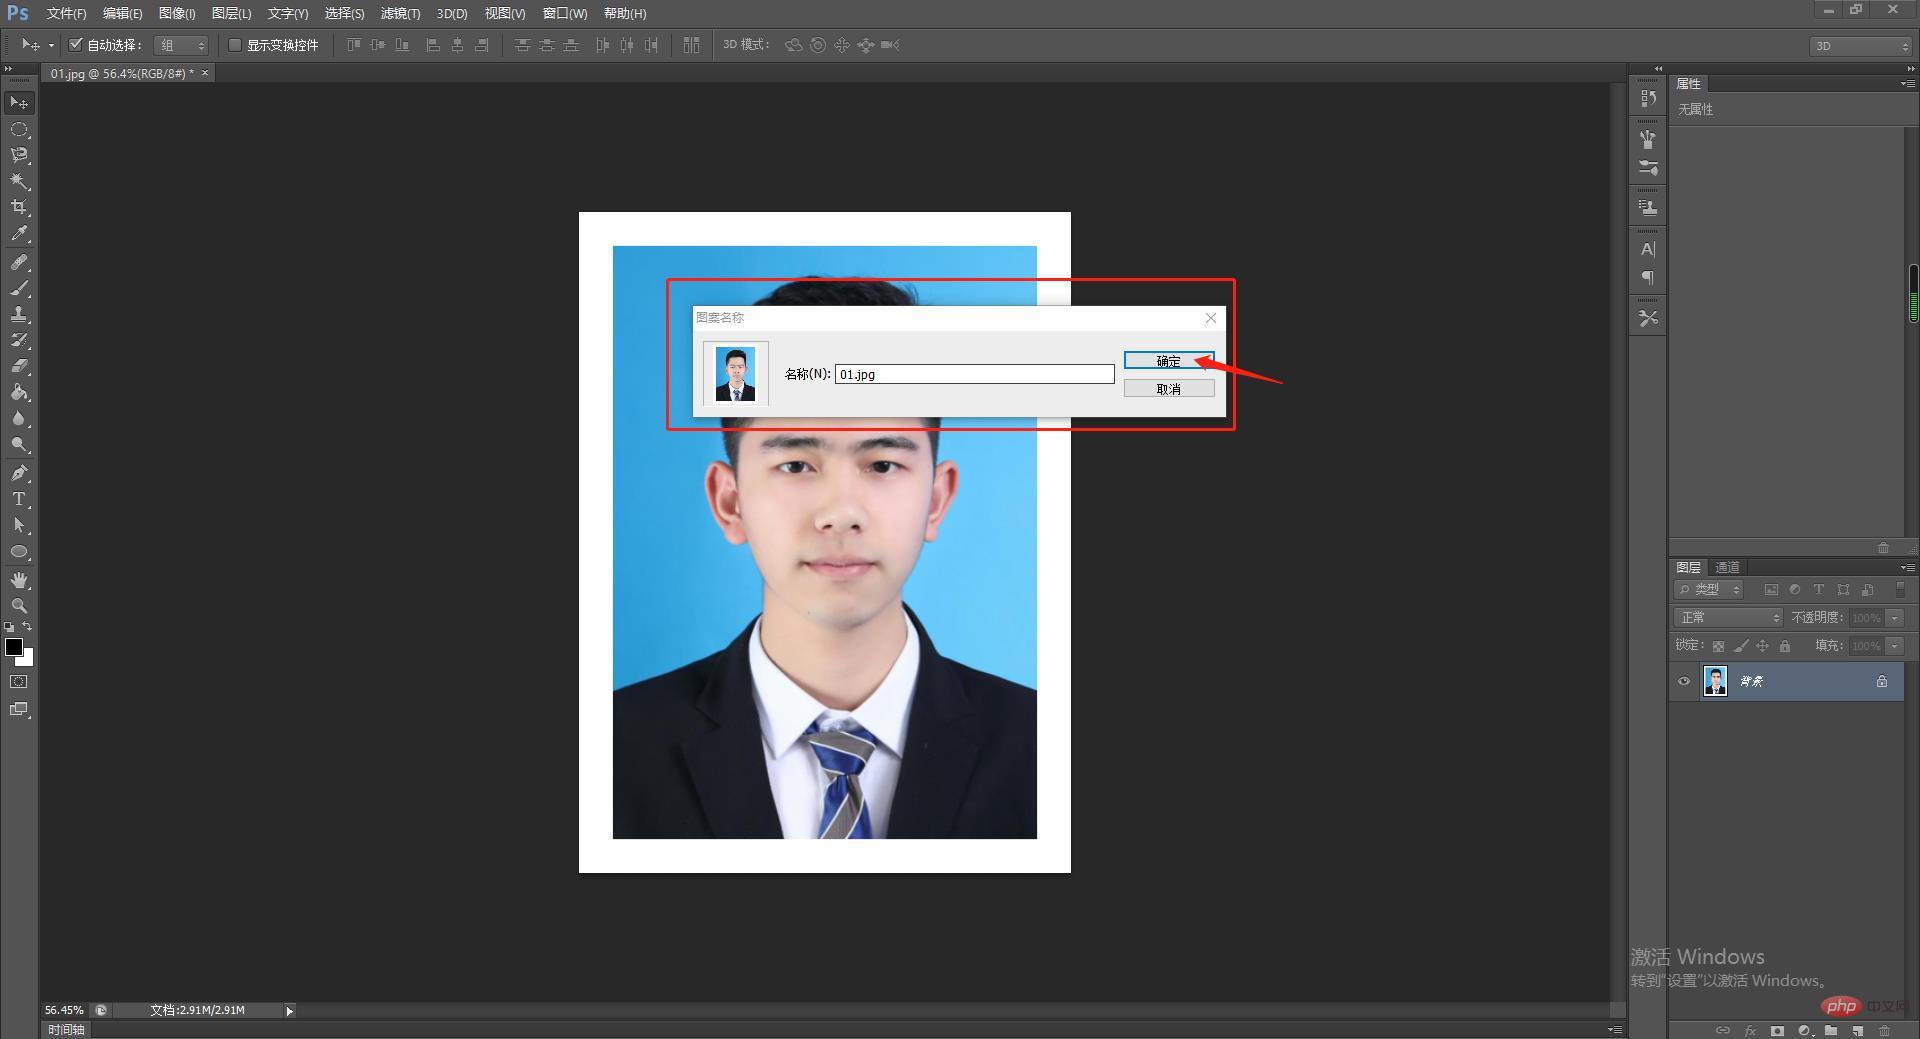
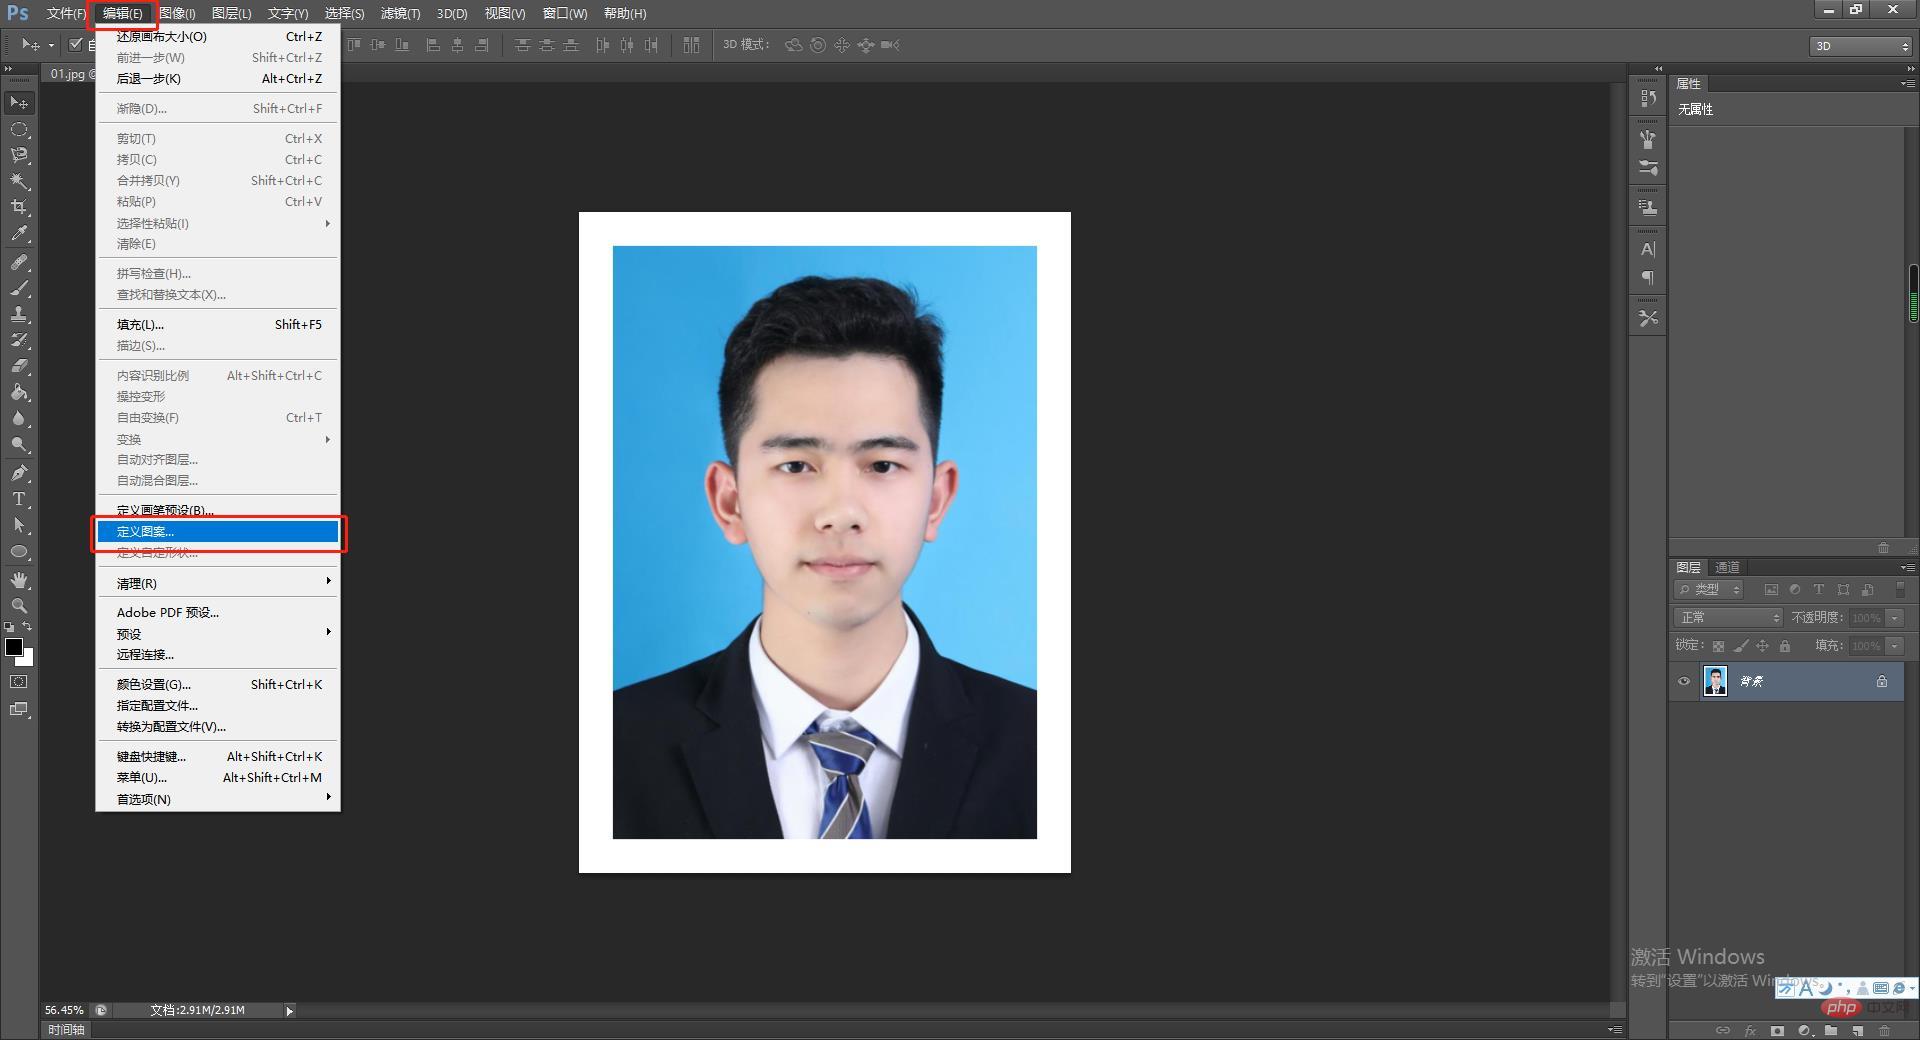
Teach you step by step how to create a small 2-inch photo using PS (detailed steps)##3. Select Edit->Define pattern, and Photos are defined as patterns and named.
Teach you step by step how to create a small 2-inch photo using PS (detailed steps)

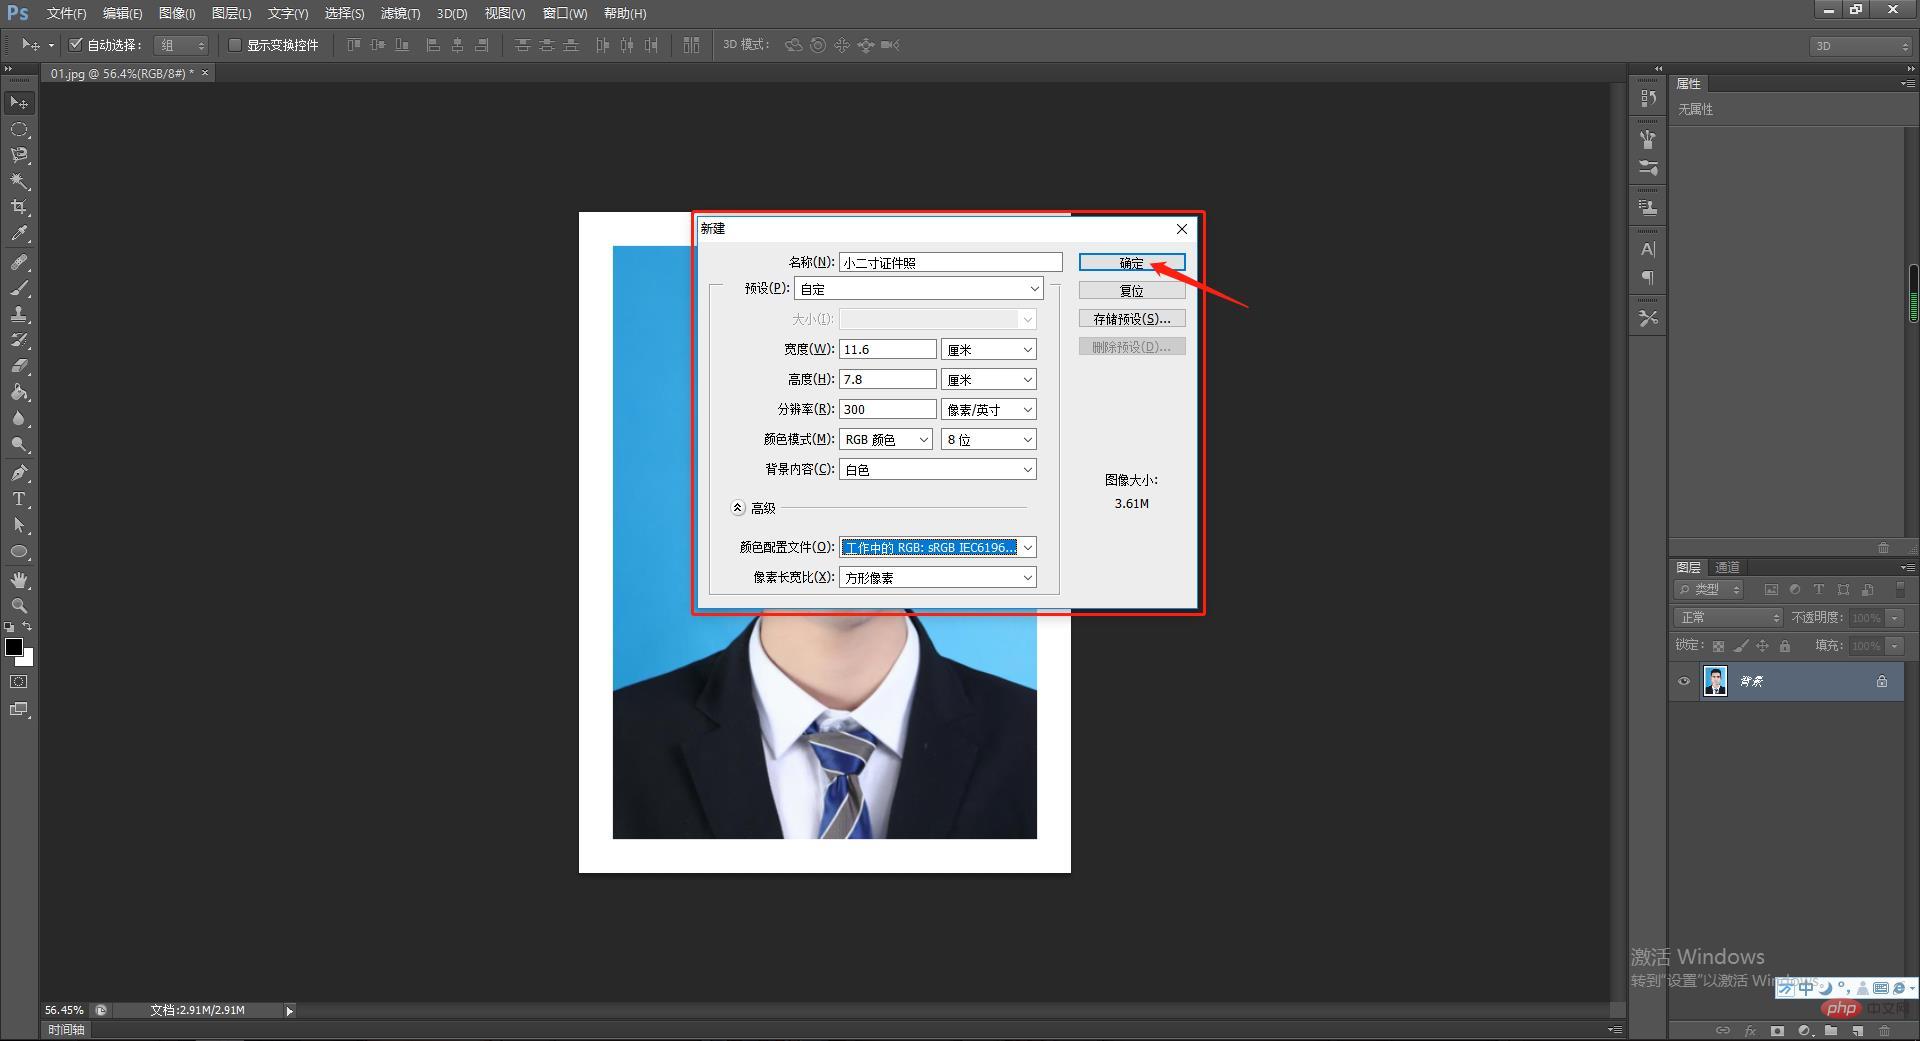
Teach you step by step how to create a small 2-inch photo using PS (detailed steps)4. Create a new PS file and set the following parameters:

    Width: 11.6 cm
  • Height: 7.8 cm
  • Resolution: 300 pixels/cm
  • Color mode: CMYK
  • Background color: white

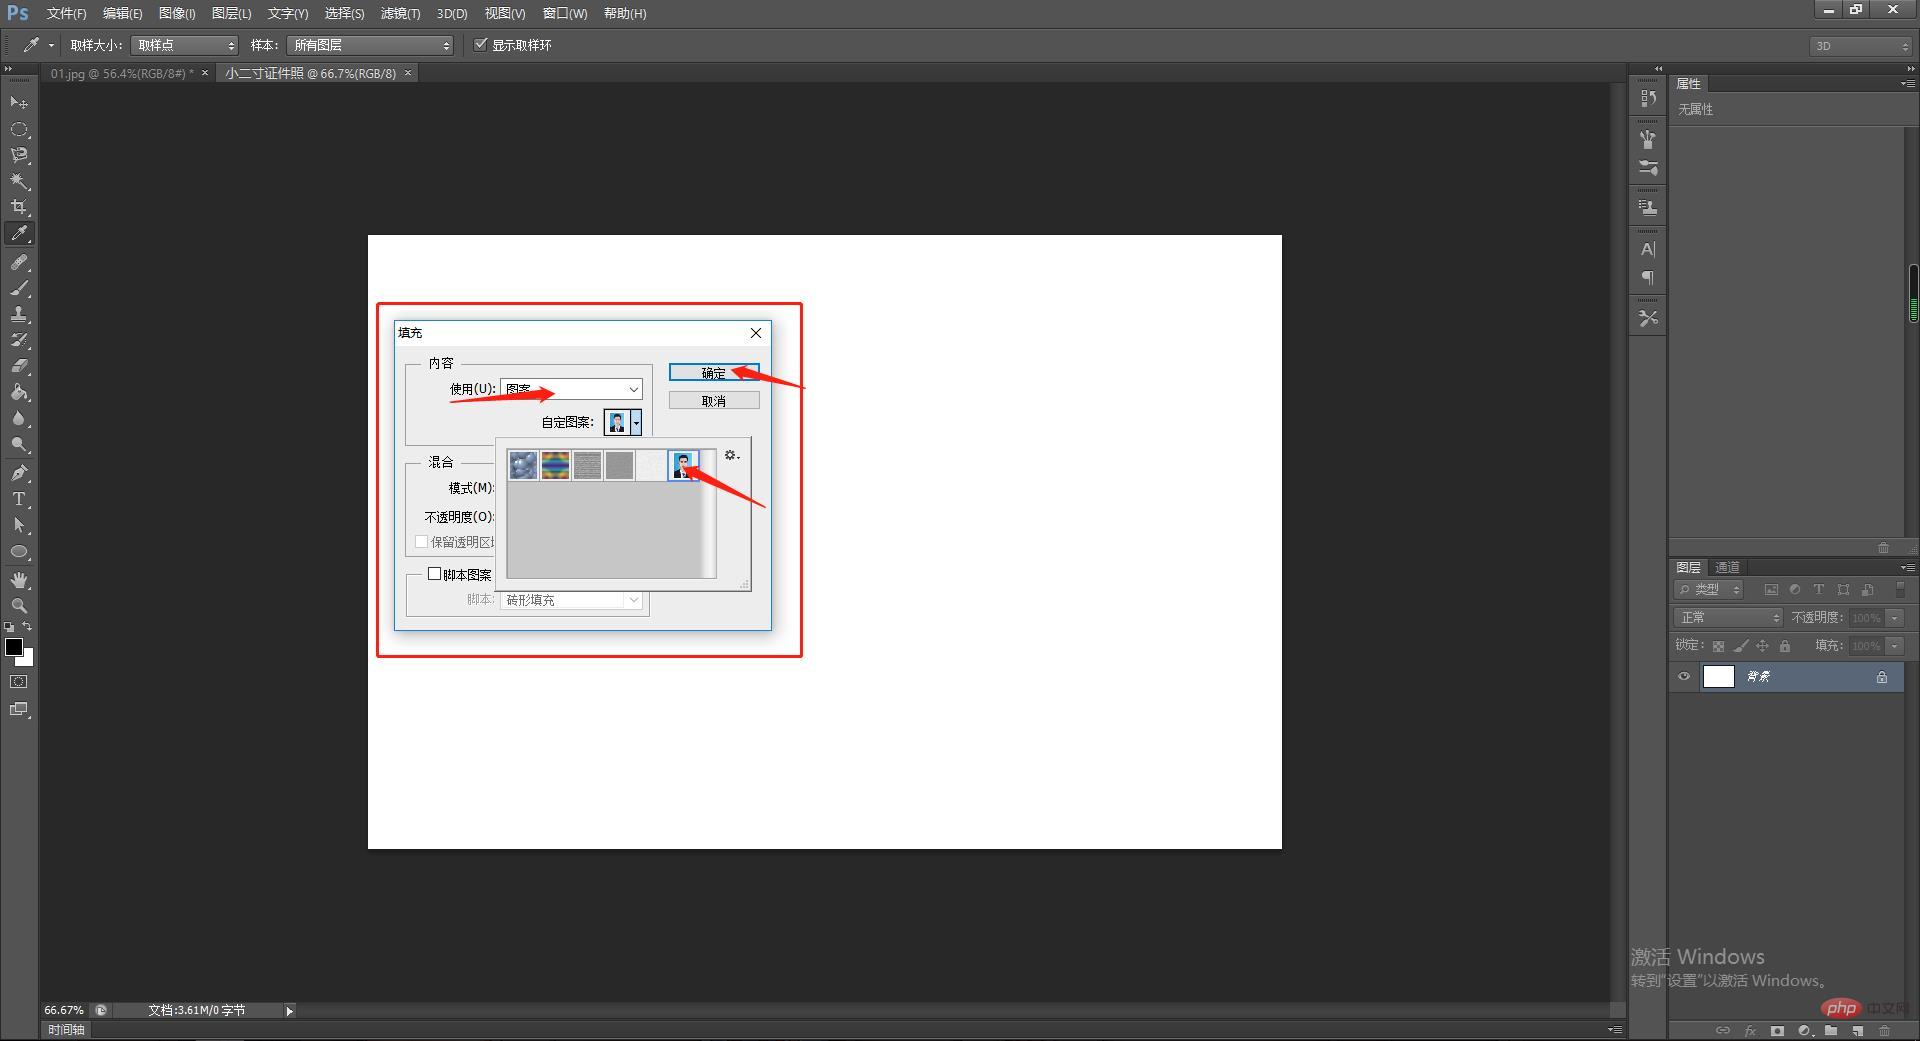
##5. Select Edit->Fill, fill method: Pattern filling, find the ID photo pattern just defined, click Confirm, and the ID photo effect is completed. Teach you step by step how to create a small 2-inch photo using PS (detailed steps)
Teach you step by step how to create a small 2-inch photo using PS (detailed steps)

Teach you step by step how to create a small 2-inch photo using PS (detailed steps)Note:

The photo is a small 2 inches Size: 2.5 cm Video tutorial

The above is the detailed content of Teach you step by step how to create a small 2-inch photo using PS (detailed steps). For more information, please follow other related articles on the PHP Chinese website!

Related labels:
ps
source:php.cn
Statement of this Website
The content of this article is voluntarily contributed by netizens, and the copyright belongs to the original author. This site does not assume corresponding legal responsibility. If you find any content suspected of plagiarism or infringement, please contact admin@php.cn
Latest Articles by Author
Popular Tutorials
More>
Latest Downloads
More>
Web Effects
Website Source Code
Website Materials
Front End Template