


What is white noise? How to use Perlin noise to draw cool graphics in CSS? The following article will introduce to you how to use noise to build beautiful CSS graphics. I hope it will be helpful to you!

#In normal times, I like to use CSS to build some interesting graphics. [Recommended learning:css video tutorial]
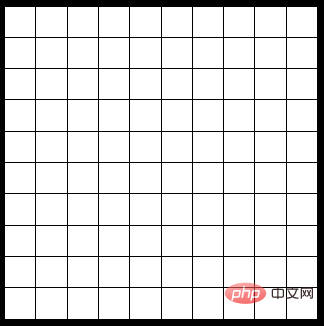
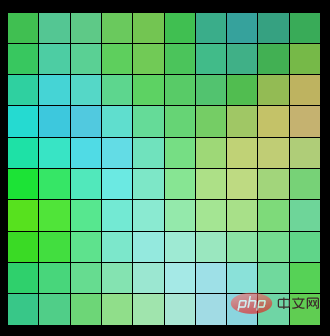
Let’s first look at a simple example. First, suppose we implement a 10x10 grid:
At this time, we can use some random effects to optimize this pattern. For example, we randomly add different colors to it:
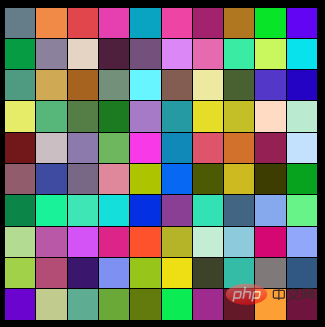
#Although random is used to randomly fill the color of each grid, it looks a little interesting, but this is just A messy graphic has no sense of art.
Why is this? Because the randomness here is completely random and a kind of white noise.
Noise is actually a random number generator.
So, what iswhite noise? If you understand it from a programmer's perspective, it can be understood that therandom()function we use in JavaScript, the generated number is roughly completely random within the range of 0~1.
The basis of noise is random numbers. For example, if we add a random color to each grid of the above graphics, what we get is a messy graphics block without much beauty at all.
White noise or white noise is a random signal with a constant power spectral density. In other words, the power spectral density of this signalis the same in each frequency band. Since white light is mixed with monochromatic light of various frequencies (colors), this signal has a flat The nature of the power spectrum is said to be "white", and the signal is therefore called white noise.
Because the graphics generated by white noise look unnatural and not very aesthetic.
Observe natural noises in real life, they don’t look like the ones above. For example, the texture of wood and the undulations of mountains tend to be fractal in shape, that is, they contain different levels of details. These random components are not completely independent, and there is a certain correlation between them. And apparently, white noise doesn't do that.
In this way, we naturally introducePerlin Noise.
Perlin noise (Perlin noise) refers to the natural noise generation algorithm invented by Ken Perlin.
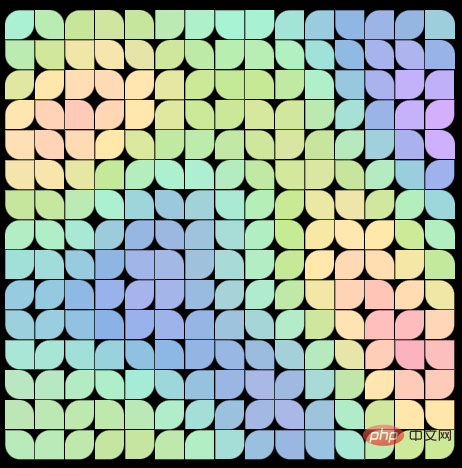
Before introducing it, let's first take a look at the above graph. What would it look like if we did not use white noise (completely random), but used Perlin noise?
It may look like this:
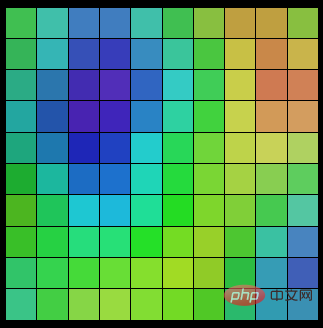
Here I made an animated picture, you can feel it, each click is a use of Berlin noise Randomly, the result of giving each grid a different random color:
It can be seen that the graphics generated by the random effect ofPerlin Noiseare not different from each other. There is no connection at all, the changes between them are continuous, and there is no jump between them. This random effect is similar to the random effects in nature, such as the changes in wood texture and mountain ranges mentioned above.
As mentioned above, noise is actually a random number generator. And here:
The problem with white noiseis that it is too random and has no rules
TheBerlin noiseis based on randomness, and uses the easing curve to perform smooth interpolation on this basis, making the final noise effect more natural.
Specific implementation method HereImproved Noise reference implementation, you can take a look, there is actually not much source code:
// This code implements the algorithm I describe in a corresponding SIGGRAPH 2002 paper. // JAVA REFERENCE IMPLEMENTATION OF IMPROVED NOISE - COPYRIGHT 2002 KEN PERLIN. public final class ImprovedNoise { static public double noise(double x, double y, double z) { int X = (int)Math.floor(x) & 255, // FIND UNIT CUBE THAT Y = (int)Math.floor(y) & 255, // CONTAINS POINT. Z = (int)Math.floor(z) & 255; x -= Math.floor(x); // FIND RELATIVE X,Y,Z y -= Math.floor(y); // OF POINT IN CUBE. z -= Math.floor(z); double u = fade(x), // COMPUTE FADE CURVES v = fade(y), // FOR EACH OF X,Y,Z. w = fade(z); int A = p[X ]+Y, AA = p[A]+Z, AB = p[A+1]+Z, // HASH COORDINATES OF B = p[X+1]+Y, BA = p[B]+Z, BB = p[B+1]+Z; // THE 8 CUBE CORNERS, return lerp(w, lerp(v, lerp(u, grad(p[AA ], x , y , z ), // AND ADD grad(p[BA ], x-1, y , z )), // BLENDED lerp(u, grad(p[AB ], x , y-1, z ), // RESULTS grad(p[BB ], x-1, y-1, z ))),// FROM 8 lerp(v, lerp(u, grad(p[AA+1], x , y , z-1 ), // CORNERS grad(p[BA+1], x-1, y , z-1 )), // OF CUBE lerp(u, grad(p[AB+1], x , y-1, z-1 ), grad(p[BB+1], x-1, y-1, z-1 )))); } static double fade(double t) { return t * t * t * (t * (t * 6 - 15) + 10); } static double lerp(double t, double a, double b) { return a + t * (b - a); } static double grad(int hash, double x, double y, double z) { int h = hash & 15; // CONVERT LO 4 BITS OF HASH CODE double u = h<8 ? x : y, // INTO 12 GRADIENT DIRECTIONS. v = h<4 ? y : h==12||h==14 ? x : z; return ((h&1) == 0 ? u : -u) + ((h&2) == 0 ? v : -v); } static final int p[] = new int[512], permutation[] = { 151,160,137,91,90,15, 131,13,201,95,96,53,194,233,7,225,140,36,103,30,69,142,8,99,37,240,21,10,23, 190, 6,148,247,120,234,75,0,26,197,62,94,252,219,203,117,35,11,32,57,177,33, 88,237,149,56,87,174,20,125,136,171,168, 68,175,74,165,71,134,139,48,27,166, 77,146,158,231,83,111,229,122,60,211,133,230,220,105,92,41,55,46,245,40,244, 102,143,54, 65,25,63,161, 1,216,80,73,209,76,132,187,208, 89,18,169,200,196, 135,130,116,188,159,86,164,100,109,198,173,186, 3,64,52,217,226,250,124,123, 5,202,38,147,118,126,255,82,85,212,207,206,59,227,47,16,58,17,182,189,28,42, 223,183,170,213,119,248,152, 2,44,154,163, 70,221,153,101,155,167, 43,172,9, 129,22,39,253, 19,98,108,110,79,113,224,232,178,185, 112,104,218,246,97,228, 251,34,242,193,238,210,144,12,191,179,162,241, 81,51,145,235,249,14,239,107, 49,192,214, 31,181,199,106,157,184, 84,204,176,115,121,50,45,127, 4,150,254, 138,236,205,93,222,114,67,29,24,72,243,141,128,195,78,66,215,61,156,180 }; static { for (int i=0; i < 256 ; i++) p[256+i] = p[i] = permutation[i]; } }
Of course, this article is not specifically about howBerlin noiseis implemented, the above code Anyone who looks at it is dizzy. We just need to know that we can use Perlin noise to construct more regular graphic effects. Make our graphics more beautiful.
So, how do we usePerlin noisein CSS?
一种方式是找一些现成的库,譬如 p5.js 里面的noise函数。
当然,这里,我习惯使用CSS-doodle,这个 CSS 图形构建库我在多篇文章中已经都有介绍过。
简单而言,CSS-doodle 它是一个基于 Web-Component 的库。允许我们快速的创建基于 CSS Grid 布局的页面,并且提供各种便捷的指令及函数(随机、循环等等),让我们能通过一套规则,得到不同 CSS 效果。可以简单看看它的主页 --Home Page of CSS-doodle,只需要 5min 也许就能快速上手。
譬如上述的图形,它的全部代码:
:doodle { @size: 50vmin; gap: 1px; } background: hsl(@rn(255, 1, 2), @rn(10%, 90%), @rn(10%, 90%));
没错,只需要这么寥寥几句,就可以勾勒出这样一幅图案:
CSS Pattern -- CSS Doodle
https://codepen.io/Chokcoco/pen/eYMNWNq
简单解释下:
css-doodle是基于 Web-Component 封装的,基本所有的代码都写在
使用grid="10x10"即可生成一个 10x10 的 Grid 网格,再配合@size: 50vmin,表示生成一个宽高大小为50vmin的 10x10 Grid 网格布局,其中gap: 1px表示 Gird 网格布局的 gap
最后,整个代码的核心部分即是background: hsl(@rn(255, 1, 2), @rn(10%, 90%), @rn(10%, 90%)),这里即表示对每个 grid item 赋予背景色,其中@rn(),就是最核心的部分,利用了柏林噪声算法,有规律的将背景色 map 到每一个 grid 上
当然,最新的CSS-doodle文档上暂时还查不到@rn()function 的用法。为此我特意请教了下该库的作者袁川老师。
得到的回复是,官网近期会重构,所以目前没有更新最新的语法。同时,@rn()的实现使用的就是柏林噪声的实现。同时,函数相当于是类似 p5.js 里面的 noise 函数同时做了 map,map 到前面函数参数设定的 from 到 to 范围内。
这里的@rn()柏林噪声随机会根据 Grid 网格,Map 到每一个网格上,使之相邻的 Grid item 之间的值,存在一定的关联。
举个栗子,我们有个 10x10 的 Grid 布局,给其每个 Grid item,添加一个伪元素,伪元素的内容,使用@r(100)进行填充,注意,@r()函数是没有规律的完全随机,那么生成的数字大概是这样的:
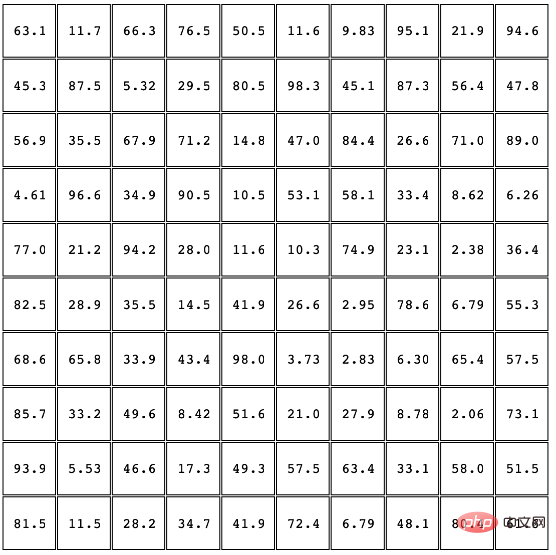
可以看到,它们每个各自之间的数字,是完全随机毫无关联的。
如果我们使用有关联的柏林噪声随机呢?使用@rn(100)填充每个格子的话,大概是这样:
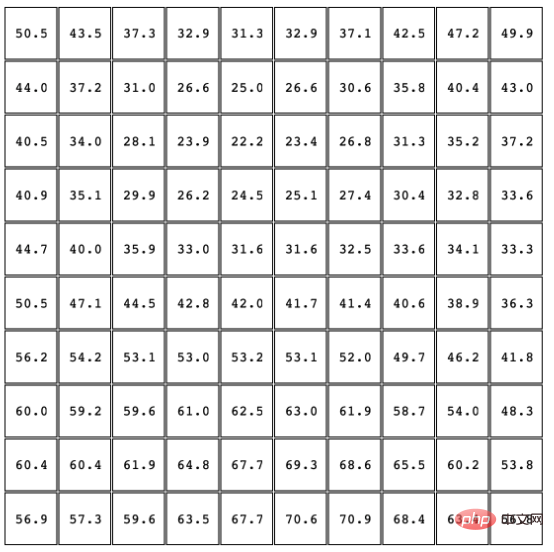
观察一下,很容易发现,相邻的盒子之间,或者多个连续的格子之间,存在一定的关联性,这就使得,我们利用它创造出来的图形,会具备一定的规律。
可以简单看看源码的实现,当前,前提是你需要对 CSS-doodle 的用法有一定的了解:
rn({ x, y, context, position, grid, extra, shuffle }) { let counter = 'noise-2d' + position; let [ni, nx, ny, nm, NX, NY] = last(extra) || []; let isSeqContext = (ni && nm); return (...args) => { let {from = 0, to = from, frequency = 1, amplitude = 1} = get_named_arguments(args, [ 'from', 'to', 'frequency', 'amplitude' ]); if (args.length == 1) { [from, to] = [0, from]; } if (!context[counter]) { context[counter] = new Perlin(shuffle); } frequency = clamp(frequency, 0, Infinity); amplitude = clamp(amplitude, 0, Infinity); let transform = [from, to].every(is_letter) ? by_charcode : by_unit; let t = isSeqContext ? context[counter].noise((nx - 1)/NX * frequency, (ny - 1)/NY * frequency, 0) : context[counter].noise((x - 1)/grid.x * frequency, (y - 1)/grid.y * frequency, 0); let fn = transform((from, to) => map2d(t * amplitude, from, to, amplitude)); let value = fn(from, to); return push_stack(context, 'last_rand', value); }; },
语法大概是@rn(from, to, frequency, amplitude),其中from、to表示随机范围,而frequency表示噪声的频率,amplitude表示噪声的振幅。这两个参数可以理解为控制随机效果的频率和幅度。
其中new Perlin(shuffle)即运用到了柏林噪声算法。
OK,上文介绍了很多与噪声和 CSS-doodle 相关的知识,下面我们回归 CSS,回归本文的主体。
在上述图形的基础上,我们可以再添加上随机的scale()、以及skew()。如果是完全随机的话,代码是这样的:
:doodle { grid-gap: 1px; width: 600px; height: 600px; } background: hsl(@r(360), 80%, 80%); transform: scale(@r(1.1, .3, 3)) skew(@r(-45deg, 45deg, 3));
html, body { width: 100%; height: 100%; background-color: #000; }
上述代码表示的是一个 20x20 的 Grid 网格,每个 Grid item 都设置了完全随机的背景色、scale()以及skew()。当然,这里我们用的是@r()而不是@rn(),每个格子的每个属性的随机,没有任何的关联,那么我们会得到这样一幅图案:
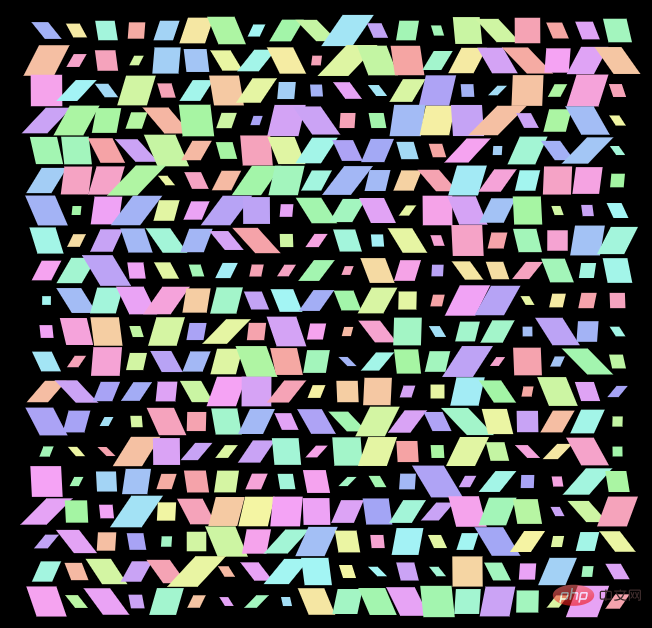
好吧,这是什么鬼,毫无美感可言。我们只需要在上述代码的基础上,将普通的完全随机,改为柏林噪声随机@rn():
:doodle { grid-gap: 1px; width: 600px; height: 600px; } background: hsl(@rn(360), 80%, 80%); transform: scale(@rn(1.1, .3, 3)) skew(@rn(-45deg, 45deg, 3));
此时,就能得到完全不一样的效果:

这是由于,每个 Grid item 的随机效果,都基于它们在 Grid 布局中的位置,彼此存在关联,这就是柏林噪声随机的效果。
我可以再添加上hue-rotate动画:
html, body { width: 100%; height: 100%; background-color: #000; animation: change 10s linear infinite; } @keyframes change { 10% { filter: hue-rotate(360deg); } }
看看效果,并且,在 CSS-doodle 中,由于随机效果,每次刷新,都可以得到不一样的图案:
CSS Doodle - CSS Pattern2
https://codepen.io/Chokcoco/pen/mdxJrGR
当然,这个样式还可以搭配各式各样其他的 idea,像是这样:
CSS Doodle - CSS Pattern 3
https://codepen.io/Chokcoco/pen/wvmazOy
又或者是这样:
CSS Doodle - CSS Pattern 4
https://codepen.io/Chokcoco/pen/dymoOGN
emmm,又或者这样:
CSS Doodle - CSS Pattern 5
https://codepen.io/Chokcoco/pen/PoRqdYP
是的,我们可以把柏林噪声随机应用在各种属性上,我们可以放飞想象,去尝试各种不一样的搭配。下面这个, 就是把柏林噪声运用在点阵定位上:
:doodle { @size: 90vmin; perspective: 10px; } position: absolute; top: 0; left: 0; width: 2px; height: 2px; border-radius: 50%; top: @rn(1%, 100%, 1.5); left: @rn(1%, 100%, 1.5); transform: scale(@rn(.1, 5, 2)); background: hsl(@rn(1, 255, 3), @rn(10%, 90%), @rn(10%, 90%));
CodePen Demo -- CSS Doodle - CSS Pattern6
https://codepen.io/Chokcoco/pen/GRxJXVE
亦或者配合运用在transform: rotate()上:
@place-cell: center; @size: calc(@i * 1.5%); :doodle { width: 60vmin; height: 60vmin; } z-index: calc(999 - @i); border-radius: 50%; border: 1px @p(dashed, solid, double) hsl(@rn(255), 70%, @rn(60, 90%)); border-bottom-color: transparent; border-left-color: transparent; transform: rotate(@rn(-720deg, 720deg)) scale(@rn(.8, 1.2, 3));
效果如下:
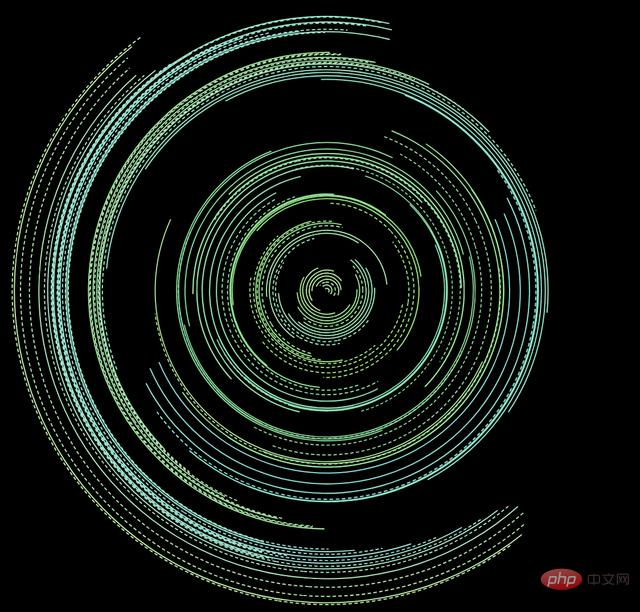
当然,每一次随机,都会是不一样的结果:
CodePen Demo -- CSS doodle - CSS Pattern7
https://codepen.io/Chokcoco/pen/ZExGjoy
好吧,我个人想象力有限,大家可以自行找到任一 DEMO,Fork 后自己去尝试碰撞出不一样的火花。
原文地址:https://segmentfault.com/a/1190000042103702
作者:chokcoco
(学习视频分享:web前端入门)
The above is the detailed content of Let's talk about how to use Perlin noise to draw cool graphics in CSS!. For more information, please follow other related articles on the PHP Chinese website!


![[Web front-end] Node.js quick start](https://img.php.cn/upload/course/000/000/067/662b5d34ba7c0227.png)


