In the previous article "PS Tutorial: How to Add Leather Effect to Text (Technique Sharing)", I introduced you to a little trick, how to use PS to add smoke effect to pictures. . The following article will introduce to you how to add smoke effects to pictures in PS. Friends in need can refer to it. I hope it will be helpful to you.

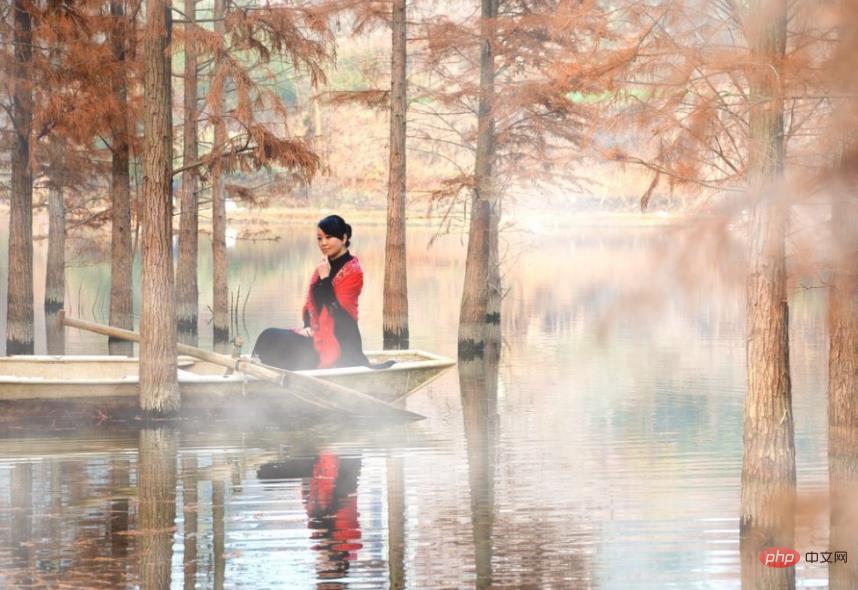
The picture smoke effect is as follows

1. Open ps, import the material, create a new blank layer, and click [Filter]-[Render]-[Clouds].
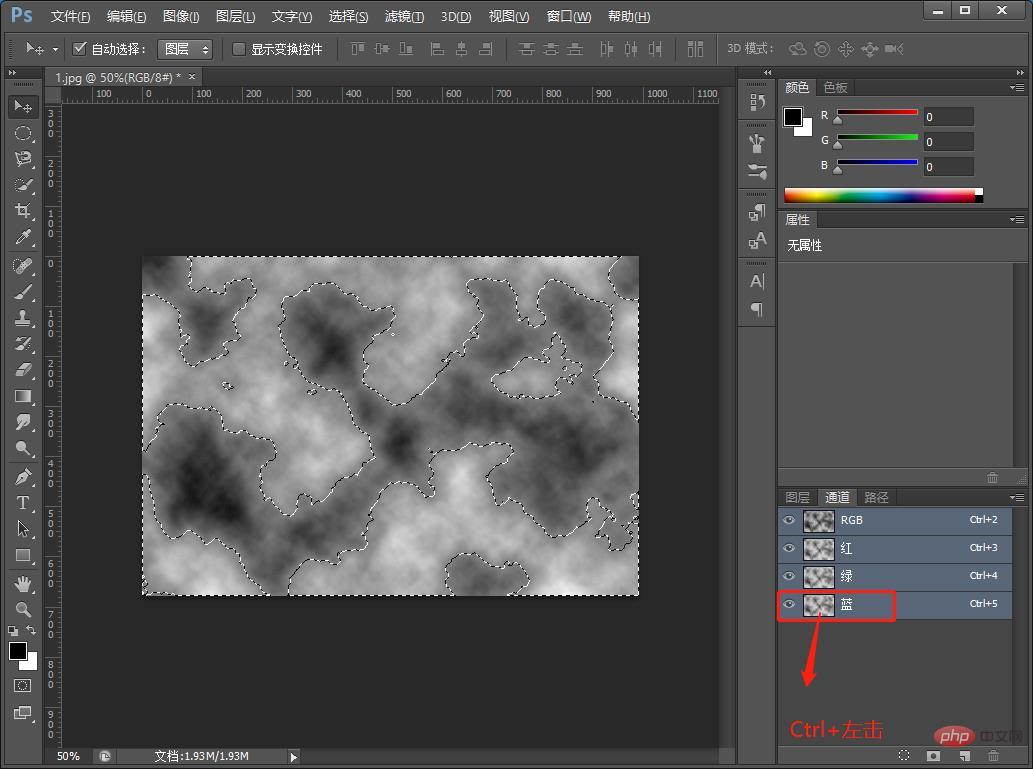
#2. The cloud effect comes out, then find the channel, select [Blue] for all layers, and left-click Ctrl to create a selection.

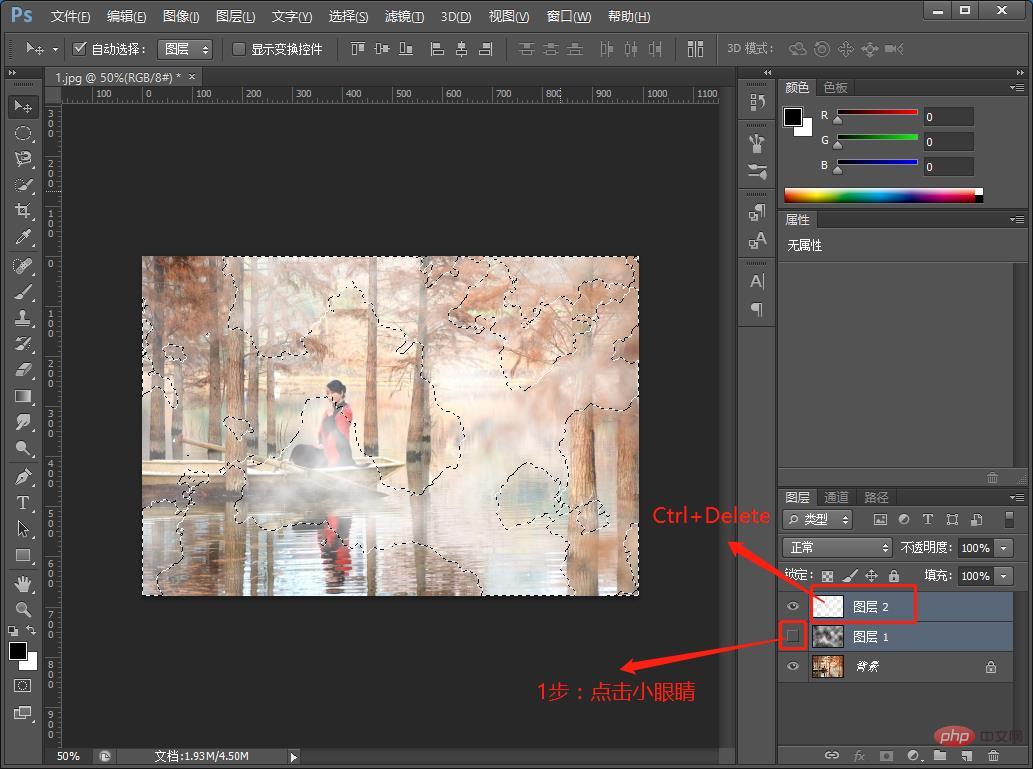
#3. First click the small eye on [Cloud Layer] to make it invisible, then go to [Layer 2] and press the Ctrl Delete shortcut key.

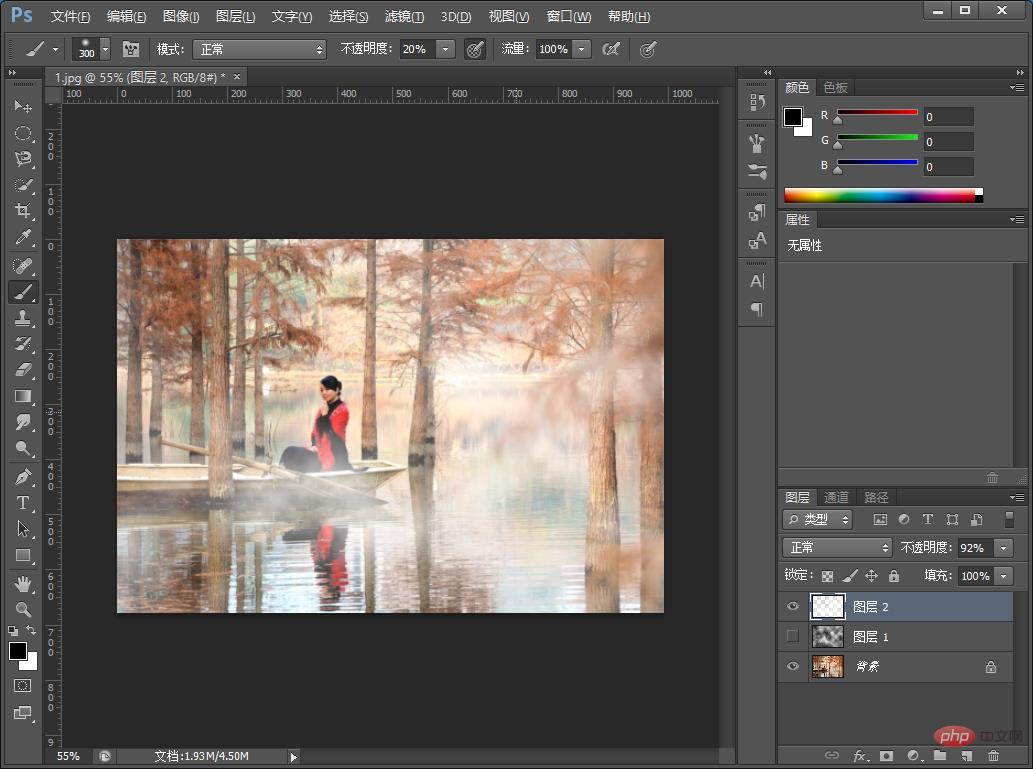
#4. Press the Ctrl D shortcut key to cancel the selection and the effect is completed.

Recommended learning:PS video tutorial
The above is the detailed content of One trick to teach you how to use PS to add smoke effects to pictures (4 steps in total). For more information, please follow other related articles on the PHP Chinese website!