In the previous article "Take you one minute to use PS to add colorful special effects to text (detailed pictures and texts)", I introduced you to a way to quickly create colorful and cool text. The following article will introduce to you how to use PS to add a crystal ball effect to a starry sky image. Let’s see how to do it together.
The crystal ball renderings are as follows
1. Open ps and import starry sky pictures.
#2. Copy [Background] to a layer and select the [Elliptical Marquee Tool] to draw a circular selection.
3. Find [Filter]-[Distortion]-[Spherization] on the menu
4 , click OK directly in the dialog box that opens.
5. Select the selection and then [Ctrl J]
6. Select [Filter] on [Layer 2] 】-[Distortion]-[Rotation and Distortion] click to open and set to numerical parameters as shown in the figure.
#7. Click OK to rotate and twist and then add a layer mask.
8. Use the [Brush Tool] to adjust the size according to your own needs.
#9. Apply with one click.
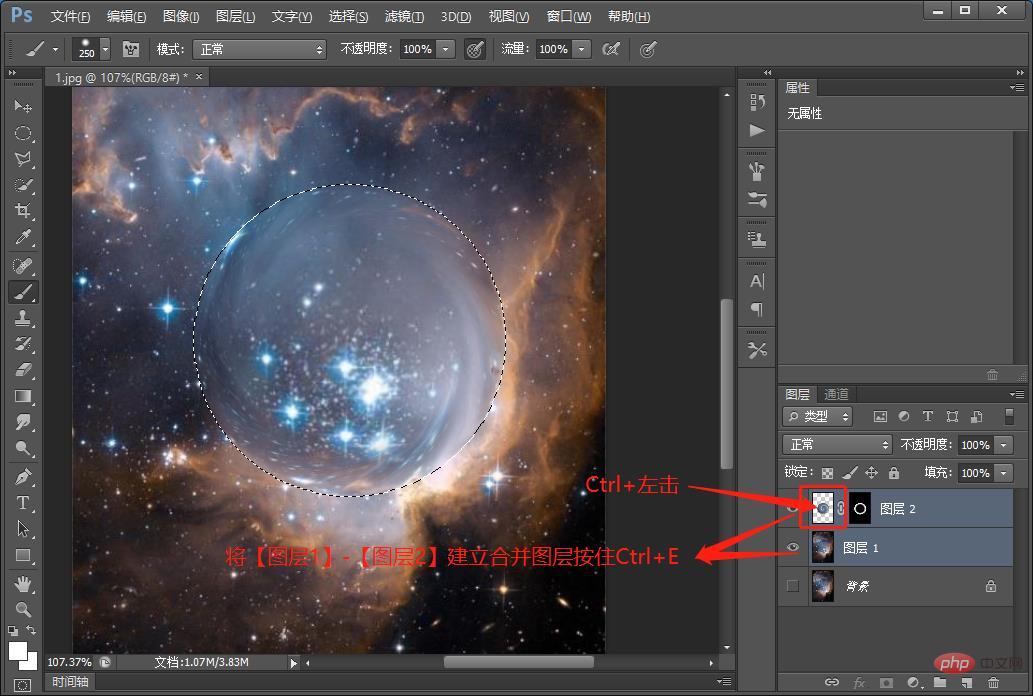
10. Ctrl-left-click [Layer 2] to make a selection and then create a merged layer from [Layer 1]-[Layer 2] and hold down [Ctrl E 】

#11. After merging the layers, when the selection does not disappear, press [Ctrl J] to copy the layer and the selection disappears.
#12. Duplicate a layer and move the size freely.
13. Add [Hue/Saturation] to adjust the color, and the effect is like this.
Recommended learning:PS video tutorial
The above is the detailed content of PS tips: How to add a crystal ball effect to starry sky pictures (share). For more information, please follow other related articles on the PHP Chinese website!