
Previous article "How to use the PS repair brush tool for newbies? (The veteran driver will take you flying, get in the car quickly!)" introduces how to use the PS brush tool. The following article introduces our more common questions, which is how to make blurry pictures clear through PS processing? Let’s take a look at the steps to use the ps sharpening tool to improve the clarity of pictures!

The first step is to open a blurry photo, as shown in the picture, it is quite beautiful. There is a blurry feeling, but if we want to make the picture clearer, we need to copy a layer first. We can use the layer copy shortcut Ctrl J to quickly copy, or drag the layer to the New Layer button.
The second step is to perform some preliminary sharpening on the image. As shown in the picture, go to Filter--Sharpening--USM Sharpening. , this is more commonly used.
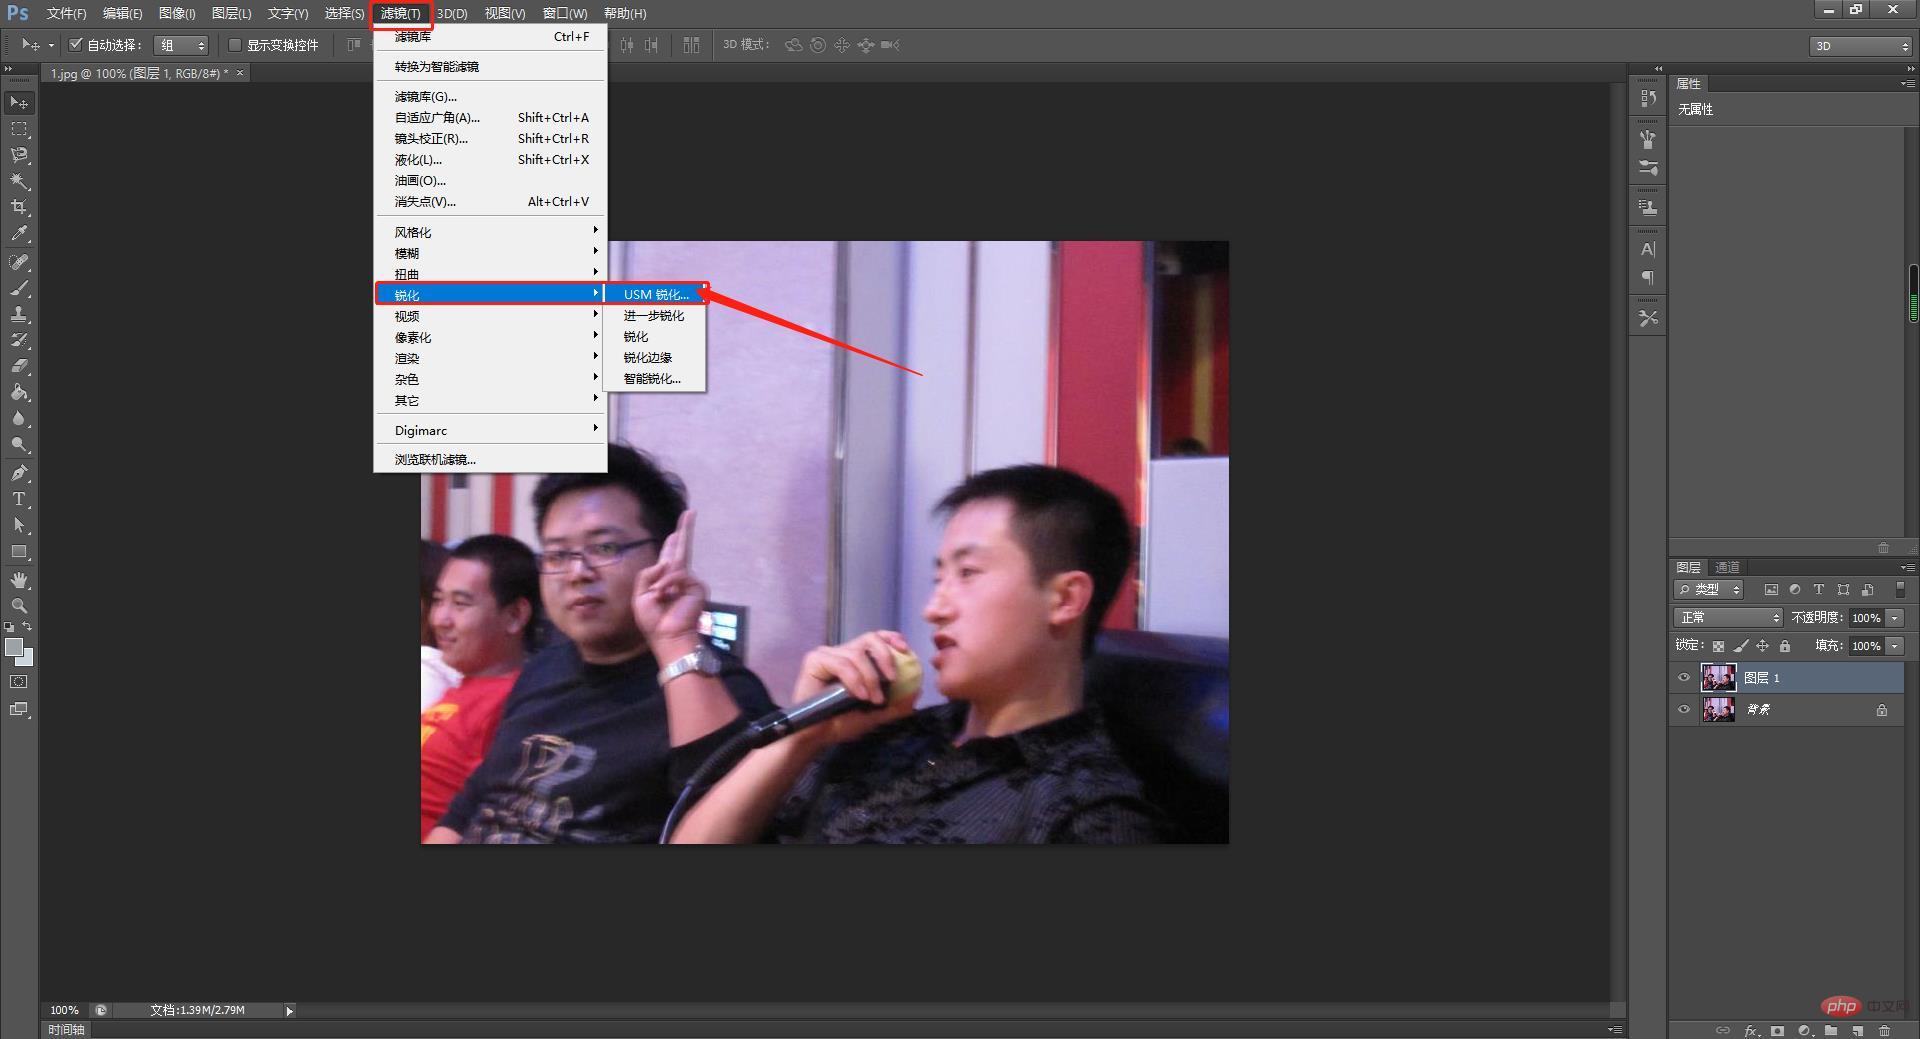
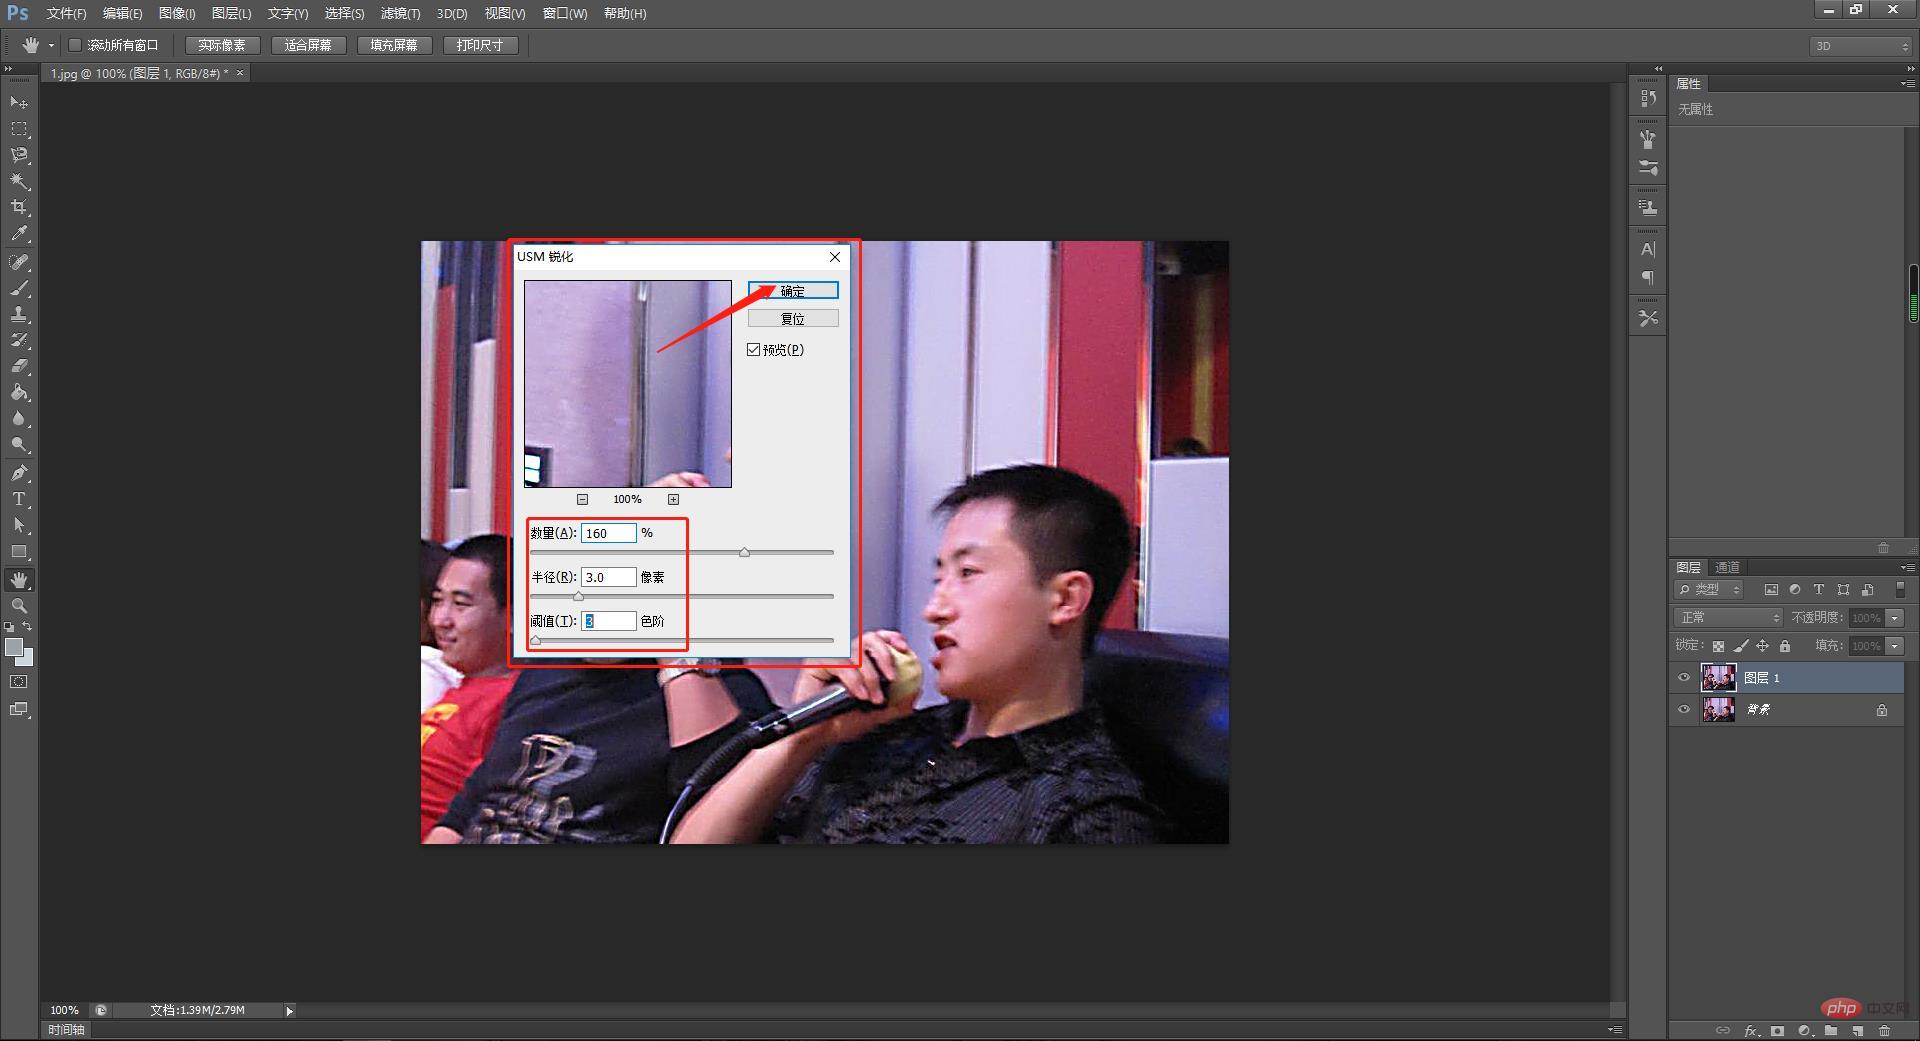
The third step is to set the parameters in the USM sharpening parameter setting box. Set the sharpening value to 60-160, and set the radius to 3 pixels. Adjust accordingly. Set the number for the final picture effect.
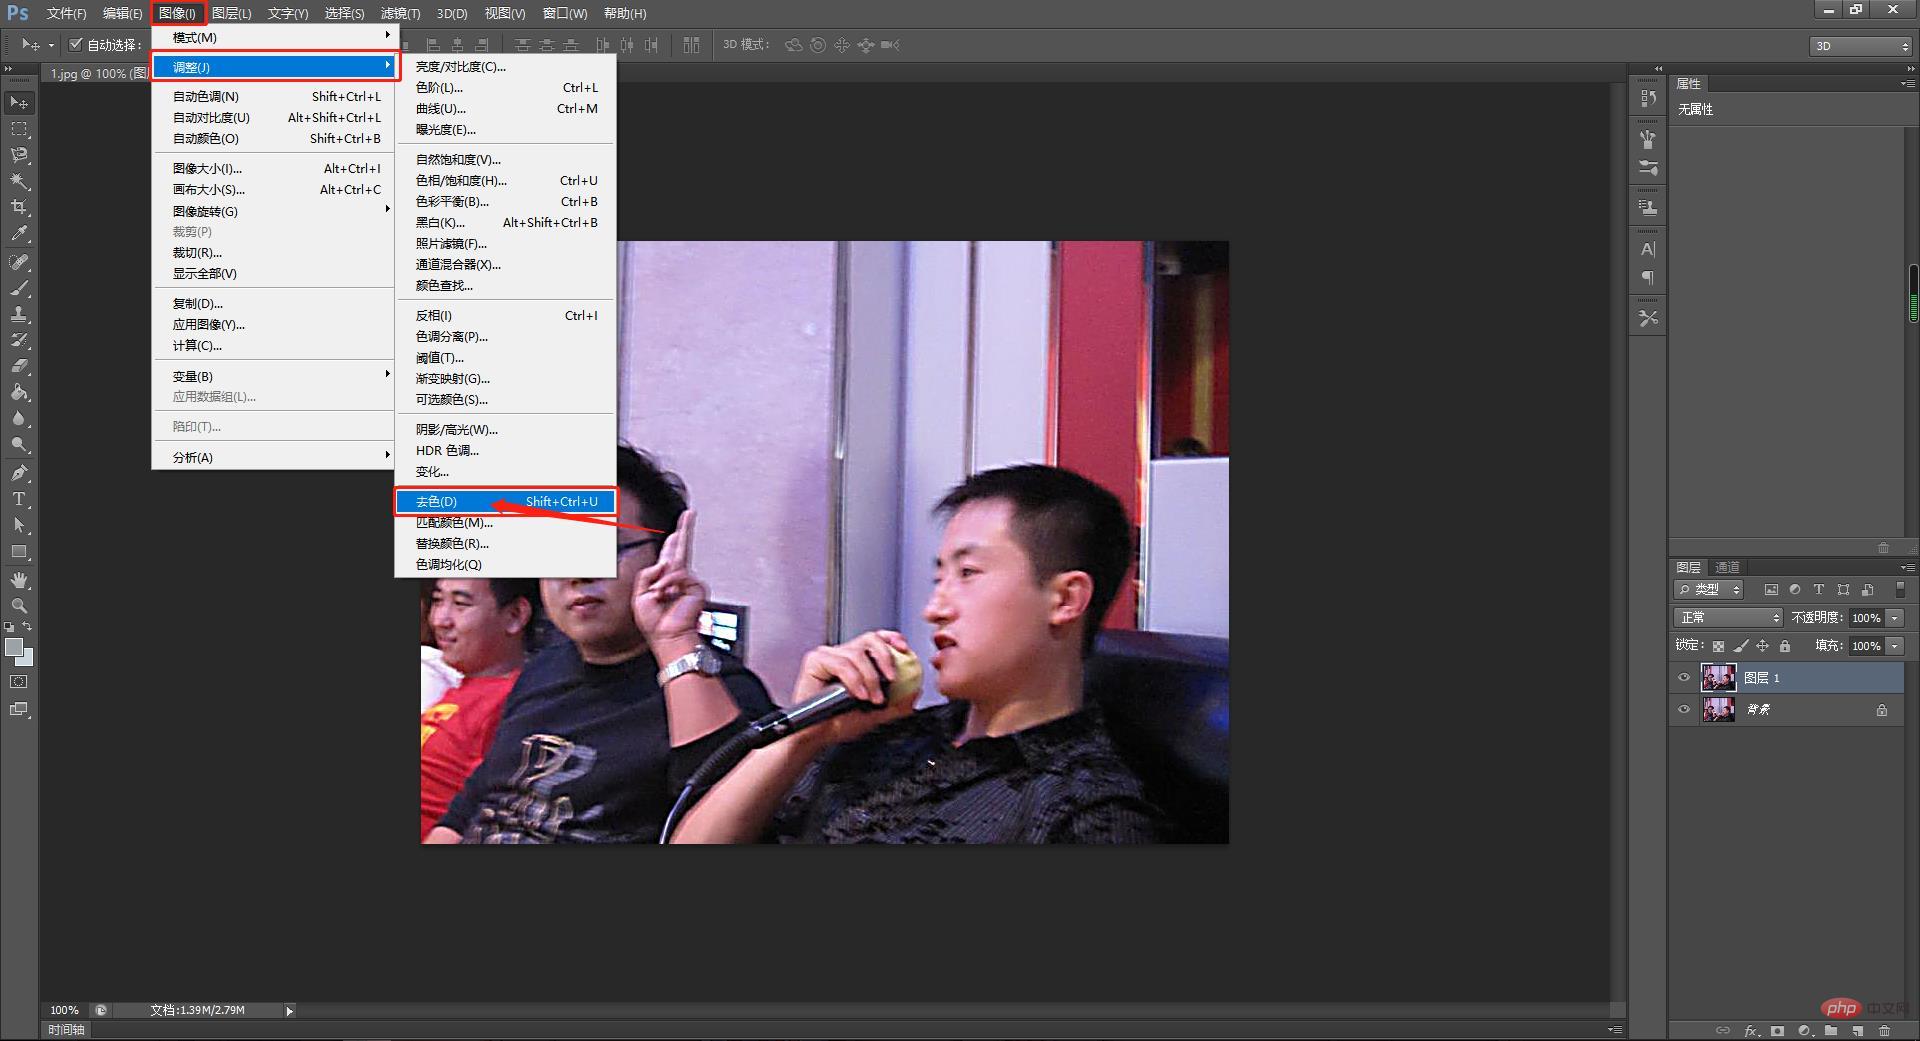
The fourth step, next we want to use the filter to illuminate the edge, then first we decolorize this layer, as shown in the picture, We use the Image-Adjustment-Decolor command so that our photo becomes black and white, which helps us distinguish between light and dark.
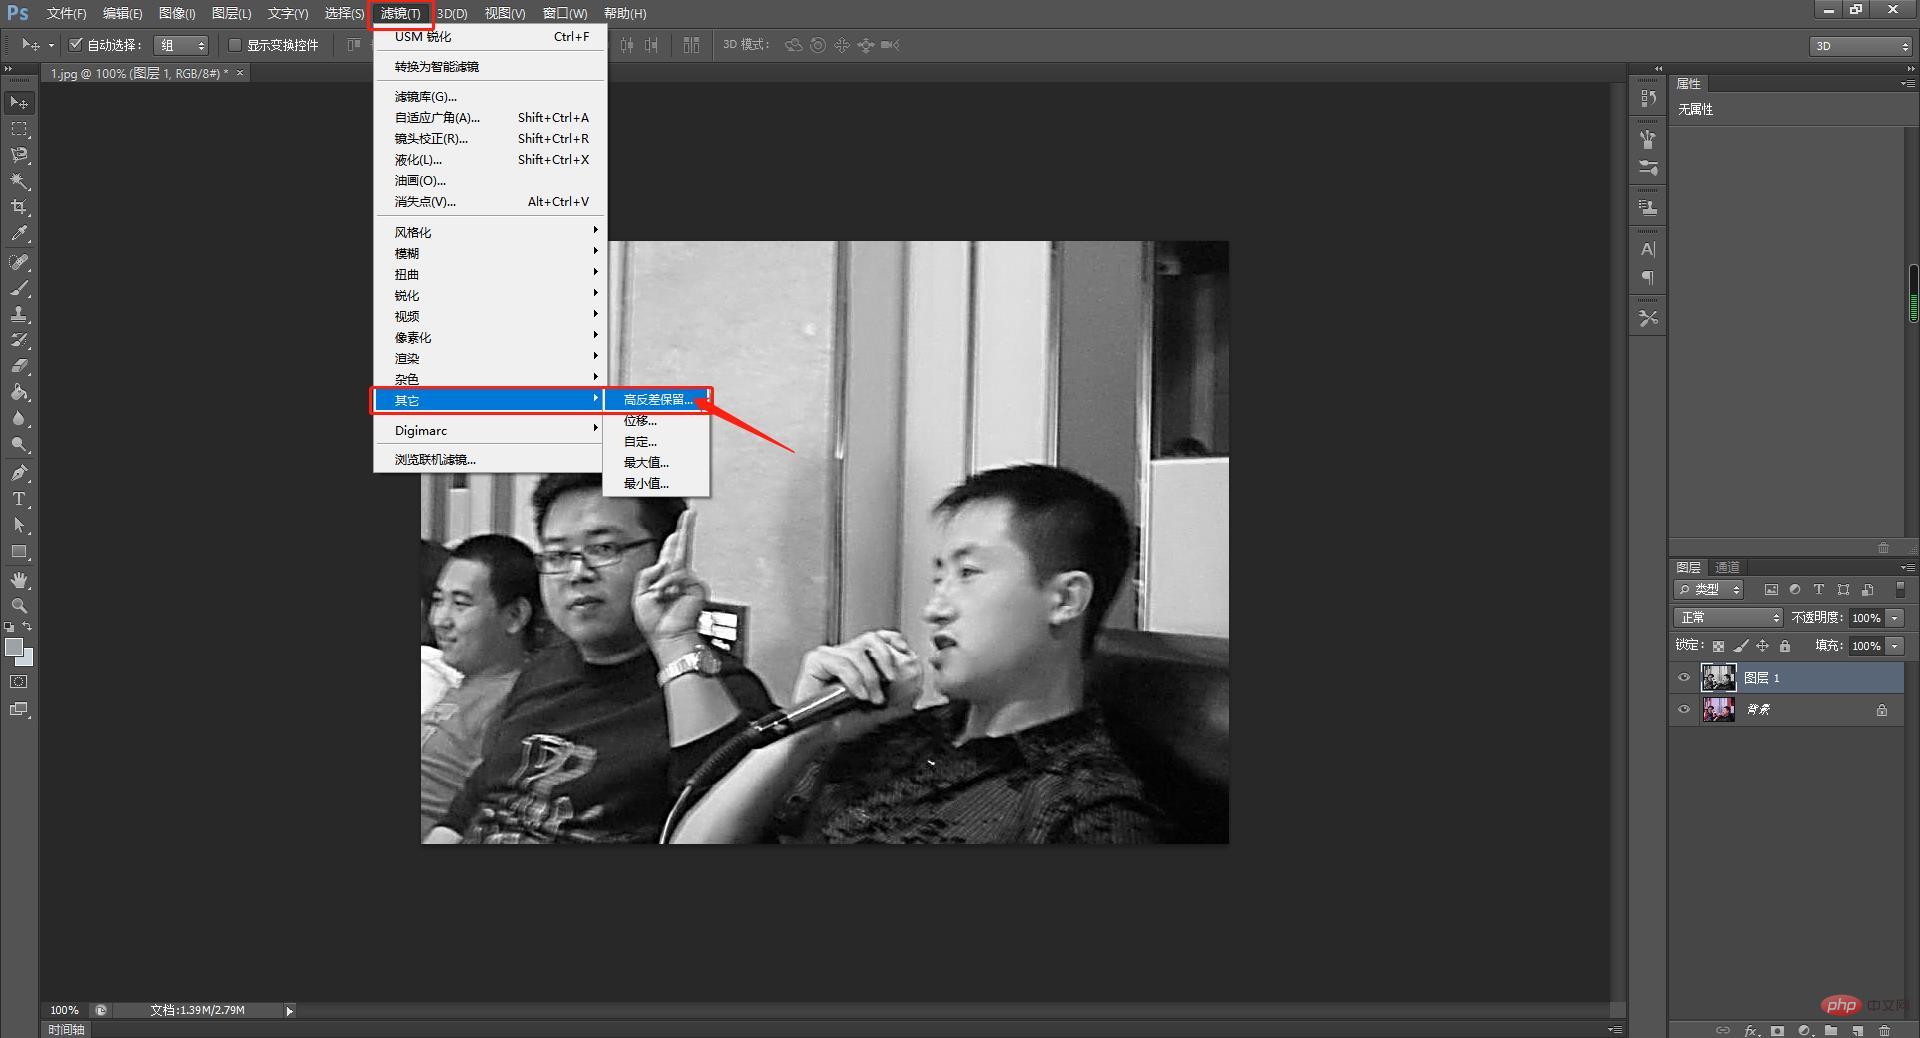
The fifth step, then if we want to make the layer feel clear, we need to use high contrast retention, as shown in the picture, in Filter--Others-- High contrast is retained. Take a look at the effect of the picture. These values can be modified.
The sixth step, I adjusted the value to 20 at the beginning. At that time, I felt that the layer effect was not obvious, so I performed a high contrast preservation again, as shown in the picture. , at this time our numerical parameter is set to 60.
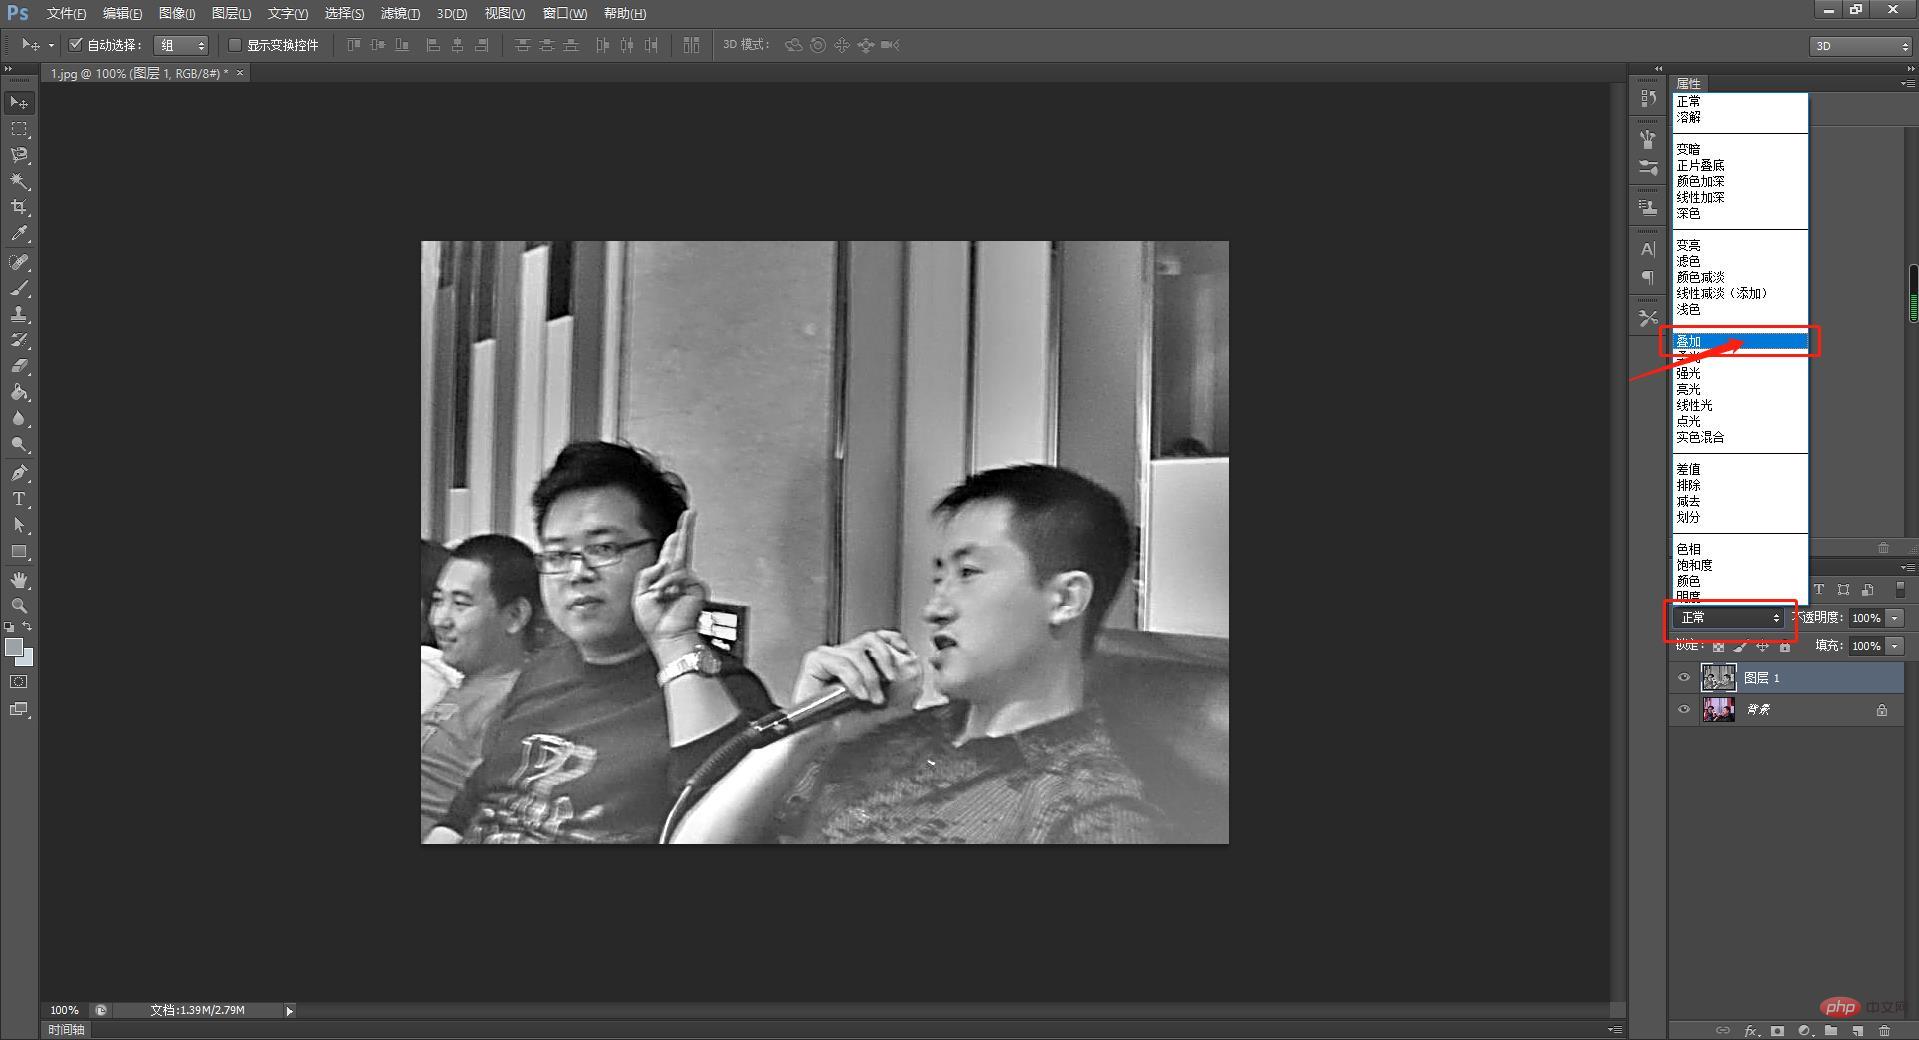
Step 7. After processing, we found that the image was a little clearer, but it became black and white. So in the layer blending mode, we can set the direct mode of the layer, click the small triangle of the layer mode, and find the overlay mode inside, as shown in the figure. You can try other effects by adjusting the blending mode.
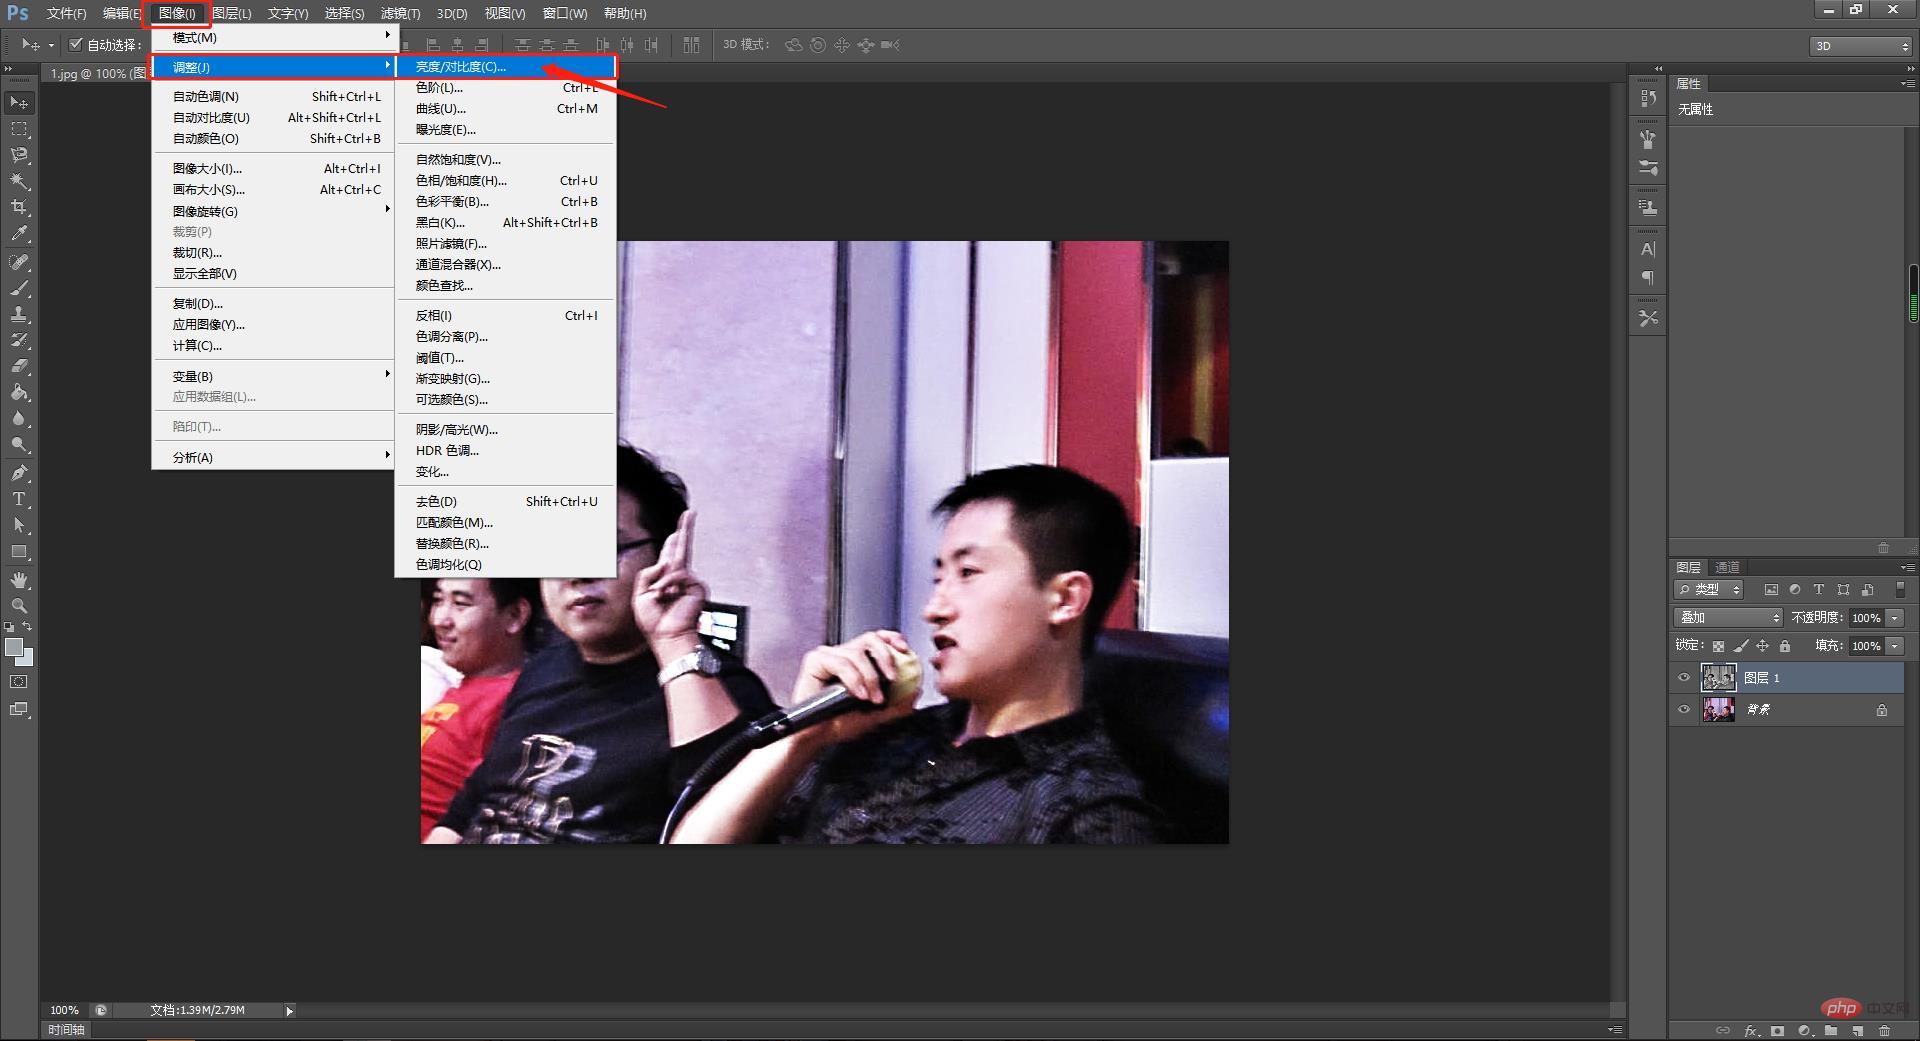
The eighth step is to adjust the contrast of the layer. Go to Image--Adjustment--Brightness Contrast to further adjust the contrast parameters of this layer. Adjust
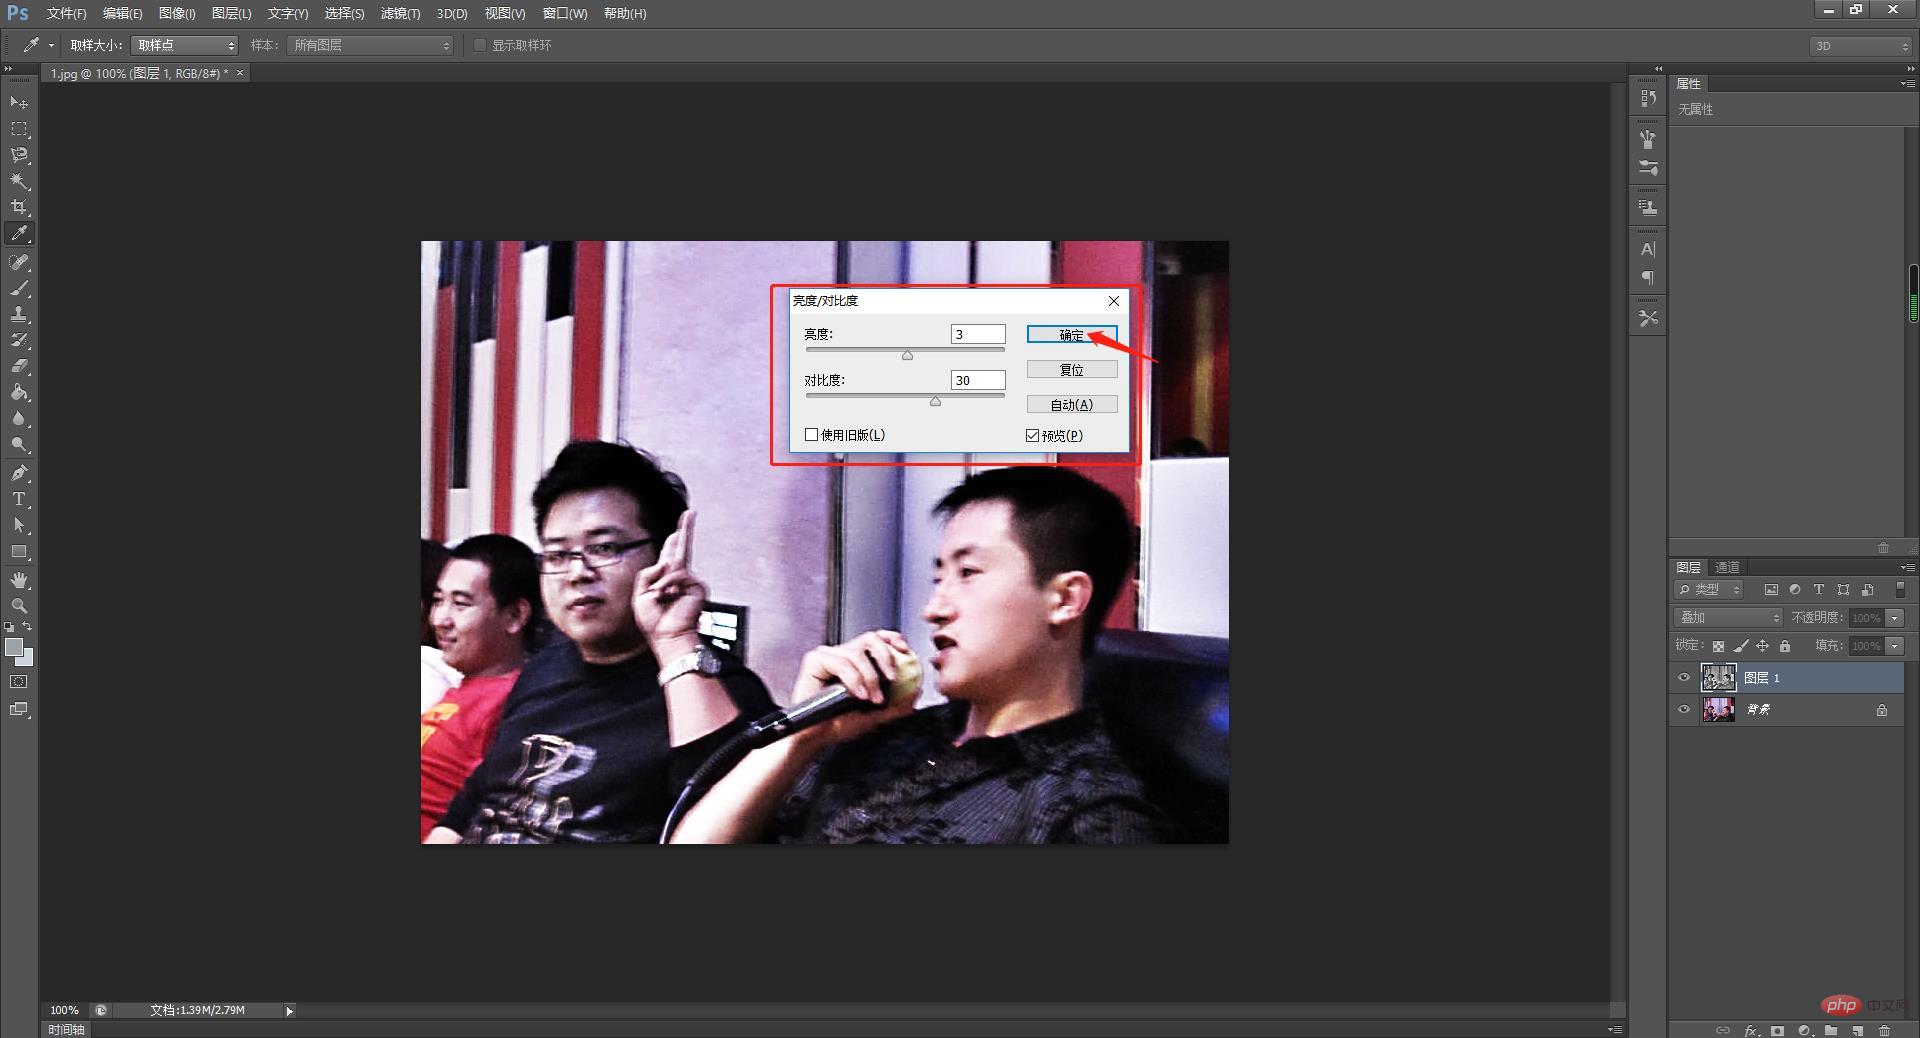
Step 9, as shown in the picture, set the brightness parameter setting dialog box to 3 and contrast to 28. In the same way, these values are what I feel the image is adjusted. It is determined by the effect. Friends can adjust according to their actual situation. The values are for reference only.
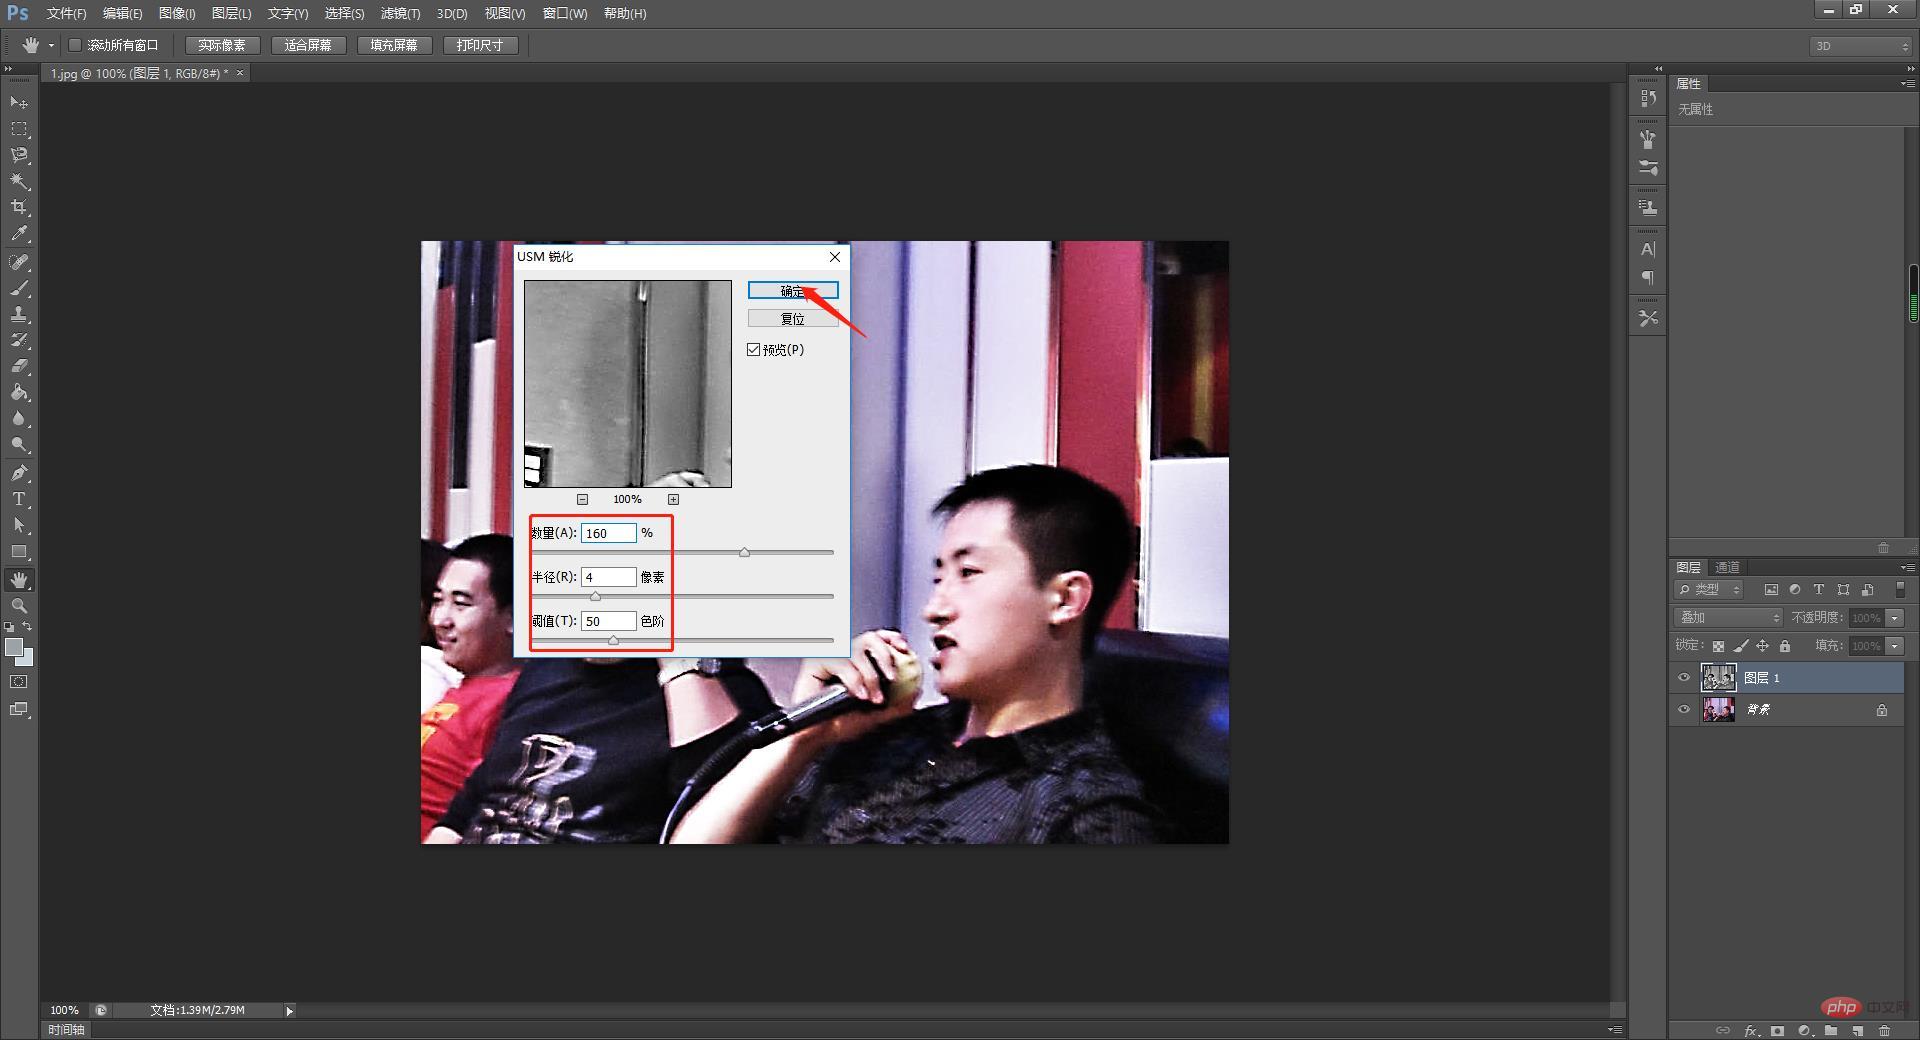
The tenth step is to execute the softening command again. This time when executing USM sharpening, we set the value to be larger, as shown in the figure, the quantity is 160 and the radius is 4 pixels. The unit threshold value is 50 values. The specific value depends on the effect.
The eleventh step, next we find a channel with obvious contrast in the channel panel. I looked for the blue channel, which is still a layer. It's clear and obvious, so I decided to adjust the blue channel.
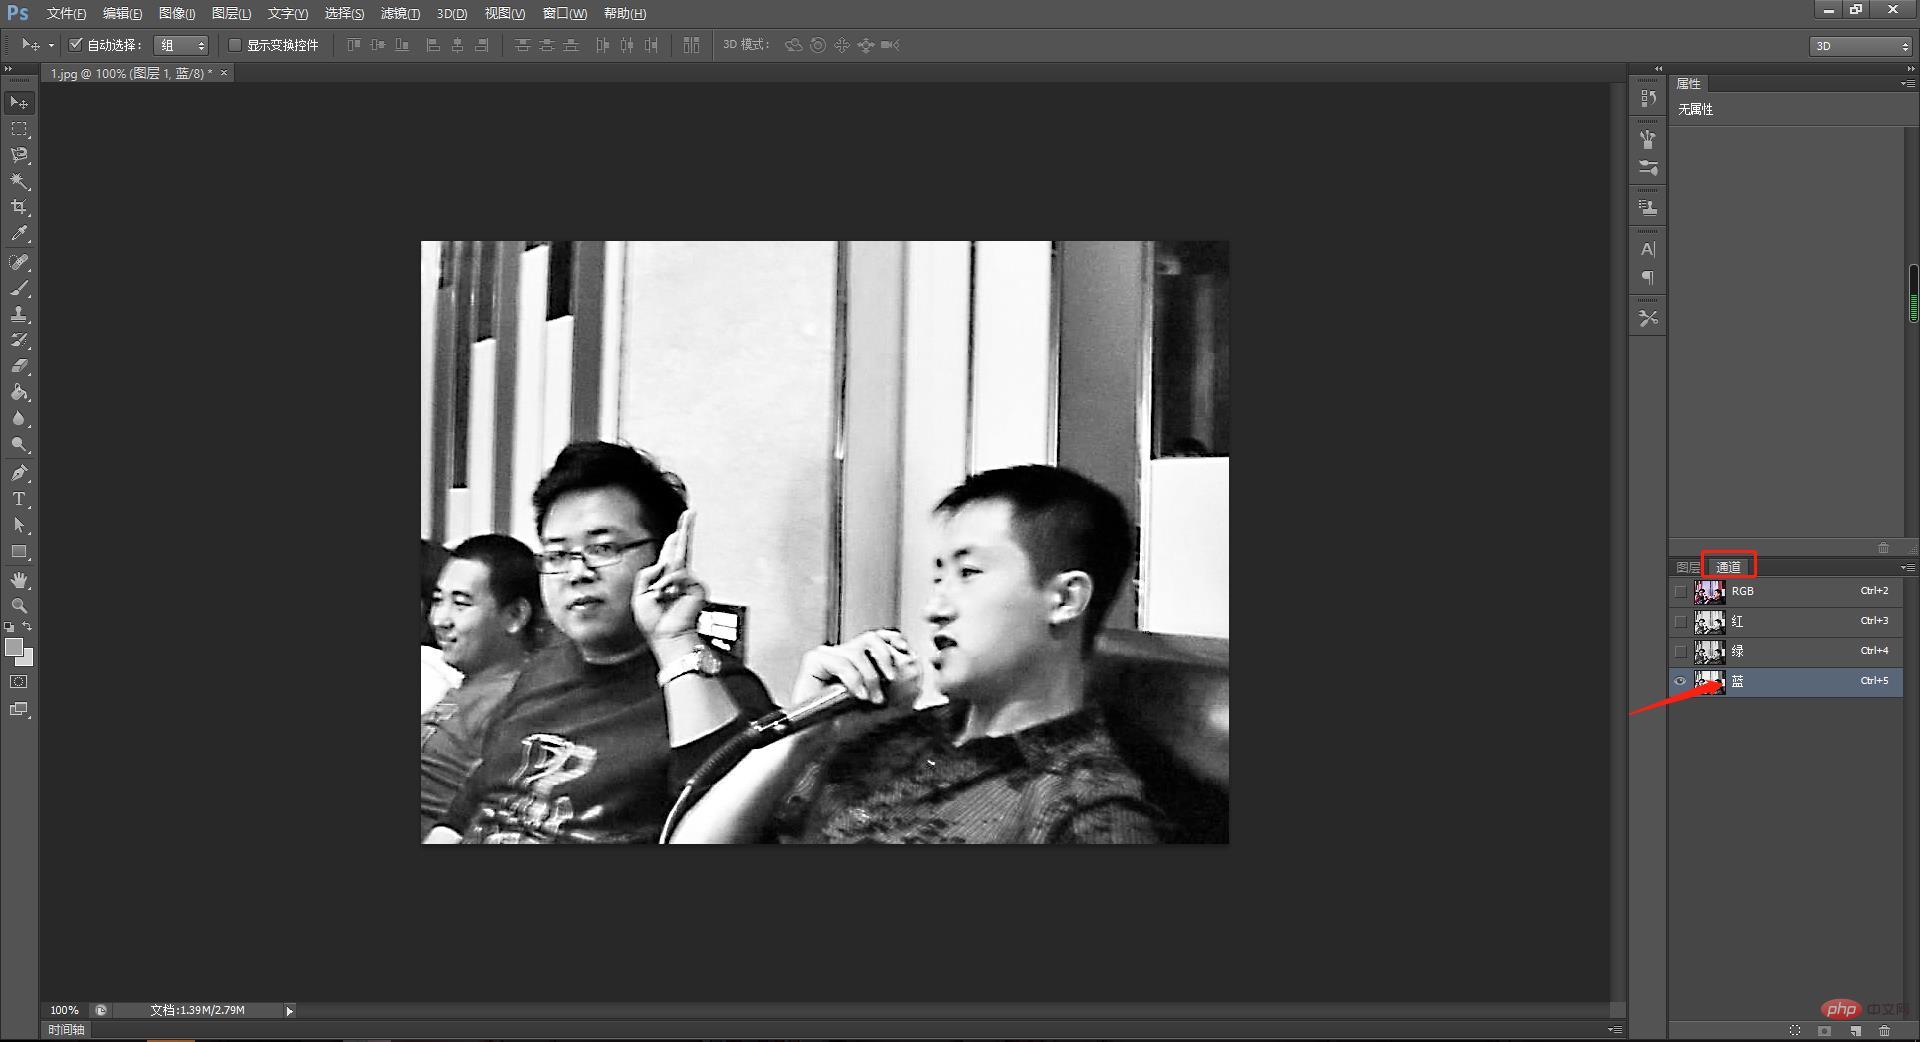
Step 12, bring up the filter library. I want to use the illuminate edge tool in the filter. There is no such command in the filter, so I need to use it in the filter library. Select and call up this command in the mirror library. The path of the specific command is as shown in the figure. This requires us to have a familiar understanding of filter tools so that we can directly find the corresponding filter for the effect we want.
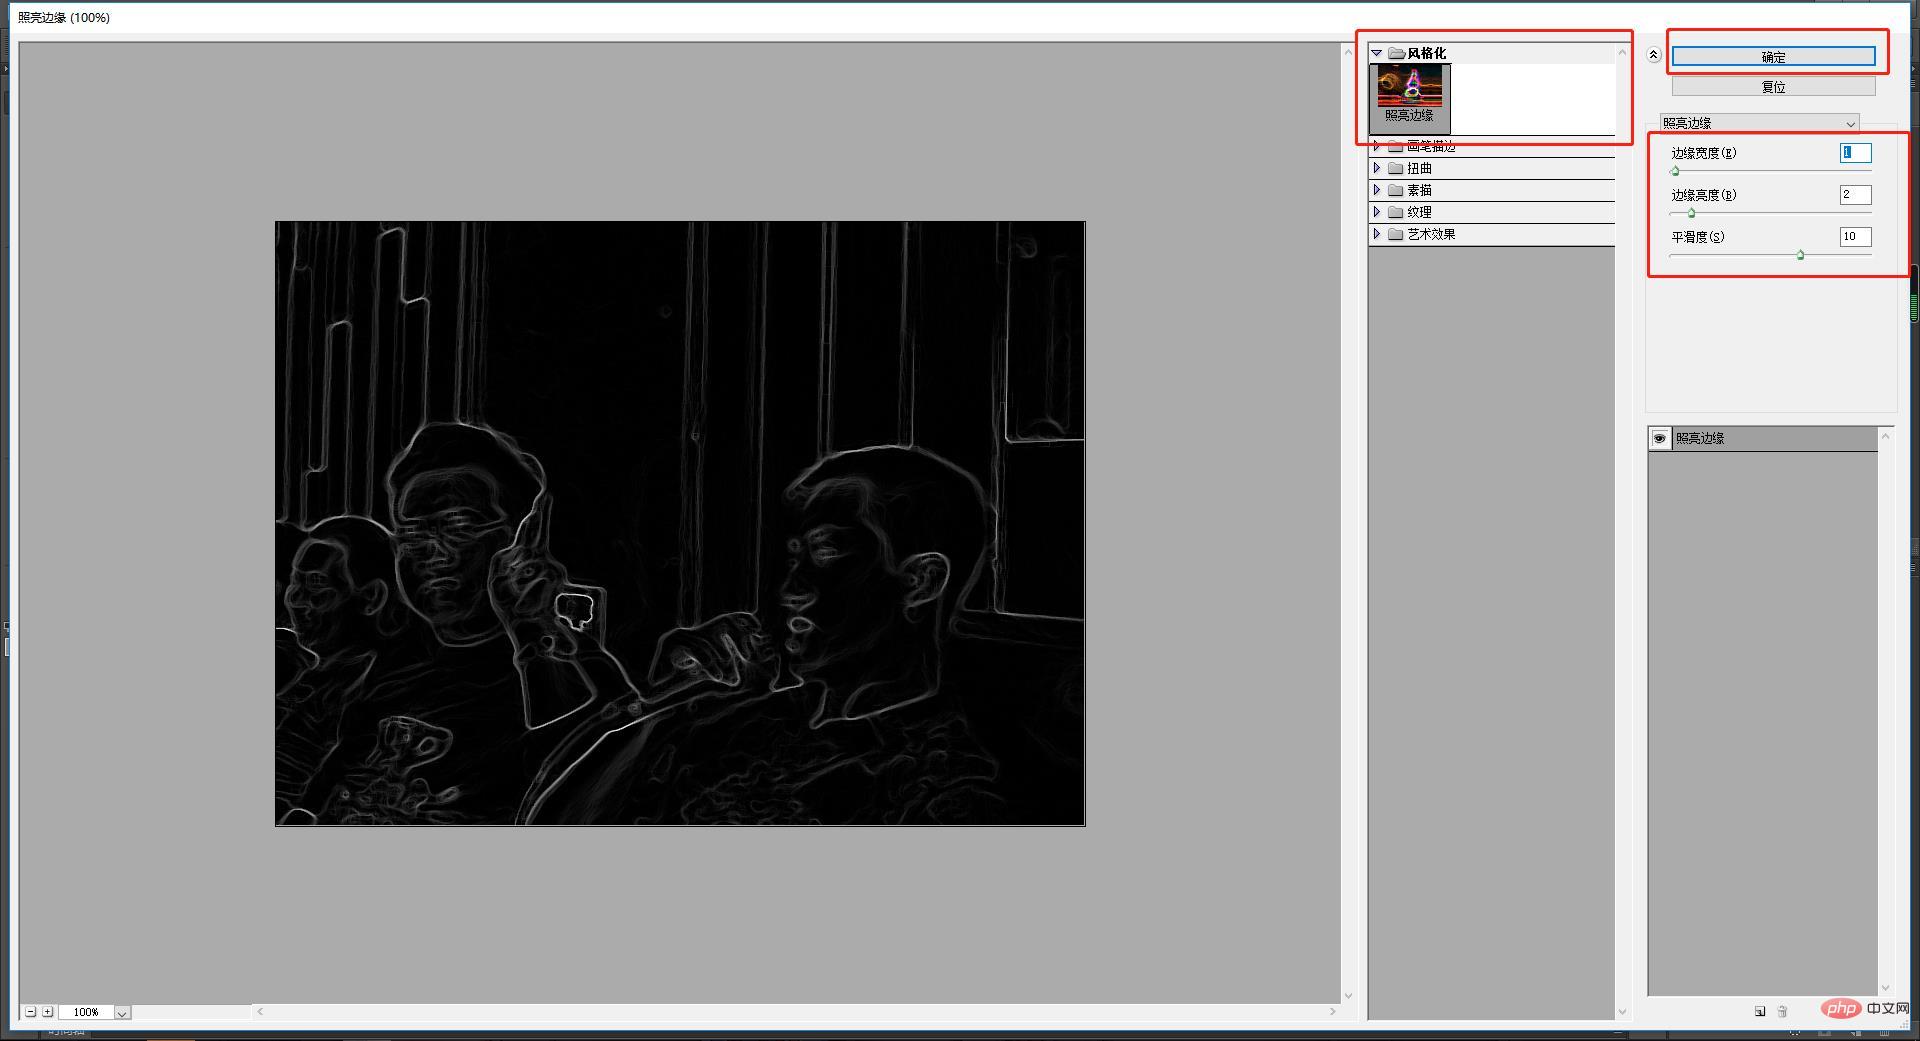
Step 13, next we set the parameters of the edge lighting filter, as shown in the figure, the edge width is set to 3 pixels, the edge lighting is set to 9 pixels, and the smoothness is set to 6 . Then in this case our effect will come out.
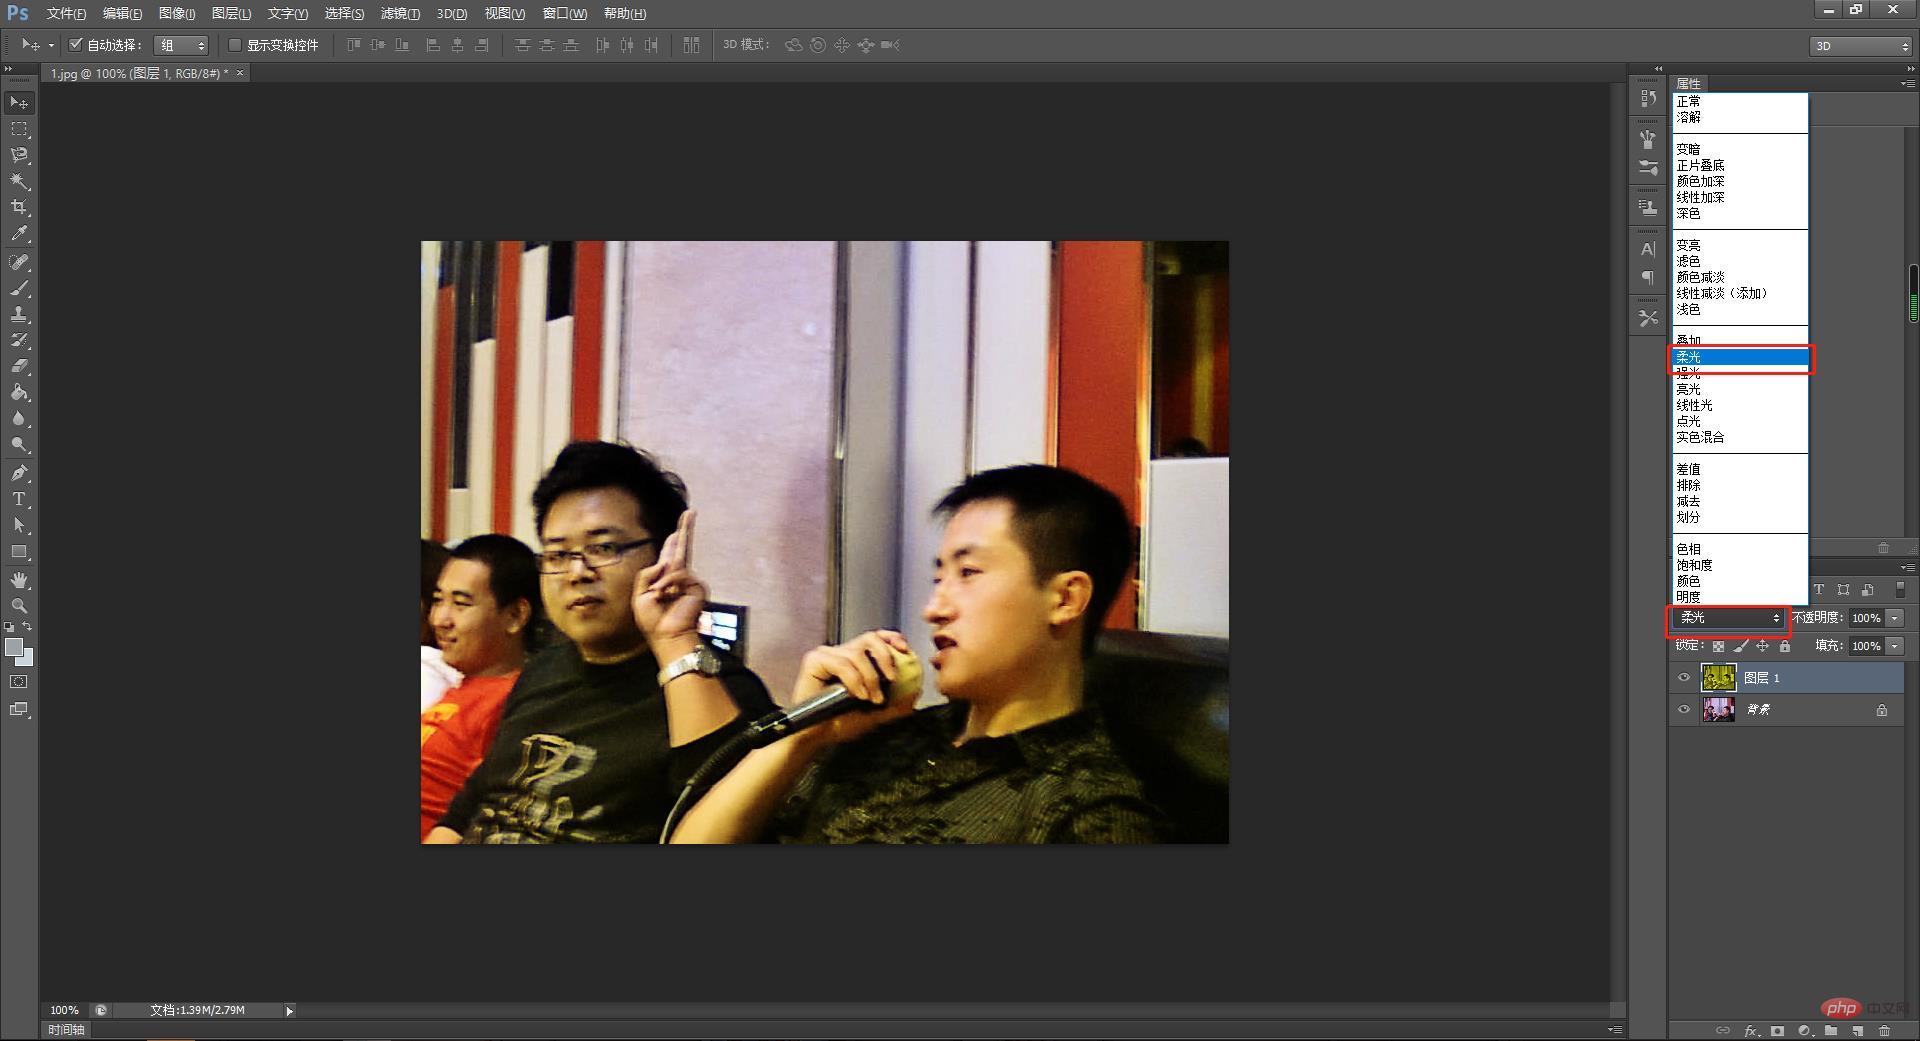
By comparison, it basically meets the requirements I want. If you are still not satisfied, you can use the USM sharpening filter.

Recommended learning:PS video tutorial
The above is the detailed content of How to improve PS resolution? How to sharpen images in PS to improve clarity (implementation steps). For more information, please follow other related articles on the PHP Chinese website!