Troubled by the problem of drawing curved curtain walls in Revit? Don’t worry, PHP editor Xiaoxin will bring you detailed solutions! This article will guide you step by step in mastering the art of drawing curved curtain walls, covering every step from creating the curtain wall system to adding components. Through step-by-step instructions, you will easily learn how to deal with the challenges of drawing curved curtain walls. Once the problem is solved, your Revit model will be more realistic and your design will be better.
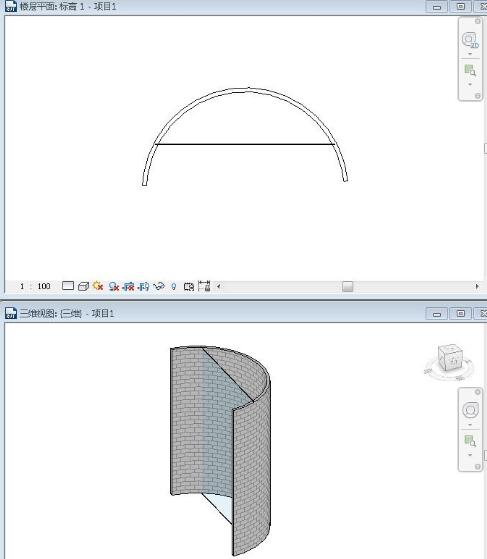
Open the Revit software, first use the [Wall] command under the [Architecture] tab to draw a section of arc wall, and then use the [Curtain Wall] type under the [Wall] command to draw an arc on the wall just drawn Curved curtain wall, we will see that the drawn curved curtain wall is still straight, how to adjust it?

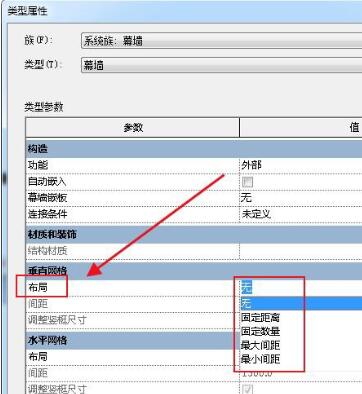
Select the curtain wall, click [Edit Type] on the property bar to enter the type property dialog box, and set the [Layout] parameter value in [Vertical Grid] to a value to adjust. Yes (all values except [None] are acceptable).

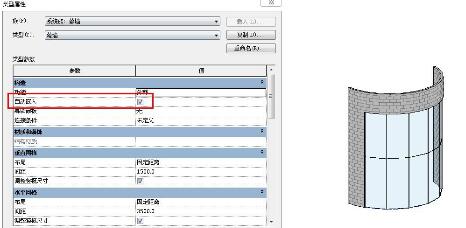
After clicking [OK], you will find that the curtain wall has become a curve, but the wall has not been cut. Return to the type properties dialog box and check [Auto Embed] to automatically Cut the wall.

The above is the detailed content of How to draw curved curtain wall in Revit. For more information, please follow other related articles on the PHP Chinese website!


