
php editor Baicao brings you eight solutions for Win11 virus and threat protection. With the release of Windows 11, users have been upgrading their operating systems, but at the same time they are also facing the problem of unavailable virus and threat protection. In this article, we will introduce you to eight effective solutions to help you protect your computer from viruses and threats. Whether it's updating protective software, optimizing system settings or strengthening network security, these methods can help you improve security on the Windows 11 operating system. Let’s take a look at these solutions!
Eight ways to prevent Win11 virus and threat protection from being available
Method 1: Restart your computer
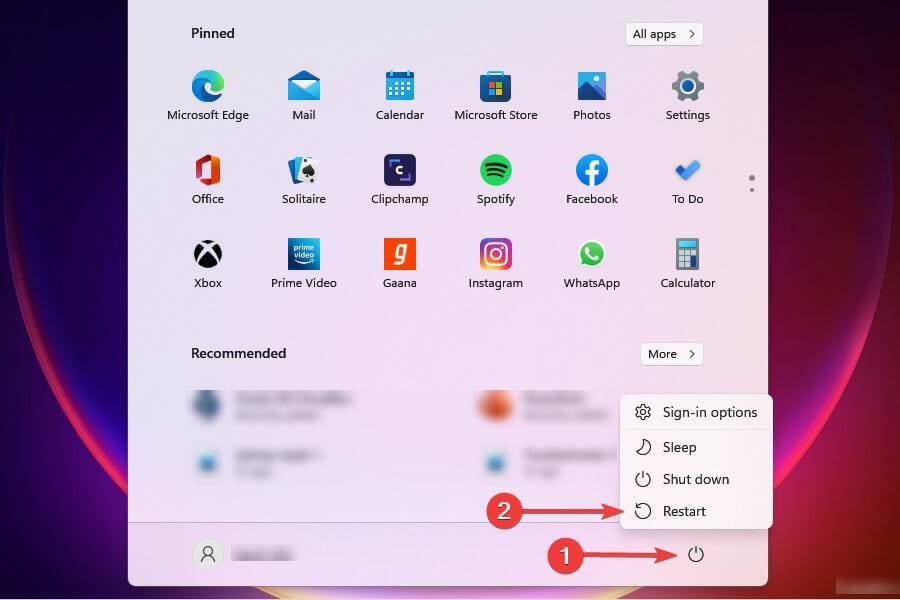
1. Press the WIindows key to launch the start menu.
2. Click the power button and select Restart from the pop-up menu.
3. After the PC restarts, check whether you can access and use virus and threat protection.
Method 2:
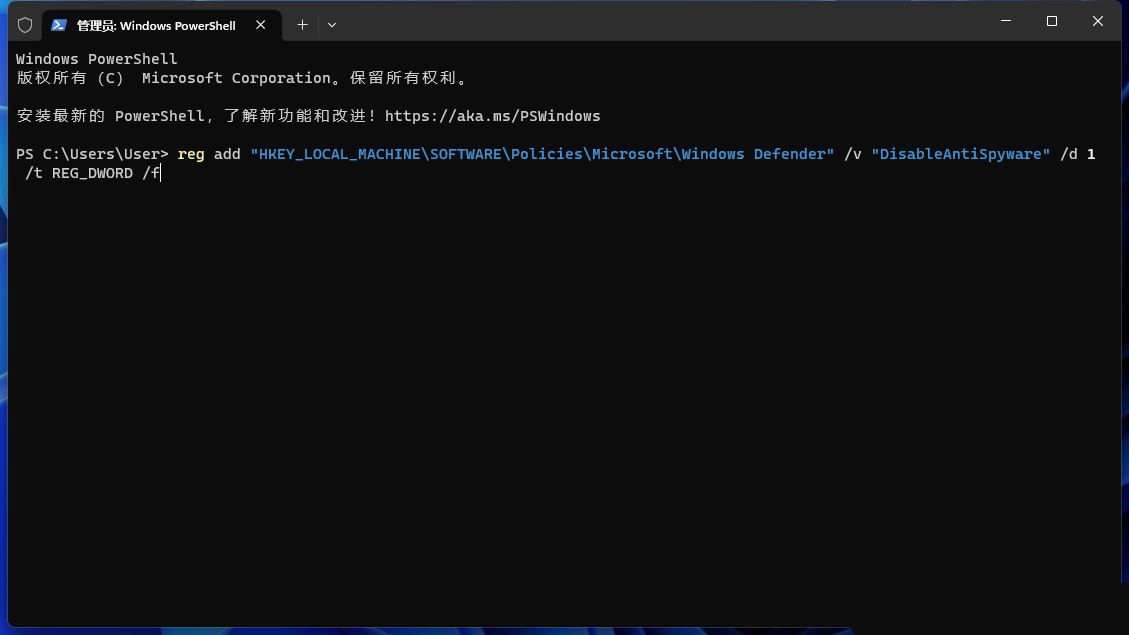
1. Press [Win X], select [Terminal Administrator], and run the following command:
1reg add “HKEY_LOCAL_MACHINE\SOFTWARE\Policies\Microsoft\Windows Defender” /v “DisableAntiSpyware” /d 1 /t REG_DWORD /f
2. The prompt [Operation completed successfully] means Running the command was successful.
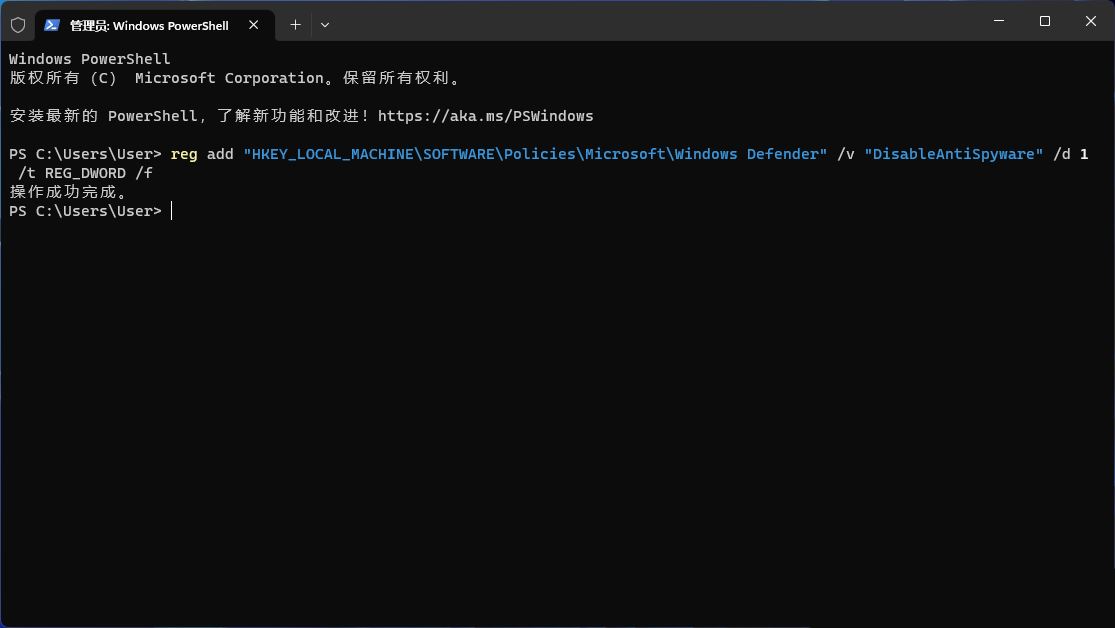
#3. Finally, restart the computer.
If an error is displayed when running the above command, please check whether the command is correct and whether there are too many spaces or too few spaces. The commands must be consistent.
Method 3:
1. Press [Win R] to open the run window, enter [gpedit.msc] to open the local group policy editor.
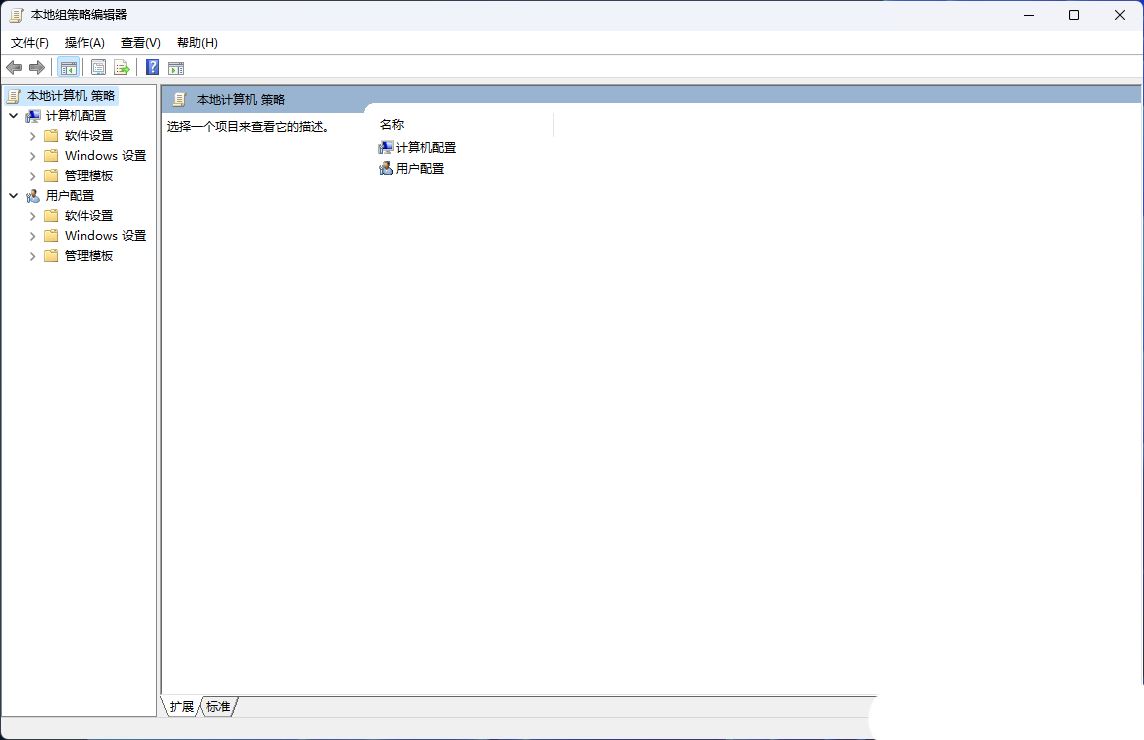
2. Expand [Computer Configuration - Administrative Templates - Microsoft Defender Antivirus] on the left, and find [Turn off Microsoft Defender Antivirus] in the list on the right.
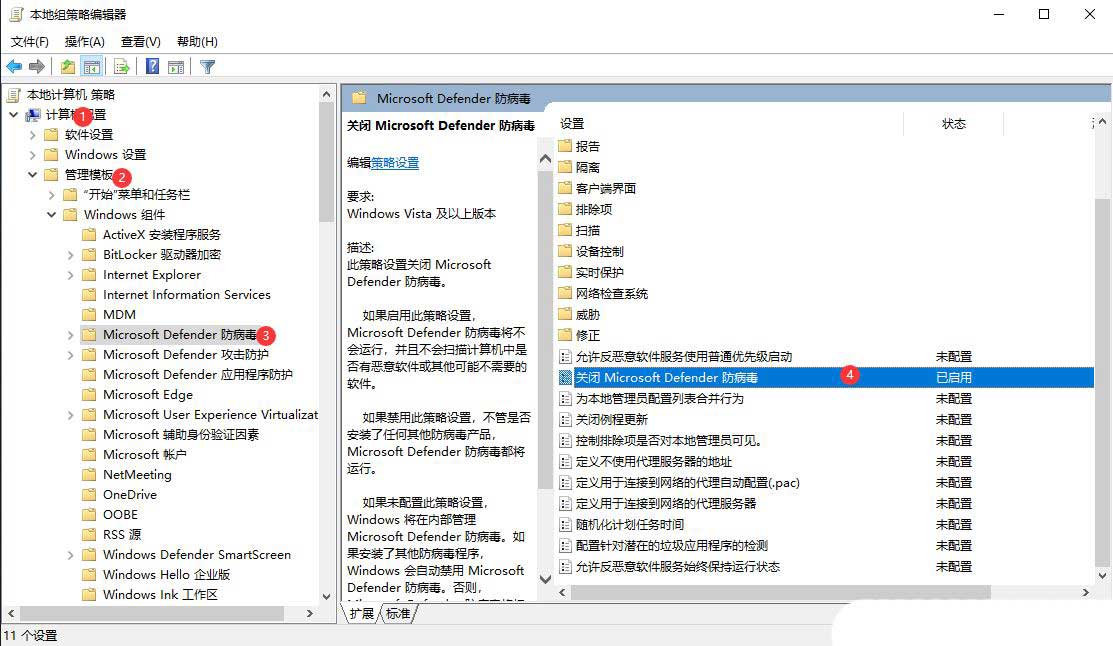
3. Double-click to open [Turn off Microsoft Defender Antivirus].
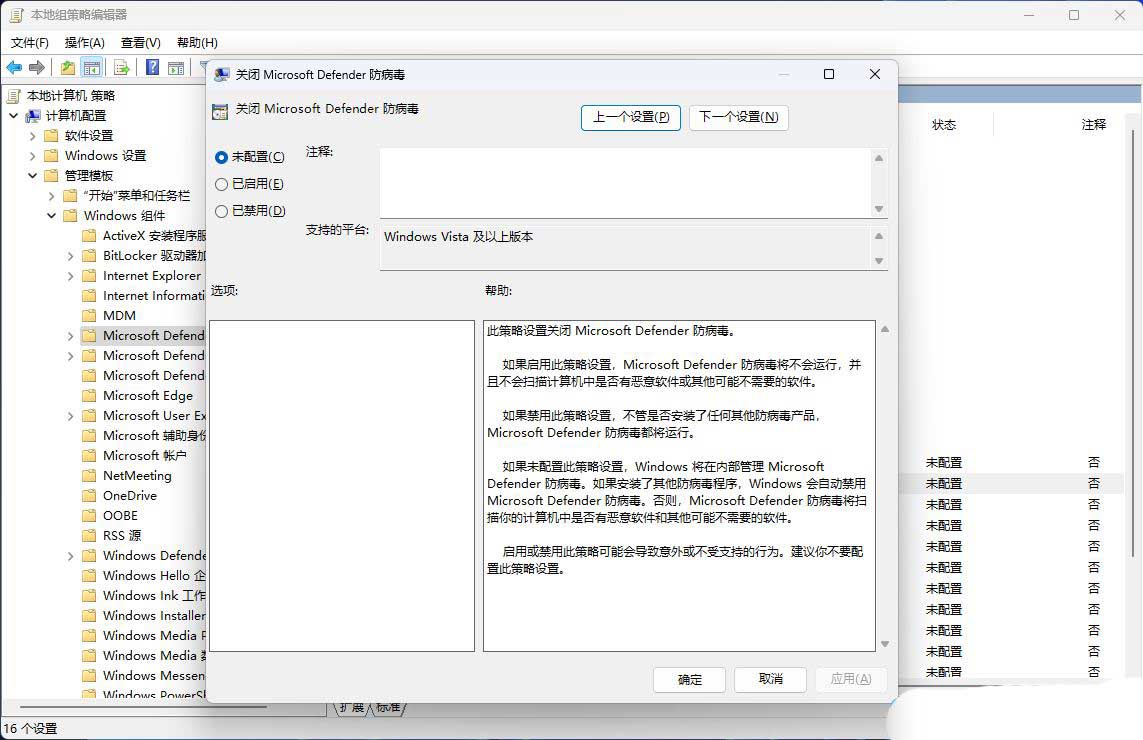
4. Then, press [Win R] to open the run window, enter [regedit] to open the registry
Expand [Computer\HKEY_LOCAL_MACHINE] on the left \SOFTWARE\Policies\Microsoft\Windows Defender], find [DisableAntiVirus] on the right, double-click, change the value to [1], click [OK]
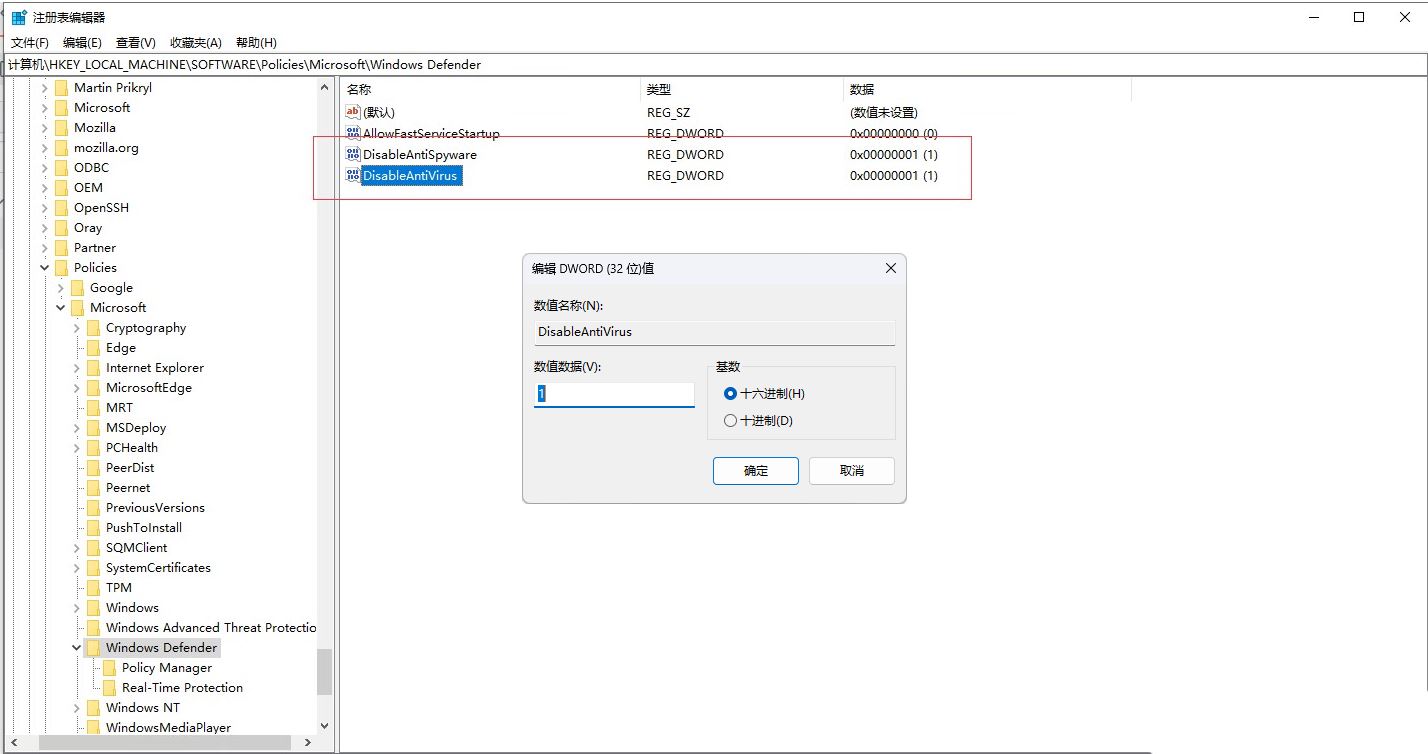
5, After the changes are completed, restart the computer and see if it can be opened normally.
Method 4: Update the operating system
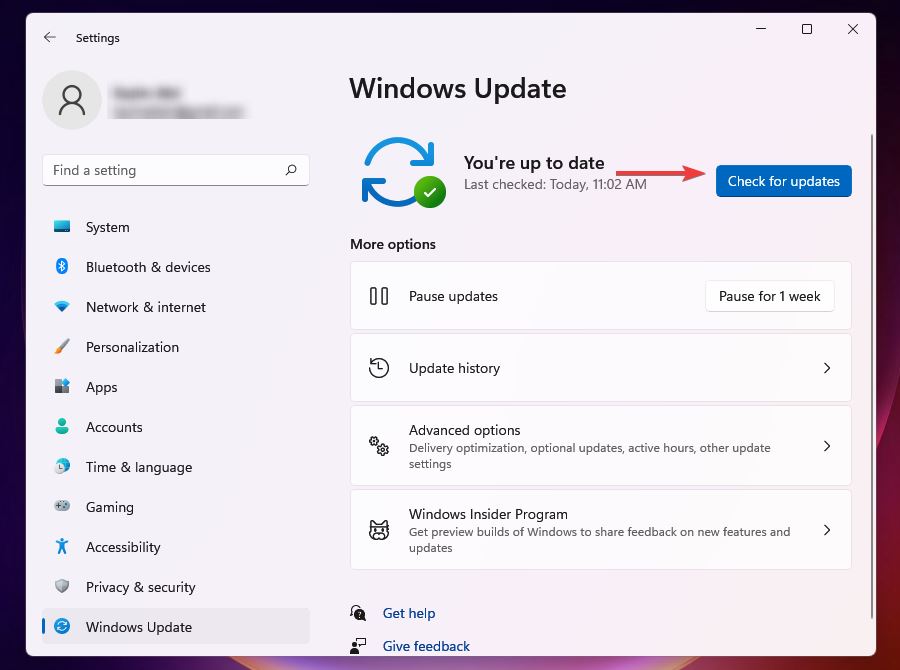
1. Press Windows I to start the settings.
2. Select Windows Update from the tabs listed on the left.
3. Click Check for updates on the right.
4. Wait for Windows to scan for updates, then download and install them (if available).
5. If there is a bug in the current version that causes the problem, updating Windows may fix it. Microsoft will identify such bugs and introduce patches for them in subsequent updates.
Method 5: Uninstall any other third-party anti-virus software
1. Press Windows I to start the setup.
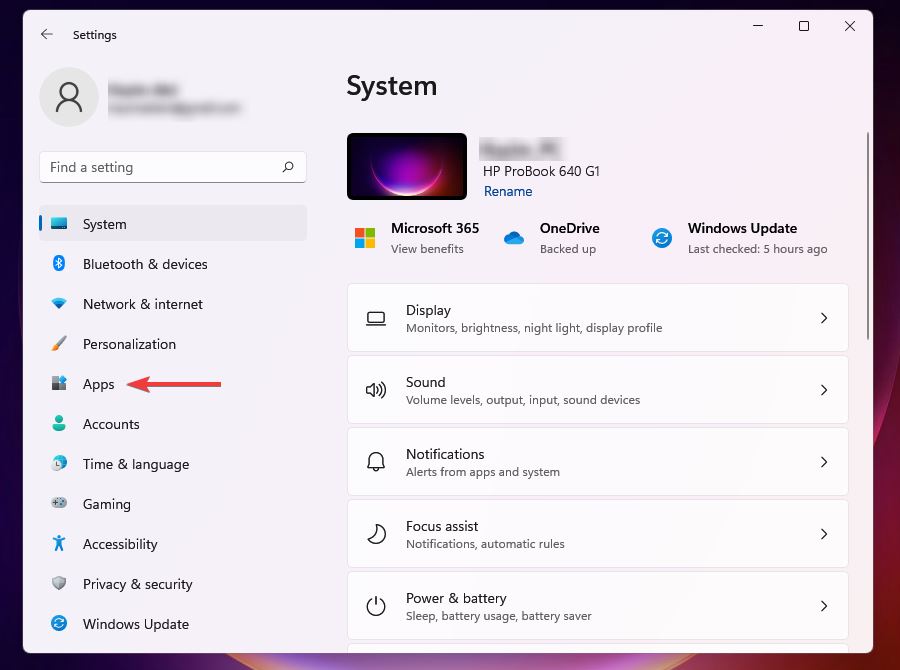
2. Select the Applications tab from the left.
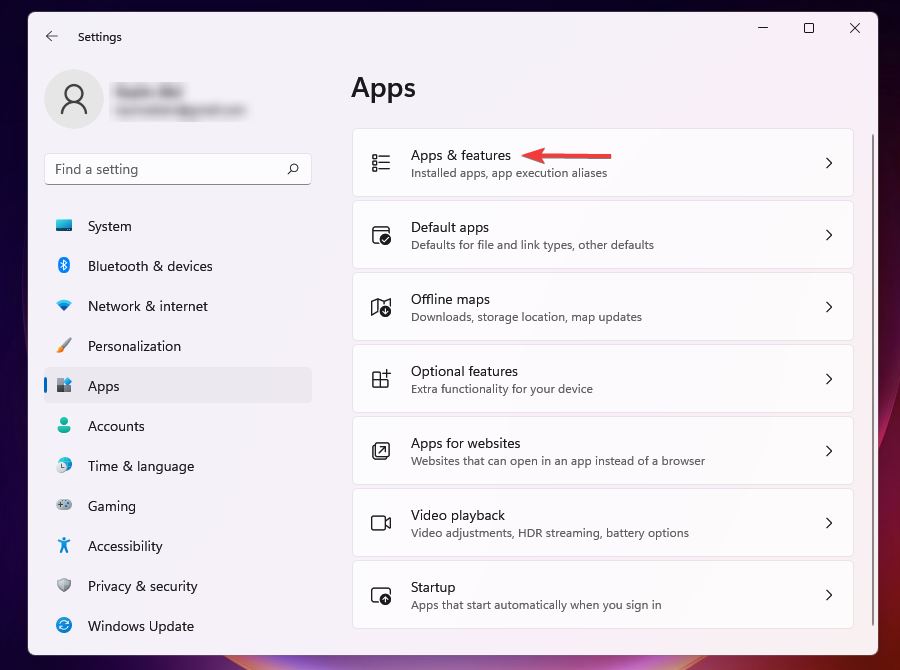
3. Select applications and functions.
#4. Click the ellipsis next to the antivirus software you want to remove, and then select Uninstall from the pop-up menu.
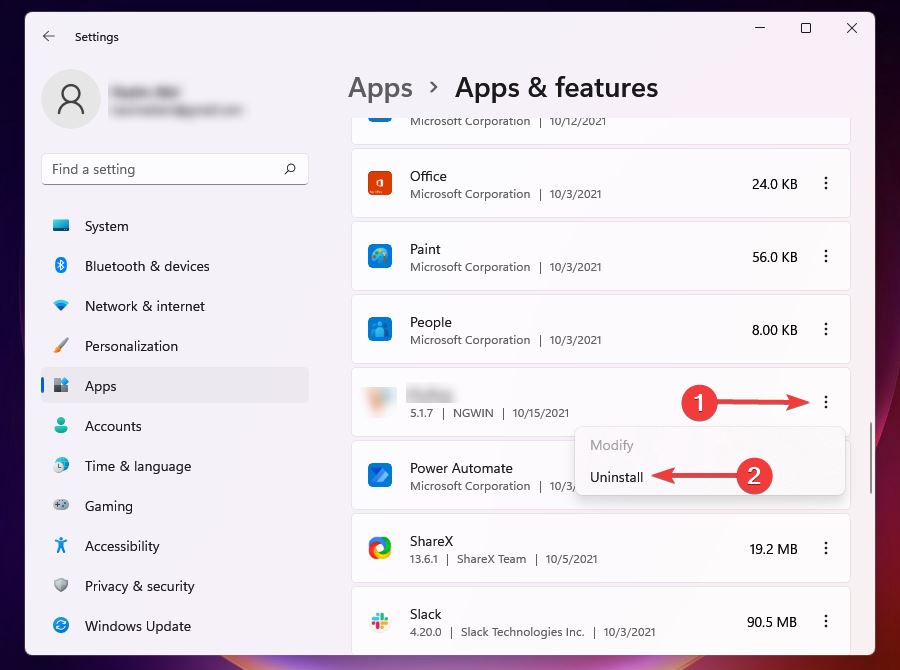
5. Click Uninstall in the prompt.
6. If you have third-party antivirus software installed on your PC, it may conflict with the virus and threat protection features.
Additionally, sometimes when Windows detects that a similar tool is installed on your system, it disables Windows Defender to avoid conflict between the two. Therefore, uninstalling antivirus software should be the primary way to resolve the error.
Method 6: Turn on real-time protection
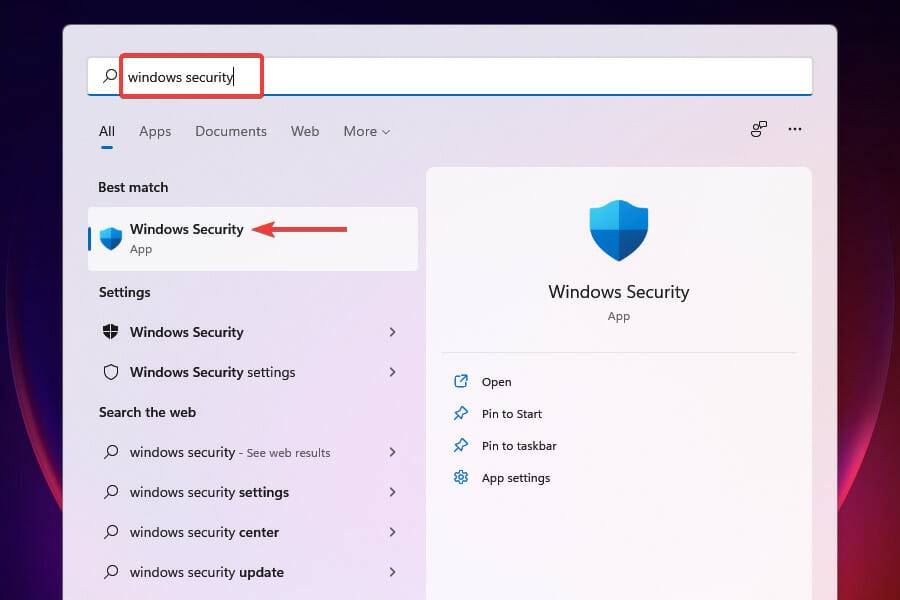
1. Press Windows S to start the search menu.
2. Enter Windows Security in the text field and click the relevant search results.
#3. Select virus and threat protection.
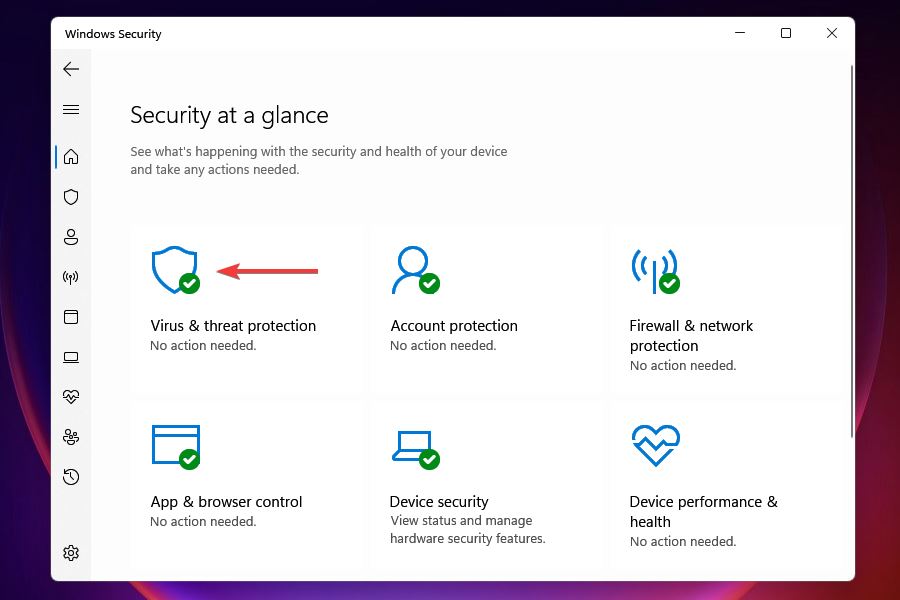
#4. Click Manage Settings under Virus and Threat Protection Settings.
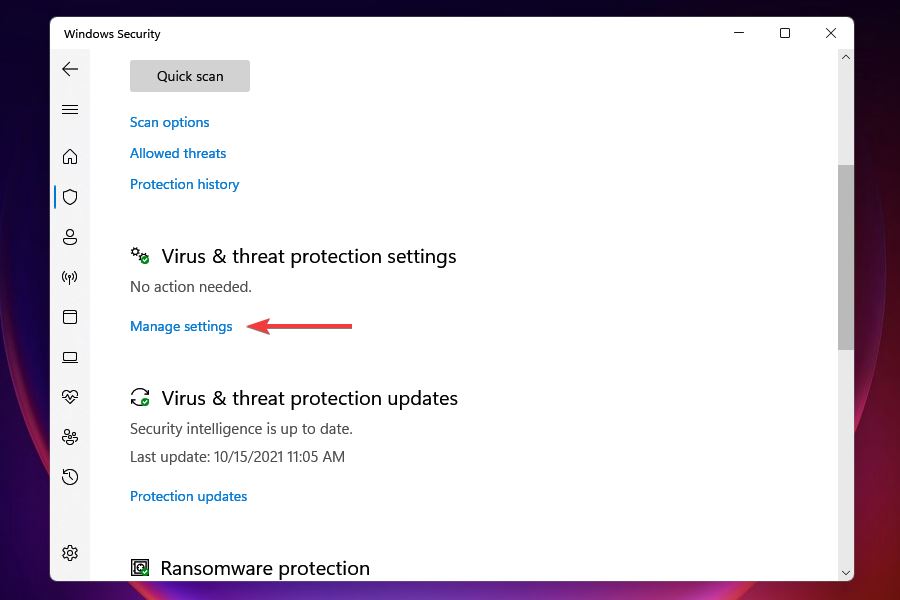
#5. Enable real-time protection switching.
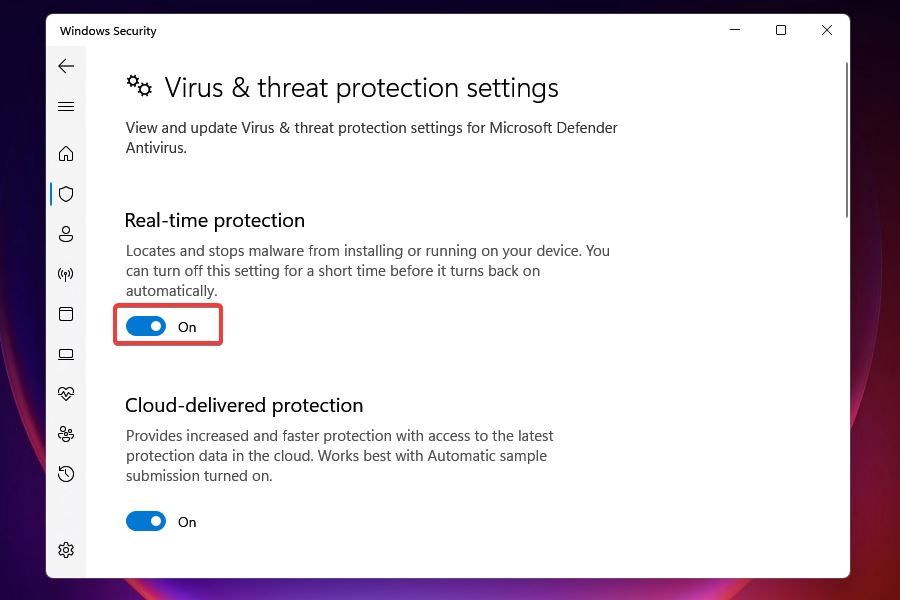
#6. After enabling real-time protection, you should be able to access virus and threat protection. The toggle may be turned off manually by you, or it may be turned off by Windows itself in case it detects that third-party antivirus software is running.
Method 7: Repair Windows Security Application
1. Press Windows I to start the settings.
2. Select an application from the tabs listed on the left, and then click Applications and Features on the right.
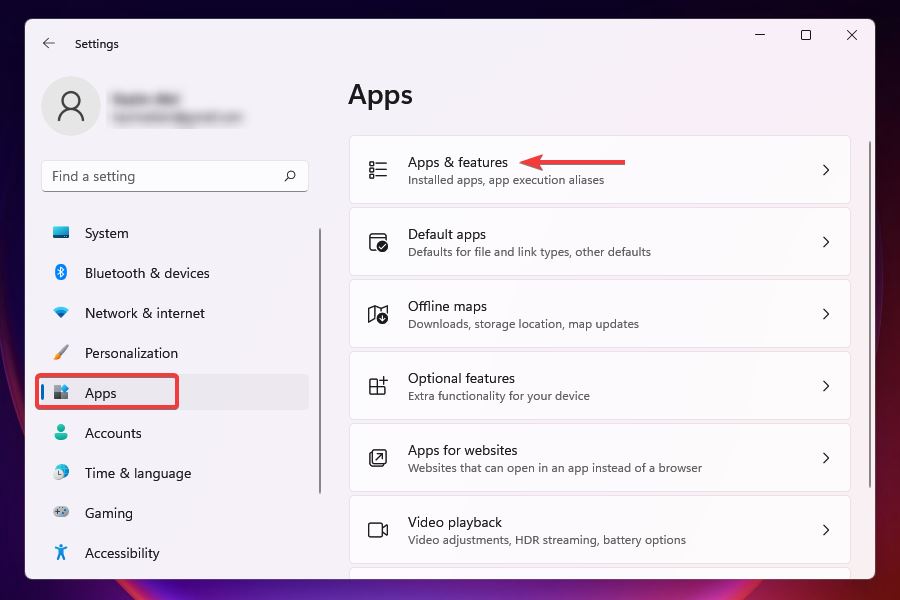
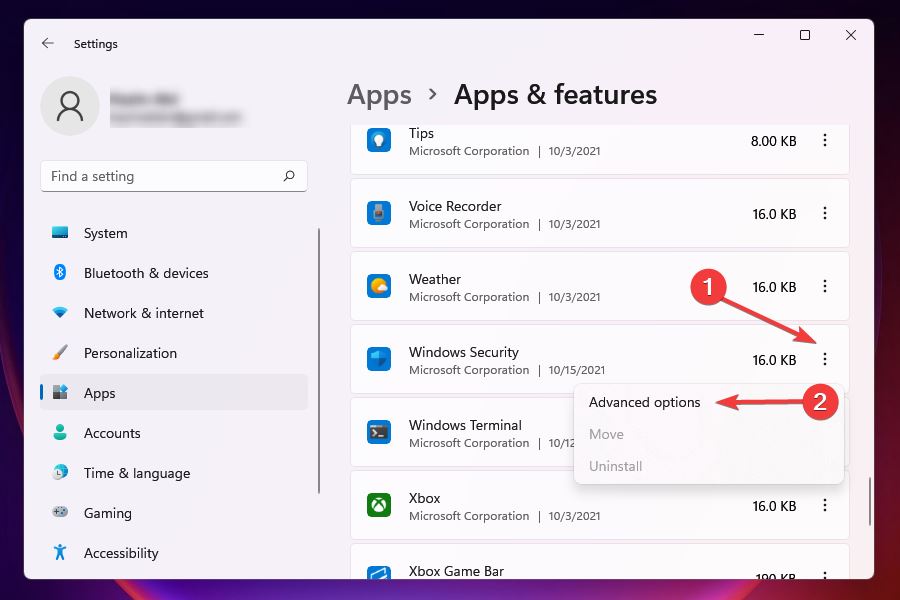
#3. Find the Windows Security application, click the ellipsis next to it, and then select Advanced Options from the pop-up menu.
4. Click "Repair" under "Reset".
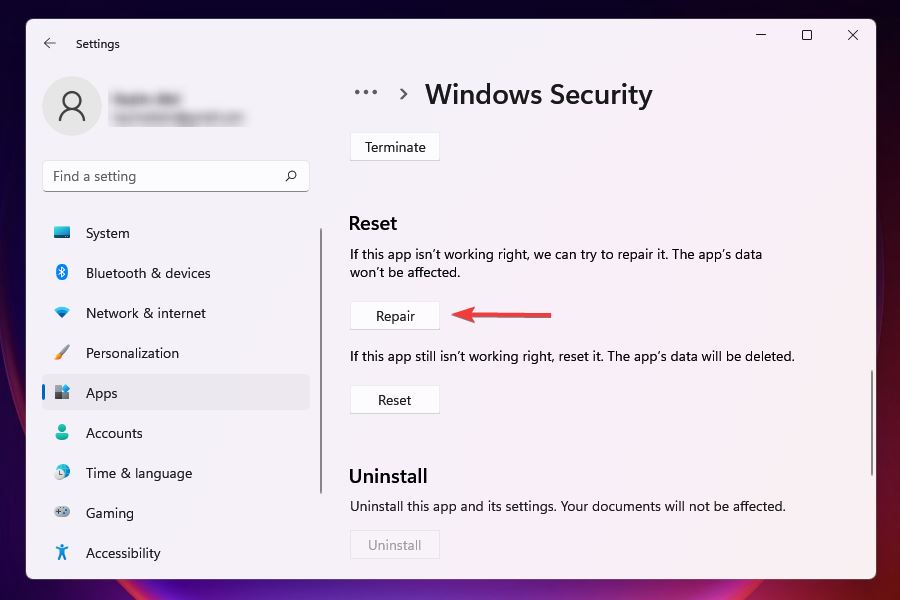
5. Wait for the repair process to be completed.
If the program throws an error at startup or during runtime, it may help to fix it. When you repair an application, Windows looks at its installation, identifies and replaces any problematic files, and checks its entries in the registry.
This is a quick troubleshooting method and you won't lose any data or configured settings.
Method 8: Use the registry to enable Windows Defender (be careful when modifying the registry, and it is best to back it up in advance)
This fix should only be performed after trying the fixes listed previously. Additionally, we recommend being extremely careful when changing the registry, as small mistakes on your part could damage your PC and render it unusable.
1. Press Windows S to start the search menu.
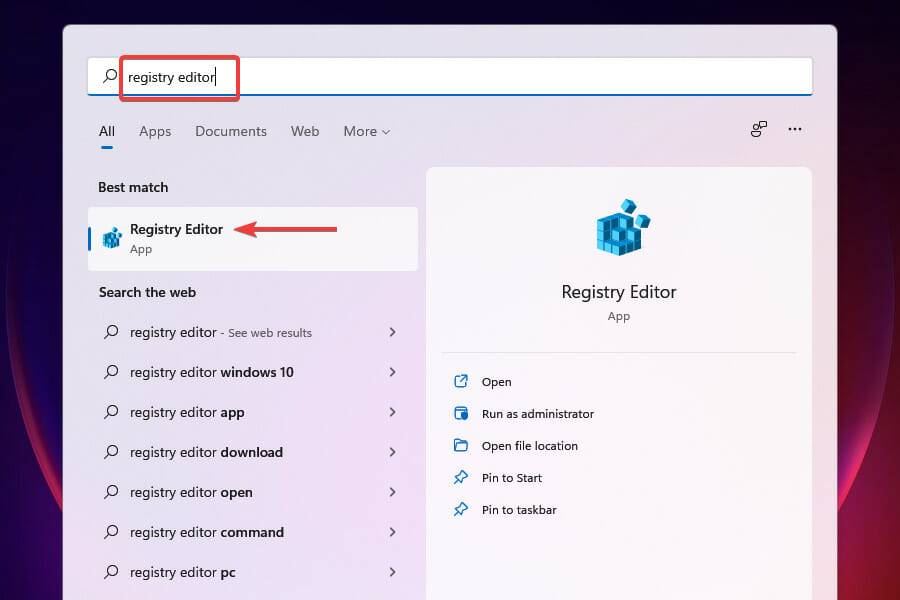
2. Enter Registry Editor in the text field at the top, and then click on the relevant search results.
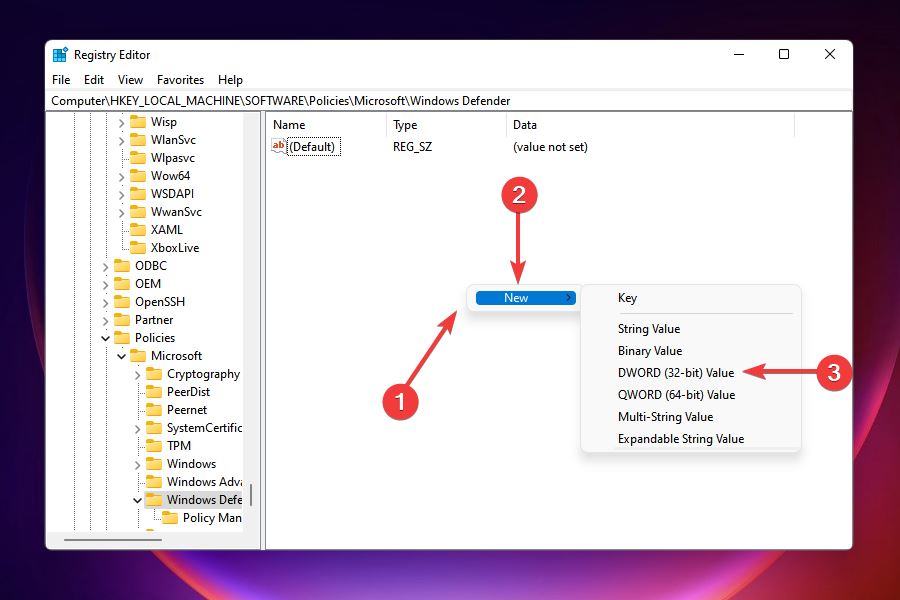
3. Paste the following path in the address bar at the top and click Enter: HKEY_LOCAL_MACHINE\SOFTWARE\Policies\Microsoft\Windows Defender
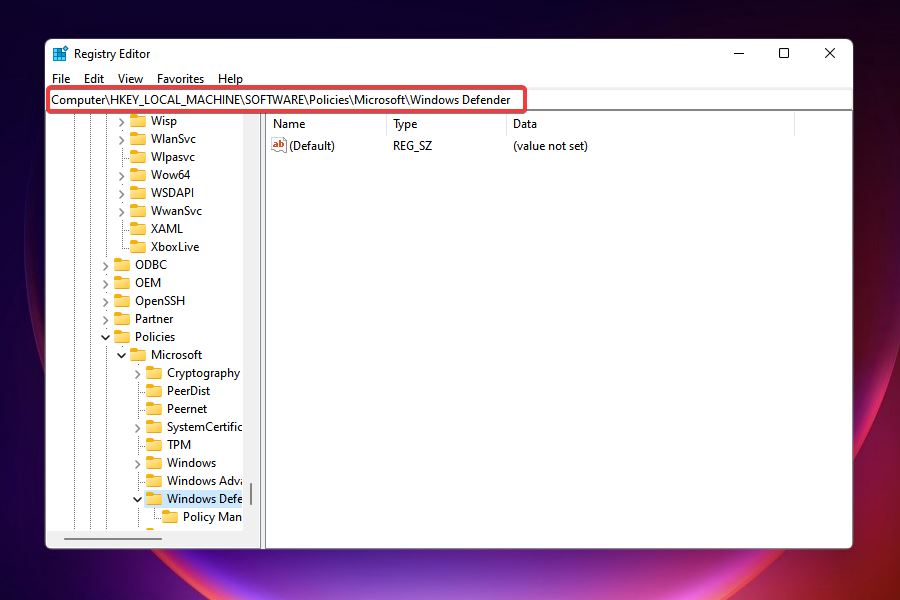
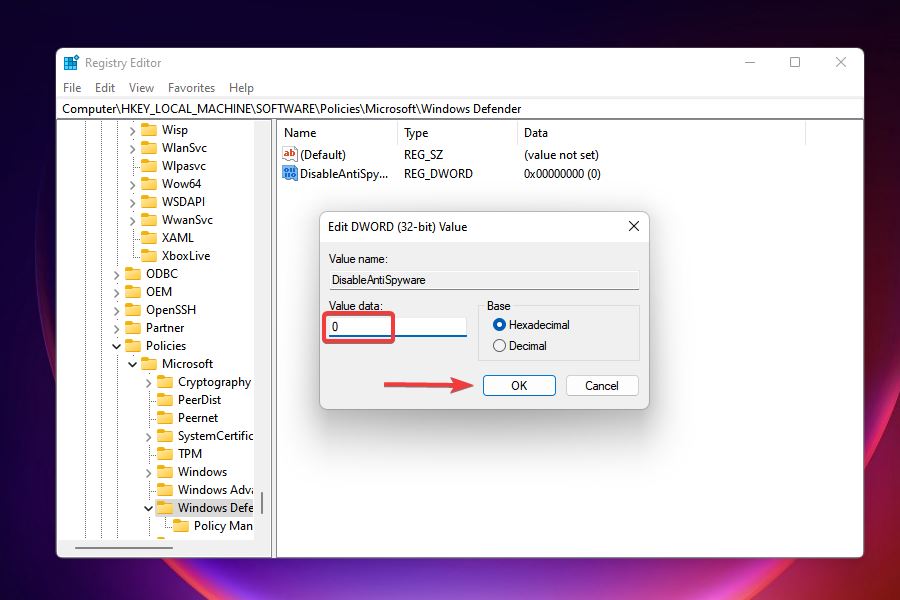
4. Find the DisableAntiSpyware entry and set its value to 0.
5. If the entry does not exist, right-click on the blank space, hover the cursor over New, and then select DWORD (32-bit) value from the menu. Name the entry DisableAntiSpyware.
#6. Double-click the entry and enter 0 under Value data.
#7. After changing the registry, please check whether the problem with Windows Defended has been resolved and whether you can access and make changes to it.
The above is the detailed content of Eight ways to fix Windows 11 virus and threat protection not working. For more information, please follow other related articles on the PHP Chinese website!
 There is no WLAN option in win11
 How to skip online activation in win11
 Win11 skips the tutorial to log in to Microsoft account
 How to open win11 control panel
 Introduction to win11 screenshot shortcut keys
 Windows 11 my computer transfer to the desktop tutorial
 Solution to the problem of downloading software and installing it in win11
 How to skip network connection during win11 installation


