
php editor Strawberry will introduce how to share printers with other users in the Win11 operating system. Sharing a printer on a Win11 computer can facilitate other computer users to perform printing operations and improve work efficiency. The specific steps are as follows: First, open the "Settings" menu on your Win11 computer and select the "Device" option. Then, click "Printers and Scanners", find the printer that needs to be shared, right-click the printer icon, and select the "Turn on sharing" option. In the pop-up window, check "Share this printer" and set the share name, and finally click the "Apply" button to save the settings. After the sharing is completed, other Win11 computer users can connect to the shared printer through the network for printing operations. I hope the above steps can help everyone realize the printer sharing function on Win11 computers.
Win11 set up printer sharing with others?
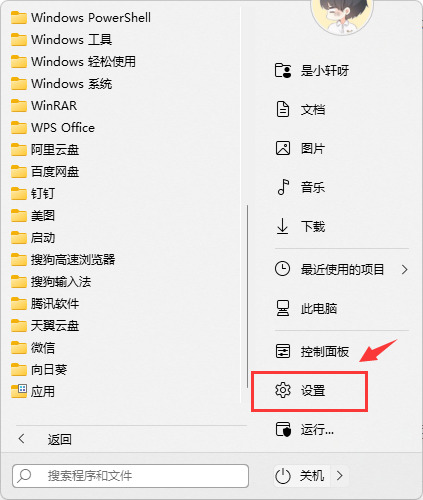
First, click the Start menu on the taskbar, then click [Settings] in the pinned area, or press the shortcut WIN I key.
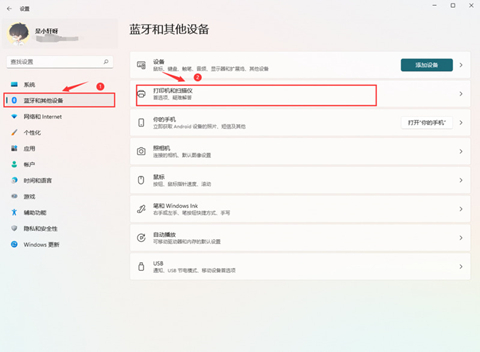
#2. Then find and enter the Bluetooth and other devices interface in the left navigation, and then select Printers and Scanners in the options.
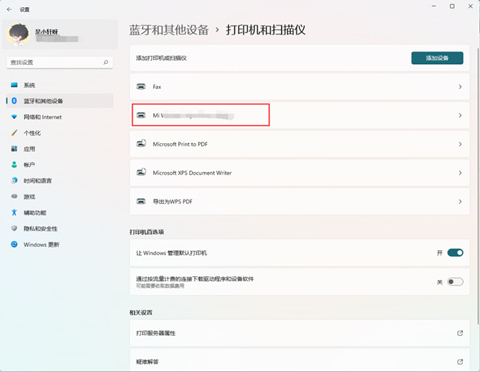
Enter the printer and scanner management interface and select the printer to be shared.
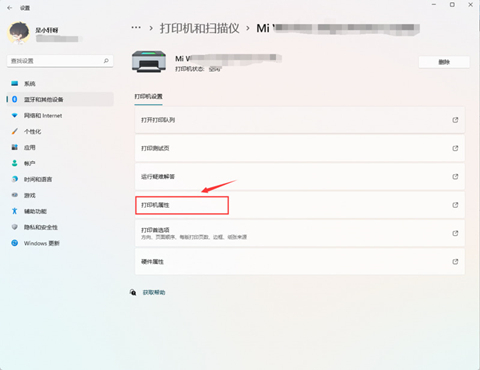
#4. After entering the printer setting interface, click to open the printer properties in the function list.
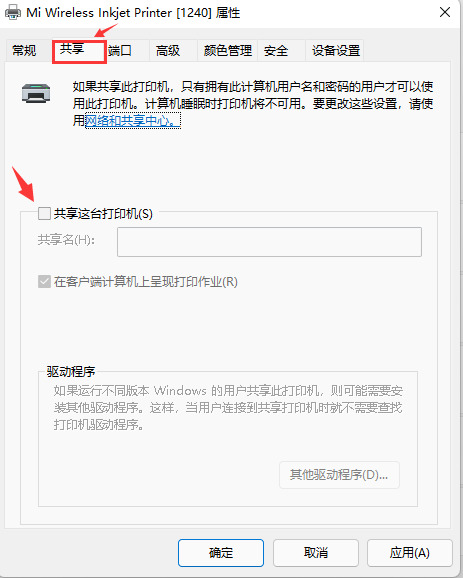
#5. In the pop-up printer properties tab, choose to enter the sharing options window and check the Share this printer option.
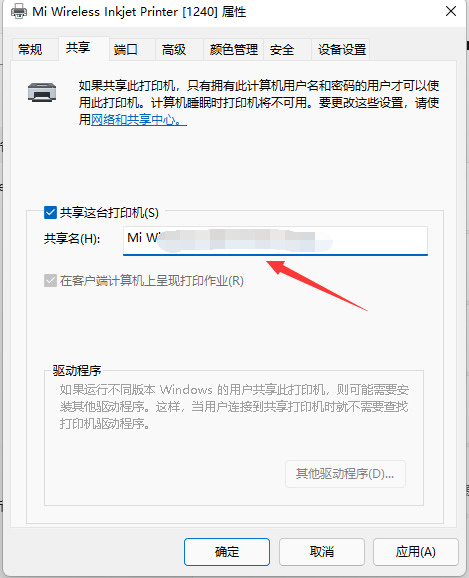
#6. Then customize a shared name in the share name, and then click [OK] to save the printer sharing settings.
Now other computers can search for the shared printer through the LAN and can use it after installing the driver.
The above is the detailed content of Steps to share the printer on your Win11 computer with others. For more information, please follow other related articles on the PHP Chinese website!
 win10 connect to shared printer
 How to share printer in win10
 There is no WLAN option in win11
 How to share a printer between two computers
 How to skip online activation in win11
 Win11 skips the tutorial to log in to Microsoft account
 How to open win11 control panel
 Introduction to win11 screenshot shortcut keys


