


##Original address: https://ailjx.blog.csdn.net/article/details/127909213Author: Undersea BBQ Restaurant aiIn the previous sections we have created and optimized the project structure of the simple user management system, and also explained the working principle of
Cookie-Session login verification. Next we We will continue to supplement the functions of this system. In this section, we will actually use Cookie-Session to implement the login verification function of this system. [Related tutorial recommendations: nodejs video tutorial]
session, cookie! Go check out the previous article: Detailed explanation of how Cookie-Session login authentication works
in the vies directory: <div class="code" style="position:relative; padding:0px; margin:0px;"><pre class='brush:php;toolbar:false;'><!DOCTYPE html>
<html>
<head>
<meta charset="UTF-8">
<meta http-equiv="X-UA-Compatible" content="IE=edge">
<meta name="viewport" content="width=device-width, initial-scale=1.0">
<title>Document</title>
</head>
<body>
<h1>登录页面</h1>
<div>用户名:<input type="text" id="username"></div>
<div>密码:<input type="password" id="password"></div>
<div><button id="login">登录</button></div>
<script>
const uname = document.getElementById("username");
const pwd = document.getElementById("password");
const login = document.getElementById("login");
login.onclick = () => {
fetch(&#39;/api/login&#39;, {
method: &#39;POST&#39;,
body: JSON.stringify({
username: uname.value,
password: pwd.value
}),
headers: {
"Content-Type": "application/json"
}
}).then(res => res.json()).then(res => {
// console.log(res);
if (res.ok) {
location.href = "/"
} else {
alert("用户名密码不匹配!")
}
})
}
</script>
</body>
</html></pre><div class="contentsignin">Copy after login</div></div>
POST /api/loginlogin.jsRequest
Create a new
in the routes directory. This file defines the page routing of the login page: <div class="code" style="position:relative; padding:0px; margin:0px;"><pre class='brush:php;toolbar:false;'>var express = require("express");
var router = express.Router();
/* GET login page. */
router.get("/", function (req, res, next) {
res.render("login");
});
module.exports = router;</pre><div class="contentsignin">Copy after login</div></div>Mount page routing in
: <div class="code" style="position:relative; padding:0px; margin:0px;"><pre class='brush:php;toolbar:false;'>// 引入
var loginRouter = require("./routes/login");
// 挂载
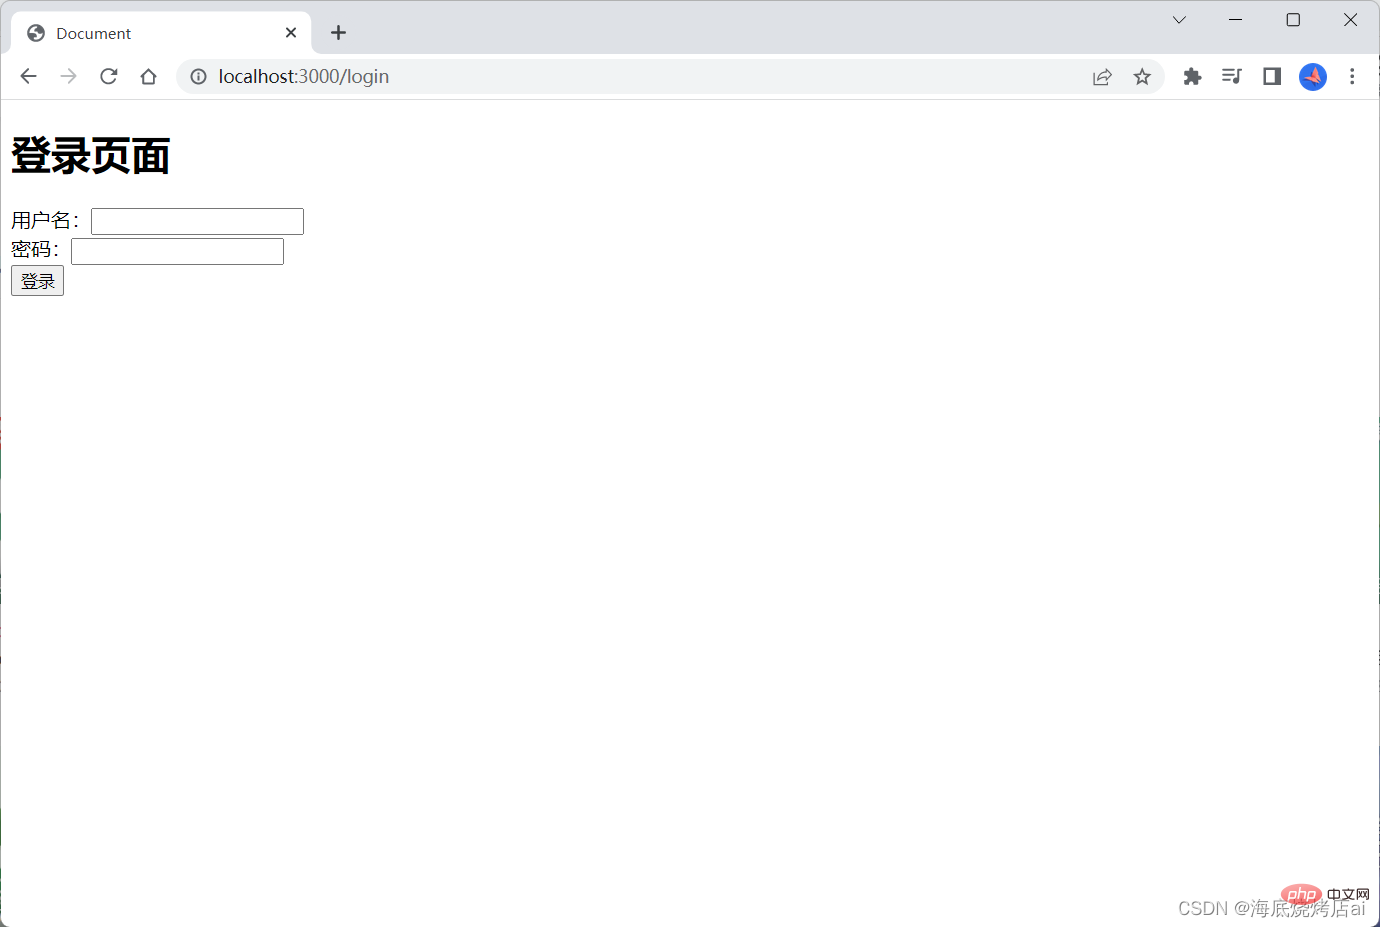
app.use("/login", loginRouter);</pre><div class="contentsignin">Copy after login</div></div>Start the project and visit
Normal display:
M layer):
const UserService = {
	// .......
    // 登录查询
    login: (username, password) => {
    	// 向数据库查询该用户
        return UserModel.findOne({ username, password });
    },
};controllers/UserController.js :
const UserController = {
 	// ......
 	// 登录验证
    login: async (req, res, next) => {
        try {
            const { username, password } = req.body;
            const data = await UserService.login(username, password);
            // console.log(data);
            if (data) {
                res.send({ ok: 1, msg: "登录成功!", data });
            } else {
                res.send({ ok: 0, msg: "用户不存在,登录失败!" });
            }
        } catch (error) {
            console.log(error);
        }
    },
};routes/users.js:
// 登录校验
router.post("/login", UserController.login); At this point, the login page is set up: 
Figure 1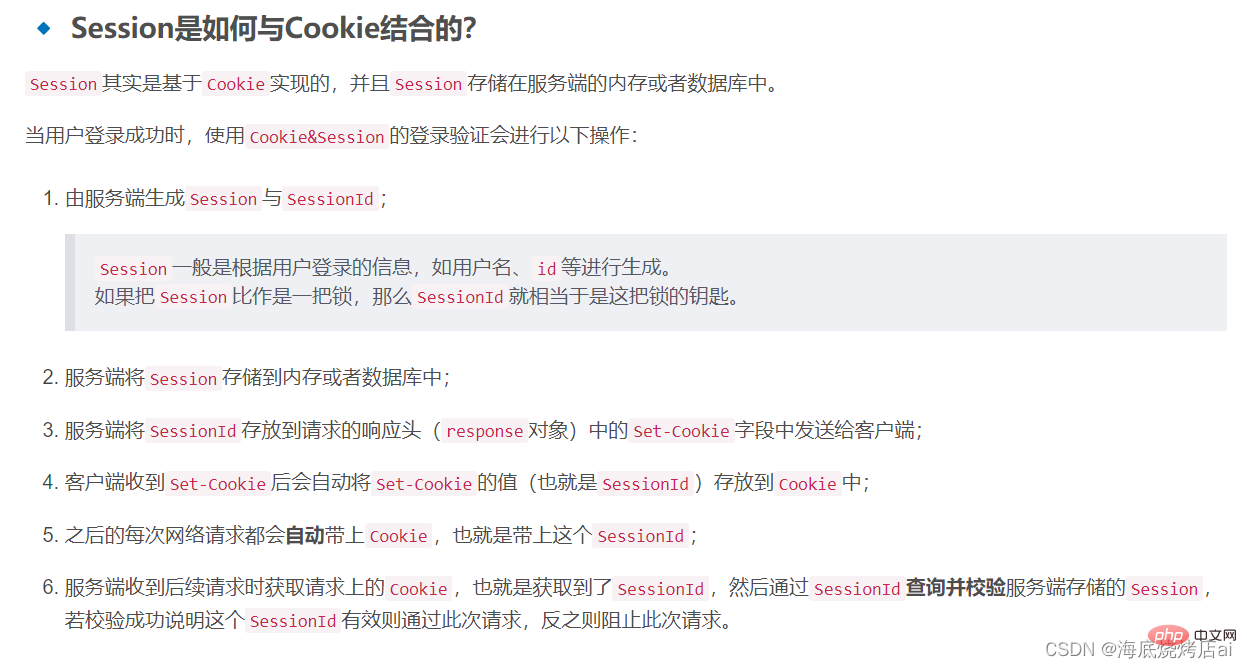
The express-session module can greatly reduce our workload and allow us to stand on the shoulders of giants for development! Downloadexpress-session
npm i express-session
Configure in app.js:// 引入express-session
var session = require("express-session");
// 配置session:需要放在在路由配置的前面
app.use(
session({
name: "AilixUserSystem", // cookie名字
secret: "iahsiuhaishia666sasas", // 密钥:服务器生成的session的签名
cookie: {
maxAge: 1000 * 60 * 60, // 过期时间:一个小时过期
secure: false, // 为true时表示只有https协议才能访问cookie
},
resave: true, // 重新设置session后会重新计算过期时间
rolling: true, // 为true时表示:在超时前刷新时cookie会重新计时;为false表示:在超时前无论刷新多少次,都是按照第一次刷新开始计时
saveUninitialized: true, // 为true时表示一开始访问网站就生成cookie,不过生成的这个cookie是无效的,相当于是没有激活的信用卡
})
);After configuration, just You will find that there is a cookie named AilixUserSystem in the browser:
This is because 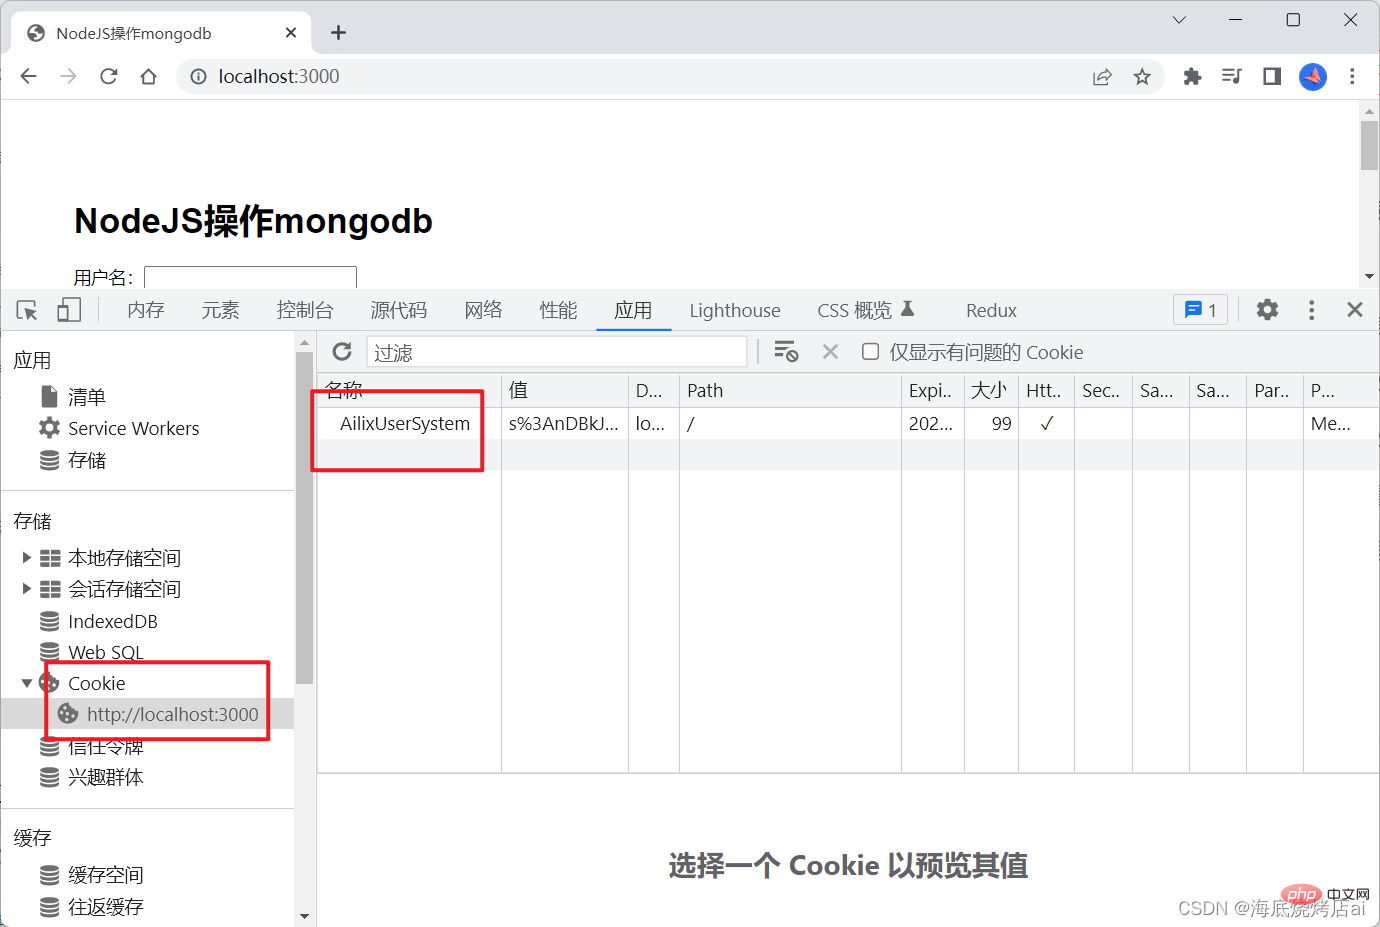 express-session
cookie and set cookie to the front end, which is equivalent to 3 and 6 in Figure 1 (the first half: query through SessionId Session), we no longer need to manually operate cookie.
// controllers/UserController.js
// ....
// 登录校验
login: async (req, res, next) => {
   try {
       const { username, password } = req.body;
       const data = await UserService.login(username, password);
       // console.log(data);
       if (data) {
           // 设置session:向session对象内添加一个user字段表示当前登录用户
           req.session.user = data; // 默认存在内存中,服务器一重启就没了
           res.send({ ok: 1, msg: "登录成功!", data });
       } else {
           res.send({ ok: 0, msg: "用户不存在,登录失败!" });
       }
   } catch (error) {
       console.log(error);
   }
},We request # A user field is added to ##req.session to save user login information. This step is equivalent to #1 in Figure 1 (SessionId will be express-session Module automatically generated), 2. req.session is a
object. It should be noted that although this object exists in:req
app.js, it is actually different Theirreq.sessionis different when people access the system becausereq.sessionis based on thecookiewe set (by Thegenerated automatically by the express-sessionmodule (AilixUserSystem), and thecookiegenerated by each person accessing the system is unique, so theirreq .sessionis also unique.Verifysessionwhen receiving the request, add the following code in
// 设置中间件:session过期校验
app.use((req, res, next) => {
    // 排除login相关的路由和接口
    // 这个项目中有两个,一个是/login的页面路由,一个是/api/login的post api路由,这两个路由不能被拦截
    if (req.url.includes("login")) {
        next();
        return;
    }
    if (req.session.user) {
        // session对象内存在user,代表已登录,则放行
        // 重新设置一下session,从而使session的过期时间重新计算(在session配置中配置了: resave: true)
        // 假如设置的过期时间为1小时,则当我12点调用接口时,session会在1点过期,当我12点半再次调用接口时,session会变成在1点半才会过期
        // 如果不重新计算session的过期时间,session则会固定的1小时过期一次,无论这期间你是否进行调用接口等操作
        // 重新计算session的过期时间的目的就是为了防止用户正在操作时session过期导致操作中断
        req.session.myData = Date.now();
        // 放行
        next();
    } else {
        // session对象内不存在user,代表未登录
        // 如果当前路由是页面路由,,则重定向到登录页
        // 如果当前理由是api接口路由,则返回错误码(因为针对ajax请求的前后端分离的应用请求,后端的重定向不会起作用,需要返回错误码通知前端,让前端自己进行重定向)
        req.url.includes("api")
            ? res.status(401).send({ msg: "登录过期!", code: 401 })
            : res.redirect("/login");
    }
});session, thereby triggeringobject through
req.session.myData = Date.now();
session Update of expiration time (session on myDataThis attribute and its valueDate.now()We just modify session Object tool, itself has no meaning), you can also use other methods, as long as req.session can be modified.
因为我们这个项目是后端渲染模板的项目,并不是前后端分离的项目,所以在配置中间件进行session过期校验拦截路由时需要区分Api路由和页面路由。
后端在拦截API路由后,向前端返回错误和状态码:
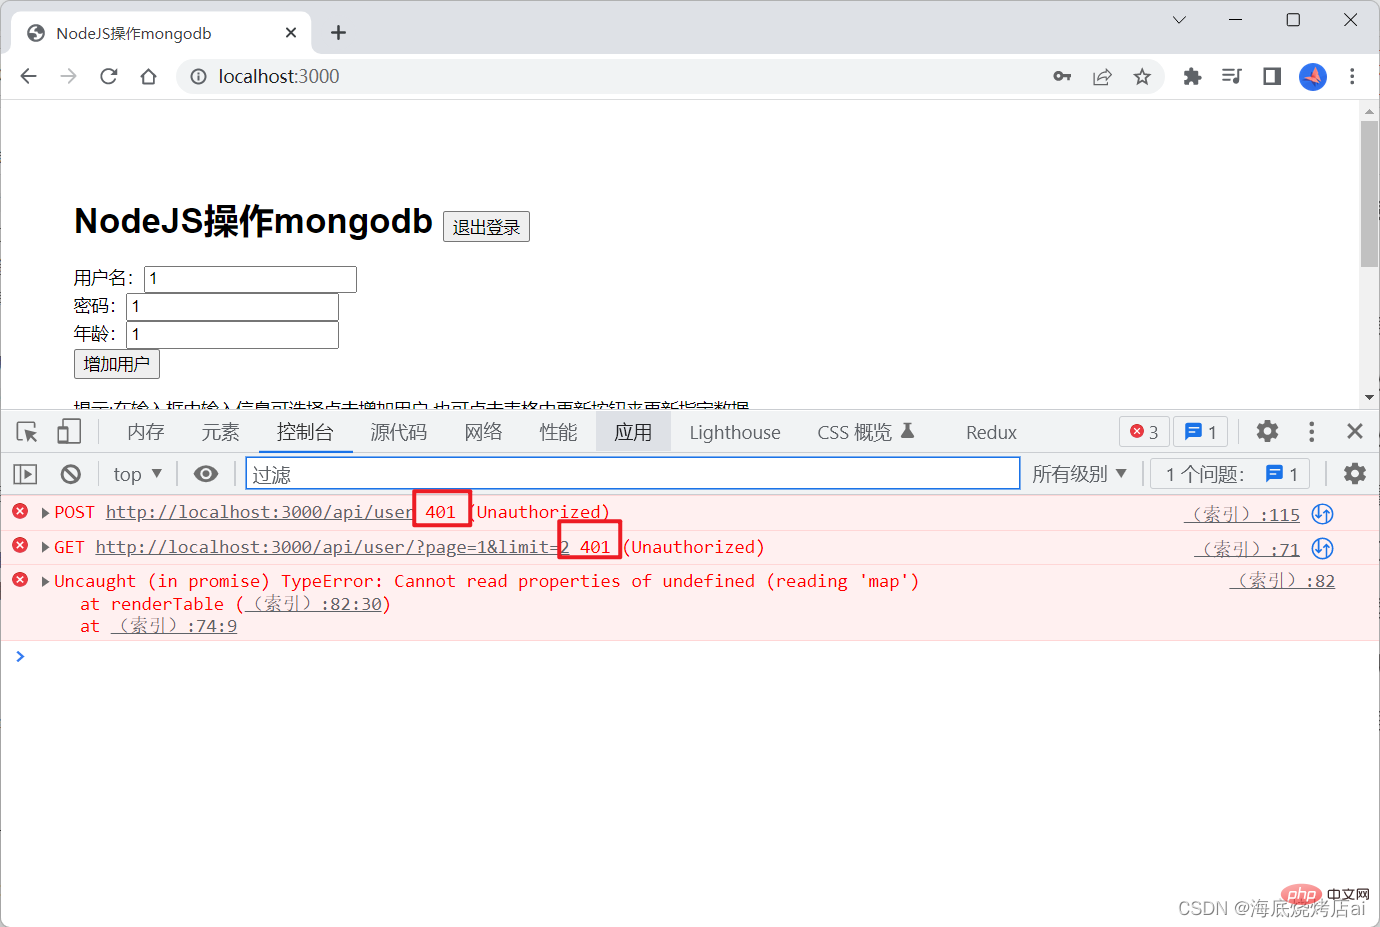
这个时候需要让前端自己对返回结果进行判断从而进行下一步的操作(如回到登录页或显示弹窗提示),该系统中前端是使用JavaScript内置的fetch来进行请求发送的,通过它来对每一个请求结果进行判断比较麻烦,大家可以自行改用axios,在axios的响应拦截器中对返回结果做统一的判断。
向首页(index.ejs)添加一个退出登录的按钮:
<button id="exit">退出登录</button>
为按钮添加点击事件:
const exit = document.getElementById('exit')

// 退出登录
exit.onclick = () => {
  fetch("/api/logout").then(res => res.json()).then(res => {
    if (res.ok) {
      location.href = "/login"
    }
  })
}这里调用了GET /api/logout接口,现在定义一下这个接口,在controllers/UserController.js中定义接口的控制层(C层):
const UserController = {
 	// ......
    // 退出登录
    logout: async (req, res, next) => {
        // destroy方法用来清除cookie,当清除成功后会执行接收的参数(一个后调函数)
        req.session.destroy(() => {
            res.send({ ok: 1, msg: "退出登录成功!" });
        });
    },
};在routes/users.js中定义Api路由:
// 退出登录
router.get("/logout", UserController.logout);前面我们通过 req.session.user = data;设置的session默认是存放到内存中的,当后端服务重启时这些session就会被清空,为了解决这一问题我们可以将session存放到数据库中。
安装connect-mongo:
npm i connect-mongo
connect-mongo是MongoDB会话存储,用于用
Typescript编写的连接和Express。
修改app.js:
// 引入connect-mongo
var MongoStore = require("connect-mongo");

// 配置session
app.use(
    session({
        name: "AilixUserSystem", // cookie名字
        secret: "iahsiuhaishia666sasas", // 密钥:服务器生成的session的签名
        cookie: {
            maxAge: 1000 * 60 * 60, // 过期时间:一个小时过期
            secure: false, // 为true时表示只有https协议才能访问cookie
        },
        resave: true, // 重新设置session后会重新计算过期时间
        rolling: true, // 为true时表示:在超时前刷新时cookie会重新计时;为false表示:在超时前无论刷新多少次,都是按照第一次刷新开始计时
        saveUninitialized: true, // 为true时表示一开始访问网站就生成cookie,不过生成的这个cookie是无效的,相当于是没有激活的信用卡
        store: MongoStore.create({
            mongoUrl: "mongodb://127.0.0.1:27017/usersystem_session", // 表示新建一个usersystem_session数据库用来存放session
            ttl: 1000 * 60 * 60, // 过期时间
        }), // 存放数据库的配置
    })
);至此,我们就实现了运用Cookie&Session进行登录验证/权限拦截的功能!
更多node相关知识,请访问:nodejs 教程!
The above is the detailed content of Node practice: using Cookie&Session for login verification. For more information, please follow other related articles on the PHP Chinese website!
 Solution to the problem that exe files cannot be opened in win10 system
 How to integrate idea with Tomcat
 js rounding
 Solution to garbled characters when opening excel
 How to buy, sell and trade Bitcoin
 A memory that can exchange information directly with the CPU is a
 How to set automatic line wrapping in word
 Introduction to screenshot shortcut keys in win8


![[Web front-end] Node.js quick start](https://img.php.cn/upload/course/000/000/067/662b5d34ba7c0227.png)


