This article will help you develop a vscode variable translation plug-in from scratch. This article will completely show the complete process of the entire plug-in from functional design to release from four aspects. I hope it will be helpful to everyone. !

The reason for the demand is that English scumbags often encounter a variable in the development process. They know what the Chinese name is, but they may forget the English word, or they may not know it. At this time , what I did before was to open the browser, open Google Translate, enter Chinese, copy the English, then switch back to vscode and paste the results.
It’s really troublesome. When I was young, I had a good memory and could remember most English words. But as I get older, my hair becomes less and less, and my memory becomes worse and worse. Poor, the above steps are repeated more and more times, so I learned from the painful experience and developed this plug-in.
Because I am also learning plug-in development from scratch in the past few days, this article completely records the plug-in development path developed by a novice. The content is mainly a practical introduction, mainly from four aspects. To completely show the complete process of the entire plug-in from functional design to release.
Functional design
Environment construction
Plug-in function development
Plug-in packaging and release

[Recommended learning: "vscode introductory tutorial"]
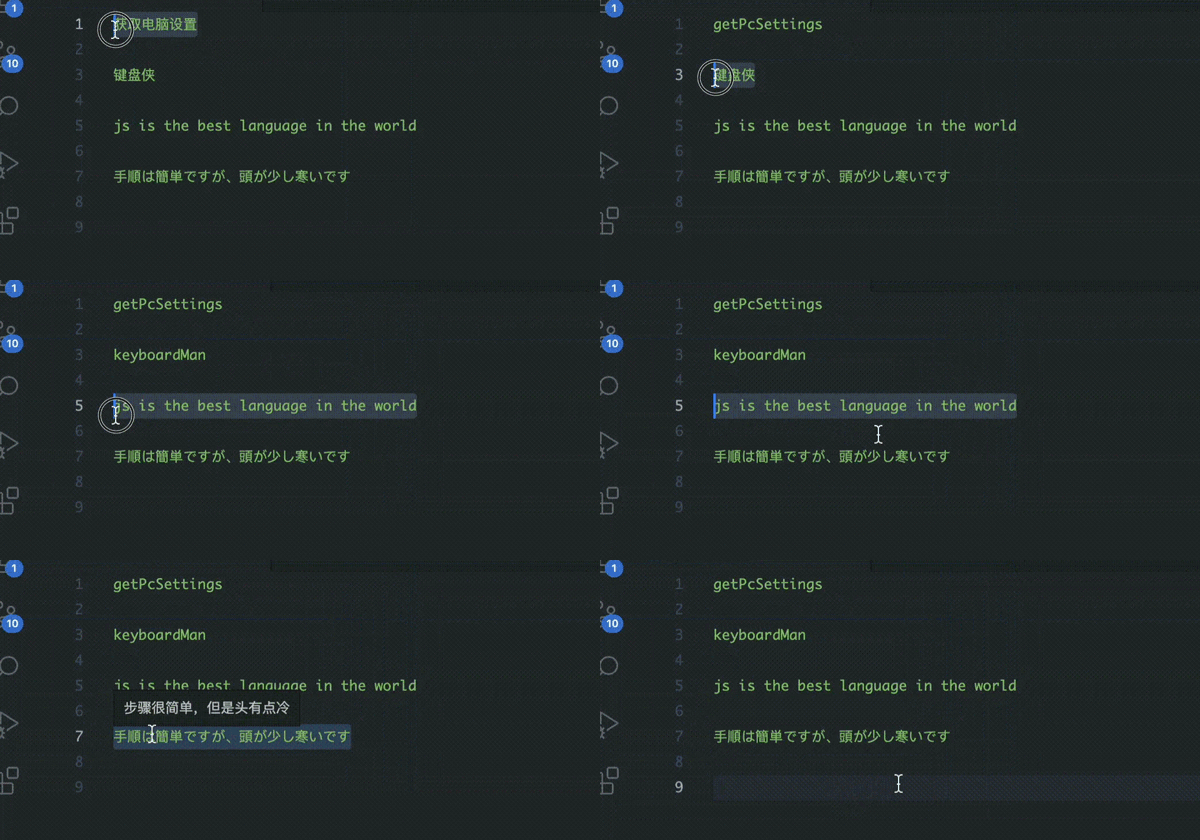
The function is mainly two functions, Chinese to English, and other languages to be translated into Chinese
Replace Chinese variables with translated English variables, multiple Words need to be automatically humped. The scenario to be solved is the "English stuck" that is often encountered in daily development. When I look at the comments of the source code of foreign projects, I encounter words I don’t know and don’t know what they mean, which affects efficiency
Environment building
Install scaffolding,
yo, these two tools can help us quickly build the project, details can be found (https://github .com/Microsoft/vscode-generator-code)//安装
yarn global add yo generator-code
yarn global add vsce
Generate and initialize the project, fill in the initialization information according to your own situation
//初始化生成项目
yo code
How to debug?
Go to Run and Debugging panel and click
Run Extention, or shortcut key F5, mac can directly click on the touch bar debugging After the button
is opened, a new vscode window will pop up. This new window is your test environment (Extended Development Host
of the previous window. For example, the built-in example is in our new windowcmd/ctrl shift p After entering Hello world, some information will be printed on the console of the previous window
At this point, the development preparation environment is ready, next step Just start the formal plug-in function developmentImportant file description
package.json

onCommand...For more information, please view the vscode document activationEvents (https://code.visualstudio.com/api/references/activation-events)main
represents the main entrance of the plug-incontributes用来注册命令(commands),绑定快捷键(keybindings),**配置设置项(configuration)**等等,更多可配置项可看文档(https://code.visualstudio.com/api/references/contribution-points)
extention.js
extention.js主要作用是作为插件功能的实现点,通过active,deactive函数,以及vscode提供的api以及一些事件钩子来完成插件功能的开发
实现翻译功能
翻译这里主要是使用了两个服务,谷歌和百度翻译。
谷歌翻译参考了别人的做法,使用google-translate-token获取到token,然后构造请求url,再处理返回的body,拿到返回结果。这里还有一个没搞懂的地方就是请求url的生成很迷,不知道这一块是啥意思。
const qs = require('querystring');
const got = require('got');
const safeEval = require('safe-eval');
const googleToken = require('google-translate-token');
const languages = require('../utils/languages.js');
const config = require('../config/index.js');
// 获取请求url
async function getRequestUrl(text, opts) {
let token = await googleToken.get(text);
const data = {
client: 'gtx',
sl: opts.from,
tl: opts.to,
hl: opts.to,
dt: ['at', 'bd', 'ex', 'ld', 'md', 'qca', 'rw', 'rm', 'ss', 't'],
ie: 'UTF-8',
oe: 'UTF-8',
otf: 1,
ssel: 0,
tsel: 0,
kc: 7,
q: text
};
data[token.name] = token.value;
const requestUrl = `${config.googleBaseUrl}${qs.stringify(data)}`;
return requestUrl;
}
//处理返回的body
async function handleBody(url, opts) {
const result = await got(url);
let resultObj = {
text: '',
from: {
language: {
didYouMean: false,
iso: ''
},
text: {
autoCorrected: false,
value: '',
didYouMean: false
}
},
raw: ''
};
if (opts.raw) {
resultObj.raw = result.body;
}
const body = safeEval(result.body);
// console.log('body', body);
body[0].forEach(function(obj) {
if (obj[0]) {
resultObj.text += obj[0];
}
});
if (body[2] === body[8][0][0]) {
resultObj.from.language.iso = body[2];
} else {
resultObj.from.language.didYouMean = true;
resultObj.from.language.iso = body[8][0][0];
}
if (body[7] && body[7][0]) {
let str = body[7][0];
str = str.replace(/<b><i>/g, '[');
str = str.replace(/<\/i><\/b>/g, ']');
resultObj.from.text.value = str;
if (body[7][5] === true) {
resultObj.from.text.autoCorrected = true;
} else {
resultObj.from.text.didYouMean = true;
}
}
return resultObj;
}
//翻译
async function translate(text, opts) {
opts = opts || {};
opts.from = opts.from || 'auto';
opts.to = opts.to || 'en';
opts.from = languages.getCode(opts.from);
opts.to = languages.getCode(opts.to);
try {
const requestUrl = await getRequestUrl(text, opts);
const result = await handleBody(requestUrl, opts);
return result;
} catch (error) {
console.log(error);
}
}
// 获取翻译结果
const getGoogleTransResult = async(originText, ops = {}) => {
const { from, to } = ops;
try {
const result = await translate(originText, { from: from || config.defaultFrom, to: to || defaultTo });
console.log('谷歌翻译结果', result.text);
return result;
} catch (error) {
console.log(error);
console.log('翻译失败');
}
}
module.exports = getGoogleTransResult;百度翻译,百度翻译的比较简单,申请服务,获得appid和key,然后构造请求url直接请求就行
不知道如何申请的,可查看我之前的一篇文章 Electron+Vue从零开始打造一个本地文件翻译器 进行申请
https://juejin.cn/post/6899581622471884813
const md5 = require("md5");
const axios = require("axios");
const config = require('../config/index.js');
axios.defaults.withCredentials = true;
axios.defaults.crossDomain = true;
axios.defaults.headers.post["Content-Type"] =
    "application/x-www-form-urlencoded";

// 百度翻译
async function getBaiduTransResult(text = "", opt = {}) {
    const { from, to, appid, key } = opt;
    try {
        const q = text;
        const salt = parseInt(Math.random() * 1000000000);
        let str = `${appid}${q}${salt}${key}`;
        const sign = md5(str);
        const query = encodeURI(q);
        const params = `q=${query}&from=${from}&to=${to}&appid=${appid}&salt=${salt}&sign=${sign}`;
        const url = `${config.baiduBaseUrl}${params}`;
        console.log(url);
        const res = await axios.get(url);
        console.log('百度翻译结果', res.data.trans_result[0]);
        return res.data.trans_result[0];
    } catch (error) {
        console.log({ error });
    }
}

module.exports = getBaiduTransResult;获取选中的文本
使用事件钩子onDidChangeTextEditorSelection,获取选中的文本
    onDidChangeTextEditorSelection(({ textEditor, selections }) => {
        text = textEditor.document.getText(selections[0]);
})配置项的获取更新
通过vscode.workspace.getConfiguration获取到工作区的配置项,然后通过事件钩子onDidChangeConfiguration监听配置项的变动。
获取更新配置项
const { getConfiguration } = vscode.workspace;
const config = getConfiguration();

//注意get里面的参数其实就是package.json配置项里面的contributes.configuration.properties.xxx
const isCopy = config.get(IS_COPY);
const isReplace = config.get(IS_REPLACE);
const isHump = config.get(IS_HUMP);
const service = config.get(SERVICE);
const baiduAppid = config.get(BAIDU_APPID);
const baiduKey = config.get(BAIDU_KEY);

//更新使用update方法,第三个参数为true代表应用到全局
config.update(SERVICE, selectedItem, true);监听配置项的变动
const { getConfiguration, onDidChangeConfiguration } = vscode.workspace;
const config = getConfiguration();

//监听变动
const disposeConfig = onDidChangeConfiguration(() => {
  config = getConfiguration();
})监听个别配置项的变动
const disposeConfig = onDidChangeConfiguration((e) => {
    if (e && e.affectsConfiguration(BAIDU_KEY)) {
        //干些什么
    }
})获取当前打开的编辑器对象
vscode.window.activeTextEditor代表当前打开的编辑器,如果切换标签页,而没有设置监听,那么这个这个对象不会自动更新,所以需要使用onDidChangeActiveTextEditor来监听,并替换之前的编辑器对象
const { activeTextEditor, onDidChangeActiveTextEditor } = vscode.window;
let active = activeTextEditor;
const edit = onDidChangeActiveTextEditor((textEditor) => {
  console.log('activeEditor改变了');
  //更换打开的编辑器对象
  if (textEditor) {
      active = textEditor;
  }
})划词翻译悬浮提示
通过vscode.languages.registerHoverProvider注册一个Hover,然后通过activeTextEditor拿到选中的词语进行翻译,然后再通过new vscode.Hover将翻译结果悬浮提示
// 划词翻译检测
const disposeHover = vscode.languages.registerHoverProvider("*", {
    async provideHover(document, position, token) {
        const service = config.get(SERVICE);
        const baiduAppid = config.get(BAIDU_APPID);
        const baiduKey = config.get(BAIDU_KEY);

        let response, responseText;
        const selected = document.getText(active.selection);
        // 谷歌翻译
        if (service === 'google') {
            response = await getGoogleTransResult(selected, { from: 'auto', to: 'zh-cn' });
            responseText = response.text;
        }

        // 百度翻译
        if (service === 'baidu') {
            response = await getBaiduTransResult(selected, { from: "auto", to: "zh", appid: baiduAppid, key: baiduKey });
            responseText = response.dst;
        }
        // 悬浮提示
        return new vscode.Hover(`${responseText}`);
    }
})替换选中的文本
获取到activeTextEditor,调用他的edit方法,然后使用回调中的replace
//是否替换原文
if (isReplace) {
  let selectedItem = active.selection;
  active.edit(editBuilder => {
    editBuilder.replace(selectedItem, result)
  })
}复制到剪贴板
使用vscode.env.clipboard.writeText;
// 是否复制翻译结果
if (isCopy) {
  vscode.env.clipboard.writeText(result);
}驼峰处理
function toHump(str) {
    if (!str) {
        return
    }
    const strArray = str.split(' ');
    const firstLetter = [strArray.shift()];
    const newArray = strArray.map(item => {
        return `${item.substring(0,1).toUpperCase()}${item.substring(1)}`;
    })
    const result = firstLetter.concat(newArray).join('');
    return result;
}

module.exports = toHump;快捷键绑定
通过vscode.commands.registerCommand注册绑定之前package.json中设置的keybindings,需要注意的是registerCommand的第一个参数需要与keybindings的command保持一致才能绑定
registerCommand('translateVariable.toEN', async() => {
  //do something
})


//package.json
"keybindings": [{
  "key": "ctrl+t",
  "mac": "cmd+t",
  "when": "editorTextFocus",
  "command": "translateVariable.toEN"
}],插件打包发布
打包
vsce package
打包后会在目录下生成.vsix后缀的插件
发布
插件发布主要是把打包的vsix后缀插件,传入微软vscode插件商店,当然也能本地安装使用。
传入商店
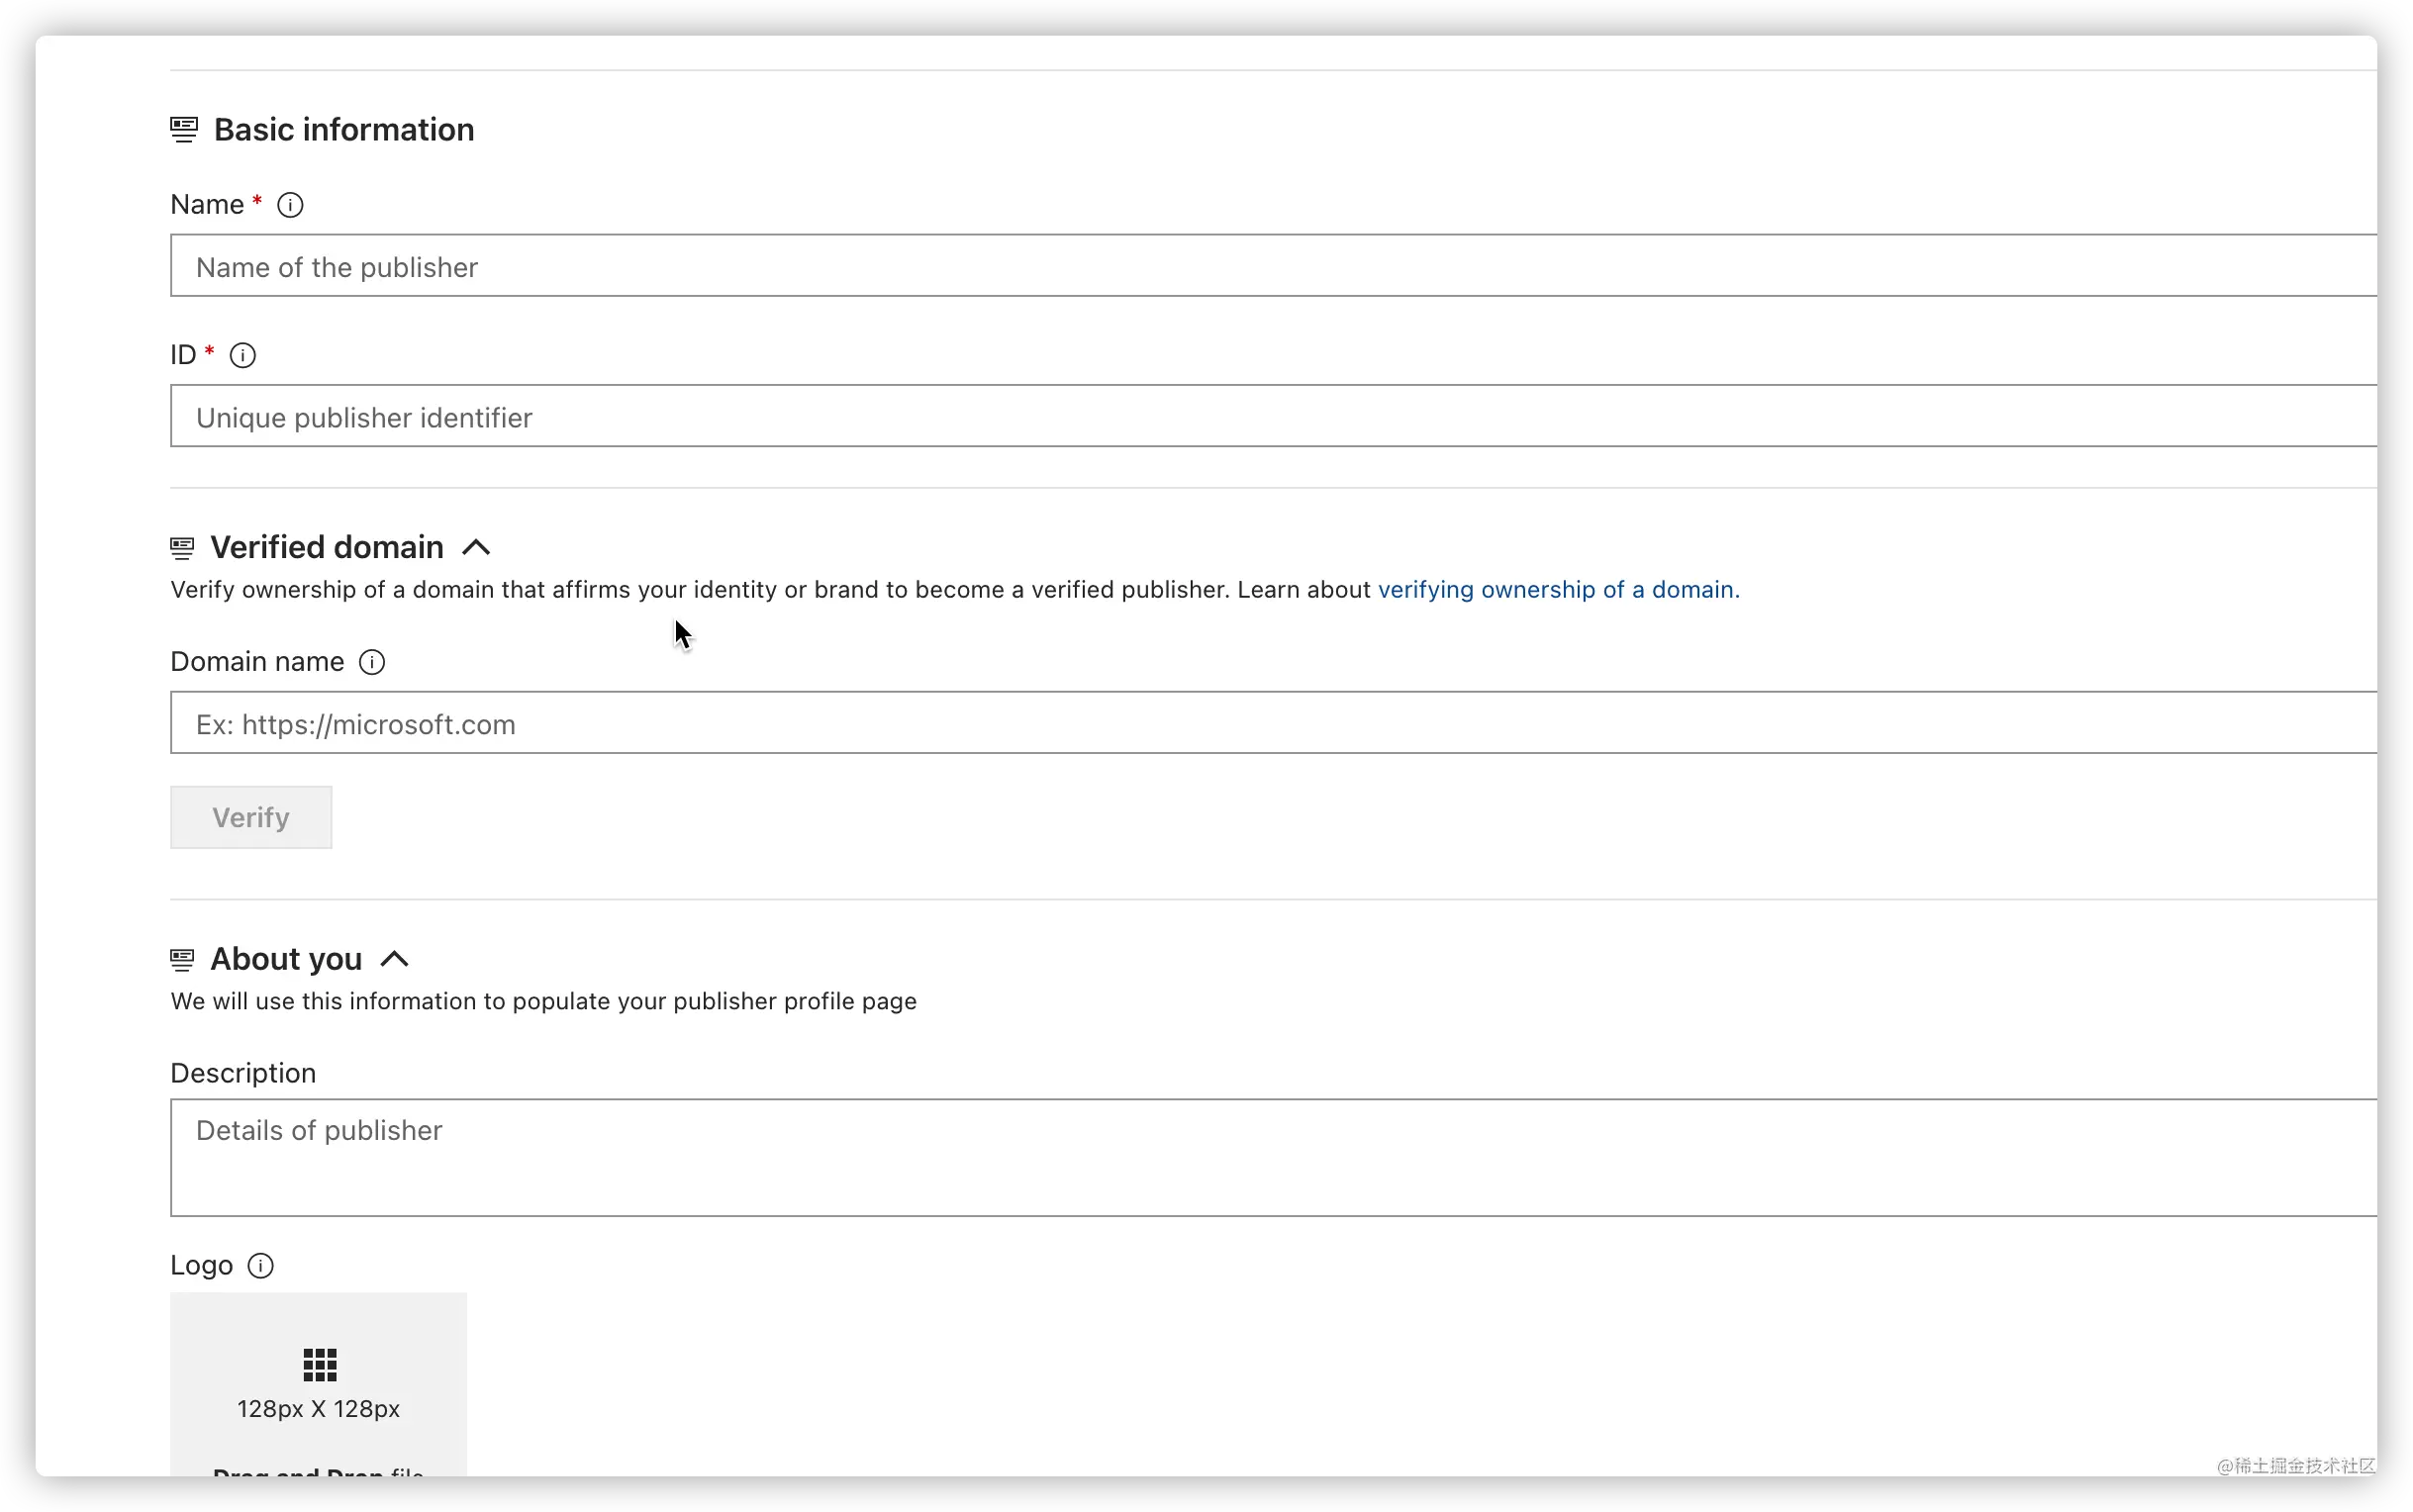
发布到线上需要到 微软插件商店管理页面(https://marketplace.visualstudio.com/manage/createpublisher),创建发布者信息,如果没有微软账号,需要去申请。

创建完成后,选择发布到vscode商店
本地安装
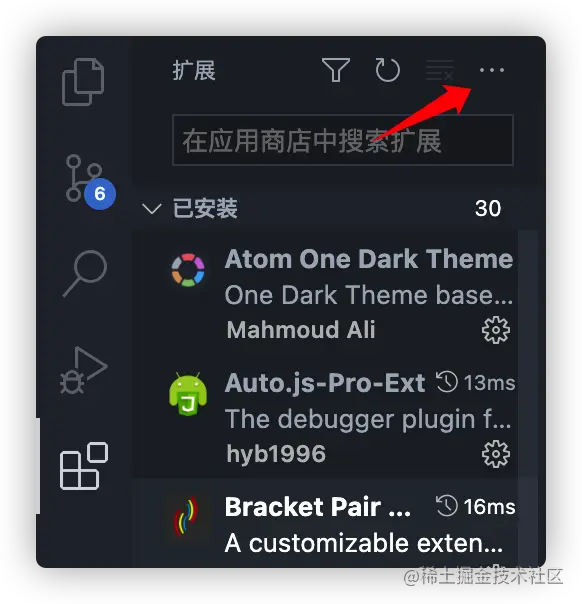
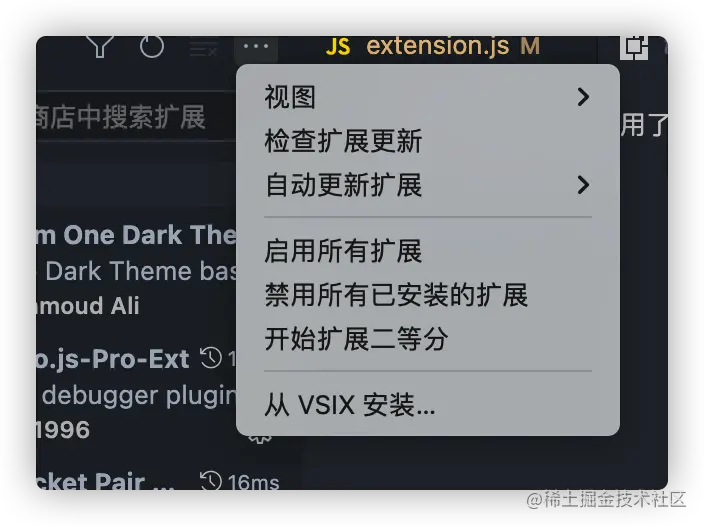
本地是可以直接安装.vsix后缀插件的,找到插件菜单

选择从VSIX安装,安装上面打包的插件就好了

vscode has a little bit of Chinese information. I spent most of this development time reading English documents and looking for information on the Internet. English is really important. Later I need to learn more English. I hope that I will use the plug-in I made less and less in the future. The project has been open source, with instructions and source code portal (https://github.com/Kerinlin/translate-variable)
For more knowledge about VSCode, please visit: vscode tutorial! !
The above is the detailed content of Teach you step by step from scratch to develop a vscode variable translation plug-in. For more information, please follow other related articles on the PHP Chinese website!