One trick to teach you how to use ps to convert images into web format (detailed explanation with pictures and text)

奋力向前
Release: 2021-07-23 14:18:23
Original
14789 people have browsed it

In the previous article "ps version: How to restore default preferences in CC2019 (Summary)", we introduced a method to quickly restore default preferences to help you at work. convenience. The following article will introduce to you how to convert pictures into web pages. The ps function - storing pictures in Web format, is suitable for uploading pictures for daily use in space and other networks.

One trick to teach you how to use ps to convert images into web format (detailed explanation with pictures and text)

ps Convert the picture to web format

1. Open a picture in PS, hold down Ctrl J and copy a layer.

One trick to teach you how to use ps to convert images into web format (detailed explanation with pictures and text)

#2. Select the crop tool and set the value to the appropriate crop size.
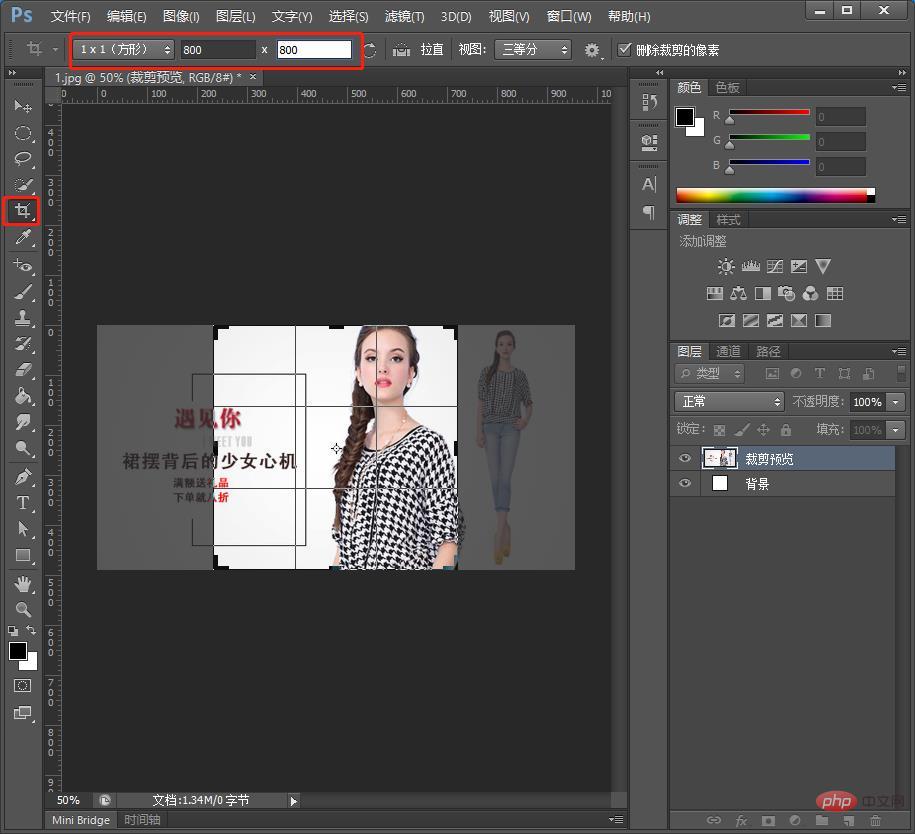
One trick to teach you how to use ps to convert images into web format (detailed explanation with pictures and text)

#3. Use the mouse to move the four corners to adjust the composition.

One trick to teach you how to use ps to convert images into web format (detailed explanation with pictures and text)

#4. Click [File] in the menu bar and select [Save for web and format].

One trick to teach you how to use ps to convert images into web format (detailed explanation with pictures and text)

#5. Select the JPEG format. In order to ensure that the colors uploaded to the network are not compressed, check the same three options as below.

One trick to teach you how to use ps to convert images into web format (detailed explanation with pictures and text)

#6. Click on the window, focus on the place circled in the picture above, optimize the file size, and enter the limited value.

One trick to teach you how to use ps to convert images into web format (detailed explanation with pictures and text)

7. Save according to your choice. Choose image only, and another choose html only to save web page mode, that is, you can choose to open it in the browser. If you select both, both will be saved. Choose according to your needs.

One trick to teach you how to use ps to convert images into web format (detailed explanation with pictures and text)

#8. After clicking save, right-click on the desktop to open properties and see if the size is 50KB.
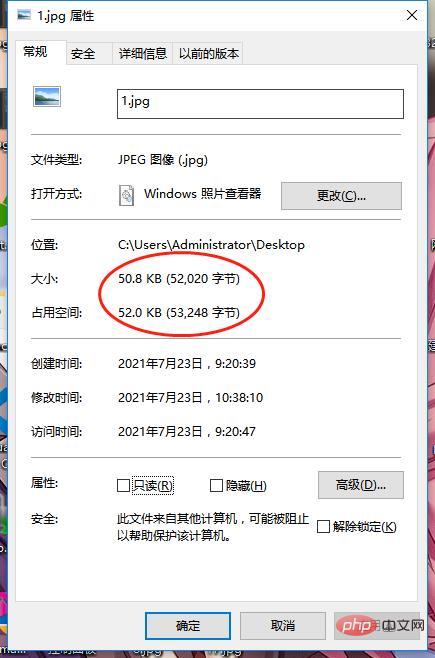
One trick to teach you how to use ps to convert images into web format (detailed explanation with pictures and text)

You can optimize the file size through this

9. The "Save as web and format used" function is very practical and can also be used to export gif animations. Picture

Select the "GIF" format and click Save.

One trick to teach you how to use ps to convert images into web format (detailed explanation with pictures and text)

gif animation renderings:

One trick to teach you how to use ps to convert images into web format (detailed explanation with pictures and text)

## Recommended learning:

PS video tutorial

The above is the detailed content of One trick to teach you how to use ps to convert images into web format (detailed explanation with pictures and text). For more information, please follow other related articles on the PHP Chinese website!

Related labels:
ps
source:php.cn
Statement of this Website
The content of this article is voluntarily contributed by netizens, and the copyright belongs to the original author. This site does not assume corresponding legal responsibility. If you find any content suspected of plagiarism or infringement, please contact admin@php.cn
Latest Articles by Author
Latest Downloads
More>
Web Effects
Website Source Code
Website Materials
Front End Template
About us Disclaimer Sitemap
php.cn:Public welfare online PHP training,Help PHP learners grow quickly!