
Browser extensions are small programs that modify and enhance the functionality of your web browser. They can be used for various tasks such as blocking ads, managing passwords, organizing tags, changing the look and behavior of web pages, and more.
#The good news is that browser extensions are not difficult to write. Can be created using web technologies you're already familiar with (HTML, CSS, and JavaScript) - just like a regular web page. But unlike web pages, extensions have access to many browser-specific APIs, and this is where the fun begins.
In this tutorial, I'll show you how to build a simple extension for Chrome that changes the behavior of the new tab page. For the JavaScript portion of this extension, I'll be using the Vue.js framework because it will allow us to get up and running quickly and it's fun to work with vue.
The code for this tutorial can be found on GitHub
The core part of a Chrome extension is the manifest File and Backend script. The manifest file is in JSON format and provides important information about the extension, such as its version, resources, or required permissions. Background scripts allow extensions to react to specific browser events, such as the creation of new tabs.
To demonstrate these concepts, let's first write a "Hello, World!" Chrome extension.
Create a new folder named hello-world-chrome and two files: manifest.json and background.js:
mkdir hello-world-chrome
cd hello-world-chrome
touch manifest.json background.js
Open manifest.json and add the following code:
{
  "name": "Hello World Extension",
  "version": "0.0.1",
  "manifest_version": 2,
  "background": {
    "scripts": ["background.js"],
    "persistent": false
  }
}name, version and manifest_version are all required fields. The name and version fields can be anything you want; manifest version should be set to 2 (as of Chrome 18).
background allows us to register a background script, listed in the array after scripts. Unless the extension needs to block or modify network requests using the chrome.webRequest API, the persistent key should be set to false.
Add the following code to background.js to make the browser pop up a hello dialog box when installing the extension:
chrome.runtime.onInstalled.addListener(() => {
  alert('Hello, World!');
});Finally install the extension. Open Chrome and enter chrome://extensions/ in the address bar. You should see a page showing the installed extension.
Since we are installing our extension from a file (rather than the Chrome Web Store), we need to activate Developer Mode using the toggle button in the upper right corner of the page. This should add an extra menu bar with the Load unpacked option. Click this button and select the hello-world-chrome folder you created earlier. Click to open , you should be able to see the installed extension and the "Hello, World!" window will pop up.
Congratulations! You just made a Chrome extension.
In order to be greeted by its own extension when opening a new tab. This can be done using the Override Pages API.
Note: Before you make progress, be sure to disable other extensions that override the Chrome New Tab page. Only one extension at a time is allowed to change this behavior.
First create a page to be displayed, not a new tab page. Let's call it tab.html. It should be in the same folder as the manifest file and background script:
<!DOCTYPE html>
<html>
<head>
  <meta charset="UTF-8">
  <title>My New Tab Page!</title>
</head>
<body>
  <h1>My New Tab Page!</h1>
  <p>You can put any content here you like</p>
</body>
</html>
Next you need to let the extension know that the page exists. This can be achieved by specifying chrome_url_overrides in the manifest file, like this:
"chrome_url_overrides": {
  "newtab": "tab.html"
}Finally, you need to reload the extension for the changes to take effect. You can do this by clicking the Hello World extension's reload icon on Chrome's Extensions page.
现在,当你打开新标签页时,你的自定义消息会出现。
现在我们有一个非常基本的扩展,接下来要实现剩下的需功能了。当用户打开新标签页时,我希望扩展能够:
chrome.storage。当然你也可以用纯 JavaScript 或像 jQuery 这样的库来完成所有这些 —— 你开心就好!
但是出于本教程的目的,我将用 Vue 和令人敬畏的 vue-web-extension 样板来实现此功能。
用 Vue 可以让我又快又好地编写更有条理的代码。正如我们所看到的,样板文件提供了几个脚本,可以在构建 Chrome 扩展程序时解决一些痛苦的常见任务(例如:每当你进行更改时都必须重新加载扩展程序)。
本节假定你的计算机上安装了 Node 和 npm。如果不是这样,你可以到 https://nodejs.org/en/ 获取相关二进制文件,或者你可以使用版本管理器。我建议使用版本管理器。
我们还需要安装 Vue CLI 和 @vue/cli-init package:
npm install -g @vue/cli
npm install -g @vue/cli-init
完成后,让我们得到样板的副本:
vue init kocal/vue-web-extension new-tab-page
这将打开一个向导,询问你一堆问题。为了保证本教程的重点,我把回答列出来:
? Project name new-tab-page ? Project description A Vue.js web extension ? Author James Hibbard <jim@example.com> ? License MIT ? Use Mozilla's web-extension polyfill? No ? Provide an options page? No ? Install vue-router? No ? Install vuex? No ? Install axios? Yes ? Install ESLint? No ? Install Prettier? No ? Automatically install dependencies? npm
你可以根据自己的喜好调整答案,但是你一定要安装 axios。我们会用它来获取笑话。
接下来,切换到项目目录并安装依赖项:
cd new-tab-page
npm install
然后就可以用样板提供的脚本构建我们的新扩展了:
npm run watch:dev
这会将扩展构建到项目根目录中的 dist 文件夹中,来进行开发并监视更改。
要将扩展程序添加到 Chrome,请执行上述相同的步骤,要选择 dist 文件夹作为扩展程序目录。如果一切按计划进行,那么当扩展程序初始化时,你应该看到“Hello world!”消息。
让我们花一点时间来看看样板给了我们些什么。当前文件夹结构应如下所示:
.
├── dist
│   └── <the built extension>
├── node_modules
│   └── <one or two files and folders>
├── package.json
├── package-lock.json
├── scripts
│   ├── build-zip.js
│   └── remove-evals.js
├── src
│   ├── background.js
│   ├── icons
│   │   ├── icon_128.png
│   │   ├── icon_48.png
│   │   └── icon.xcf
│   ├── manifest.json
│   └── popup
│       ├── App.vue
│       ├── popup.html
│       └── popup.js
└── webpack.config.js
在项目根目录中可以看到,样板文件正在使用 webpack。这很好,因为这为我们的后台脚本提供了 Hot Module Reloading。
src文件夹包含我们将用于扩展的所有文件。manifest 文件和 background.js 对于我们来说是熟悉的,但也要注意包含Vue 组件的 popup 文件夹。当样板文件将扩展构建到 dist 文件夹中时,它将通过 vue-loader 管理所有 .vue 文件并输出一个浏览器可以理解的 JavaScript 包。
在 src 文件夹中还有一个 icons 文件夹。如果你看一眼 Chrome 的工具栏,会看到我们的扩展程序的新图标(也被称为 browser action)。这就是从此文件夹中拿到的。如果单击它,你应该会看到一个弹出窗口,显示“Hello world!” 这是由 popup/App.vue 创建的。
最后,请注 scripts 文件夹的两个脚本:一个用于删除 eval 用法以符合 Chrome Web Store 的内容安全策略,另一个用于当你要把扩展上传到Chrome Web Store时将其打包到 .zip 文件中,。
在 package.json 文件中还声明了各种脚本。我们将用 npm run watch:dev 来开发扩展,然后使用 npm run build-zip 生成一个ZIP文件以上传到 Chrome Web Store。
首先从 background.js 中删除烦人的 alert 语句。
在 src 文件夹中创建一个新的 tab 文件夹来存放新标签页的代码。我们将在这个新文件夹中添加三个文件 —— App.vue,tab.html, tab.js:
mkdir src/tab
touch src/tab/{App.vue,tab.html,tab.js}打开 tab.html 并添加以下内容:
<!DOCTYPE html>
<html>
<head>
  <meta charset="UTF-8">
  <title>New Tab Page</title>
  <link rel="stylesheet" href="tab.css">
</head>
<body>
  <div id="app"></div>
  <script src="tab.js"></script>
</body>
</html>
这里没什么特别的。这是一个简单的 HTML 页面,它将保存我们的 Vue 实例。
接下来在 tab.js 中添加:
import Vue from 'vue';
import App from './App';

new Vue({
  el: '#app',
  render: h => h(App)
});在这里导入 Vue,用它为元素传递一个选择器,然后告诉它渲染 App 组件。
最后在 App.vue 中写如下代码:
<template>
  <p>{{ message }}</p>
</template>

<script>
export default {
  data () {
    return {
      message: "My new tab page"
    }
  }
}
</script>

<style scoped>
p {
  font-size: 20px;
}
</style>在使用这个新标签页之前,我们需要更新 manifest 文件:
{
  "name":"new-tab-page",
  ...
  "chrome_url_overrides": {
    "newtab": "tab/tab.html"
  }
}为了使它们可用于扩展,我们还需要让样板编译我们的文件并复制到 dist 文件夹。
像下面这样修改 webpack.config.js,更新entry和plugins键:
entry: {
  'background': './background.js',
  'popup/popup': './popup/popup.js',
  'tab/tab': './tab/tab.js'
}
plugins: [
  ...
  new CopyWebpackPlugin([
    { from: 'icons', to: 'icons', ignore: ['icon.xcf'] },
    { from: 'popup/popup.html', to: 'popup/popup.html', transform: transformHtml },
    { from: 'tab/tab.html', to: 'tab/tab.html', transform: transformHtml },
    ...
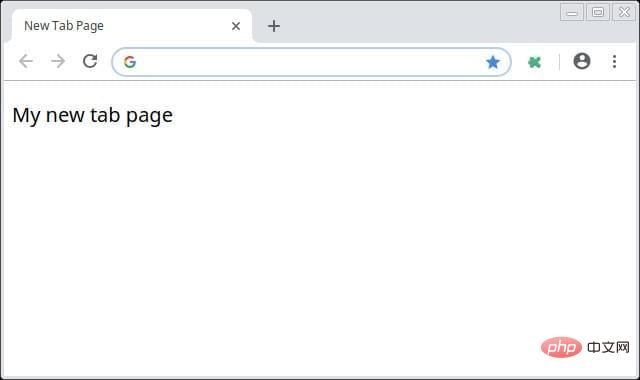
})你需要重新启动 npm run watch:dev 任务才能使这些更改生效。完成此操作后,重新加载扩展程序并打开新选项卡。你应该会看到“My new tab page”。

好的,我们已经覆盖了 Chrome 的新标签页,并且将其替换为了 mini Vue app。但是我们要做的不仅仅是显示一条消息。
更改 src/tab/App.vue 中的模板部分如下:
<template>
  <div>
    <div v-if="loading">
      <p>Loading...</p>
    </div>
    <div v-else>
      <p class="joke">{{ joke }}</p>
    </div>
  </div>
</template>将 <script> 部分更改为如下代码:
<script>
import axios from 'axios';
export default {
data () {
return {
loading: true,
joke: "",
}
},
mounted() {
axios.get(
"https://icanhazdadjoke.com/",
{ 'headers': { 'Accept': 'application/json' } }
)
.then(res => {
this.joke = res.data.joke
this.loading = false;
});
}
}
</script>最后,将 <style> 部分更改为如下代码:
<style>
body {
  height: 98vh;
  text-align: center;
  color: #353638;
  font-size: 22px;
  line-height: 30px;
  font-family: Merriweather,Georgia,serif;
  background-size: 200px;
  display: flex;
  align-items: center;
  justify-content: center;
}

.joke {
  max-width: 800px;
}
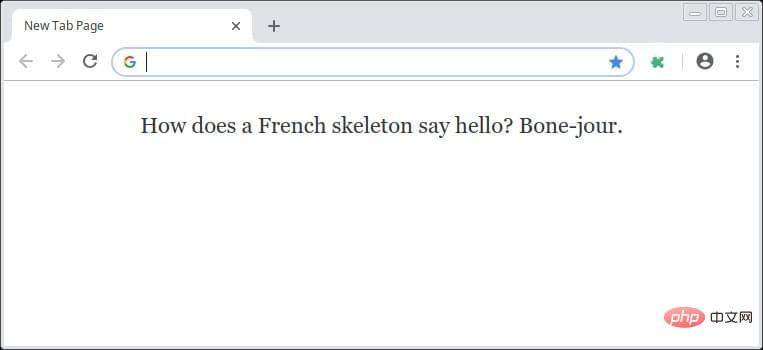
</style>如果你正在运行 npm run watch:dev 任务,则扩展程序会自动重新加载,并且每当你打开新标签页时都会看到一个笑话。

接下来花点时间来了解一下自己都做了些什么。
在模板中,我们使用 v-if 块来显示加载消息或笑话,具体取决于 loading 的状态。最初它被设置为 true(显示加载消息),然后我们的脚本将触发 Ajax 请求来检索笑话。一旦 Ajax 请求完成,loading 属性将被设置为 false,导致组件被重新渲染并显示笑话。
在 <script> 部分,我们导入了 axios,然后声明了几个数据属性——前面提到的 loading 属性和一个 joke 属性来保存这个笑话。然后使用了 mount 生命周期钩子,一旦我们的 Vue 实例被挂载就会触发,向 joke API 发出 Ajax 请求。请求完成后,更新两个数据属性使组件重新渲染。
到目前为止还挺好。
接下来,添加一些能够让用户喜欢一个笑话和列出喜欢的笑话列表的按钮。由于我们将使用 Chrome’s storage API 来保存这些笑话,所以可能需要添加第三个按钮来删除 storage 中的笑话。
将按钮添加到 v-else 块:
<div v-else>
  <p class="joke">{{ joke }}</p>

  <button @click="likeJoke" :disabled="likeButtonDisabled">Like Joke</button>
  <button @click="logJokes" class="btn">Log Jokes</button>
  <button @click="clearStorage" class="btn">Clear Storage</button>
</div>没有什么令人兴奋的东西了。请注意我们将类似按钮的 disabled 属性绑定到 Vue 实例上的数据属性来确定其状态。这是因为用户不应该多次喜欢一个笑话。
接下来,将 click handler 和 Like Button Disabled 添加到脚本部分:
export default {
  data () {
    return {
      loading: true,
      joke: "",
      likeButtonDisabled: false
    }
  },
  methods: {
    likeJoke(){
      chrome.storage.local.get("jokes", (res) => {
        if(!res.jokes) res.jokes = [];
        res.jokes.push(this.joke)
        chrome.storage.local.set(res);
        this.likeButtonDisabled = true;
      });
    },
    logJokes(){
      chrome.storage.local.get("jokes", (res) => {
        if(res.jokes) res.jokes.map(joke => console.log(joke))
      });
    },
    clearStorage(){
      chrome.storage.local.clear();
    }
  },
  mounted() { ... }
}在这里,我们声明了三个新方法来处理这三个新按钮。
likeJoke 方法在 Chrome 的存储中查找 jokes 属性。如果它不存在(也就是说,用户尚未喜欢一个笑话),会将其初始化为空数组。然后它将当前的笑话推送到此数组并将其保存到 storage。最后,将 likeButtonDisabled 数据属性设置为 true,并禁用 like 按钮。
logJokes 方法还在 Chrome storage 中查找 jokes 属性。如果找到了,会遍历其所有条目并将它们输出到控制台。
clearStorage 方法负责清除数据。
继续在扩展中调整这个新功能,直到自己满意。
它能够工作了,但是按钮是很丑,页面也有点简单。下面就要给扩展做一些润色。
下一步,安装 vue-awesome 库。它能够使我们在页面上使用 Font Awesome 图标,并使这些按钮看起来更漂亮一些:
npm install vue-awesome
在 src/tab/tab.js 中对库进行注册:
import Vue from 'vue';
import App from './App';
import "vue-awesome/icons";
import Icon from "vue-awesome/components/Icon";

Vue.component("icon", Icon);

new Vue({
  el: '#app',
  render: h => h(App)
});修改模板:
<template>
  <div>
    <div v-if="loading" class="centered">
      <p>Loading...</p>
    </div>
    <div v-else>
      <p class="joke">{{ joke }}</p>

      <div class="button-container">
        <button @click="likeJoke" :disabled="likeButtonDisabled" class="btn">
        <icon name="thumbs-up"></icon>
        </button>
        <button @click="logJokes" class="btn"><icon name="list"></icon></button>
        <button @click="clearStorage" class="btn"><icon name="trash"></icon></button>
      </div>
    </div>
  </div>
</template>最后,让我们为按钮添加更多样式,并添加一张图片:
<style>
body {
  height: 98vh;
  text-align: center;
  color: #353638;
  font-size: 22px;
  line-height: 30px;
  font-family: Merriweather,Georgia,serif;
  background:url("https://dab1nmslvvntp.cloudfront.net/wp-content/uploads/2018/12/1544189726troll-dad
  .png") no-repeat 1% 99%;
  background-size: 200px;
  display: flex;
  align-items: center;
  justify-content: center;
}

.joke {
  max-width: 800px;
}

.button-container {
  position: absolute;
  right: 0px;
  top: calc(50% - 74px);
}

.btn {
  background-color: #D8D8D8;
  border: none;
  color: white;
  padding: 12px 16px;
  font-size: 16px;
  cursor: pointer;
  display: block;
  margin-bottom: 5px;
  width: 50px;
}

.btn:hover {
  background-color: #C8C8C8;
}

.btn:disabled {
  background-color: #909090;
}
</style>重新加载扩展并打开一个新标签,你应该看到这样的东西。
如果想让其他人也可以使用你的扩展程序,可以通过 Chrome Web Store 做到。
首先你需要有一个 Google 帐户,可以用该帐户登录 Developer Dashboard 。系统会提示你输入开发人员详细信息,在发布第一个应用程序之前,你必须支付 5 美元的开发人员注册费(通过信用卡)。
接下来,你需要为自己的应用创建一个 ZIP 文件。你可以通过 npm run build-zip 在本地执行这项操作。这会在项目根目录中创建一个名为 dist-zip 的文件夹,其中包含准备上传到 Web Store 的 ZIP 文件。
对于简单的小扩展,这就够了。但是,在你上传自己的扩展之前,请务必阅读官方 Publish in the Chrome Web Store 指南。
在本教程中,我重点介绍了 Chrome 扩展程序的主要部分,并展示了如何用在 Vue.js 中 vue-web-extension 样板构建扩展程序,最后讲解了如何将扩展上传到 Web Store。
希望你喜欢本教程,并用它指导你始构建自己的 Chrome 扩展。
英文原文地址:https://www.sitepoint.com/build-vue-chrome-extension/
相关推荐:
更多编程相关知识,请访问:编程入门!!
The above is the detailed content of How to develop Chrome extensions using Vue. For more information, please follow other related articles on the PHP Chinese website!