
Steps for cutting out images using the pen tool:
1. Take the material we want to use the pen tool to cut out. Put it into the PS interface, copy this material to a copy of the background, and then click [Pen Tool] to prepare for the cutout operation of the PS Pen Tool on this background copy, as shown in the picture~


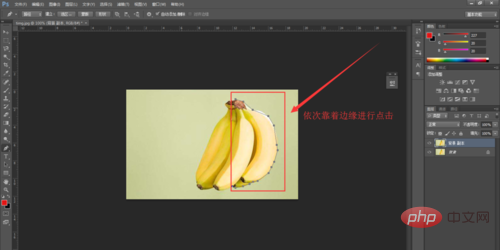
#2. Click the edge of the bunch of bananas with the mouse in sequence until it almost forms a peripheral [Pen Tool] track line, as shown in the picture~


3. When the final connection is about to form a closed shape, double-click the mouse. Then we can see the [preliminary cutout effect] we drew with the [Pen Tool], as shown in the picture


4. In the [preliminary rendering] we just created, we can see that the edges around the banana are very stiff, and the cutout effect is definitely not good. Therefore, we need to weave these stiff straight lines into smooth curves. Click [Add Anchor Point Tool] in [Pen Tool], as shown in the picture~

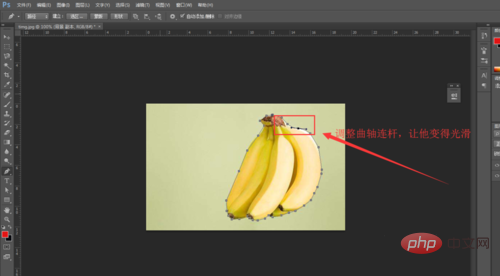
5. After clicking this [Add Anchor Point Tool], we are more blunt Click on the straight line, and then a [Crankshaft Connecting Rod] will appear. Adjust the direction of this [Crankshaft Connecting Rod] to adapt to the curvature of the edge of the banana, close to the edge of the banana, as shown in the picture~

6. When we operate this picture, you will find that there are too many anchor points. At this time, we need to reduce the anchor points. Click the [Delete Anchor Point Tool] in the [Pen Tool]. 】,as the picture shows. Choose to adjust the closeness between the anchor point and the edge curvature according to your own situation, and patiently repeat the above [Add Anchor Point] or [Delete Anchor Point] operation until the entire edge of the banana can be well selected, such as As shown in the picture~


7. At this time, hold down the shortcut key [Ctrl Enter] to create the file just created with the pen tool. The path curve becomes a selection line around the banana, as shown in the picture~
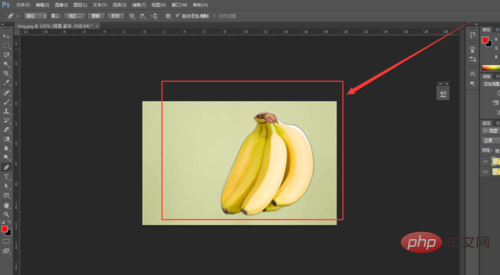
8. Then we hold down the shortcut key [Ctrl J] to select a new picture of the banana part. Duplicate the layer, and we hide the [Small Eyes] of the lower two layers, and you can see the effect of the cutout we just used [Pen Tool], as shown in the picture~
The above is the detailed content of How to cut out pictures with PS pen tool. For more information, please follow other related articles on the PHP Chinese website!