這篇文章主要介紹了微信小程式tabs選項卡效果的實現的相關資料,微信小程式內部組件沒有Tabs 選項卡的功能,自己實現個類似的,需要的朋友可以參考下
微信小程式tabs選項卡效果
前言:
最近微信應用程式號碼是炒的如火如荼,熱門滿滿,但是也可以發現搜索關鍵字出來,各類網站出現的還都是微信的官方文檔解釋。剛好趕上這個熱潮,這幾天先把小程式技術文件看了個遍,就直接著手寫案例了。很多組件微信內部已經封裝完了,剛好發現沒有tab選項卡效果,這兩天剛好研究了一下。想法如下:
1.首先點擊導航的時候需要兩個變數,一個儲存目前點擊樣式類,一個是其它導航預設的樣式類別
2.選項卡內容列表同樣也需要兩個變量,一個儲存目前顯示區塊,一個儲存的是其它隱藏的預設區塊
3.使用三目運算透過點選取得導覽索引,根據索引判斷是否新增目前類別【備註,這裡我將點選事件綁定在父級導覽欄,透過target物件得到點選觸發的事件物件屬性】
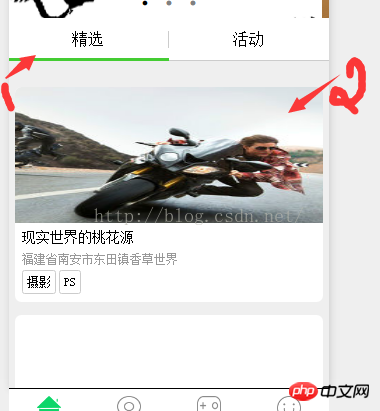
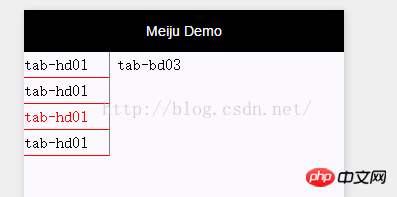
請結合以下效果圖:

<view class="tab">
<view class="tab-left" bindtap="tabFun">
<view class="{{tabArr.curHdIndex=='0'? 'active' : ''}}" id="tab-hd01" data-id="0">tab-hd01</view>
<view class="{{tabArr.curHdIndex=='1'? 'active' : ''}}" id="tab-hd02" data-id="1">tab-hd01</view>
<view class="{{tabArr.curHdIndex=='2'? 'active' : ''}}" id="tab-hd03" data-id="2">tab-hd01</view>
<view class="{{tabArr.curHdIndex=='3'? 'active' : ''}}" id="tab-hd04" data-id="3">tab-hd01</view>
</view>
<view class="tab-right">
<view class="right-item {{tabArr.curBdIndex=='0'? 'active' : ''}}">tab-bd01</view>
<view class="right-item {{tabArr.curBdIndex=='1'? 'active' : ''}}">tab-bd02</view>
<view class="right-item {{tabArr.curBdIndex=='2'? 'active' : ''}}">tab-bd03</view>
<view class="right-item {{tabArr.curBdIndex=='3'? 'active' : ''}}">tab-bd04</view>
</view>
</view>Page( {
data: {
tabArr: {
curHdIndex: 0,
curBdIndex: 0
},
},
tabFun: function(e){
//获取触发事件组件的dataset属性
var _datasetId=e.target.dataset.id;
console.log("----"+_datasetId+"----");
var _obj={};
_obj.curHdIndex=_datasetId;
_obj.curBdIndex=_datasetId;
this.setData({
tabArr: _obj
});
},
onLoad: function( options ) {
alert( "------" );
}
});.tab{
display: flex;
flex-direction: row;
}
.tab-left{
width: 200rpx;
line-height: 160%;
border-right: solid 1px gray;
}
.tab-left view{
border-bottom: solid 1px red;
}
.tab-left .active{
color: #f00;
}
.tab-right{
line-height: 160%;
}
.tab-right .right-item{
padding-left: 15rpx;
display: none;
}
.tab-right .right-item.active{
display: block;
}


以上是小程式開發製作tabs選項卡的實例教學的詳細內容。更多資訊請關注PHP中文網其他相關文章!


