Found a total of 10000 related content
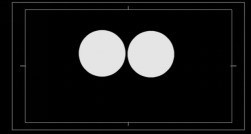
How to create a telescope effect in Adobe Premiere Pro CS6 Specific operations of creating a telescope effect in Adobe Premiere Pro CS6
Article Introduction:First, we import the materials used into the project panel and create a new [Dual Telescope] sequence. Click [Subtitles - New Subtitles - Default Static Subtitles] in the menu bar, select the Ellipse tool in the pop-up dialog box, hold down the shift key at the same time, draw a circle on the screen, then click the selection tool, while holding down Alt Click and drag the circle just now to copy a circle, as shown in Figure 1. Name the subtitle [Telescope]. Then we drag the material landscape.jpg to the video track 1, and drag the subtitle [Telescope] to the video track 2. Add [Video Special Effects - Keying - Track Mask Key] to the material in the video track 1, click to select the material in the video track 1, open the special effects control panel and set the parameters of the track mask key as shown in Figure 2. Then click
2024-06-02
comment 0
848

How to create rounded polygons with AI
Article Introduction:1. First draw an ellipse and find the "Ellipse Tool" on the toolbar (the shortcut key is L). 2. Drag the mouse on the drawing board to draw an ellipse. If you hold down the shift+alt keys, you can draw a circle with the mouse click position as the center. 3. Draw a rounded polygon and find the "Polygon Tool" on the toolbar. 4. Press the "↑" arrow key while drawing to increase the number of sides of the polygon. 5. Find "Effect/Stylization/Rounded Corners" and fill in a fillet radius to get a rounded polygon. 6. Draw a pentagon below and find the "Star Tool" in the toolbar. 7. Press the "↓↑" arrow keys while drawing to adjust the number of star corners; in addition, when drawing a pentagon, press the ctrl, alt, and shift keys respectively to get different results as shown in the figure.
2024-04-07
comment 0
560
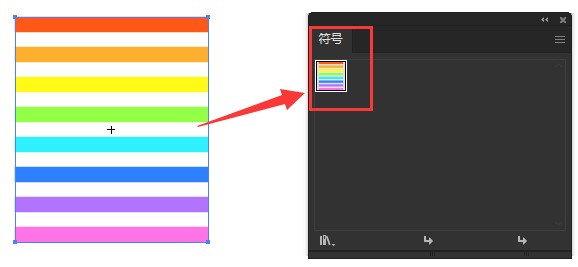
How to draw a hollow ball with colored stripes using AI - Tutorial on drawing a hollow ball with colored stripes using AI
Article Introduction:1. First, in the ai software, use the shape tool to draw bar graphics of different colors, select them all with the mouse and drag them to the symbol panel 2. Then, click the ellipse tool to draw a semicircle graphic 3. Next, select the semicircle , click the 3D rotation option in the effect menu above, and modify the parameter information as shown below 4. Then, click the map button, select the definition symbol in step 2, click the Scale to fit button in the lower left corner, and check the 3D model Invisible option 5. Finally, click OK to return to the 3D rotation options menu, set the surface to no shading effect, and the tutorial for drawing colorful hollow balls with AI is shared here. I hope it will be useful to everyone.
2024-05-06
comment 0
719
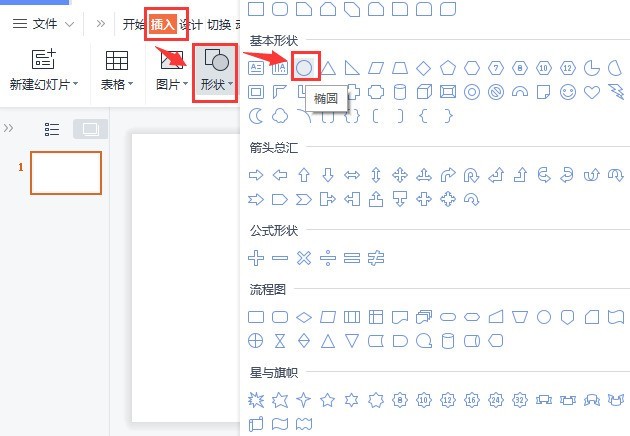
How to draw a gradient arc in wps_How to draw a gradient arc in wps
Article Introduction:1. After opening the interface, click the shape option in the insert menu and select the ellipse style. 2. Drag the mouse to draw a 15*15 cm circle, change the color fill to orange, and set the no-outline effect. 3. Copy the circle. And modify the height and width to 16.5*16.5 cm 4. Open the object properties panel of the copied circle, modify the no fill and gradient line effects 5. Adjust the gradient color, position and transparency of the arc according to the parameters shown in the figure 6. Finally: Align the arc and circle settings in the center to complete the arc drawing of the circle.
2024-04-25
comment 0
786
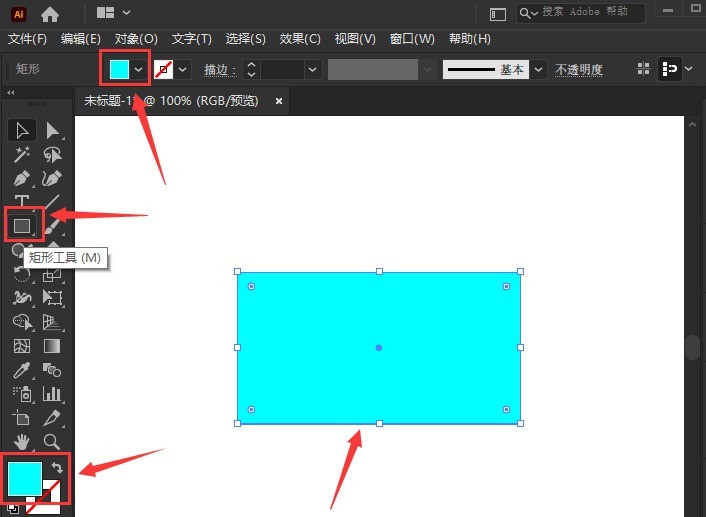
How to transform ai rectangular distortion-ai rectangular distortion transformation method
Article Introduction:1. After opening the interface, click the rectangle tool to draw a rectangular pattern, and set the fill color to cyan 2. After clicking the mouse to select the rectangle, find the distortion and transformation column in the effect menu above and select the free distortion effect 3. Drag the mouse to move Position the corners of the rectangle, twist it into a parallelogram effect, and click OK to save. 4. Finally, modify the fillet parameters appropriately for the rectangle.
2024-05-06
comment 0
866

How to use edius to create video recall effects
Article Introduction:Create a new project, import the video material to be edited in the material library, and drag the material to the timeline. Click [Special Effects], select [Video Special Effects], find [Hand-Drawn Mask], then left-click and drag it to the top of our video. Then click [Hand-drawn Mask] in the lower right corner. Find the ellipse in the menu bar, click on the preview image to draw the place where you want to suppress the vignetting; then check [Outer] at the bottom; adjust the outer: visibility on the right, check the filter; edge: check [Soften] to adjust the width , until soft. Want the effect to be more obvious. You can find [Monochrome] in the color correction of [Special Effects], click and drag it to the top of the video to add this effect. Also find [Single Color] on the lower right, edit details: hue, etc., click [OK] and finally save: Select [Output] in the file and select [Export]
2024-04-19
comment 0
1001

How to remove watermark in pr cc2019_How to remove watermark in pr cc2019
Article Introduction:1. First open the prcc2019 software on your computer and enter the home page, as shown in the figure below. 2. Import the video you want to remove the watermark into the software, as shown in the figure below. 3. Hold down the alt key and drag upward, as shown in the figure below. 4. Right-click the mouse and select the Ungroup option in the pop-up menu, as shown in the figure below. 5. Click the Effects tab at the top of the page, as shown in the figure below. 6. Select the median option on the right side of the page. 7. Click to select the oval under the median value category, as shown in the figure below. 8. Click and drag the ellipse into the video watermark, and then set the radius and feathering values, as shown in the figure below. 9. Finally, the watermark can be successfully removed, as shown in the picture below.
2024-06-13
comment 0
404
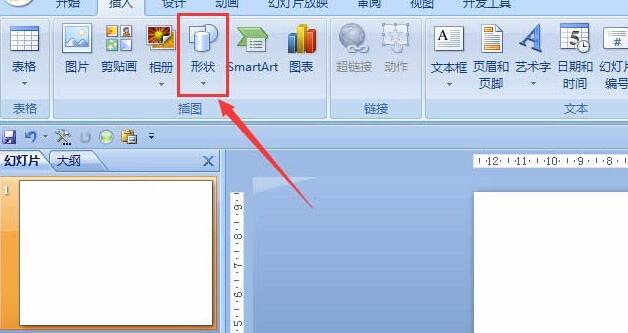
Graphical tutorial on inserting pictures into elliptical annotations in PPT documents
Article Introduction:1. Open PPT and select [Shape] in the [Illustration] palette of the Insert menu. 2. Find the oval annotation shape in the shape panel that appears. 3. Drag the mouse in the blank area, select the yellow part and stretch it as shown in the picture. 4. Right-click the shape and select [Format Shape]. 5. Select [Picture and Texture Fill] in the opened panel, as shown by the red line. 6. Click the [File] button as shown in the figure, then click and select the picture you want to insert in the dialog box that opens. 7. The final effect is as shown in the figure. The operation method for other shapes is similar. The demo pictures here are just randomly selected. You can choose the appropriate picture according to your needs.
2024-03-26
comment 0
1021
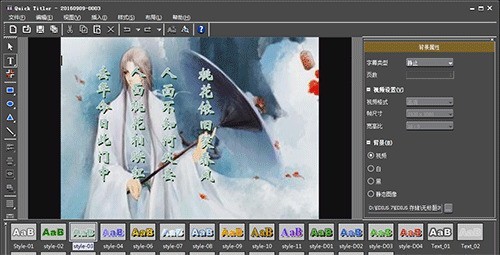
How to create calligraphy gradient effect in edius
Article Introduction:1. Import a picture as a background image. After dragging the picture onto the material, right-click the mouse in the material library and select [Add Subtitles] to enter the subtitle editing interface as shown in the figure: 2. You can write it in the window above. The text you want to write and adjust the font, position, size, spacing and other information of the text, then click Save in the upper left corner. Select the hand-drawn mask in the Effects panel, then drag and drop it onto the video track above the subtitle file. Please make sure that the subtitle file is on top of the background image. 4. Double-click [Hand-drawn Mask] in the information panel to enter the hand-drawn mask setting interface. Select the rectangular selection tool in the menu and select the text we wrote, as shown in the figure: Then set keyframes for these texts. There are four shape attributes on the timeline, and we can respectively
2024-03-27
comment 0
1000

How to create 3D raised text effect in ai-How to create 3D raised text effect in ai
Article Introduction:1. First, after opening the ai software interface, click the text tool to enter text, change the font fill to white, move the mouse and drag it to the square to align it 2. Then, click the direct selection tool to convert the text to rounded corners, and then open the symbol Create a new symbol in the panel 3. Next, draw a square filled with gray, find the 3d column in the effect menu, and select the bulge and bevel buttons 4. Modify the parameters as shown below to make it a cube shape 5. Click the lower left corner Texture options, add text symbols on the three sides of the rectangle in sequence 6. Finally, click the Expand Appearance button in the object menu, expand the appearance twice, ungroup, and extract the text shape.
2024-05-06
comment 0
1069

How to check the monetization income of special effects in Kuaishou
Article Introduction:Many friends expressed that they want to know how to check their own special effects monetization income in Kuaishou. Here is a check method for you. Friends who are interested can come and take a look with me. Open the Kuaishou APP on your phone, enter the main interface, click the "My" button in the lower right corner, and then click the circular icon in the upper right corner of the My page. There are three horizontal lines on the icon to open more function options. . 2. A menu window will pop up, in which click and select "Creator Center" to enter. 3. There is "All Services" in the Creator Center. Click to select it after seeing it. 4. Next, find "Special Effects Monetization" in the options under "Content Monetization" on the page you enter, and click on it to enter. 5. Click the "My" option at the bottom right to switch
2024-03-01
comment 0
767
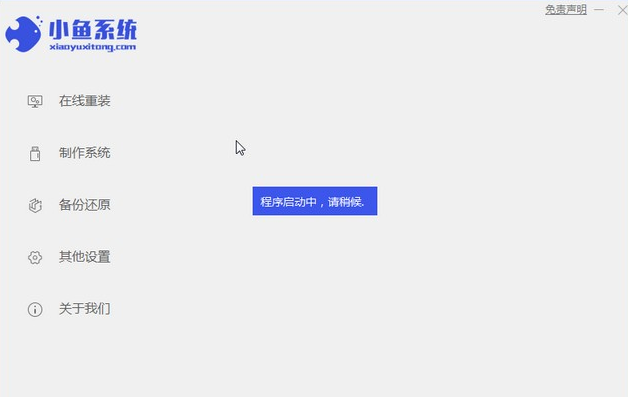
How to install win7 operating system on computer
Article Introduction:Among computer operating systems, WIN7 system is a very classic computer operating system, so how to install win7 system? The editor below will introduce in detail how to install the win7 system on your computer. 1. First download the Xiaoyu system and reinstall the system software on your desktop computer. 2. Select the win7 system and click "Install this system". 3. Then start downloading the image of the win7 system. 4. After downloading, deploy the environment, and then click Restart Now after completion. 5. After restarting the computer, the Windows Manager page will appear. We choose the second one. 6. Return to the computer pe interface to continue the installation. 7. After completion, restart the computer. 8. Finally come to the desktop and the system installation is completed. One-click installation of win7 system
2023-07-16
comment 0
1201
php-insertion sort
Article Introduction::This article mainly introduces php-insertion sort. Students who are interested in PHP tutorials can refer to it.
2016-08-08
comment 0
1056
Graphical method to find the path of the PHP configuration file php.ini, _PHP tutorial
Article Introduction:Illustrated method to find the path of the PHP configuration file php.ini. Graphical method to find the path of the PHP configuration file php.ini. Recently, some bloggers asked in which directory php.ini exists? Or why does it not take effect after modifying php.ini? Based on the above two questions,
2016-07-13
comment 0
803
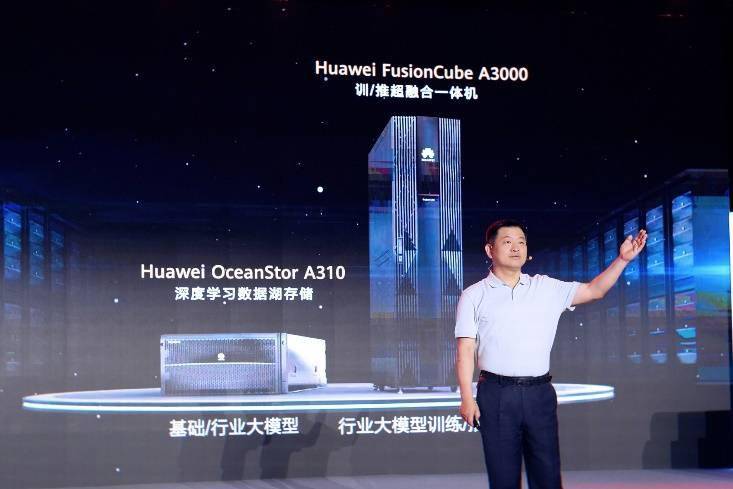
Huawei launches two new commercial AI large model storage products, supporting 12 million IOPS performance
Article Introduction:IT House reported on July 14 that Huawei recently released new commercial AI storage products "OceanStorA310 deep learning data lake storage" and "FusionCubeA3000 training/pushing hyper-converged all-in-one machine". Officials said that "these two products can train basic AI models." , industry model training, and segmented scenario model training and inference provide new momentum." ▲ Picture source Huawei IT Home compiled and summarized: OceanStorA310 deep learning data lake storage is mainly oriented to basic/industry large model data lake scenarios to achieve data regression from Massive data management in the entire AI process from collection and preprocessing to model training and inference application. Officially stated that OceanStorA310 single frame 5U supports the industry’s highest 400GB/s
2023-07-16
comment 0
1532
PHP function container ing...
Article Introduction::This article mainly introduces the PHP function container ing..., students who are interested in PHP tutorials can refer to it.
2016-08-08
comment 0
1097


