Found a total of 10000 related content

How to modify the label in dedecms
Article Introduction:How to modify tags in dedecms: 1. Open the backend management interface of DedeCMS website and log in to the backend management; 2. Find the "Template Management" menu and click to enter; 3. Select the template whose tags need to be modified in the template management interface and click behind it "Modify" button to enter the template editing interface; 4. In the template editing interface, you can see the source code of the template file. Just find the location of the label that needs to be modified.
2023-07-19
comment 0
1563

What does Dreamweaver CMS mainly do?
Article Introduction:Dreamweaver CMS is mainly responsible for the construction, management and maintenance of websites. 1. Website construction, Dreamweaver CMS provides a wealth of templates and plug-in resources. Users can choose appropriate templates and plug-ins according to their own needs and quickly build their own websites; 2. Website management, Dreamweaver CMS provides simple and easy-to-use templates and plug-ins. Management backend interface, users can log in to the backend through a browser for website management; 3. Website maintenance, Dreamweaver CMS provides automatic backup and database management functions to ensure the security and stable operation of the website.
2023-08-08
comment 0
974

How to modify the navigation bar in dedecms
Article Introduction:How to modify the navigation bar of dedecms: 1. Log in to the dedeCMS background management interface; 2. Find "System" in the left menu bar, enter and select "Template Management" to operate; 3. Find and click to open the "templets/default" folder; 4. , find "head.htm" or a similar file, open it, and see the HTML code; 5. Start modifying the style of the navigation bar from here.
2023-07-19
comment 0
1810

Where can I buy the membership group plug-in in Empire CMS?
Article Introduction:The Empire CMS purchase membership group plug-in is located in "Backstage->Members->Member Group Management". Specific usage: Install plug-in: Upload the plug-in to the /e/extend/plugins/ directory. Enable plug-in: Enable the "Purchase Membership Group" plug-in in the plug-in management interface. Create a membership group: Create a membership group that needs to be purchased in the membership group management interface. Set payment method: Set available payment methods in payment method management. Set up a purchase page: Use the [payfun] tag to create a purchase page template. Generate purchase link: Fill in the information as required to generate a purchase link. After the user pays successfully, the system will automatically add them to the purchased membership group.
2024-04-17
comment 0
537

How to adjust the overall color in sai_sai overall color adjustment tutorial
Article Introduction:1. First open the sai software interface and you will see the default color palette. 2. Then there is a row of buttons above the color wheel, which can open and close additional color adjustment panels. If needed for color adjustment, click the Show/Hide Scratchpad option. 3. Another way to switch panels is to select from the window options in the menu bar. This operation is the same as PS. You can also open the Scratch Pad panel from here. 4. Then you need to click a brush. 5. After selecting the color to be adjusted, right-click on the color in this small area (at this time, you will see the cursor turning into a straw tool). This will select the color for color adjustment just like the eyedropper, as shown in the picture. Shown is a color change. 6. Finally, if you want to adjust multiple colors at one time and want to save them, you need to use a custom color wheel. exist
2024-04-08
comment 0
504

What does the empire cms directory structure mean?
Article Introduction:The Empire CMS directory structure consists of seven main directories, which together provide a framework for organizing and managing content and system components: eadmin: Backend management files (user interface, content management and settings) data: Content data (articles, categories, comments etc.) include: system core functions and files lib: third-party libraries and modules (extended functions) skin: website templates and themes (appearance customization) www: website front-end directory (user access) wwwroot: website root directory (entry point)
2024-04-17
comment 0
451

Does Gigabyte appcenter need to be installed?
Article Introduction:Does Gigabyte appcenter need to be installed? need. In order to better manage functional software, GIGABYTE designed a small software called APPCenter to avoid the accumulation of small software icons in the lower right corner of the desktop. After APPCenter is opened, it will appear in the lower right corner, and you can wake it up at any time. The initial color of the interface is blue, and we can also adjust it to a more vibrant orange or green according to our preferences. Since new DIY hardware products are launched frequently, new requirements are put forward for the compatibility of motherboards. Motherboard manufacturers can update the BIOS by "patching" to enhance the compatibility with other hardware. Gigabyte has designed a separate software for BIOS upgrade and update. We can choose local update or official website.
2024-02-22
comment 0
1387

Download software for changing fonts on your computer (software for changing fonts on your computer cannot be downloaded)
Article Introduction:1. The reason why the software for changing fonts on the computer cannot be downloaded is that the fonts and background colors are the same and blend into each other and are invisible. Just change the color and it comes out. 1. First open the computer’s control panel. 2. Open "Fonts" in the control panel. 3. Open the font management interface and find that the fonts you just installed are gray. 4. Click to select the current font and click the Show button above. 5. After the display is successful, the font color has returned to normal. 6. You can also right-click the currently gray font and select "Show". 7. Open the PS software and you can find this font. 2. Download software that can change fonts for OPPO. To change fonts for OPPO, you can download an OPPO personalized theme, so that different fonts can be changed in it. 3. Can’t I download software for changing fonts on my computer?
2024-07-12
comment 0
399

How to set ban on DingTalk group
Article Introduction:When we use DingTalk software, we will create a DingTalk group. How to set a ban on members? The following will introduce you to the specific operation method. 1. After opening the DingTalk software on your mobile phone, click Open on the DingTalk group you want to ban, and then click the three small dots icon side by side in the upper right corner of the group chat interface. 2. At this time, you will enter the group setting interface, find the "Group Management" function and click on it to enter. 3. After coming to the group management page, click on the "Set group ban" item to enter. 4. Finally, on the page you enter, there is a "Mutate All Members", and there is a switch button behind it. Click on it to set it to color to turn on this function. Except for the group owner, group administrators and designated members, other group members cannot
2024-03-01
comment 0
1334

The reason why you cannot click on the detailed solution is the update of the win101903 interface.
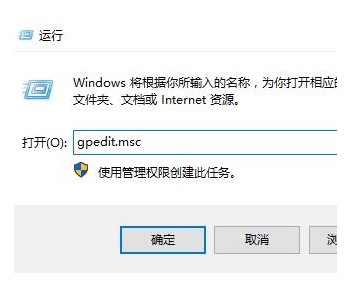
Article Introduction:When we use the win10 system and want to update and upgrade, we find that the update button on the system update interface is gray and cannot be clicked at all. How to solve this situation depends on what the editor says. Why can’t I click on the win101903 update interface? 1. First, you need to use the shortcut “Ctrl+Shift+Esc” to open the “Task Manager”. 2. Then click "File" in the upper left corner of "Task Manager" and select "Run New Task". 3. Then enter "gpedit.msc" in the pop-up window and click OK. 4. Then open the "Local Group Policy Editor" and expand "Computer Configuration--Administrative Templates--Windows Components". 5. Then in the expanded file
2024-01-14
comment 0
847

How to make your own computer theme?
Article Introduction:1. How to make your own computer theme? 1. Open the Control Panel and click Screen Theme. 2. Click on the desktop background. 3. Set the changed picture folder and click Save changes. 4. Return to the previous directory. 5. Return to the desktop, the theme has been changed. 2. Can you recommend some good software for creating computer themes? StyleXPStyleXP is a third-party XP desktop theme support and management software, and it is currently the best. It uses the theme core of Windows XP and has enhanced many functions. It can import, select, replace and manage official and unofficial desktop themes, wallpapers and even login interfaces. After the software is installed, a service StyleXPService running in the background will be added to XP, occupying 1-
2024-08-23
comment 0
965

Windows 10 Home Edition prohibits the use of Task Manager
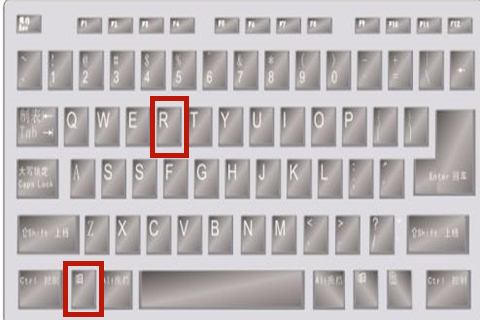
Article Introduction:If your computer's Task Manager has restricted access, we may not be able to find the Task Manager tabs in every corner of your computer. If the Task Manager is disabled, we cannot force a software to close or view what programs are running in the background. Solution to the problem that the Windows 10 Home Edition Task Manager is disabled: 1. Press "win+r" on the keyboard at the same time to start the computer's running function, then enter "gpedit.msc", and then click "OK". 2. During this process, you will enter the Local Group Policy Editor interface, select "User Configuration" - "Administrative Templates" - "System", then double-click the system, and then select "Ctrl+Shift+Del". 3. Find and click "
2024-01-16
comment 0
559

How to use VueScan How to scan files directly into PDF format with VueScan
Article Introduction:VueScan is a powerful scanner software compatible with a wide range of scanner brands and models. With its excellent image processing and optimization technology, VueScan allows users to easily adjust scanning parameters to achieve the most ideal scanning results. VueScan also provides diverse output format options, especially supporting PDF format, providing users with unparalleled flexibility and convenience. How to scan files directly into PDF format with Vuescan? 1. Open the VueScan software and switch the "Basic" mode to the "Professional" mode in the interface. 2. After entering the professional mode, there are 6 sections above the tab bar of the page, including "Selection", "Input", "Color", "Filter", "Output" and "Presets".
2024-09-02
comment 0
605

How to enable subscription recommendations for market direct recruitment
Article Introduction:In the Ganji Direct Recruitment software, we can set up a function to subscribe to recommended messages. Let me introduce how to enable it. Interested friends, please come and take a look with me. First, open the Ganji Direct Recruitment software on your mobile phone and log in, then click "My" in the lower right corner of the page to enter the personal center page, and then click the hexagonal "Settings" icon in the upper right corner to open the setting options. 2. After coming to the settings page, click on the "Message Management" item to enter. 3. Next, in the message management interface, there is a "Subscribe to recommended messages" option under "APP Push". Behind it, click the circular slider on the corresponding switch button to set it. When the button is set to color, it can be turned on. This function.
2024-03-01
comment 0
898

What should I do if the win10 interface keeps showing the warm welcome screen? What should I do if the win10 interface keeps showing the warm welcome screen?
Article Introduction:Some users open the Win10 computer, but the computer interface is always displayed on the welcome interface. They don’t know what to do. They first hold down the keyboard shortcut to open the run window, then enter the command to open the HTML page, and then click Login in the management mechanism. Select the option, and finally enable the Welcome screen cannot be displayed when logging in. The following is the solution to the problem that the Welcome screen is always displayed on the Win10 interface. The win10 interface displays the warm welcome interface all the time. Solution 1. Press and hold "win+R" and type: gpedit.msc 2. Open: Administrative Templates - System Software - Login 3. Double-click the "Warm welcome display cannot be displayed when logging in" on the right side of the mouse. 4. In the pop-up dialog box, click
2023-07-12
comment 0
3186

What framework is layui?
Article Introduction:layui is a medium and large web interface solution for rapid development of web applications and websites. It adopts modular design, supports responsive layout, and provides rich UI components. It is widely used in backend management systems, website construction, and mobile terminals. Development and API development and other scenarios, the advantages include high development efficiency, performance optimization and simple maintenance.
2024-04-04
comment 0
656

Win10 Home Edition computers are plagued by automatic installation of messy software
Article Introduction:As we use computers more and more frequently, we need to download a lot of software on the computer. However, if we do not download game software from the official website, it will cause a bunch of messy software when we download. So what is the problem? How to solve it. How to solve the automatic installation of messy software on Windows 10 Home Edition computers 1. First, we press the shortcut key win+R to open the run window, then open the run menu, enter gpedit.msc here and click the OK button to open the local group policy. 2. After entering the local group policy interface, we expand Computer Configuration - Administrative Templates - Windows Components - Windows lnstaller, and finally double-click to open the prohibited use
2024-01-23
comment 0
645

Tutorial on adjusting network speed to faster in win10
Article Introduction:Slow network speed greatly interferes with customers' online surfing experience. So how to adjust the network speed faster in win10 system software? You can first adjust to the operation window, open the local group strategy editor according to the gpedit.msc instruction, then open the management method template, select Internet, and then enter the QOS packet scheduler process. Restrict broadband networks, then choose to open the interface, set Bandwidth Control to 0, and save the settings. Tutorial on adjusting the Internet speed to a faster Win10: First, right-click the menu bar, select Action, type gpedit.msc, and click OK. 2. After entering, select Management Templates and click Internet. 3. Click on the QOS data package planning process on the right, and then double-click the mouse to open the restricted broadband network
2023-07-19
comment 0
2004

How to receive message notifications in 58.com
Article Introduction:When using 58.com software, you can set up and turn on message notifications to avoid missing important message content. The following will introduce how to turn it on. 1. After opening the 58.com app on your mobile phone, click "My" in the lower right corner of the page to switch to enter. 2. Click the gear-shaped icon in the upper right corner of my page to open the settings page, find "Message Management" and click on it to enter. 3. Next, there is a "Receive new messages" on the message management page. Click "Open" behind this item. 4. This will jump to the system settings interface, where click on the "Notifications" item. 5. Finally, click the switch button behind "Allow notifications" on the notification page. When the button is set to color, the function can be turned on.
2024-04-24
comment 0
327

How to enable account protection on MeituXiuXiu
Article Introduction:There is an account protection function in Meituan Xiuxiu. Some friends are not very familiar with it. Let me introduce you to the method of turning on the account protection function. First, open the Meitu Xiu Xiu software on your mobile phone. After entering, click "Me" in the lower right corner of the page to switch. Then find the hexagonal icon in the upper right corner of the "My" page and click it to open the "Settings" option. 2. After coming to the settings page, there is an "Account Management", click on it to select. 3. Find "Meituan Security Center" in the account and security interface, and click on it to enter. 4. After coming to the new interface, click on the "Account Protection" item to enter. 5. After jumping to the last page, click the switch button behind "Account Protection". When the button is set to color, it can be turned on.
2024-02-29
comment 0
552


