Found a total of 63 related content
How to enable secure boot in Win11 Tutorial on how to enable secure boot in Win11
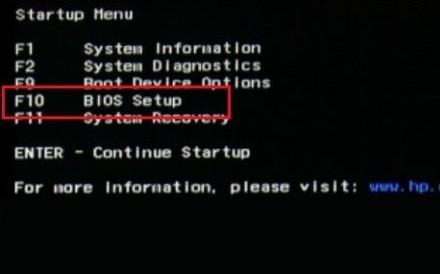
Article Introduction:Hey, you know what? Secure boot is a super important security feature. It can ensure that our system only loads system software that has passed verification and has not been modified when it starts. However, many people have encountered a problem recently when upgrading the Win11 system, that is, the computer always prompts that secure boot is not supported. So how do you turn on the safe boot of your computer? Next I will teach you! Tutorial on how to enable secure boot in Win11 1. First, we restart the computer, use the hotkey to open bios settings when the logo appears, and then press "F10" to enter biossetup. 2. Then find "bootoptions" under the "configuration" option and select enter. 3. Then look for
2024-09-09
comment 0
1075

How to enable secure boot in win11 on GIGABYTE motherboards How to enable secure boot in win11 on GIGABYTE motherboards
Article Introduction:Many people are asking how to enable secure boot in win11 on Gigabyte motherboards. It’s actually super easy! Just select the integrated peripherals project, open IntelPPT, then enter the BIOS function, find CSM support, turn it off and it's OK! I will teach you the detailed steps! How to enable secure boot in Gigabyte motherboard win11 1. First enter the BIOS interface, select the integrated peripherals item, and enable IntelPPT. 2. Then enter the BIOS function, find CSM support, and select CSM support to turn off. 3. After closing, click secureboot at the bottom. 4. After entering, turn on secureboot.
2024-09-09
comment 0
654

How to add startup items in Win11 How to add startup items in Win11
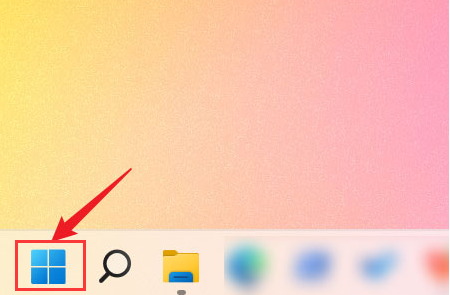
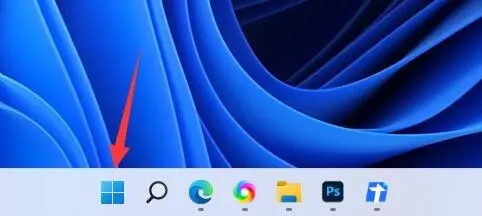
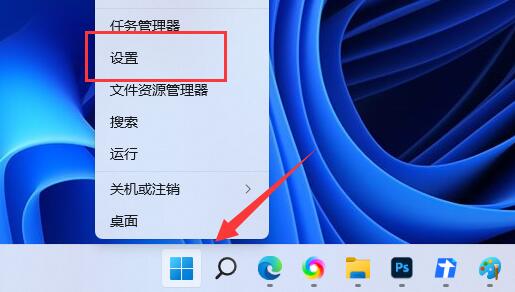
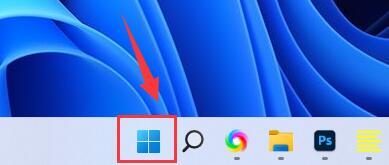
Article Introduction:Hello everyone! Today I will teach you how to add startup items on Win11! Sometimes some software needs to start automatically, then we need to add them to the startup items! I will explain how to operate in detail below, follow me and do it together! Method 1 to add startup items in Win11 1. First click on the start menu below, as shown in the figure. 2. Then open the "Settings". 3. Then click the "Apply" option in the left column. 4. Then click on the "Startup" setting. 5. You can add startup items at the location shown in the icon. Method 2 1. We can also right-click the start menu and open "Task Manager". 2. Then enter the "Startup" tab above. 3. Finally, right-click the desired startup item and click "Enable"
2024-09-09
comment 0
387
Where is the Win10 startup folder? Win10 startup folder path location
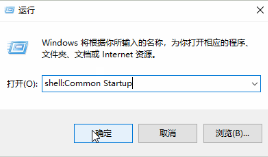
Article Introduction:During the process of Win10, I want to make some applications start automatically when booting. I need to place them in the startup folder, but I don’t know where the Win10 startup folder is. Now I will give you a detailed introduction to Win10 startup. Start the folder path location. Friends in need can take a look! 1. Use the "win R" shortcut key to start running, enter "shell:CommonStartup", and press Enter to open. 2. The opened folder window interface is the location of the startup file. You can directly drag and drop the program you want to start at startup.
2024-09-19
comment 0
881

How to open Ruyuan stronghold How to open Ruyuan stronghold
Article Introduction:How to open a stronghold in "Ru Yuan"? There are many strongholds in the game, and many good resources can be found in the strongholds. Therefore, many players want to open all the strongholds, but don't know how. Let's follow the editor to see how to open them. Bar. How to open Ruyuan Stronghold 1. Players must first complete levels 3-8 of the main story to face the challenge of the stronghold being destroyed. 2. Then, after passing levels 3-15 of the main plot, you can rebuild the stronghold. 3. Use the corresponding materials to quickly restore the original appearance of the stronghold. 4. When the exploration progress of the stronghold reaches 100, its management and character dispatch functions can be activated. 5. Finally, consuming physical strength can speed up the dispatch of characters to explore in order to obtain corresponding rewards.
2024-09-28
comment 0
588
How to enable Storage Sense in Win11 How to enable Storage Sense in Win11
Article Introduction:Turning on the Storage Sense function in Win11 can help effectively alleviate the disk space shortage. So how to turn on Storage Sense in Win11? Here I will give you a detailed introduction to how to turn on Storage Sense in Win11. If necessary, let’s take a look! 1. Click the "Start" button in the taskbar below. 2. Then select "Settings" in the menu list to open. 3. In the window interface that opens, click the "System" option in the left column. 4. Then click the "Save" option on the right. 5. Then find the "Storage Sense" function and turn on the switch button on the right side of it.
2024-09-14
comment 0
585
How to set up win11 startup items. Three settings tutorial for win11 startup items.
Article Introduction:Hi guys! Today I want to share with you a question about Win11. If your friends have upgraded to Win11 system, they may find that many software start automatically every time they turn on the computer, which will slow down the boot speed. So, let’s share three solutions so that you can set the startup items yourself! Follow me and do it now! Three tutorial methods for setting up win11 startup items 1. First, click the start menu below. 2. Then open the "Settings". 3. Then click the "Apply" option in the left column. 4. Then click on the "Startup" setting. 5. You can add startup items at the location shown in the icon. Method 2 1. We can also right-click the start menu and open "Task Manager". 2. Then enter the top "
2024-09-09
comment 0
694
How to enable SNMP service in Win11 How to enable SNMP service in Win11
Article Introduction:Some friends want to open the SNMP service for operation, but don't know how to enable the SNMP service in Win11. Now I will give you a detailed introduction to the method of opening the SNMP service in Win11. Friends in need can take a look. 1. Right-click Start in the taskbar below and select "Settings" in the option list to open it. 2. In the window interface that opens, click the "Application" option on the left, and then click the "Optional Features" option on the right. 3. Then click the "View Features" button to the right of "Add Optional Features". 4. In the pop-up window interface, find "
2024-09-19
comment 0
648

How to enable full-screen start menu in win10 tutorial on how to enable full-screen start menu in win10
Article Introduction:When we start the computer using the start menu of win10 system, we will see it appear in the lower left corner of the screen. Some friends want to change the start menu to full screen mode, but don't know how to do it. Don’t worry, I’ll teach you how to do it right now. Next, let’s take a look at the detailed steps! Tutorial on enabling the full-screen start menu in win10 1. Use the "win+i" shortcut key to open the "Settings" interface and click on the "Personalization" option. 2. After entering the new interface, click "Start" in the left column. 3. Then find "Use full-screen start screen" on the right, and finally turn on its switch button.
2024-09-10
comment 0
984

How to enable sam mode in AMD How to enable sam mode in A card
Article Introduction:How to enable AMD's SAM mode is a question that many users are probably asking, so how do you do it specifically? Users can directly press the DEL key to enter the BIOS interface, and then enter the advanced mode to operate. Let this website carefully introduce to users how to enable the SAM mode of the A card. How to enable SAM mode on A card 1. Press the DEL key to enter the BIOS interface when the computer is powered on. (If not, go to the corresponding motherboard official website and download the latest BIOS). 2. Press F7 to enter advanced mode. 3. In the advanced PCI subsystem, change the options to the settings in the picture. 4. Change the system boot mode to UEFI, enter the BIOS advanced mode, start the tab, and close CSM. (This step is
2024-09-13
comment 0
1040
How to turn on the wireless function in Win7 How to turn on the wireless function in Win7
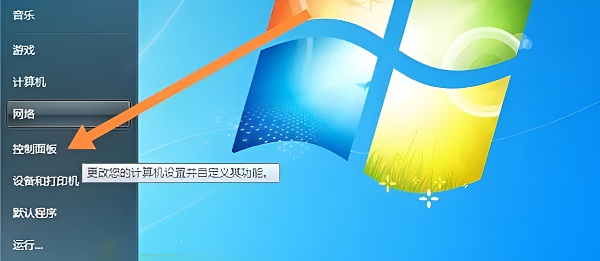
Article Introduction:Some friends found that the wireless function was turned off when the Win7 system was connected to the wireless network. So how to turn on the wireless function in Win7? The following editor will give you a detailed introduction to how to turn on the wireless function in Win7. Friends who need it can take a look. Find out. 1. Click Start in the taskbar below and select "Control Panel" in the menu option to open it. 2. After entering the new interface, click "Network and Sharing Center" to open it. 3. Then click "Change Adapter Settings" on the left. 4. Then find "Wireless Network Connection", right-click and select "Enable".
2024-09-19
comment 0
765

How to turn off the startup of 360 Security Guard? How to cancel the startup of 360 Security Guard?
Article Introduction:360 Security Guard is a security protection software used by many people. Usually the application will be started directly on startup by default. For some computers with lower configurations, the startup of the software will reduce the running speed of the device. So how do you turn off 360 Security Guard? To start, in response to this problem, today’s software tutorial will share the solution with the majority of users. Let’s take a look at the complete operation steps. How to turn off and start 360 Security Guard 1. Click the icon to open the software. 2. Click Settings again. 3. Then continue to click Startup Item Settings. 4. Deselect the option to automatically turn on the security protection center when booting, then click OK to turn off 360 Security Guard.
2024-09-09
comment 0
626
How to enable voice interaction in uTools How to enable voice interaction in uTools
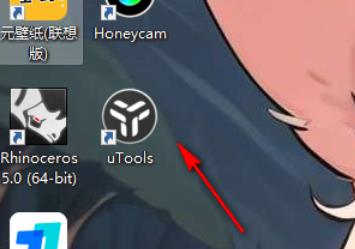
Article Introduction:uTools is a very interesting plug-in tool. Here users can perform voice interaction to quickly download the plug-ins you need. So how do you enable voice interaction in uTools? Users can directly enter the personal center options, and then see the voice interaction options to explore. Let this site carefully introduce to users how to enable voice interaction in uTools. UTools enable voice interaction method 1. First, we need to click on the utools plug-in tool on the page to open it. 2. Then you can open a utools search box. There is a utools icon on the search box. Left-click the icon to enter. 3. At this time, we will enter utoo
2024-09-10
comment 0
453

How to enable high contrast in Win10 How to enable high contrast in Win10
Article Introduction:The win10 system comes with a high contrast function that allows everyone to use the computer better. However, some users don’t know how to enable this feature. It's actually very simple, you just need to open Ease of Use under Windows Settings, and then select Good Contrast on the left. Below, this site will give you a detailed introduction on how to enable the high contrast function of win10. How to turn on high contrast in Win10 1. First, open the "Windows Settings" window and select "Ease of Use". 2. Then, in the "Ease of Use" window, select "High Contrast" on the left, find and check "Turn on High Contrast" on the right. 3. Finally, scroll down and adjust the corresponding high contrast settings according to personal circumstances.
2024-09-13
comment 0
714
How to enable super administrator in Win11 How to enable super administrator in Win11
Article Introduction:When we use Win11, we sometimes need to use the super administrator. Some friends don’t know how to enable the super administrator in Win11. Now I will give you a detailed introduction to how to enable the super administrator in Win11. Anyone who needs it Let’s see how to enable this permission together! 1. Click "Start" in the taskbar below. 2. Enter "cmd" in the search bar above the menu. 3. Then click on the "Run as administrator" option. 4. After entering the command prompt window, enter "netuseradministrator/active:yes" and finally press Enter to execute.
2024-09-19
comment 0
336

How to close team on startup in Win11 microsoft team close startup tutorial
Article Introduction:Hello everyone, today I want to share with you how to turn off the startup function of Microsoft Teams on Win11. Microsoft Teams is a chat-based intelligent team collaboration tool that many people like to use. However, some users may ask, how can Win11 prevent Teams from starting automatically? Don’t worry, we’re here to teach you how to turn off this feature! How to turn off team and start it in Win11? 1. Let’s open Teams first. 2. Right-click the Teams icon on the taskbar. 3. If there is no icon in the taskbar, click the upward arrow in the taskbar to open the hidden icon. 4. Select "Settings" from the pop-up options. 5. Select “Do you want to
2024-09-13
comment 0
607

How to disable the automatic startup of 360 Browser at startup. How to cancel the automatic startup of 360 Browser at startup.
Article Introduction:Many users will pop up the 360 Browser after turning on their computers. So how to turn off the automatic startup of the 360 Browser? How to cancel the automatic startup of 360 Browser when booting? Users can directly select the startup function under Applications and Functions, and then select the 360 Safe Browser component to close it. Now, let this site give users a detailed introduction on how to cancel the automatic startup of 360 Browser at boot. How to cancel the automatic startup of 360 Browser at startup. Method 1: 1. Right-click the stand-alone win icon and select Applications and Functions. 2. After opening, select the startup function. 3. Find the 360 Safe Browser component and just close it. It will not start automatically when you turn on the computer. Method 2: Manage startup items through third-party software
2024-09-14
comment 0
223

How to enable hardware acceleration in Win11 How to enable hardware acceleration in Win11
Article Introduction:The hardware acceleration of Win11 can improve the performance of the computer system, but I don’t know how to turn on the hardware acceleration of Win11. Here I will give you a detailed introduction to the method of turning on the hardware acceleration of Win11. Interested friends can come and take a look with the editor. look. 1. Click Start in the taskbar below and select "Settings" in the menu list to open. 2. In the window interface that opens, click the "Display" option on the right. 3. Then click the "Graphics" option under "Related Settings". 4. Then click "Change default graphics settings" under "Default Settings"
2024-09-19
comment 0
543

How to enable do not disturb mode in win11 How to enable do not disturb mode in win11
Article Introduction:There is a Do Not Disturb mode in our win11 system. After it is turned on, you will not be disturbed by messages within a set period of time. It is a very good feature for those who need to leave the computer on for a long time. However, many people don’t know how to open it. This win11 tutorial will tell you how to use it. Users in need can go to the PHP Chinese website to see the complete steps! How to enable Do Not Disturb mode in win11: 1. Start running with the "win+R" shortcut key, enter "gpedit.msc", and click "OK" to open it. 2. After entering the Group Policy Editor interface, click the "User Configuration - Administrative Templates - Notification" option in the left column. 3. Then find "Set Daily Do Not Disturb Time Start Time" on the right and double-click to open it. 4. Then
2024-09-09
comment 0
299
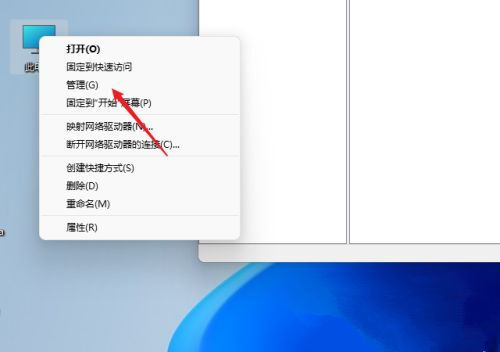
How to enable shared files in win11 How to enable shared folders in win11
Article Introduction:The shared file function in our Windows system can be used by many people to improve efficiency. However, some friends who use win11 system do not know how to turn on this function. This issue of win11 tutorial will teach you how to enable it. Follow me next to see the complete setup steps! Method to open win11 shared folder 1. For security reasons, we'd better set up a special shared account. First, right-click "This PC" on the desktop to open the "Settings" menu. 2. Then open the Computer Management window, open "System Tools" - "Local Users and Groups" - "Users", right-click on the user to open "New User". 3. Open the create new user window, set a user name and password yourself, and click "User Login"
2024-09-10
comment 0
1001
