
The lack of desktop icons in Windows 11 bothers many users and makes it difficult to quickly access files and programs. In order to solve this problem, PHP editor Banana specially compiled a tutorial to introduce in detail how to add desktop icons in Windows 11. This article will guide you step-by-step through the addition process, ensuring your desktop is once again organized and easy to use.
Step one: If you want to add a system icon, you can right-click a blank space on the desktop and open [Personalization] settings.
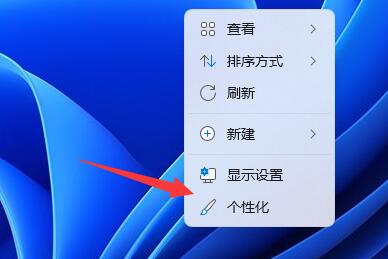
Step 2: Then find and click the [Theme] option under the list on the right.

The third step: Then enter the [Desktop Icon Settings] under the relevant settings
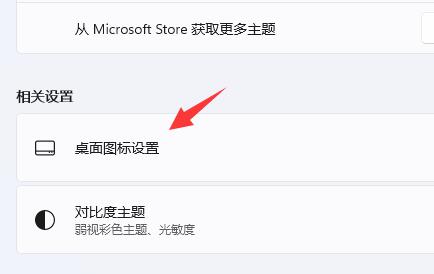
The fourth step: Finally check the desired system icon, and then click [OK] to save.
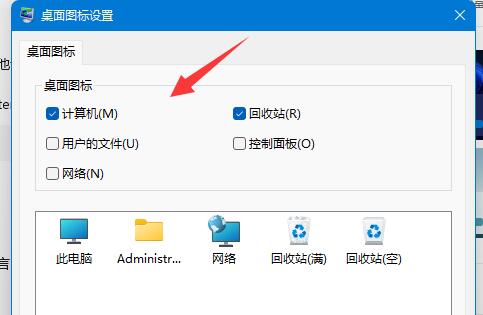
2. Software/File Icon
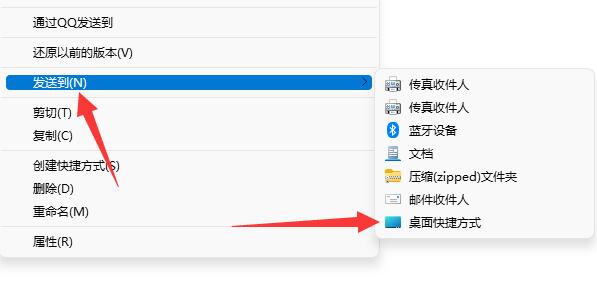
Step 1: If you want to add a software or file icon, just find the corresponding file, right-click it and select [Show more options] 】
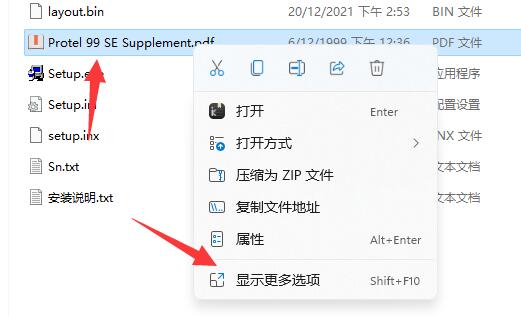
Step 2: Then click [Desktop Shortcut] in [Send To].
The above is the detailed content of How to add desktop icons in win11_How to add desktop icons in win11. For more information, please follow other related articles on the PHP Chinese website!
 There is no WLAN option in win11
 How to skip online activation in win11
 Win11 skips the tutorial to log in to Microsoft account
 How to open win11 control panel
 Introduction to win11 screenshot shortcut keys
 Windows 11 my computer transfer to the desktop tutorial
 Solution to the problem of downloading software and installing it in win11
 How to skip network connection during win11 installation


