
Elliptic curve drawing puzzle Drawing elliptic curves is a common mathematical task, but it is not intuitive to draw using software such as Geometry Sketchpad. Geometry Sketchpad offers a wealth of tools, but for beginners, it can be confusing. In order to solve this problem, PHP editor Apple will provide you with an operation tutorial to guide you to use the geometric sketchpad to easily draw elliptic curves.
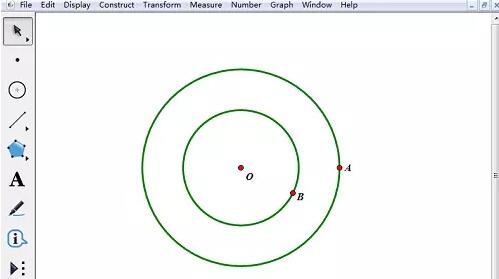
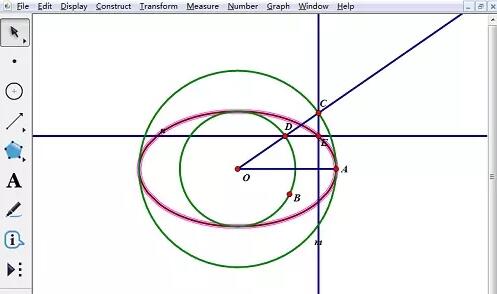
Use the circle tool to draw circles with point O as the center and passing through points A and B respectively.
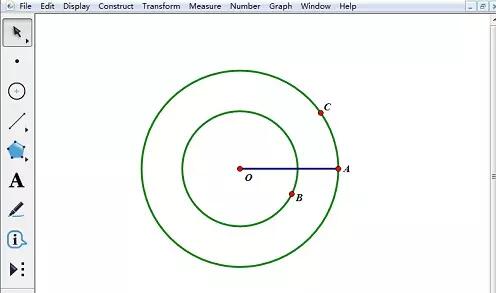
Use the line segment tool to connect OA. Select the large circle, and then select the [Construction]-[Point on Circle] command to make any point C on the large circle.
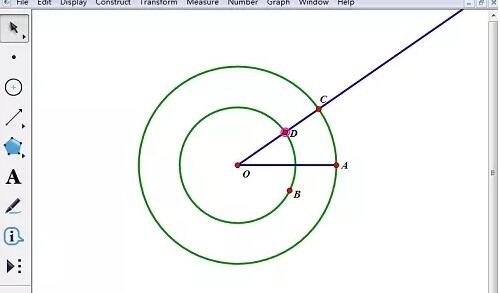
Use the ray tool to draw ray OC. Use the point tool to move the mouse pointer to the intersection of ray OC and the small circle, click the left mouse button to draw the intersection point D.
Select point C and line segment OA, select [Construction] - [Perpendicular Line] command to make a vertical line m; select point D and line segment OA, then select [Construction] - [Parallel Line] command to create parallel line n. Use the point tool to draw the intersection point E of the straight lines m and n.
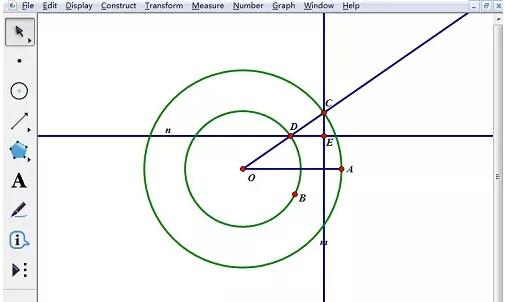
Select point E and point C in turn, then select the [Construction] - [Trajectory] command to make an ellipse as shown in the figure.
The above is the detailed content of Tutorial on how to create elliptic curves using Geometric Sketchpad. For more information, please follow other related articles on the PHP Chinese website!
 Solution to Win7 folder properties not sharing tab page
 what is vuex
 How to clean the computer's C drive that is too full
 Mathematical modeling software
 The difference between vscode and vs
 How to type the inscription on the coin circle?
 How to decrypt bitlocker encryption
 How to solve the slow download problem of Baidu Netdisk


