
php editor Yuzai will reveal to you how to use the Oil Monkey plug-in after the browser is installed, and how to add scripts to the Oil Monkey plug-in. The Grease Monkey plug-in is a powerful browser plug-in that can inject custom JavaScript scripts into web pages to enhance web page functions. After adding the Oil Monkey plug-in, users can add various scripts according to their own needs to achieve a personalized browsing experience. Below, let’s take a look at the specific steps.
Steps to add scripts to the Oil Monkey plug-in
1. Click the Grease Monkey plug-in icon in the browser--get the new script.
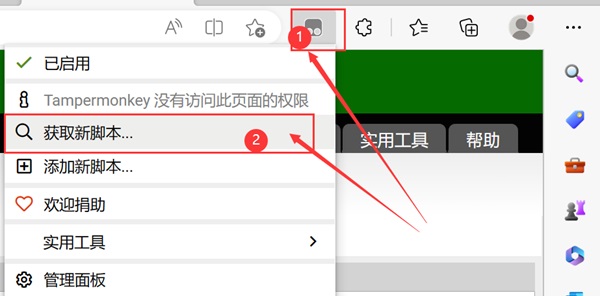
2. Search for the script you need. A keyword can usually find many scripts.
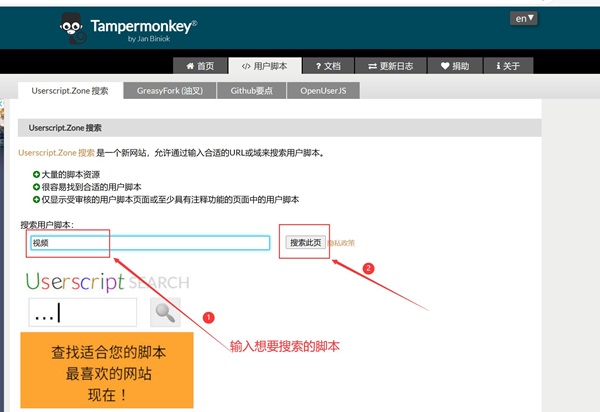
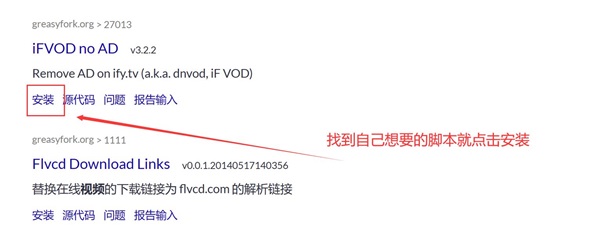
3. After finding it, click Install.
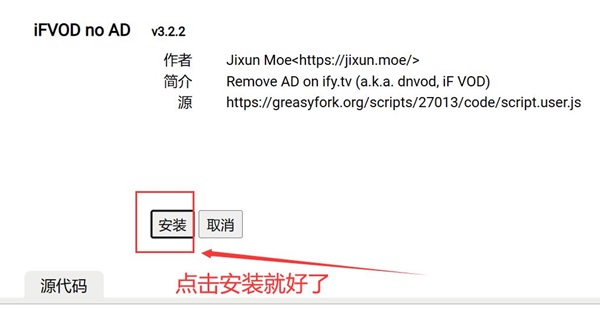
4. Click Install again.
5. Click the oil monkey icon in the upper right corner again - Management Panel.
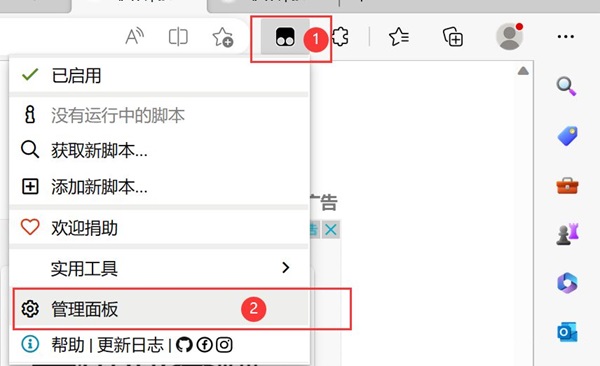
6. In the installed scripts, you can see the scripts that have been successfully installed and automatically started. You can also turn off the script here when not in use.

7. Finally, open the webpage where you want to implement the function and see if there are any extra buttons. For example, some scripts can enable convenient one-click downloading of videos, or batch unfollowing on Weibo. In short, there are many scripts with different functions that can be installed.
The above is the detailed content of How to use the Grease Monkey plug-in after installing it in the browser? How to add scripts to the Oil Monkey plug-in?. For more information, please follow other related articles on the PHP Chinese website!


