php Xiaobian Yuzai will introduce you to the detailed steps of using Photoshop to create a night sky with stars. Photoshop tools are flexible and diverse. Through step-by-step operation, you can learn how to create realistic night sky effects, making your works full of mystery and romance.
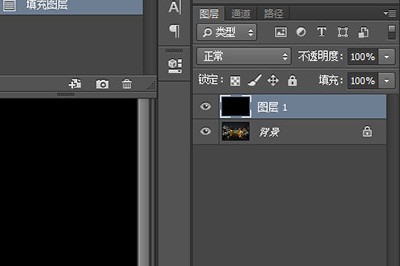
1. Import the photo into Photoshop, create a new layer 1, and press ALT DEL to quickly fill it with black.

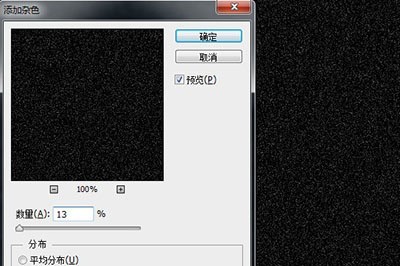
#2. Add [Filter]-[Noise]-[Add Noise] on layer 1, adjust the amount, and create the original starry sky image.

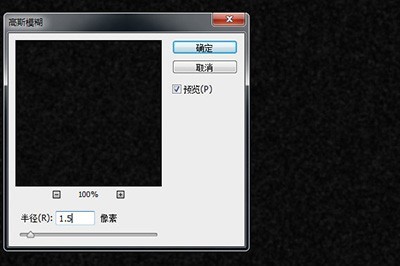
3. Add [Filter]-[Blur]-[Gaussian Blur] again, and the radius should not exceed 10 pixels.

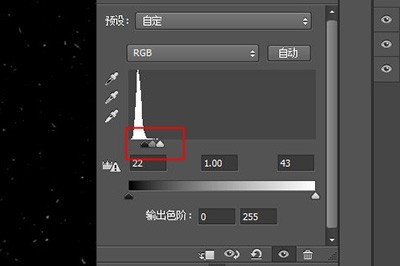
4. Click [Create a new fill or adjustment layer]-[Color Levels] below the layer, move the black, gray, and white arrows close to each other and modulate the left side until dots appear on the black screen. Until the effect of stars.

5. After making adjustments, change the blending mode of layer 1 to [Screen]. The stars in the night sky appeared.

6. Finally, create a mask on layer 1 and use the brush tool to paint other parts except the starry sky.

The above is the detailed content of Detailed steps for adding stars to the night sky using Photoshop. For more information, please follow other related articles on the PHP Chinese website!


