php editor Xigua will introduce you in detail the steps to set the path environment variable in WIN10. Configuring the correct path environment variable will help you perform command line operations more easily and improve work efficiency. By following the simple steps below, you will be able to easily change and manage the path environment variable in the WIN10 system, making your work more efficient and convenient.
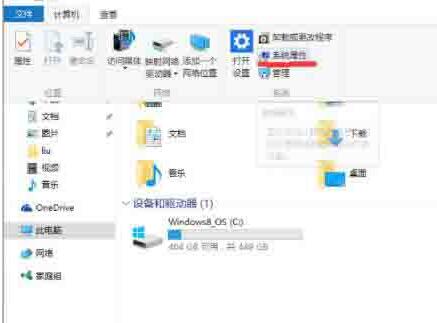
1. Click the [Computer] icon in the menu bar at the bottom of the screen.

2. Click the [Computer] tab at the top of the pop-up window, and then click the [System Properties] option in the menu that appears.

3. In the new page, click [Advanced System Settings] in the left navigation bar.
4. In the pop-up page, click the [Environment Variables] button at the bottom to pop up the environment variable management page.

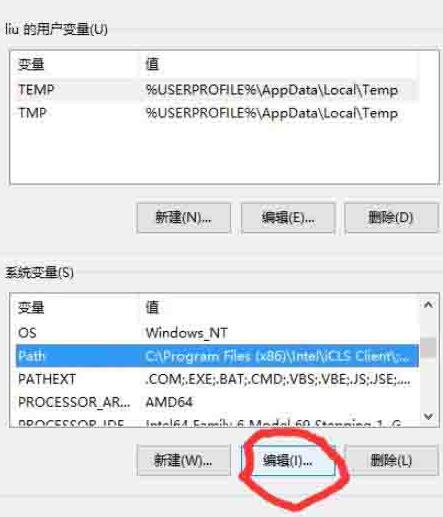
5. In the environment variable management page, find the Path variable in the lower list box, click to select it, and click the [Edit] button below.

6. The pop-up page has two input boxes. Add the path you want to add at the end of the [Variable Value] input box. The format is [;full path], that is, a semicolon. Add path. Note that the semicolon here must be an English semicolon, such as the part I added after installing Python 2.7.

7. Click OK to complete the setting.
The above is the detailed content of Detailed steps to set path environment variable in WIN10. For more information, please follow other related articles on the PHP Chinese website!
 win10 bluetooth switch is missing
 Why do all the icons in the lower right corner of win10 show up?
 The difference between win10 sleep and hibernation
 Win10 pauses updates
 What to do if the Bluetooth switch is missing in Windows 10
 win10 connect to shared printer
 Clean up junk in win10
 How to share printer in win10


