
php editor Xiaoxin will introduce you in detail how to cut out pictures in excel. Cutout is a common image processing technique that can help us separate objects in pictures from the background. In excel, although there is no special cutout tool, we can use some techniques and methods to achieve this goal. Next, let us learn the specific steps of cutting out images in Excel!
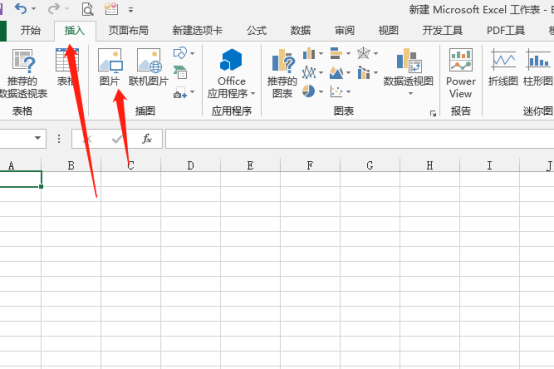
1. First, we turn on the computer, create and open a blank excel table, and click the insert option in the main menu bar, and then click the picture logo.
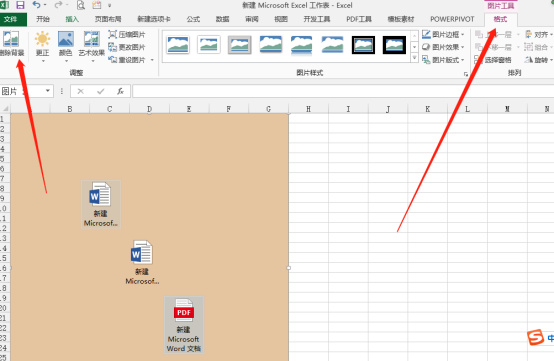
2. Subsequently, the Insert Picture dialog box pops up. We open the picture to be inserted at the specified location, then click the picture and click the Insert command. At this time, the file will automatically Switch to the format option in the picture tool, and in the tool on the left, click the Delete Background command.
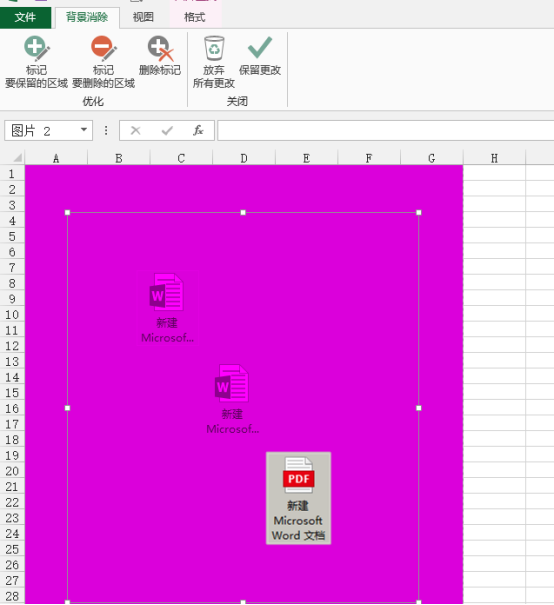
#3. A rectangular frame appears. Adjust the operating object by adjusting the rectangular frame and select the overall area you want to display.
#4. We then click the button to mark the area to be retained and mark it in the view. There is a plus sign in the middle of the dotted line. We click the mouse on the content that needs to be retained.
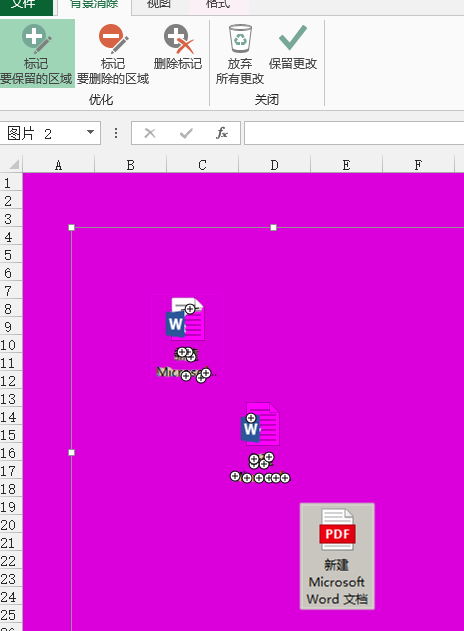
#5. Click Delete Background, so that the unnecessary background will be deleted, leaving only the marked part.
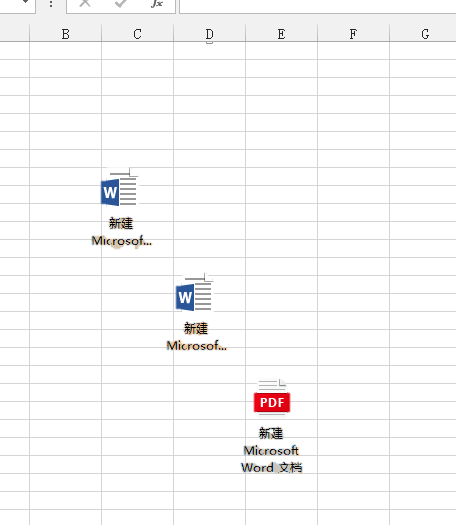
#6. Click the Start menu, select the color palette in the font options, and select the color of the new background to modify the background of the picture.
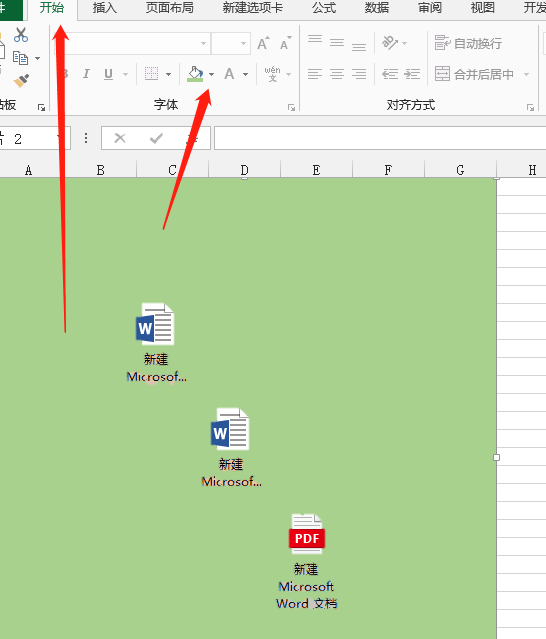
We will simply share the excel cutout operation here. Maybe our picture cutout is not so detailed, but if we handle it more carefully, we can also make comparisons. Exquisite effect. If you are interested, you can try this method to cut out pictures!
The above is the detailed content of How to cut out pictures in excel. For more information, please follow other related articles on the PHP Chinese website!
 Compare the similarities and differences between two columns of data in excel
 excel duplicate item filter color
 How to copy an Excel table to make it the same size as the original
 Excel table slash divided into two
 Excel diagonal header is divided into two
 Absolute reference input method
 java export excel
 Excel input value is illegal


