
This tutorial carefully written by php editor Banana will introduce you in detail how to create a drop-down menu in Microsoft Excel 2020. Through this article, you will learn the specific steps to create a drop-down menu, helping you process data more efficiently and improve work efficiency in Excel. Following this tutorial, you will easily master the skills of making drop-down menus in Excel 2020, making your data processing work easier and faster.
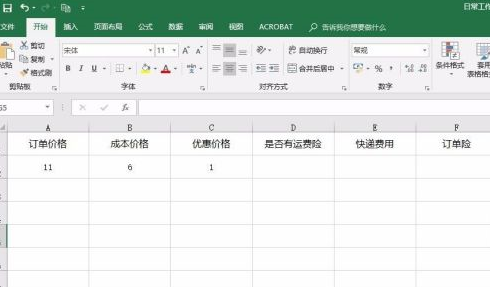
First, create a new Microsoft Excel document, open it and enter the relevant data. As shown in the picture:
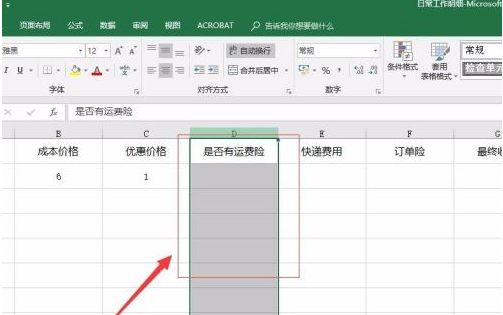
Next, select the area in the data table where you want to create a drop-down menu. As shown in the picture:
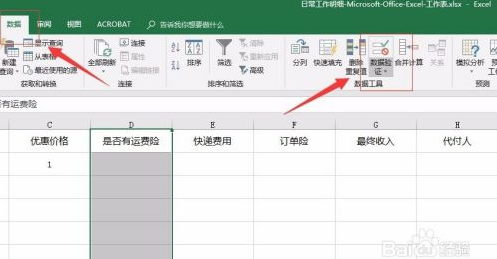
Next, find "Data" in the menu bar and find "Data Validation" under data. As shown in the picture:
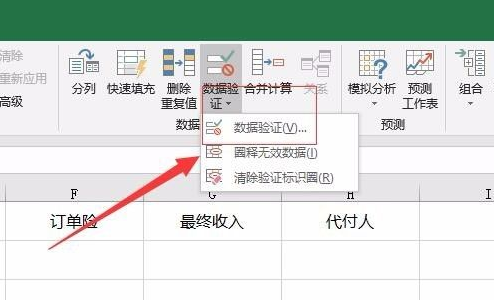
Then, select "Data Validation" from the drop-down menu that pops up for data validation. As shown in the picture:
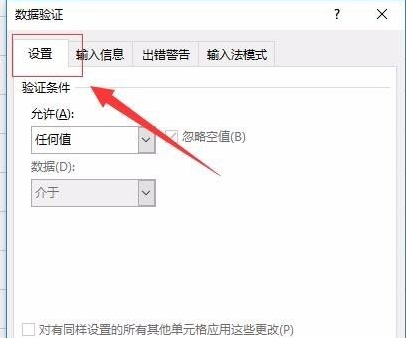
Then, in the pop-up data verification interface, find the Settings tab. As shown in the picture:
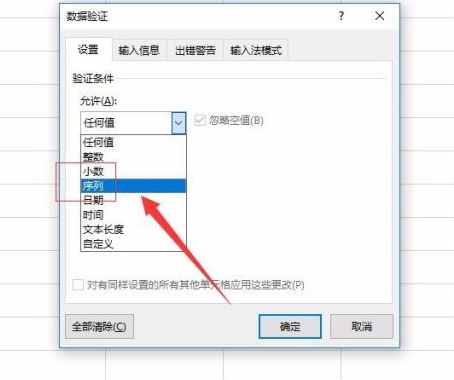
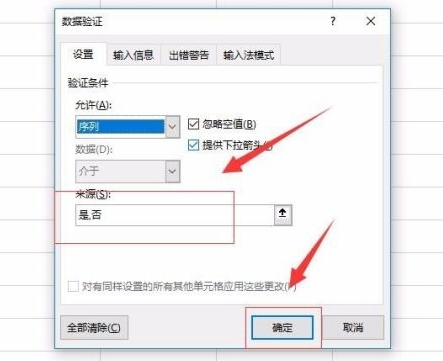
Then, select "Sequence" in the "Allow" option, fill in the content you want in the source, and when finished, click "OK" below (Note: Enter "," in English between different content). As shown in the picture:
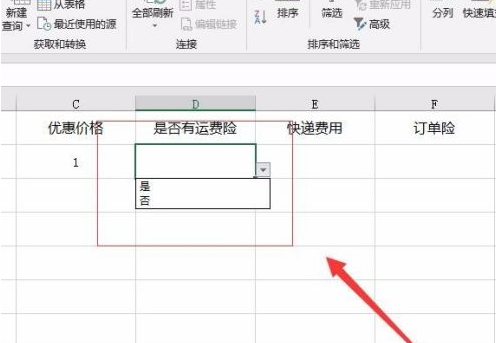
This completes the creation of the drop-down menu, and you can see the corresponding effect in the area we just selected. As shown in the picture:
The above is the detailed content of How to create a drop-down menu in Microsoft Excel 2020 - Specific operations to create a drop-down menu in Microsoft Excel 2020. For more information, please follow other related articles on the PHP Chinese website!


