Home > Software Tutorial > Computer Software > How to add borders to pictures in PS. Tutorial on how to add borders.

How to add borders to pictures in PS. Tutorial on how to add borders.

WBOY
Release: 2024-02-13 18:57:33
forward
1678 people have browsed it

php editor Xigua will give you the answer. Adding borders to pictures is a common beautification effect that can make the pictures more prominent and attractive. If you want to add a border to an image, there are several ways to choose from. A simple way is to use Photoshop software to easily add picture borders by choosing the appropriate tools and settings. This article will introduce you in detail the method and steps of adding borders to pictures in PS, so that you can easily master this technique. Whether you are a beginner or an experienced PS user, this tutorial can help you quickly add image borders.

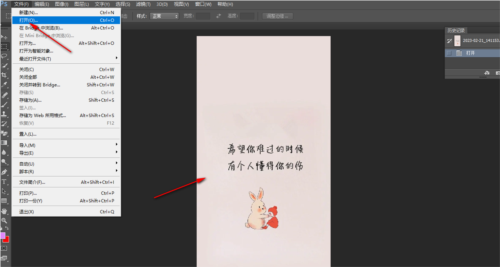
First, click the [File] option in the upper left corner, and then select the [Open] button. Just import the required pictures into the local page that opens.
PS怎么给图片加边框 添加方法教程

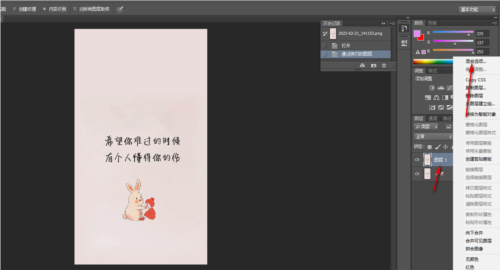
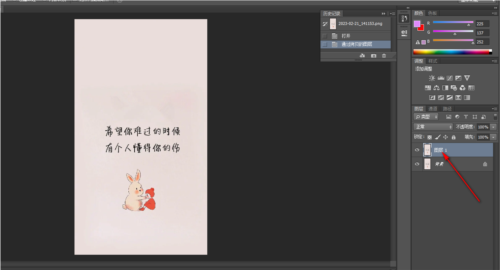
2. Press [Ctrl j] to copy a layer, or right-click the original image to copy
PS怎么给图片加边框 添加方法教程

##3. Right-click on the copied layer and select [Blending Options] in the pop-up menu option

PS怎么给图片加边框 添加方法教程

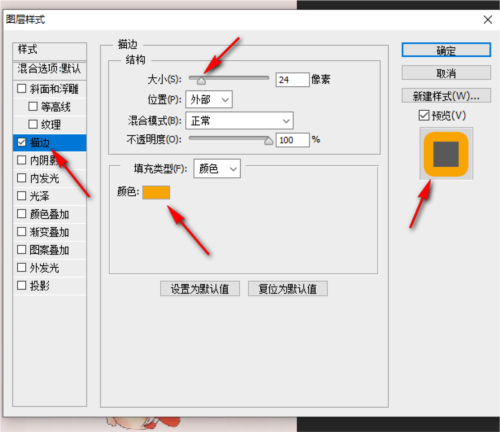
4. In [Picture Layer Style] window, click [Stroke] on the left, and then set the color, size and other parameters on the right

PS怎么给图片加边框 添加方法教程

After all parameters are set, Click the "OK" button to return to the operation surface, and you will see that the border has been added to the picture. By debugging different parameters, we can also get various borders. The above is the PS related tutorial I brought, I hope it can help everyone.

The above is the detailed content of How to add borders to pictures in PS. Tutorial on how to add borders.. For more information, please follow other related articles on the PHP Chinese website!

Related labels:
source:downxia.com
Statement of this Website
The content of this article is voluntarily contributed by netizens, and the copyright belongs to the original author. This site does not assume corresponding legal responsibility. If you find any content suspected of plagiarism or infringement, please contact admin@php.cn
Popular Tutorials
More>
Latest Downloads
More>
Web Effects
Website Source Code
Website Materials
Front End Template