php editor Apple introduces you a simple and effective method to disable the delayed startup function of Windows 10 computers. Delayed startup is a default setting of Windows 10 system, which is designed to improve the startup speed of the system. However, for some users, delayed startup may cause problems such as stuttering during startup or slow program loading. Therefore, disabling delayed startup becomes a common requirement. Next, let us learn how to turn off delayed startup settings.
Delayed startup disabling method:
1. "Win R" shortcut key to start running, enter "regedit" and press Enter to open.
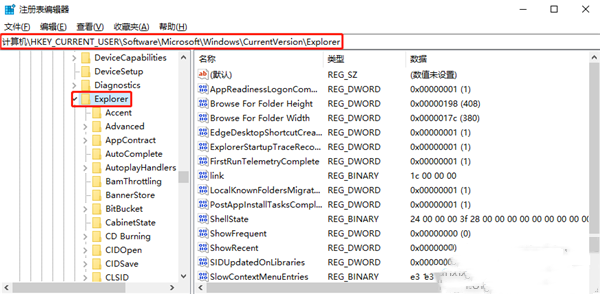
2. After entering the registry editor interface, copy and paste "HKEY_CURRENT_USER\Software\Microsoft\Windows\CurrentVersion\Explorer" into the address bar above and press Enter to locate it.

3. Right-click "Explorer", select "New" a "item", and name it "Serialize".

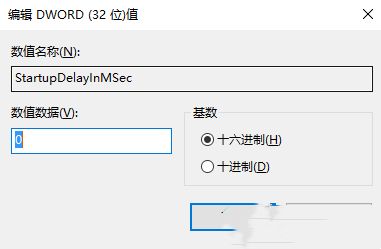
4. Click "Serialize", right-click the blank space on the right, select "New" a "DWORD value", and name it "StartupDelayInMSec".

5. Double-click to open "StartupDelayInMSec", change the "numeric data" in the window to "0", and finally click OK to save.

The above is the detailed content of How to disable delayed startup on Windows 10 computer? How to turn off delayed startup settings in win10. For more information, please follow other related articles on the PHP Chinese website!
 win10 bluetooth switch is missing
 Why do all the icons in the lower right corner of win10 show up?
 The difference between win10 sleep and hibernation
 Win10 pauses updates
 What to do if the Bluetooth switch is missing in Windows 10
 win10 connect to shared printer
 Clean up junk in win10
 How to share printer in win10


