


php editor Youzi introduces a solution to a common problem - using a USB flash drive to create a Dell boot. In daily use, sometimes we need to reinstall the operating system or repair system failures, and the USB flash drive is a convenient tool. This article will introduce in detail how to use a USB flash drive to create a Dell boot to quickly start and install the system. Whether you are a beginner or a user with some computer experience, you can easily get started and make your Dell computer come alive again. Next, let’s learn about the specific steps.
Analysis reason: The motherboard BIOS setting does not open the U disk boot item, so it will not be recognized.
Method steps:
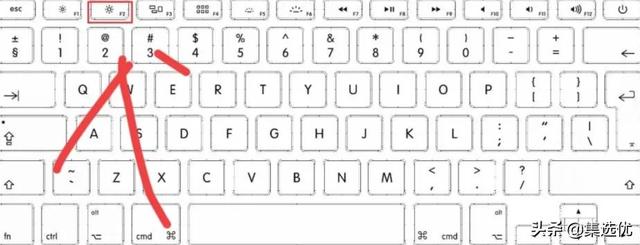
Restart the computer and keep pressing the F2 key to enter the BIOS. The buttons may be different depending on the brand, take Dell as an example.
?
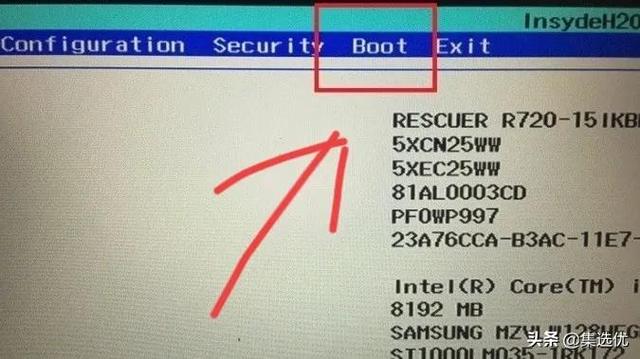
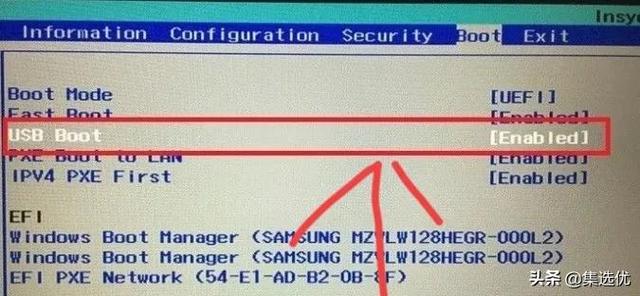
2. Then enter the bios interface, use the left and right arrow keys to select the boot option in the title option, which is the boot option.
?
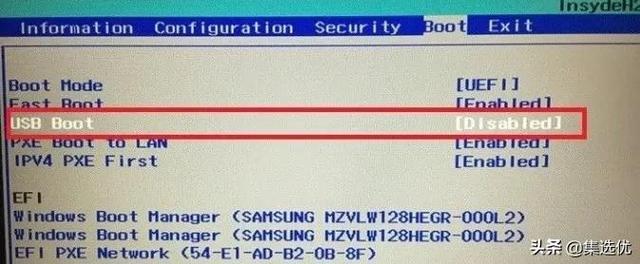
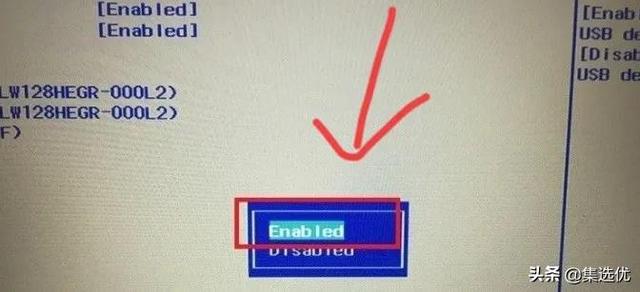
In the boot interface, you can see the usb boot option, and the following option is disabled, which is the closed state. You need to enable it first, just press Enter to select.
?
4. Then a small selection window will pop up. Select the enabled option in the options, which means enabled.
?
5. Then the usb boot option will change to the enabled option. At this time, the usb boot function will be successfully enabled and the U disk will be recognized.
?
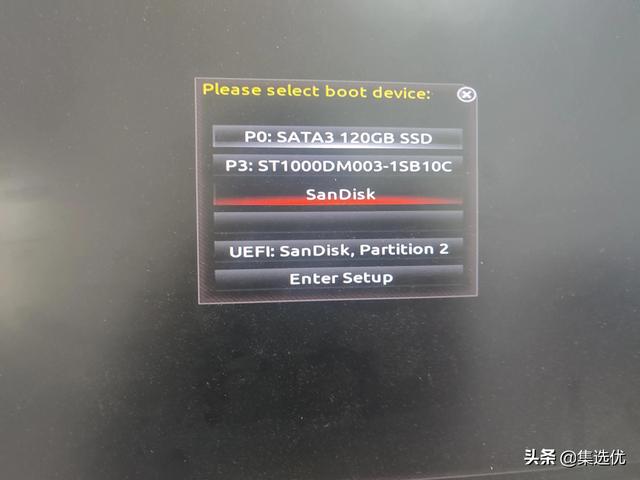
6. Finally, the computer will restart and the USB disk will be recognized and booted.
The above is the detailed content of U disk for dell boot. For more information, please follow other related articles on the PHP Chinese website!


![[Web front-end] Node.js quick start](https://img.php.cn/upload/course/000/000/067/662b5d34ba7c0227.png)


