
How to use search engines efficiently in win10 and win11 systems?Many friends don’t know how to use it. Many friends don’t know how to operate it. The editor below has compiled the detailed steps of the virtual optical drive function that comes with the win10 system. If you are interested, follow the editor and take a look below. !

First, click the "..." menu button in the upper right corner of the browser, and then click [Settings] →[Privacy, Search and Services], then slide to the bottom of the page to find the [Address Bar and Search] option.
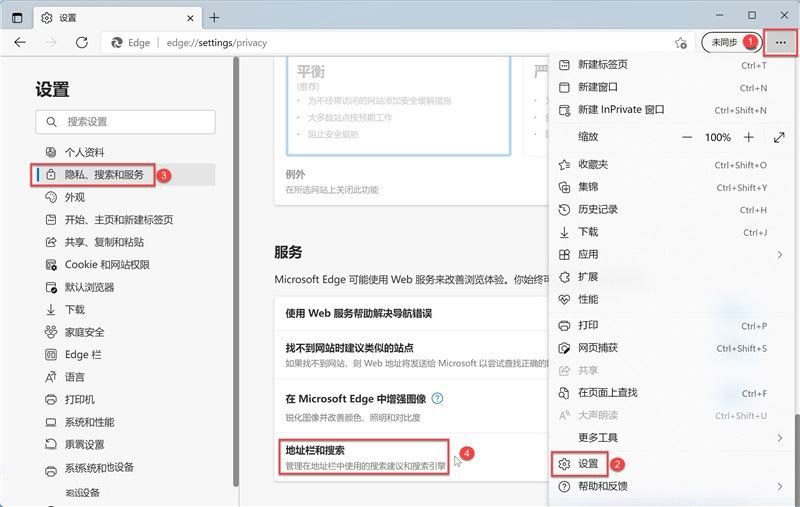
If you are careful, you may find that Microsoft has also made an annotation for this setting item (this is very considerate):
Management is in the address bar Search suggestions and search engines used in .
Based on the above content, it is not difficult to see: not only can we use the search engine to search directly in the address bar, but we can also manage and set the search engine of the address bar here.
Next, we click [Address Bar and Search] to enter the detailed settings page, as shown in the figure below. The page is divided into 3 large pieces of content:
Search suggestions, exclusive rights, and management search engine.

Let’s first look at the first section - Search suggestions. It is recommended to turn on [Use the characters I type to display search and site suggestions] and [Use the characters I type on this device] Show me suggestions from history, favorites, and other data] These two options help and guide us to quickly enter search content.
The second section - exclusive rights and interests, only applies to Microsoft's own Bing search. You can try and experience it according to your own needs, so I won't go into details here.
Let’s focus on the settings in the third section:
Click the drop-down box to the right of the [Search engine used in the address bar] option in the picture above, the default recommended option It is Bing search, we can also set it as our commonly used search engine.
Click the [Manage Search Engine] setting item in the picture above to enter the detailed setting page for this option as shown in the picture below, where we can intuitively see the search engines we usually use.
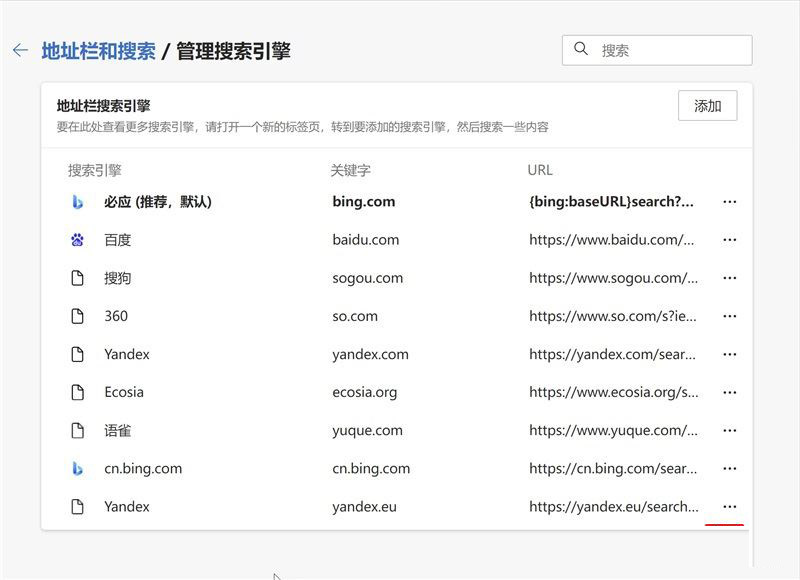 Click the "...
" menu button on the right side of a search engine. You can also see [Set as Default], [Edit ], [Delete] menu items, you can further set the search engine.
Note: The specific use of the [Add] button and [Edit] option will be discussed below.
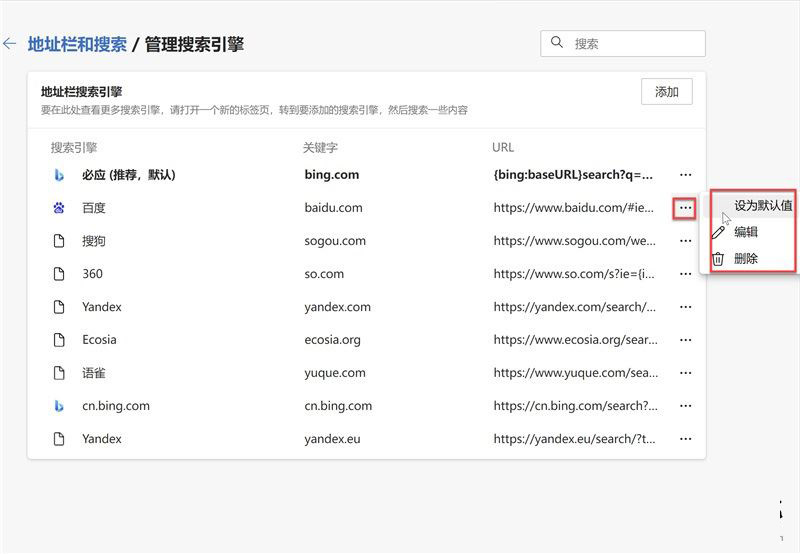 If you are careful, you will find that this setting item has also been commented:
To view more search engines here, please open one New tab, go to the search engine you want to add, and search for something.
In the next section, we will demonstrate in detail how the browser automatically collects search engine information.
To demonstrate that the browser automatically collects search engines, we need to open a new browser window (you can also press the shortcut key Ctrl N), as shown in the figure below, in the address bar of the right window
Enter the domain names of some search engines in sequence. After opening the homepage of each search engine in turn, the settings page in the left window will automatically sniff the opened search engines.
Note: If the browser cannot automatically sniff the search engine after opening the search engine homepage, you can try to search for something.
 There are so many search engines collected, so how to use them? please watch the following part.
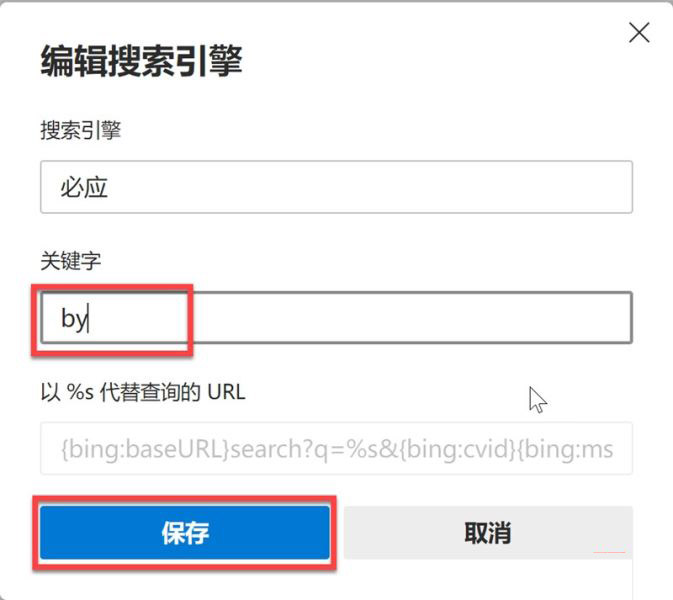
Efficient use of search engines Let’s continue the above operation. First, click the [...] menu button on the right side of the search engine and click the [Edit] option.
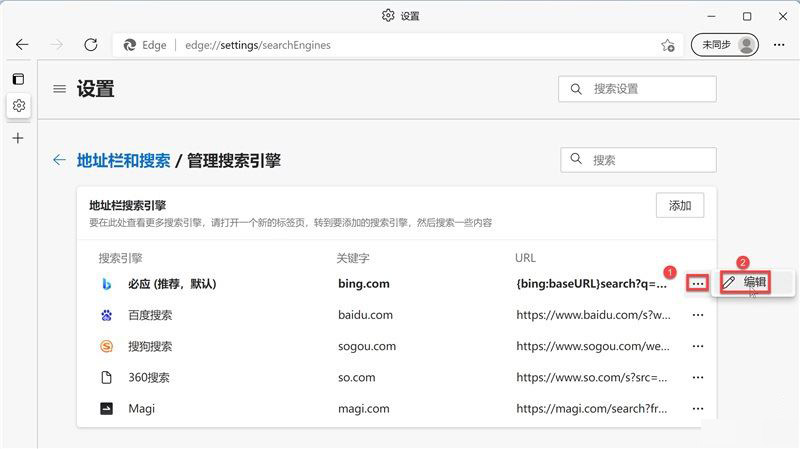 #We can easily use the first letters of Chinese Pinyin as keywords to edit. For example, for Bing, the keyword is "by", and finally click the [Save] button to save.
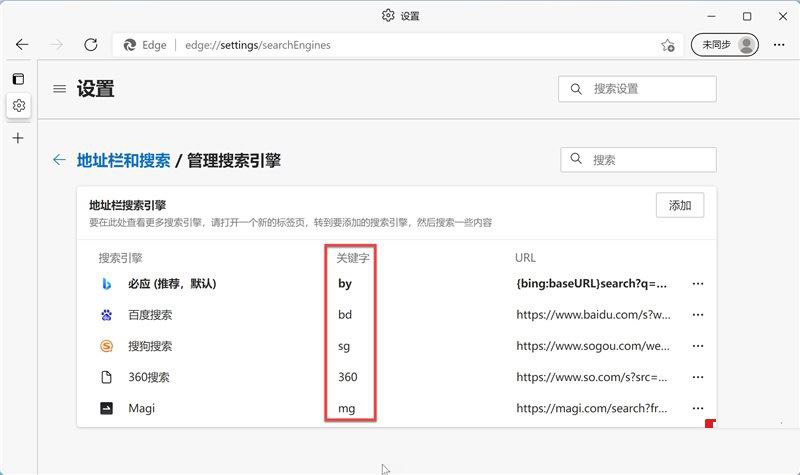
 Follow the above operations to edit the keywords of other search engines. The results are as shown in the figure below.
Note: In fact, browsers that have been used for a period of time have automatically collected certain search engines for us. We only need to edit their keywords to use them. The operation in the previous section is just to demonstrate the effect and make it convenient for everyone. better understanding.
After all the preparations are done, let’s start the operation. The operation process is: first enter the keyword in the address bar, then press the space bar (or Tab key) Enter the content you want to search for, and finally press the Enter key to search. The demonstration effect is as follows:

Where there is search, there is a search engine - manually add a search engine
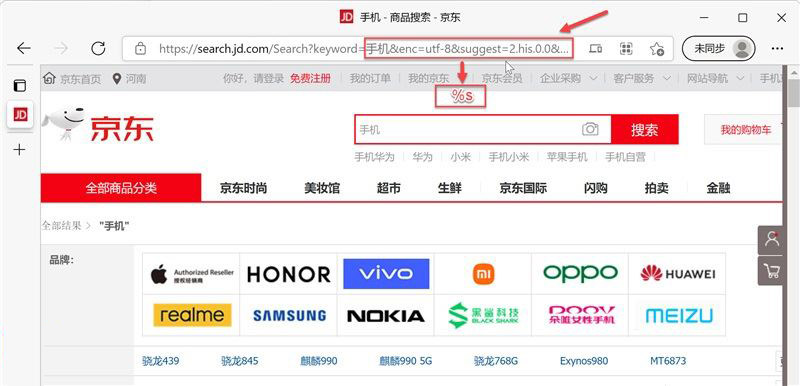
Some search engines cannot be automatically captured by browsers. We need to modify and add it manually. Let's take
as an example to search for products on JD.com. First open JD.com: https://www.jd.com/, and then enter the product you want to query, such as "mobile phone".
As shown in the figure below: Just replace the big thing after ?keyword= with %s.
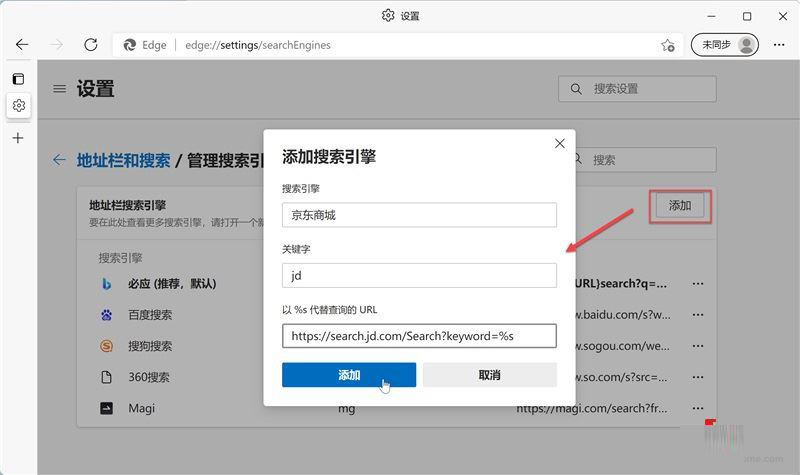
Next, you need to manually add the search engine to the browser. The specific operation is as shown in the figure below: first click the [Add] button, and then in the pop-up dialog box , modify the search engine, keywords and URL (refer to the picture above) settings, and finally click the [Add] button.
We verified the above search engine and the results are as follows:

According to the above operation, Taobao and Bing Dictionary The search engine is shown below.
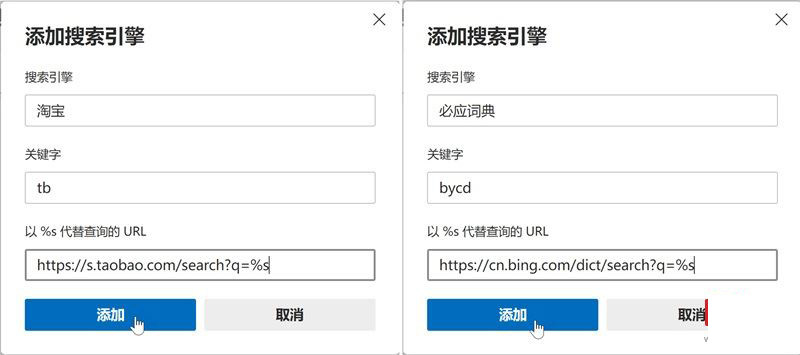
Summary: Further, we can add more commonly used search engines to the browser, so that there is no need to open its homepage when using it, just use its keywords Search quickly.
The above is the entire content of [How to use search engines efficiently in win10 and win11 systems - Techniques for efficient use of search engines in win10 and win11 systems]. More exciting tutorials are available on this site!
The above is the detailed content of How to use search engines efficiently in win10 and win11 systems. For more information, please follow other related articles on the PHP Chinese website!


