
One of the biggest draws of a Windows PC is its customizability. The number of these personalization options only increases with each passing Windows interaction (with a few exceptions). But perhaps the most important customization you make is the size of your icons on Windows 11.
Icons on Windows 11 look a little small in your face, probably a preferred design feature for better accessibility. But if you want to change it, there are a few ways. In this tutorial, we’ll learn how to make icons smaller on Windows 11, whether on the desktop, Windows Explorer, or anywhere else. So let's get started.
First, let’s see how to make desktop icons smaller with the following methods.
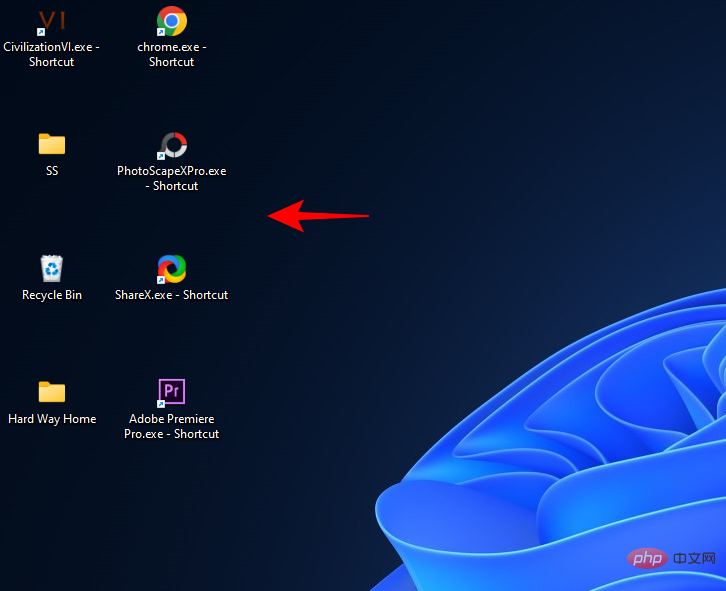
Simply right-click on the desktop and hover over the View option.
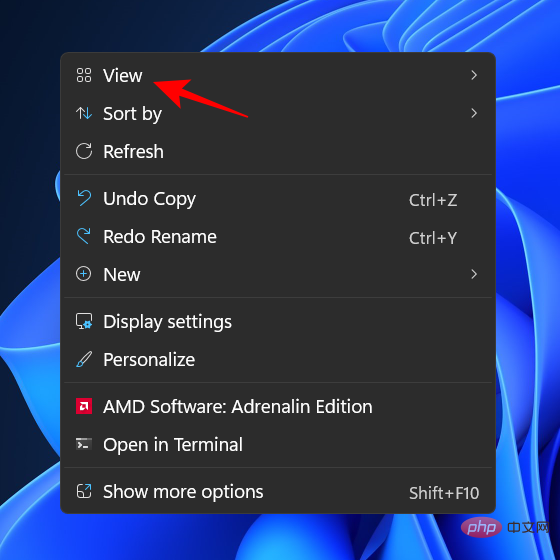
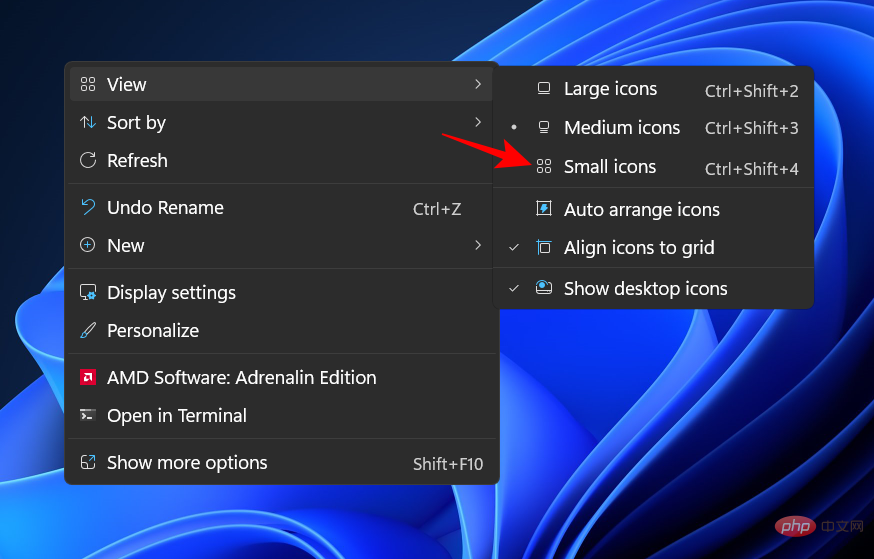
#This will display the available size options - Large Icon, Medium Icon, and Small Icon.
The default icon size is "Medium". To make it smaller, just click on the small icon.
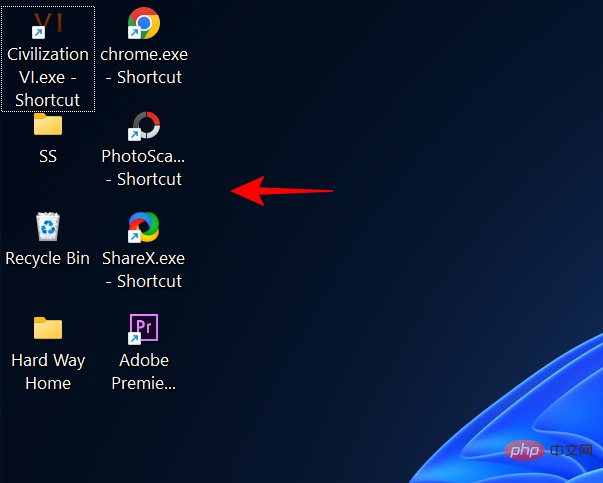
This will make your icon smaller.
Related: How to Find Large Files on Windows 11
You can also use keyboard shortcuts to achieve the same results as the previous method. You may have noticed that each of the three options has its own hotkey combination next to it. Here for quick reference:
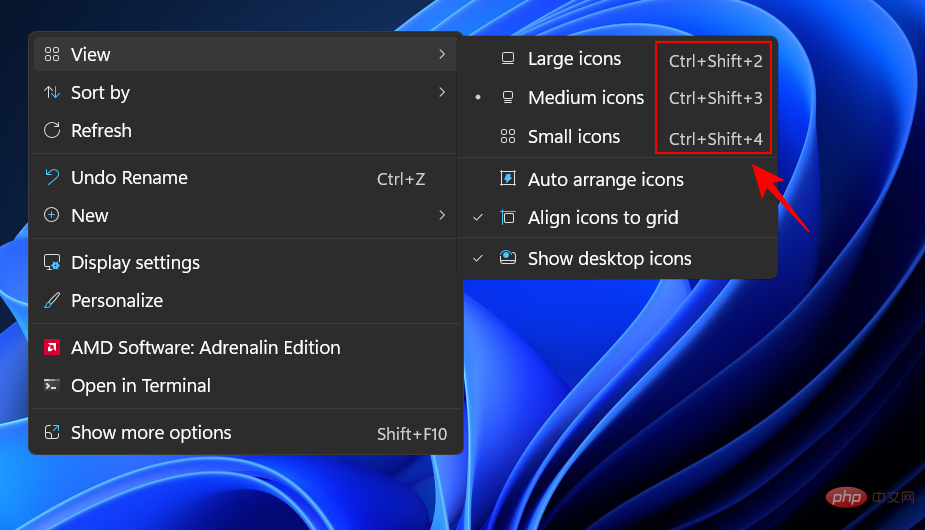
Ctrl Shift 2
Ctrl Shift 3
Ctrl Shift 4
So , to make the icon smaller, just press Ctrl Shift 4.
One of the quickest ways to change the size of an icon is to use the mouse wheel. To do this, select all icons that you want to shrink.
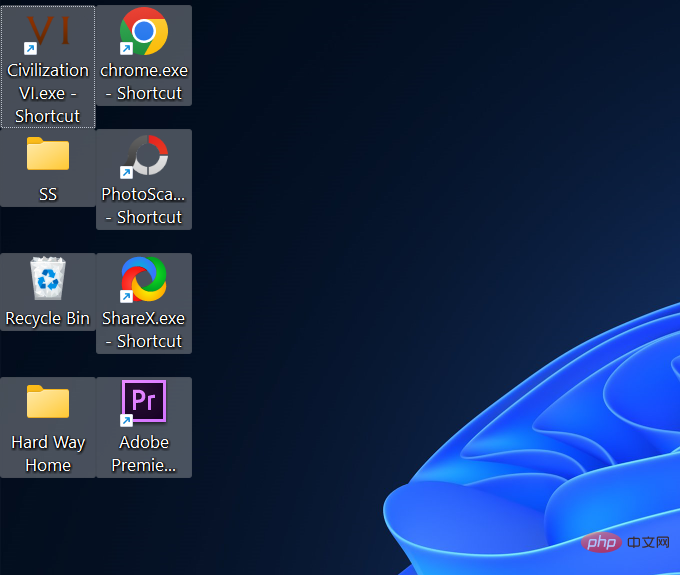
Now hold down the Ctrl button and scroll the mouse wheel down.
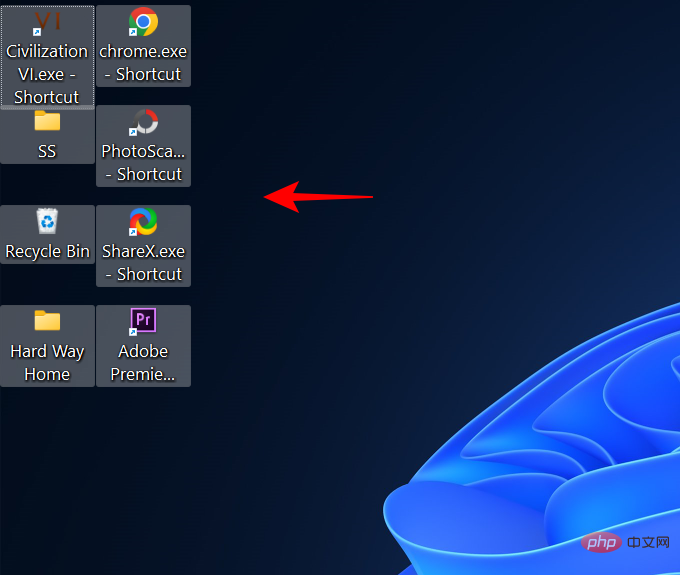
This method allows for more size changes than the first two methods, allowing you to make the icon smaller.
To increase the size, just scroll up.
Another way to make icons appear smaller is to change the display resolution and/or scaling.
By increasing the display resolution, you get a wider screen view, making icons appear smaller (or higher resolution). Here's how to change your display resolution to make icons smaller:
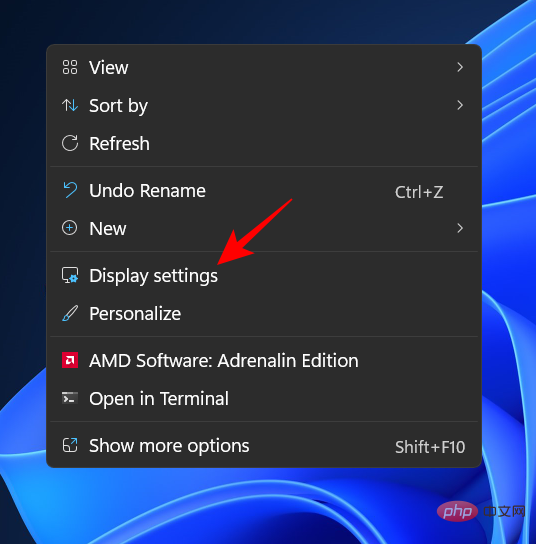
Right-click on the desktop and select Display Settings.
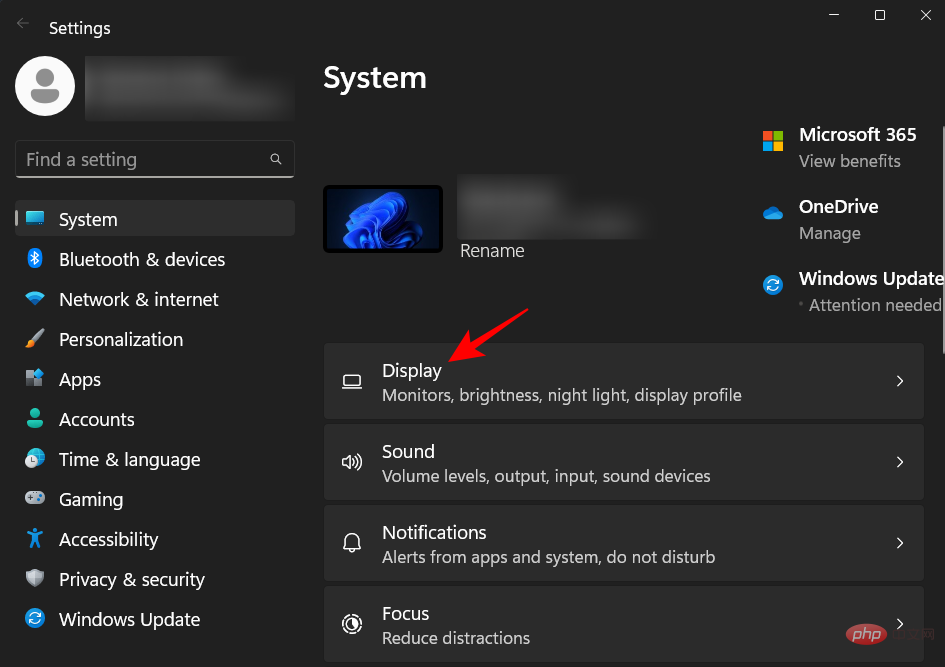
Alternatively, press Win I to open Settings. Then click to display .
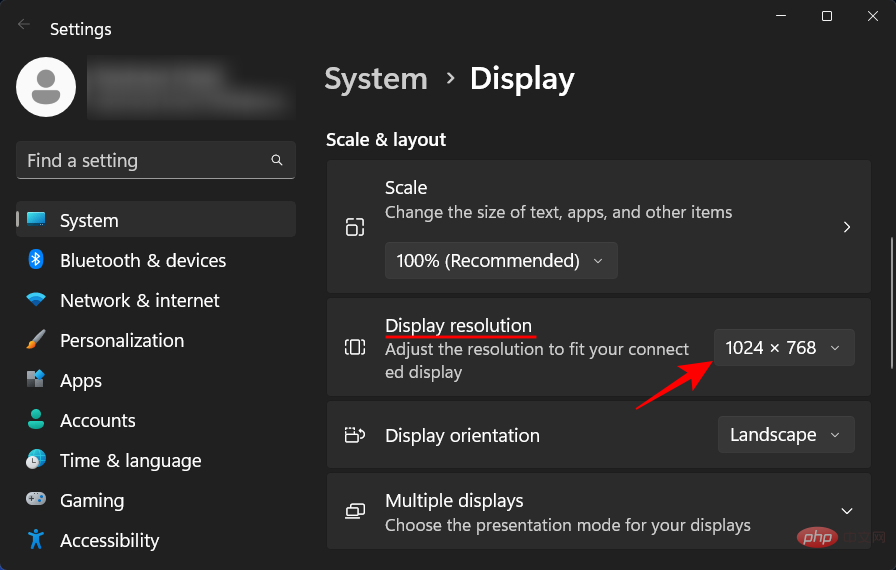
Now scroll down to Display Resolution and click on its drop-down menu.
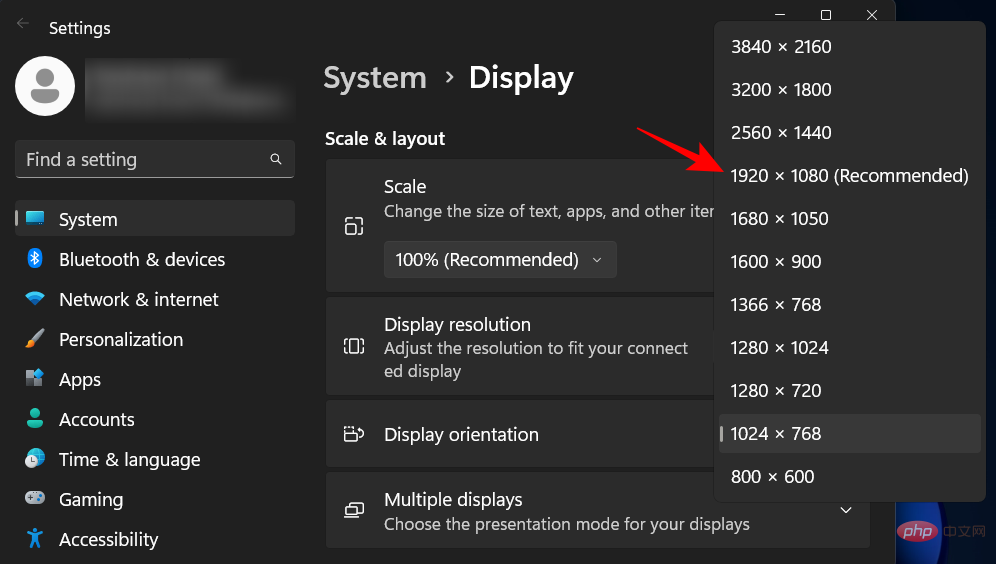
Now select the highest resolution supported by your monitor.
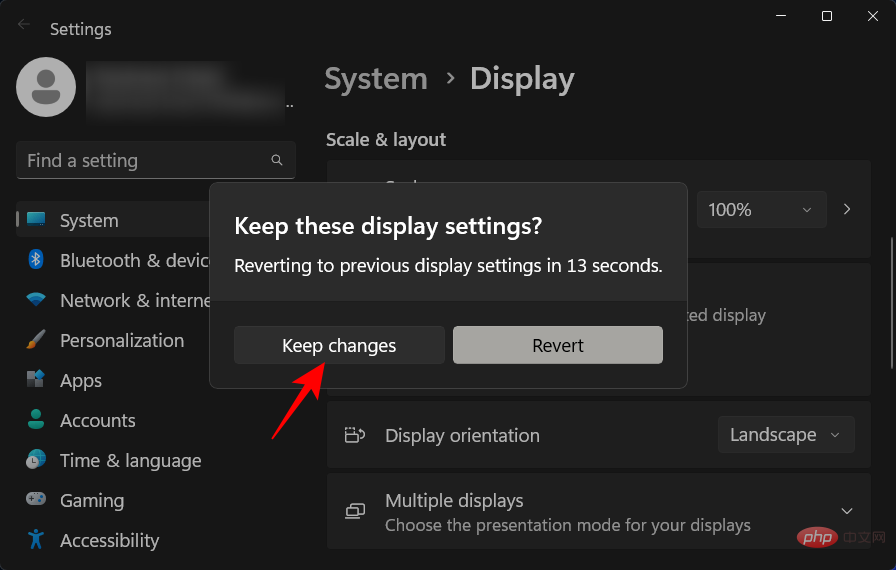
Click Keep Changes.
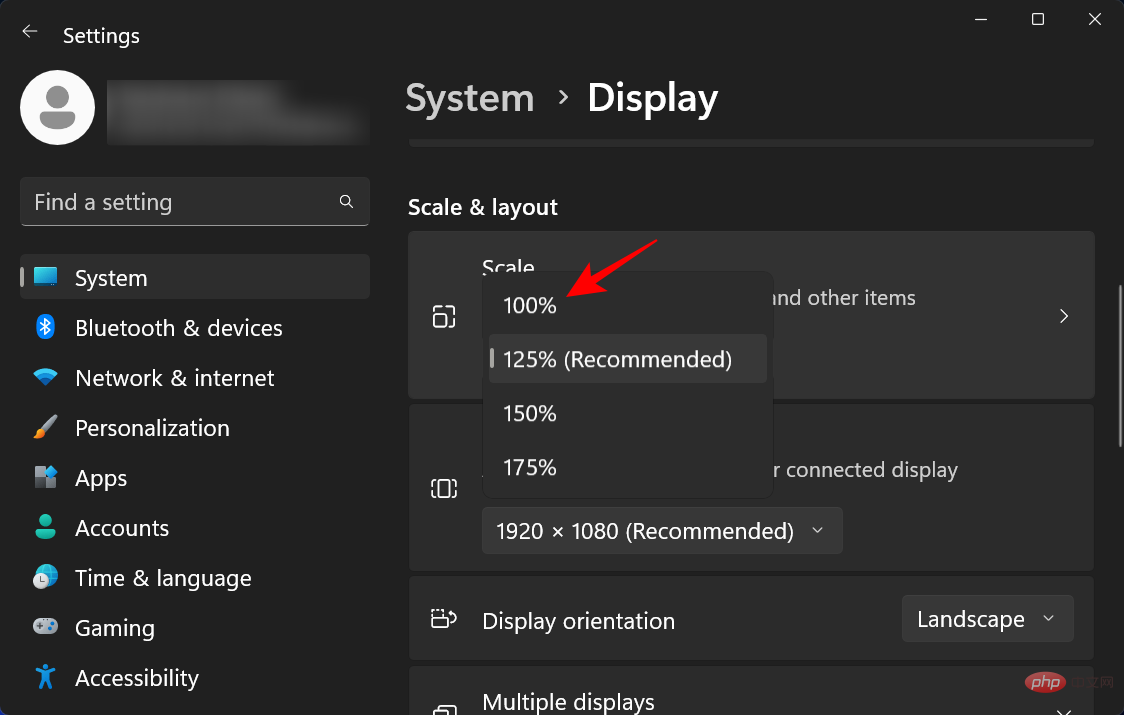
Another thing you can change to make the icon look smaller is to reduce the scaling. In the same display settings page, click the drop-down menu next to "Zoom".
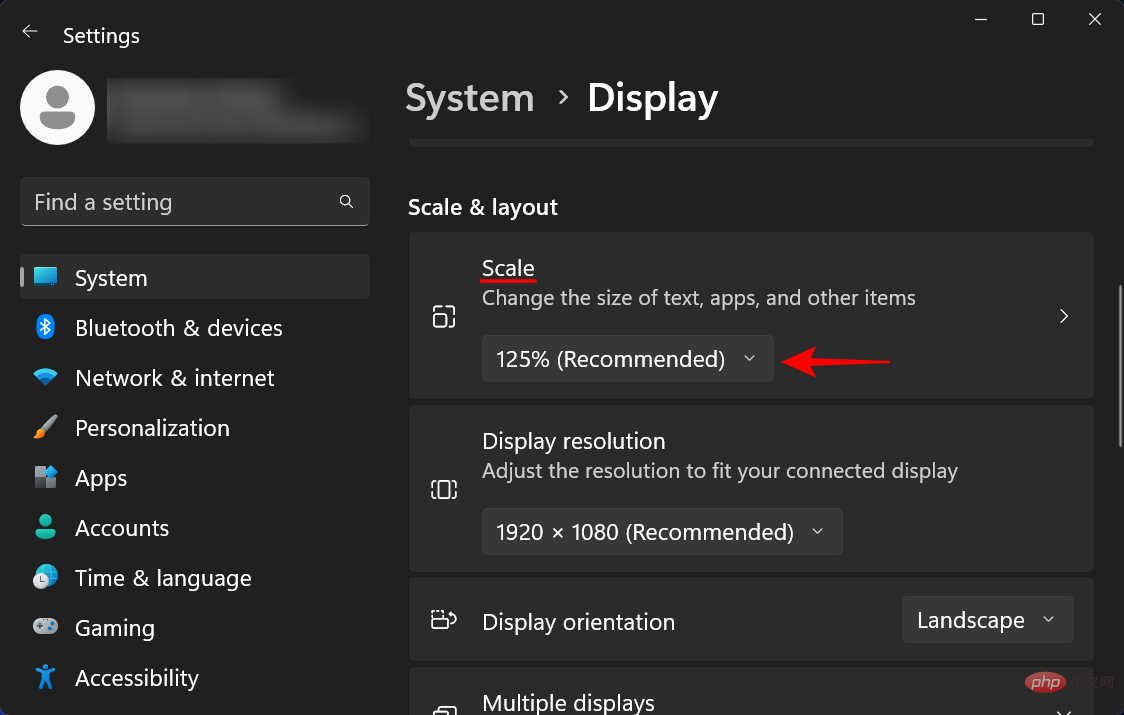
#Then select a lower zoom option.
 ##
##
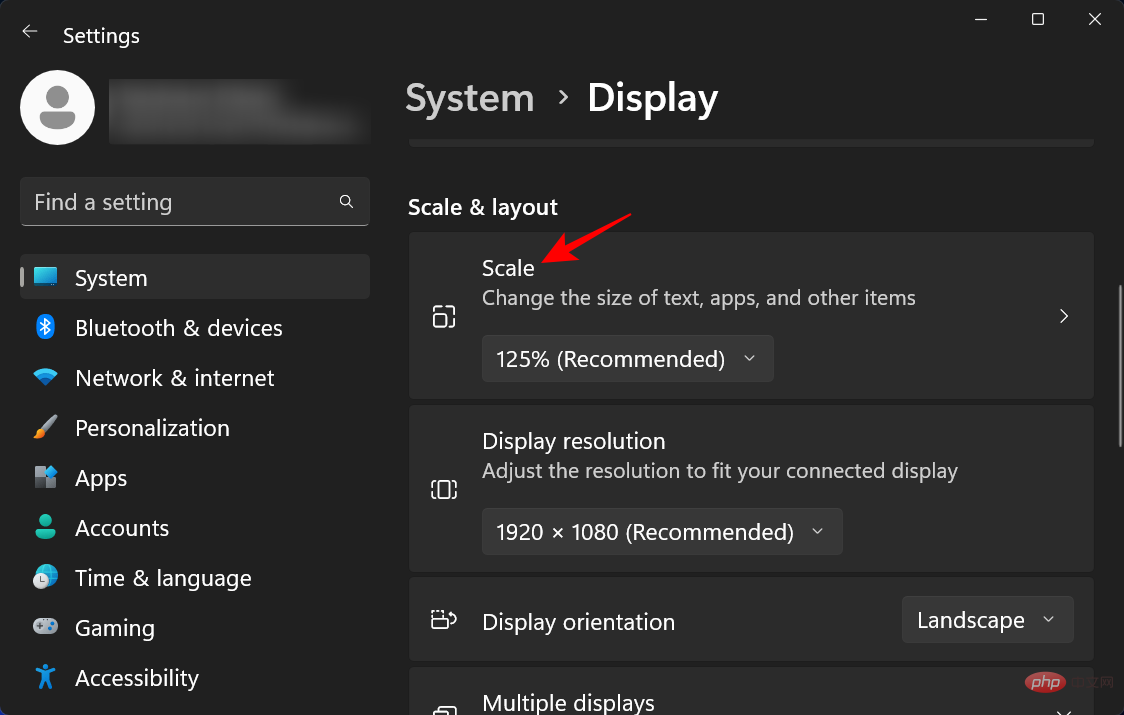
You can also enter your own custom scaling if the options provided don't quite suit you. To do this, click Zoom.
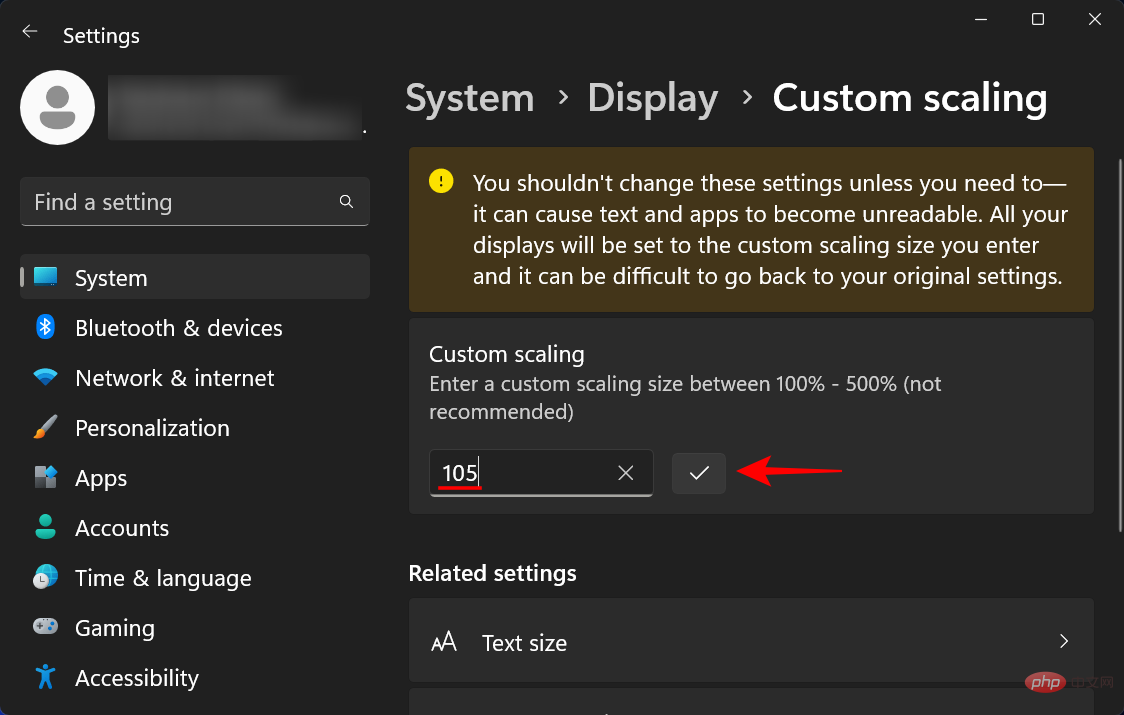
Now, next to Custom scaling, enter a new number (lower is better). If you want the icon to be smaller, make sure the percentage number is closer to 100%. Then click the tick next to it to confirm.
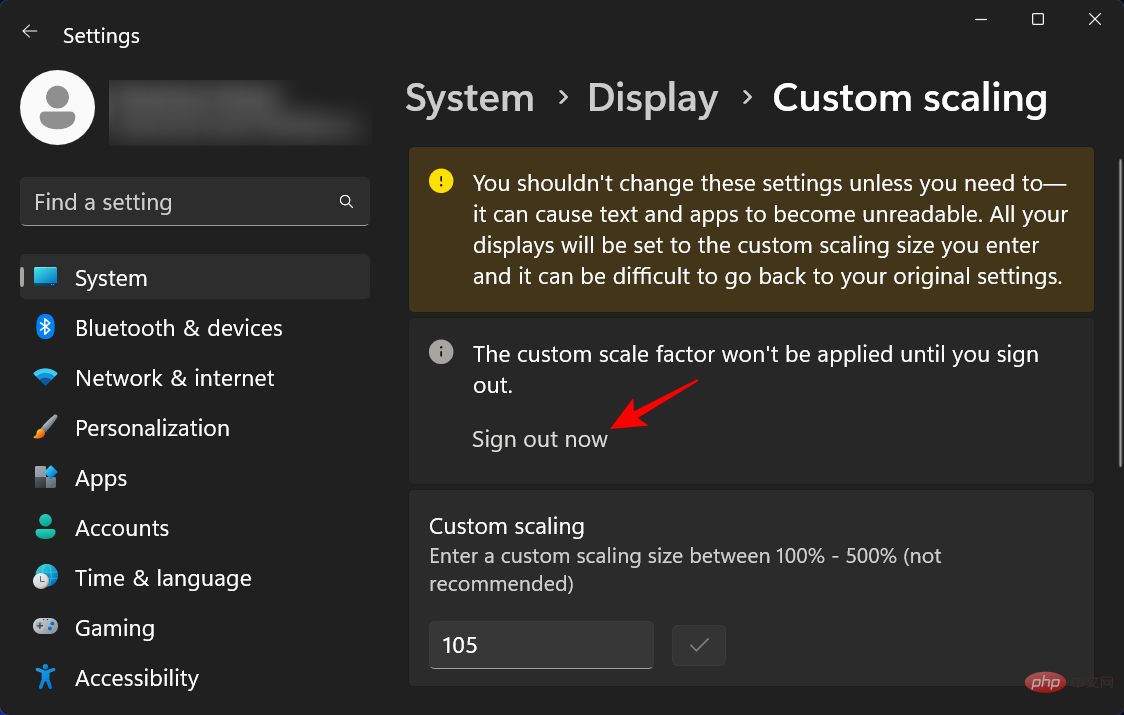
#You will receive a message telling you to exit for the changes to take effect. So click Exit now. Now log back in and your custom scaling will take effect.
The options for changing the icon size from the registry are a little more complicated than what is given above. However, if you follow the steps on the tee, you shouldn't have any problems. Here's how to do it:
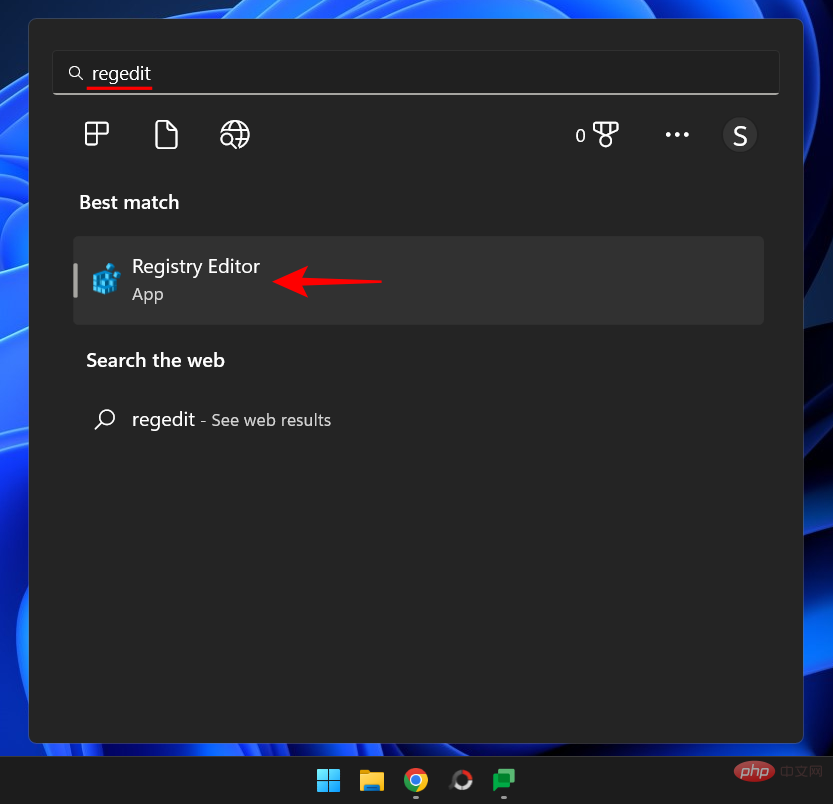
Press Start, type regedit, and press Enter.
Now navigate to the following address:
HKEY_CURRENT_USER\Software\Microsoft\Windows\Shell\Bags\1\Desktop
Alternatively, copy and paste the above into the address bar of Registry Editor.
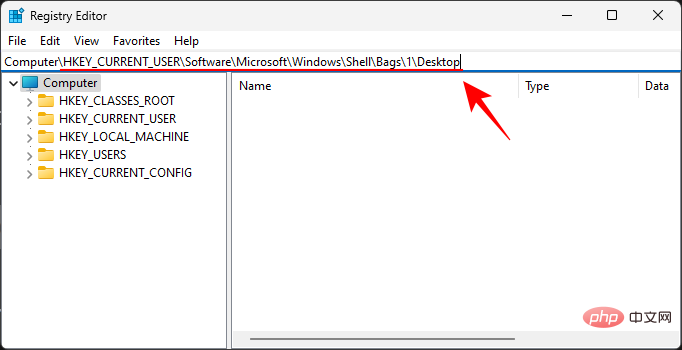
Then press Enter. Now double-click the IconSize key.
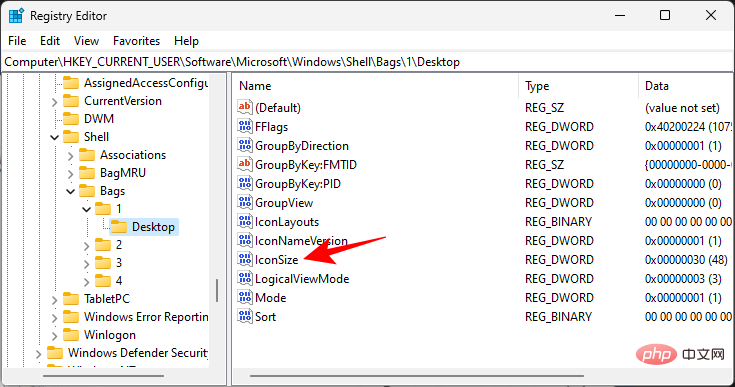
Select Decimal base.
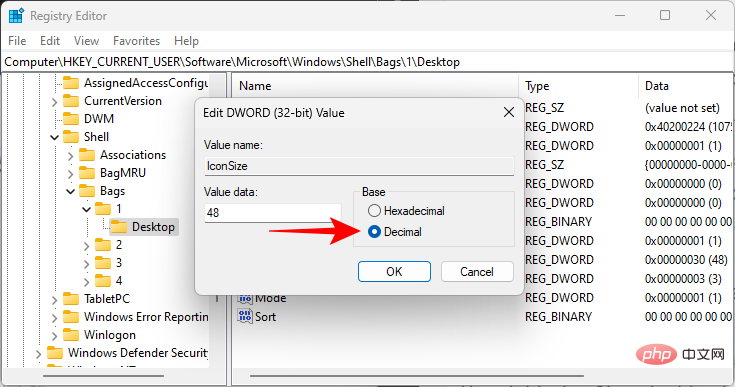
#Now enter a number that is less than the current value in the Value Data field. The icon sizes available in the desktop context menu have the following decimal values:
#32 – small icons
48 – medium icons
96 – Large Icon
256 – Extra Large Icon
However, you can enter any other number if you wish. We enter "30" as our value data to make the icon smaller.
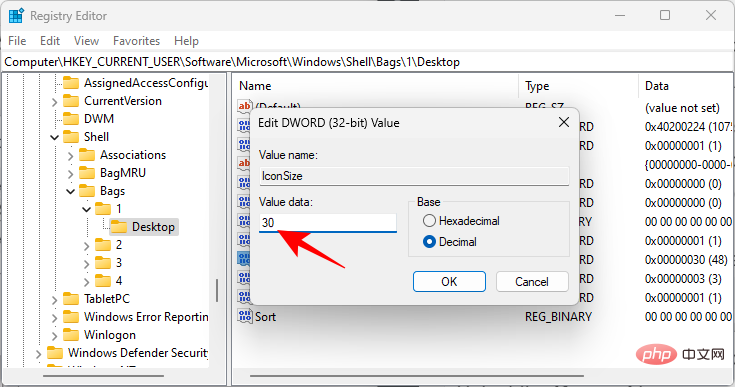
Then click "OK".
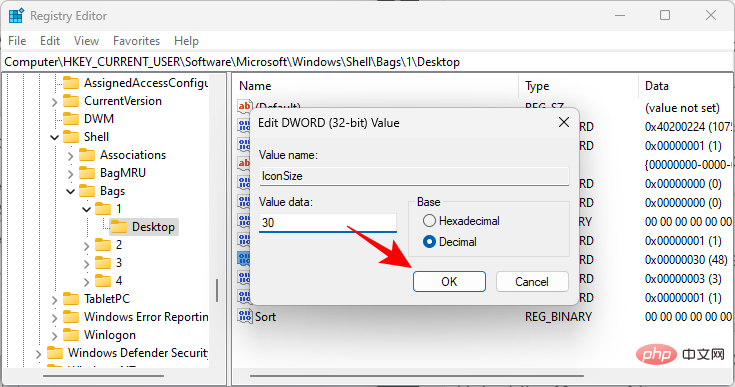
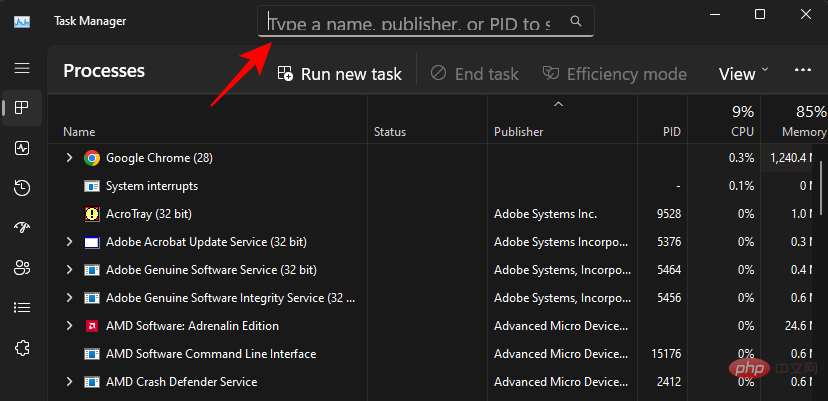
#For these changes to take effect, you must restart Windows Explorer. To do this, open Task Manager by pressing Ctrl Shift Esc.
Then click the search box at the top.
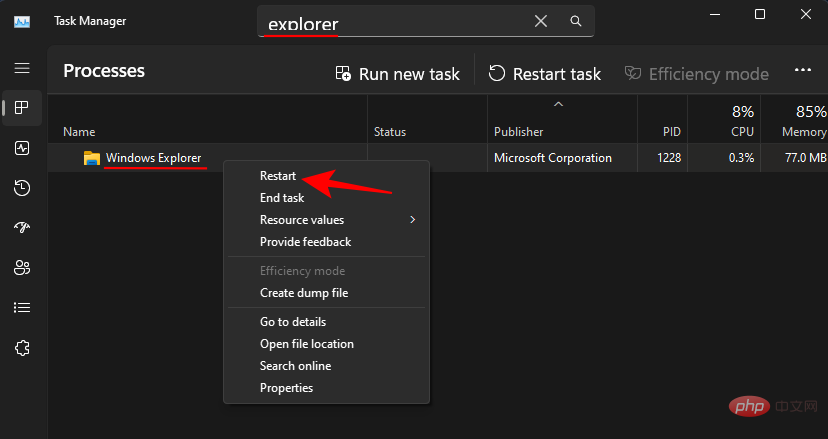
explorer, right-click the result, and select Restart.
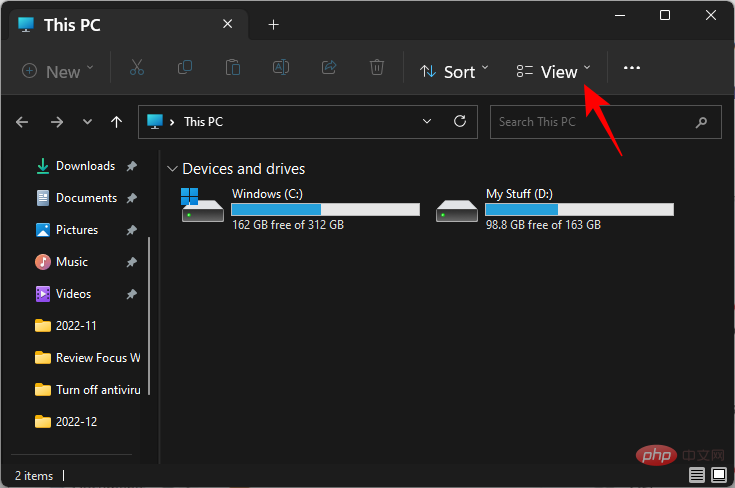
Win E and open File Explorer. Then click in the toolbar above to view .
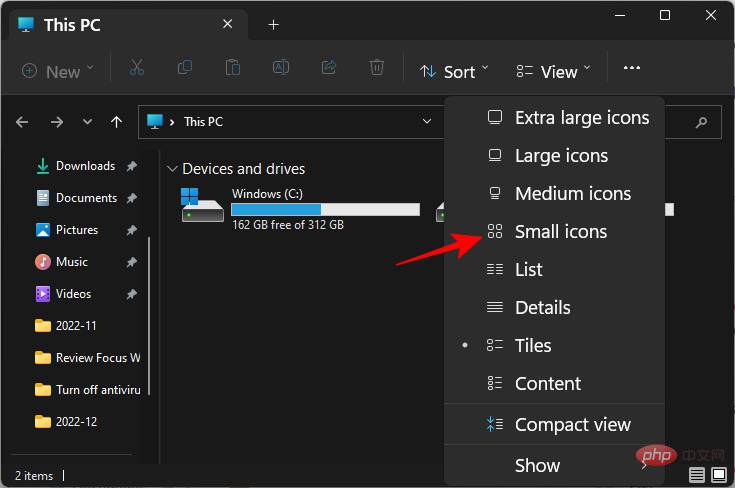
small icon.
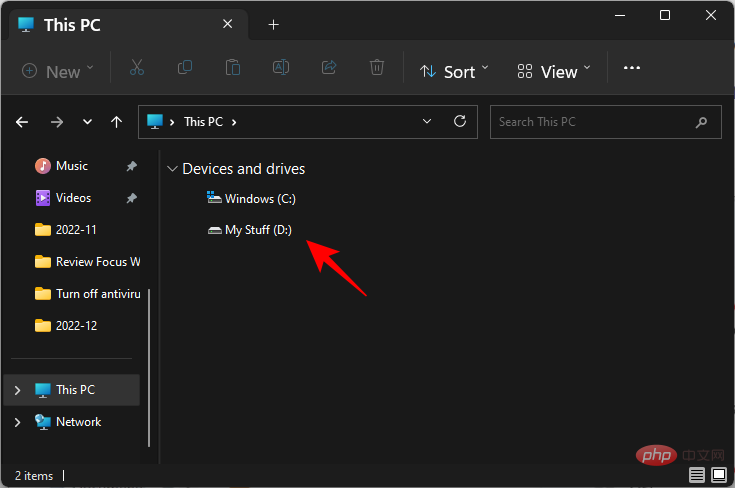
In addition to changing the size of icons, you can also shrink the taskbar to make the contents look neater and smaller. While you can remove icons from the taskbar to make it smaller, if you want to change the size of the taskbar and its icons, you'll have to use a third-party app like Stardock's Start11. Here's how to do it:
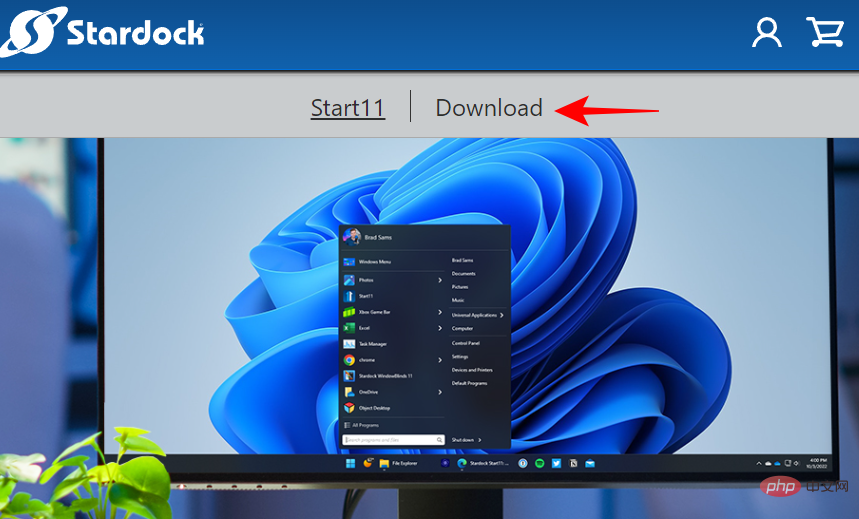
Stardock Start 11 | Download Link
Click the link above and click Download.
Then select "Free trial for 30 days".
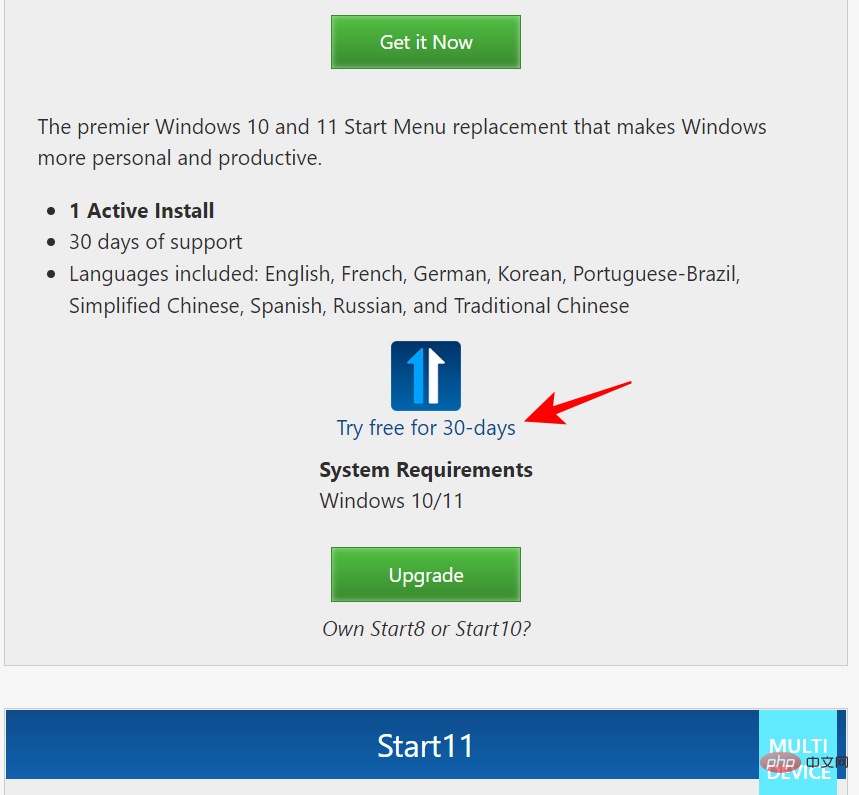
After downloading, run the installer and follow the on-screen instructions to install. Once completed, launch Start11.
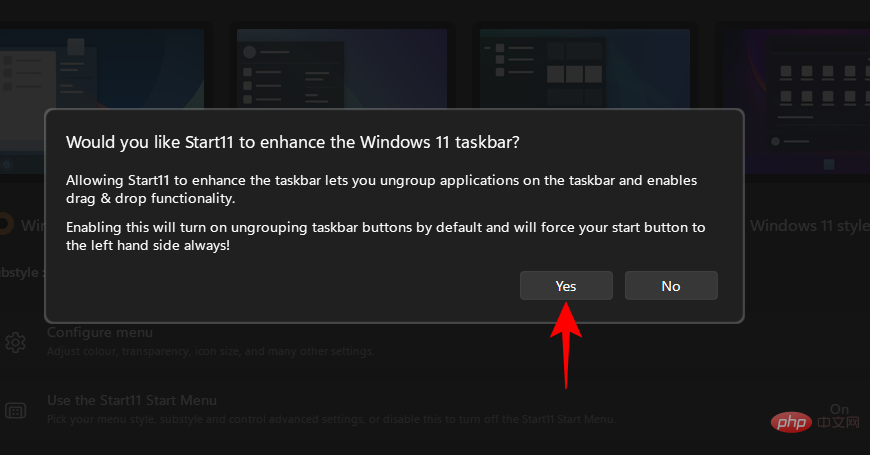
When prompted if you want Start11 to enhance the Windows 11 taskbar, select Yes.
Alternatively, click Taskbar in the left pane.
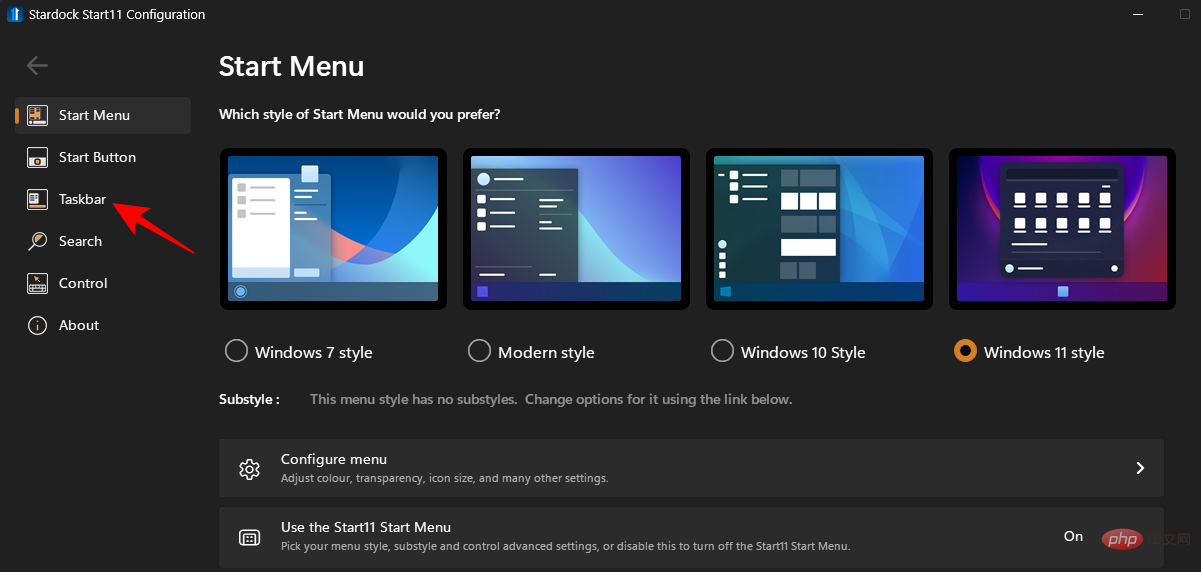
Click "Turn off" next to "Let Start11 enhance the taskbar" to turn it on.
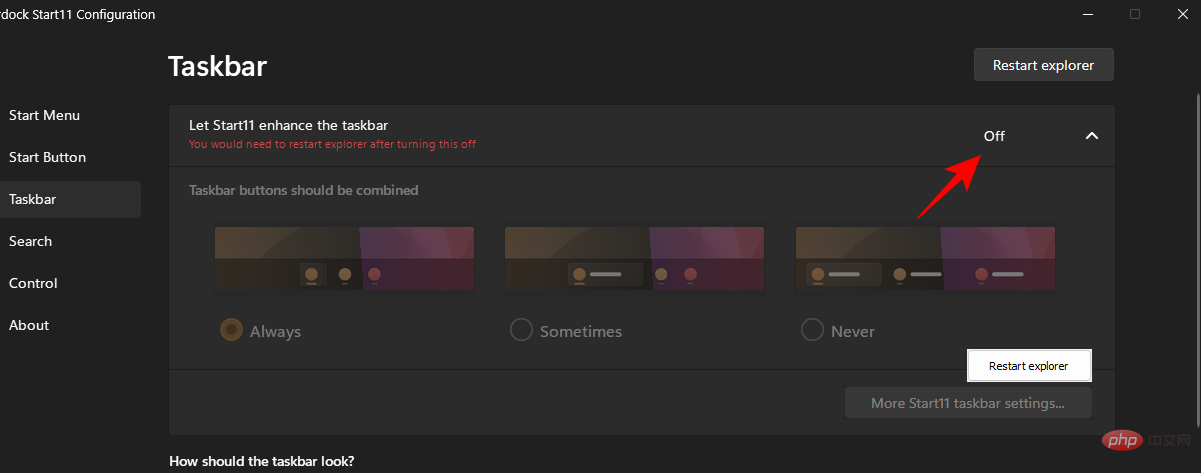
Then scroll down and click the drop-down menu next to Taskbar Size.
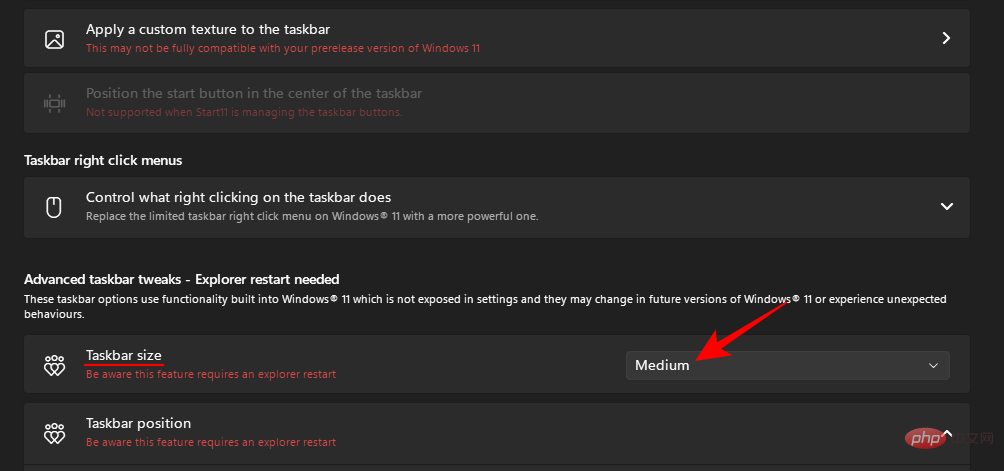
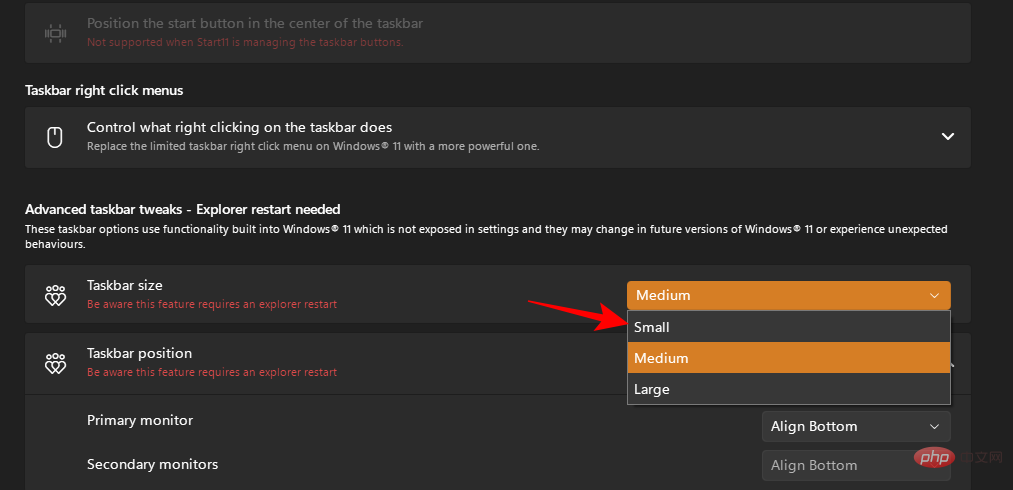
Select 小.
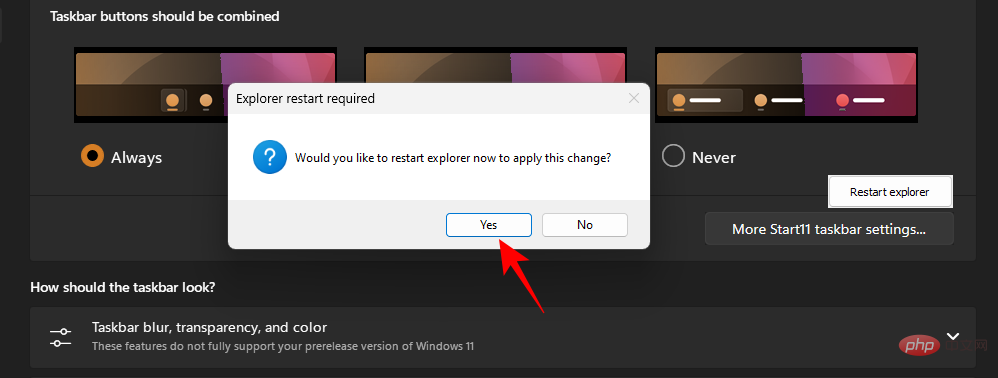
You will be asked to restart Explorer to apply the changes. Click is .
The taskbar icon will shrink together with the taskbar icon.

#However, as shown above, the start menu will automatically be left aligned. If you are changing the taskbar size, this is an action that cannot be undone because the option to focus the taskbar will be grayed out.
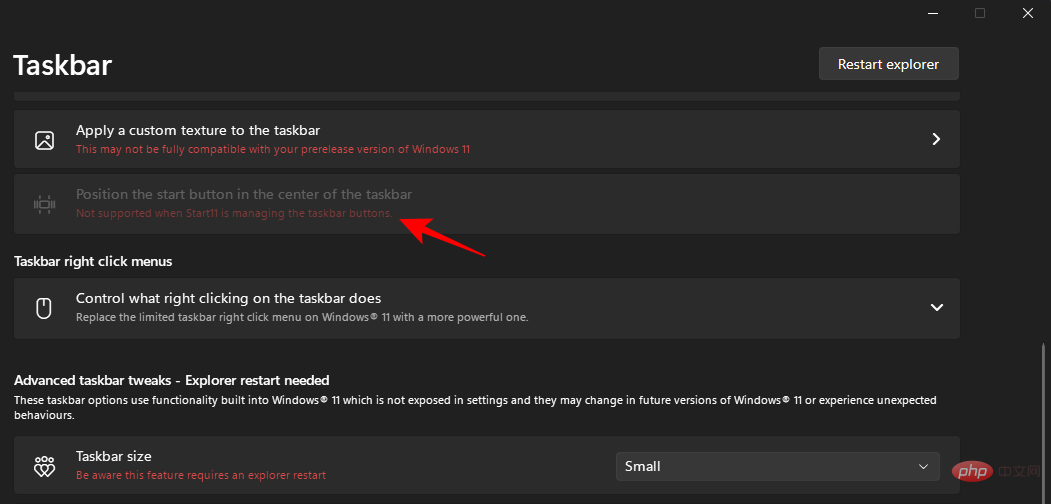
This may not be ideal for some users, but at the time of writing this tutorial, on Windows 11 Developer Build 25252, this is the case with Start11 for Stardock. You can expect this to change in the future as Windows unlocks new features and Stardock catches up with customization options.
In this section, we will take a look at some frequently asked questions about changing icon size on Windows and answer the same.
On Windows 11, the icon is a little larger than usual, probably to make it easier for users to access. However, if your icon is much larger than normal, you may have accidentally changed the icon size, changed the display resolution, or the scaling. See our tutorial above to learn how to make your icons smaller.
The easiest way to make icons smaller is to right-click on the desktop, select "View" and then click "Small Icons". Or, if you want more size flexibility, select the icon whose size you want to change, hold down the Ctrl key, and scroll down using your mouse wheel. For other methods, see our tutorial above.
Desktop icons can be easily changed. Just right-click on the icon you want to change and select Properties. Then select Change Icon. Now select an icon from the list and click OK. Your desktop icons have now changed.
Being able to customize icon sizes is an important personalization feature for those who want their desktop to look the way they want it to. We hope this tutorial helped you shrink icons on Windows 11.
The above is the detailed content of How to make icons smaller on Windows 11. For more information, please follow other related articles on the PHP Chinese website!


