


This article brings you relevant knowledge about the front-end. It mainly shares with you a simple front-end grayscale system and introduces how to write this system? Friends who are interested can take a look below. I hope it will be helpful to everyone.
Written in front
The concept of grayscale comes from the field of digital images. It was originally used to describe the grayscale value of black and white digital images, ranging from0to255,0represents black,255represents white, and the values in between represent different degrees of gray.
The grayscale system was born from the construction of interdisciplinary subjects, and the Internet is no exception. For a software product, when developing and releasing it, we definitely hope that users can smoothly see the content they want to see. However, the release is not smooth sailing. If there is a problem in a certain link of the release, such as the wrong image or a hidden bug triggered due to different deployment environments, causing the user to see the wrong page or an old page, this will happen. Production accident. In order to avoid this situation, designers designed atransition systembetween0and1by drawing on the concept of digital image processing. The concept: allow the system to be released in advance and set the visibility range, just like the circle of friends, and wait until the risk is controllable before it is visible to the public. This is the grayscale system.
The release action of the grayscale system version is calledGrayscale release, also known as canary release, or grayscale test. It refers to the smooth transition between black and white. A way to publish. A/B testing can be performed on it, that is, some users can continue to use product feature A, and some users can start using product feature B. If the users have no objections to B, then gradually expand the scope and migrate all users to B. Come. (Concept comes from Zhihu)
For the front-end field, after evolving to the present, the grayscale system mainly has the following functions:
The workflow diagram of the front-end grayscale system is as follows:
sequenceDiagram 前端项目-->灰度系统: 部署阶段 前端项目->>灰度系统: 1.CI 写入打包资源 前端项目->>灰度系统: 2.CI 打包完成后更新资源状态 前端项目-->灰度系统: 访问阶段 前端项目->>灰度系统: 1.页面访问,请求当前登录用户对应的资源版本 灰度系统-->>前端项目: 2.从对应版本的资源目录返回前端资源
The description of the priority of grayscale resources is as follows:
| Grayscale strategy | Priority |
|---|---|
| Not in effect | Low |
| In effect | High |
| Full amount | General |
如此就起到了灰度的作用:全量表示所有人都可以看;生效表示只有在规则中的用户才可以看到这部分增量更新,优先级最高;未生效表示不灰度,优先级最低。
为什么灰度系统有后端:前端项目 CI 部署后,会产生一个 commit 号和一个镜像记录,并且打包后的文件存放在服务器中某一个深层的文件夹目录中,灰度系统需要存入该部署的目录地址,便于在切换灰度时查找不同版本的文件。
先介绍一个要部署的前端项目(你可以根据自己的前端项目动态调整)。
本项目针对的前端项目是一个基于微服务架构的项目,
下面是设计ER图:
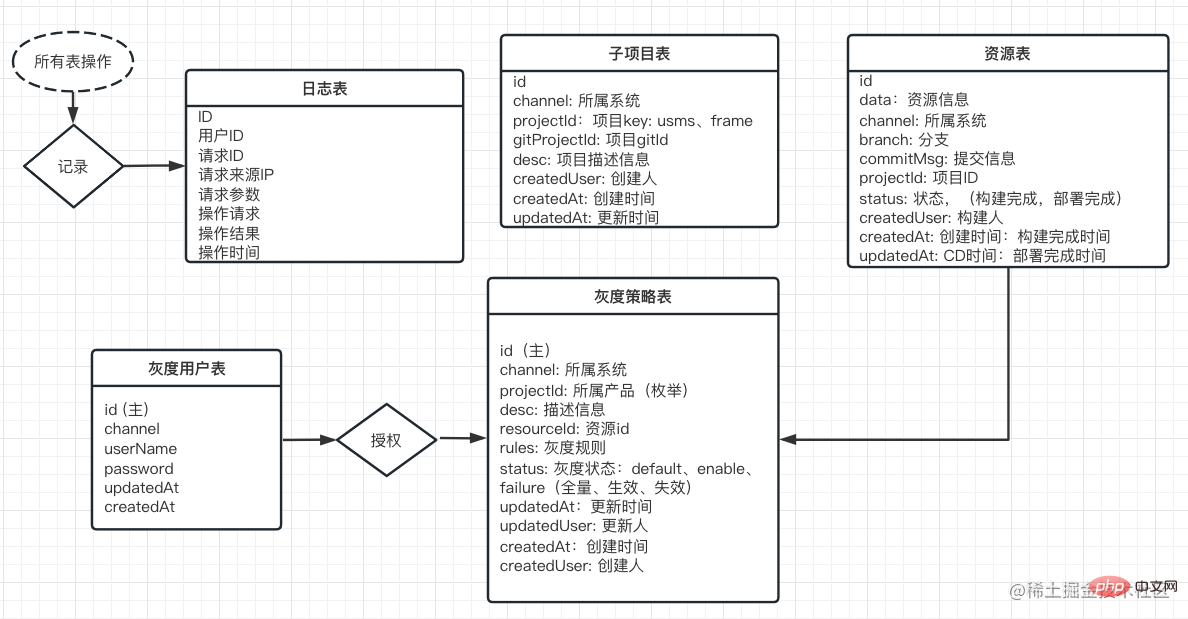
我们依此来分析:
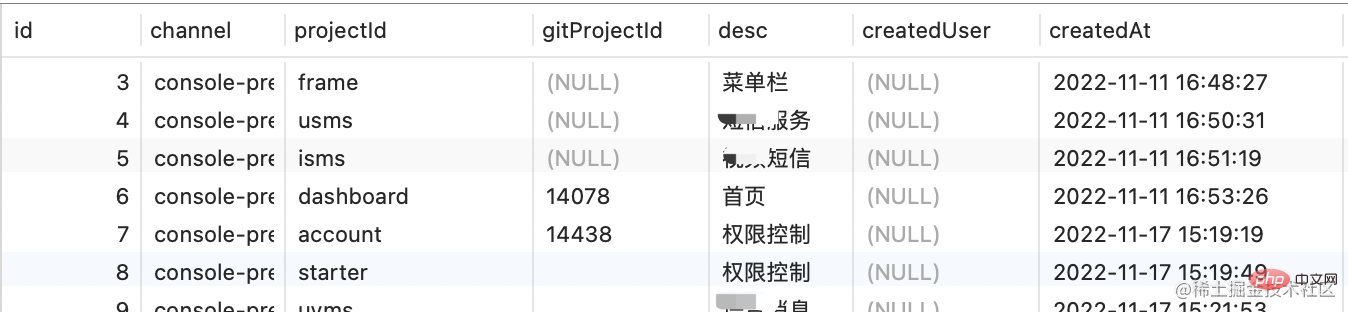
该表用于存放所有子项目的信息,新建一个微服务子项目时,会在这个表里新建一个条目,数据示意如下:
用于灰度系统登录的用户,拥有灰度权限的人才可以加入。
资源表存放项目在 CI 中写入的 commit 信息和 build 完以后在服务器的存放位置,数据示意如下:
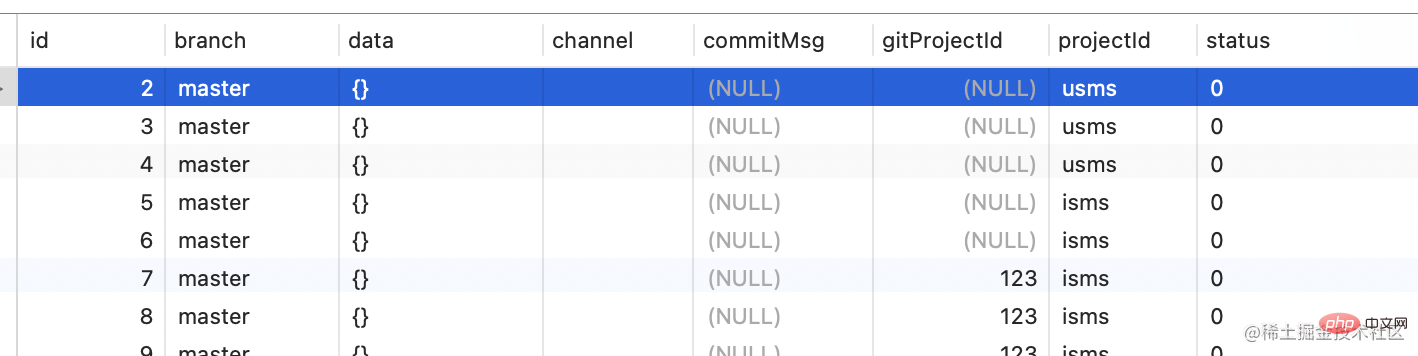
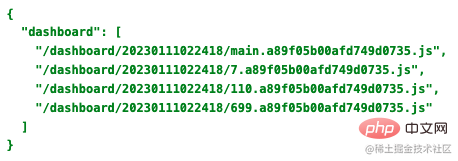
其中branch是跑CI的分支,data存放打包资源目录信息,一般结构如下:
gitProjectId存放该产品在 gitlab 中的项目号,status表示构建状态:0:构建完成 1:部署完成 2:构建失败,3:部署失败。
这里简单提一下 CI 是如何写入灰度系统数据库的,过多详情不做解释,写入数据库方式很多,这只是其中一种实现方式。

其中 build.sh 负责把传入的参数写到一个 json 中。

其中 run_gray.js:
const { ENV, file, branch, projectId, gitProjectId, user, commitMsg } = require('yargs').argv; axios({ url: URL, method: "POST", headers: { remoteUser: user }, data: { Action: "CreateResource", projectId, branch, commitMsg, gitProjectId, channel: Channel, data: fs.readFileSync(file, 'utf8'), status: "0" } }).then(...)
其中 status 的变化,在 CI 部署服务器完成后,追加一个UpdateResource动作即可:
if [[ $RetCode != 0 ]]; then curl "$STARK_URL" -X 'POST' -H 'remoteUser: '"$GITLAB_USER_NAME"'' -H 'Content-Type: application/json' -d '{"Action": "UpdateResource", "id": "'"$ResourceId"'", "status": "2"}' > test.log && echo `cat test.log`; fi
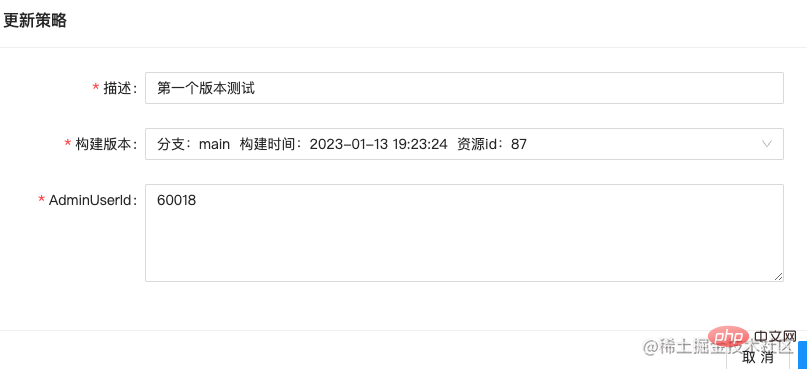
灰度策略是对灰度资源的调动配置。其设计如下:
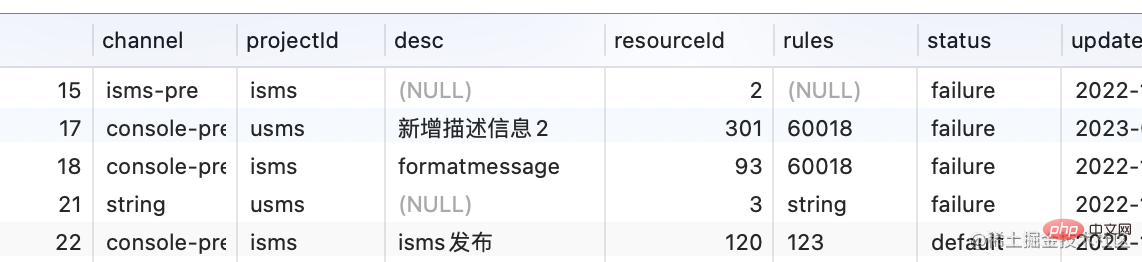
其中,prijectId表示灰度的项目,resourceId表示使用的资源,rules配置了对应的用户或用户组(看你怎么配置了,我这里只配置了单独的 userId),status是灰度的状态,我设置了三种:
状态生效表示是增量发布的意思。
到这里,数据库设计就完毕了。
有了数据库,还需要提供能够操作数据库的服务,上边创建资源的接口就是调用的灰度自己的API实现的。主要的API列表如下:
| 名称 | 描述 |
|---|---|
| getResourcesByProjectId | 获取单个产品下所有资源 |
| getResourcesById | 通过主键获取资源 |
| createResource | 创建一个资源 |
| updateResource | 更新一个资源 |
| getIngressesByProjectId | 获取单个产品下灰度策略任务列表 |
| getIngressById | 通过主键获取单个灰度策略任务详情 |
| createIngress | 创建一个策略 |
| updateIngress | 更新一个策略 |
剩余的接口有用户处理的,有子项目管理的,这里不做详述。除了上边的必须的接口外,还有一个最重要的接口,那就是获取当前登录用户需要的资源版本的接口。在用户访问时,需要首先调用灰度系统的这个接口来获取资源地址,然后才能重定向到给该用户看的页面中去:
| 名称 | 描述 | 接收参数 | 输出 |
|---|---|---|---|
| getConsoleVersion | 获取当前用的产品版本 | userId,products | resource键值对列表 |
getConsoleVersion接受两个参数,一个是当前登录的用户 ID, 一个是当前用户访问的微服务系统中所包含的产品列表。该接口做了如下几步操作:
其中第三步处理相对繁琐一些,比如说,一个资源有两个起作用的灰度资源,一个是增量的,一个是全量的,这里应该拿增量的版本,因为他优先级更高。
获取用户版本的流程图如下:
graph TD 用户登录页面 --> 获取所有产品下的资源列表 获取所有产品下的资源列表 --> 根据灰度策略筛选资源中该用户可用的部分 --> 返回产品维度的资源对象
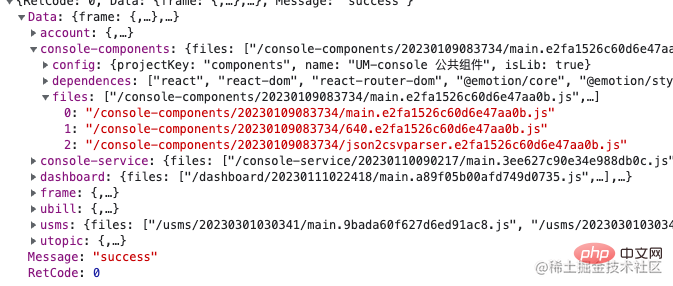
最后返回的资源大概长这个样子:
interface VersionResponse { [productId: number]: ResourceVersion; } interface ResourceVersion { files: string[]; config: ResourceConfig; dependencies: string[]; }
其中 files 就是 JSON 解析后的上述 data 信息的文件列表,因为打包后的文件往往有 css和多个js。
至于这个后端使用什么语言,什么框架来写,并不重要,重要的是一定要稳定,他要挂掉了,用户就进不去系统了,容灾和容错要做好;如果是个客户比较多的网站,并发分流也要考虑进去。
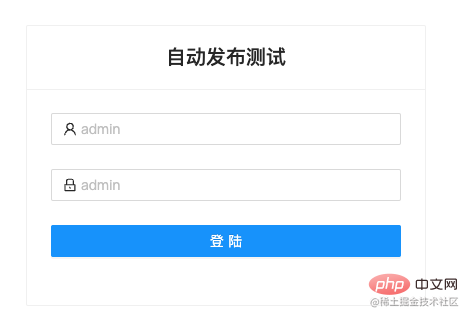
前端页面就随便使用了一个前端框架搭了一下,选型不是重点,组件库能够满足要求就行:
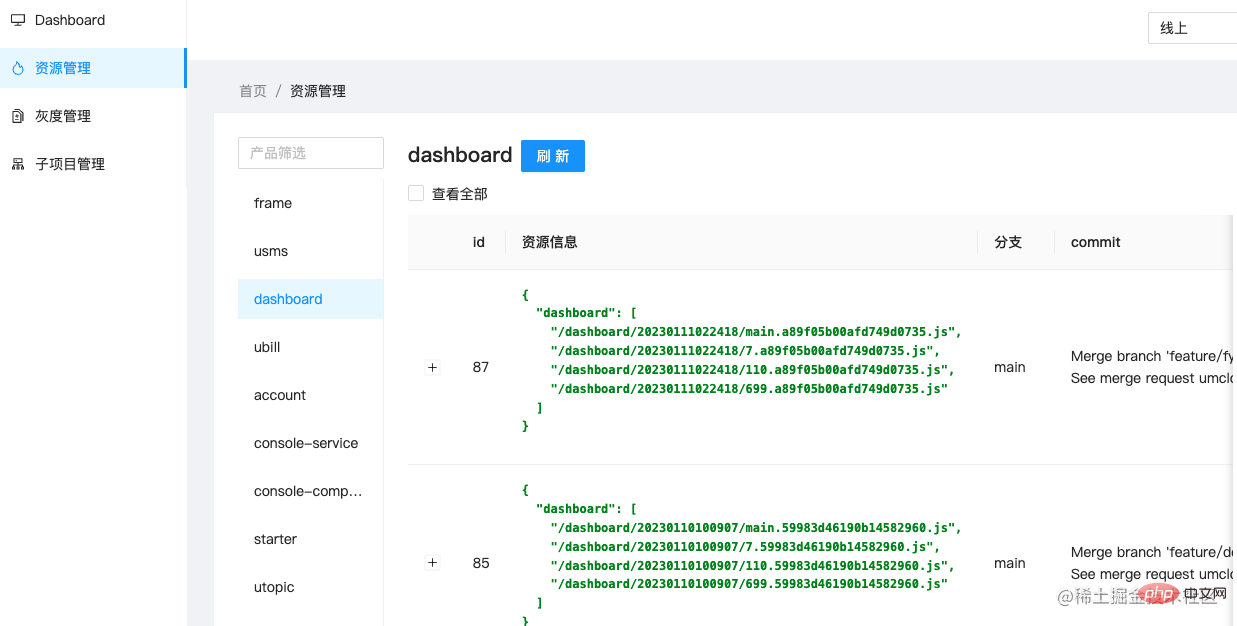
部署以后,实际运行项目看看效果:
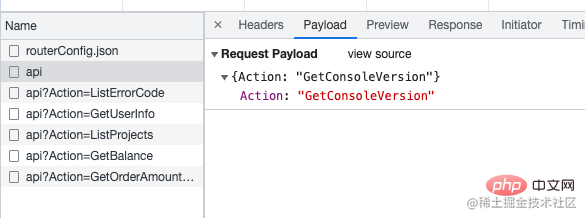
可以看到,在调用业务接口之前,优先调用了 getConsoleVersion来获取版本,其返回值是以产品为 key 的键值对:
这里拿到部署信息后,服务器要进行下一步处理的。我这里是把它封装到一个对象中,带着参数传给了微服务的 hook 去了,可以期待一下后续的手写一个前端微服务的系列文章;如果你是单页应用,可能需要把工作重心放在 Nginx 的转发上,通过灰度系统告知转发策略后,Nginx负责来切换路由转发,可能只是改变一个路由变量。 (你也可以参照我nginx 相关文章),下面我简单的给个示意图:
graph TD 灰度系统配置灰度策略 --> 告知Nginx资源地址 告知Nginx资源地址 --> Nginx服务器配置资源转发
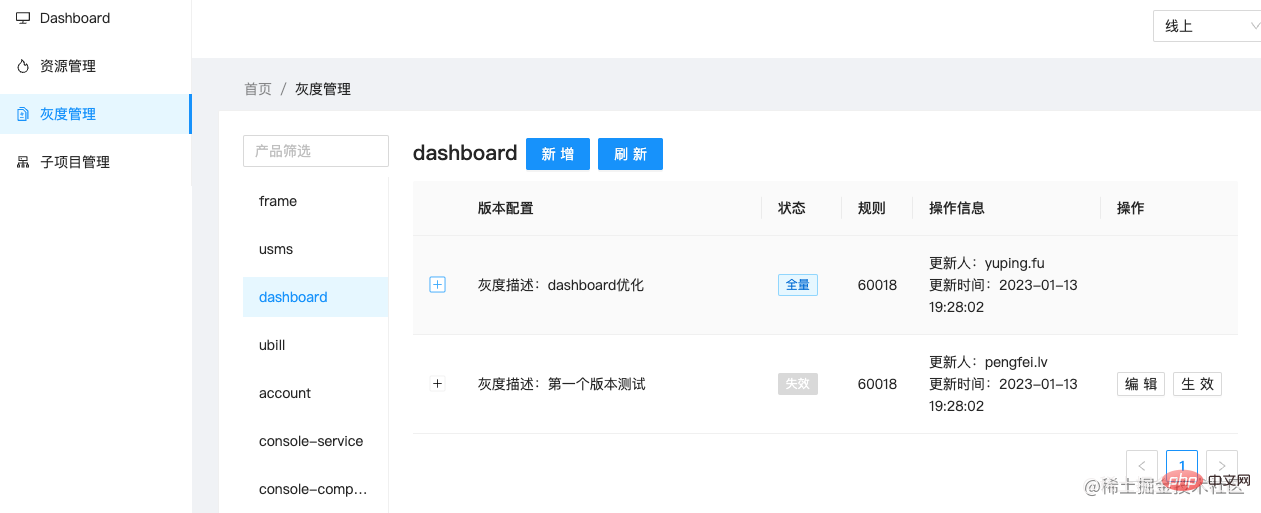
前端灰度系统,其实就是一个后台管理系统。他配置和管理了不同版本的前端部署资源和对应的用户策略,在需要的时候进行配置。
接下来的文章我会配套性的讲一下Nginx和Docker的前端入门使用,敬请期待!
推荐学习:《web前端开发》
The above is the detailed content of Share a simple front-end grayscale system. For more information, please follow other related articles on the PHP Chinese website!
 Is python front-end or back-end?
 How to implement instant messaging on the front end
 The difference between front-end and back-end
 Introduction to the relationship between php and front-end
 Learn C# from scratch
 Usage of between function
 Server monitoring software
 How to locate someone else's cell phone location


![Front-end Vue3 actual combat [handwritten vue project]](https://img.php.cn/upload/course/000/000/068/639b12e98e0b5441.png)
![WEB front-end tutorial [HTML5+CSS3+JS]](https://img.php.cn/upload/course/000/000/068/63ba60c8da520536.jpg)
![Front-end project-Shangyou [HTML/CSS/JS technology comprehensive practice]](https://img.php.cn/upload/course/000/000/068/63bfcb2974f91471.jpg)


![[Web front-end] Node.js quick start](https://img.php.cn/upload/course/000/000/067/662b5d34ba7c0227.png)


