
This article will take you to understand npm and packages in Node, 10,000-word tutorial ~ Super super detailed
![One article explains npm and packages in Node.js in detail [Wanzi Tutorial]](https://img.php.cn/upload/article/000/000/024/63737cdcc175b812.jpg)
What is a package
#The third-party module in Node.js is also called a package, which refers to the same thing , the knowledge is called differently
The source of the package
Different from the built-in modules and custom modules of Node.js, the package is provided by a third party Developed by individuals or teams and free for everyone to use. [Related tutorial recommendations: nodejs video tutorial]
Note: The packages in Node.js are free and open source, and can be downloaded and used for free without paying.
Why packages are needed
Since the built-in modules of Node.js only provide some low-level APIs, resulting in the problem of using built-in modules When developing projects, the efficiency is very low. The package is encapsulated based on built-in modules, providing a more advanced and convenient API. Greatly improves development efficiency. The relationship between packages and built-in modules is similar to the relationship between jQuery and the browser's built-in API.
Where to download
There is an IT company abroad called npm, lnc. This company has a very famous website, The world's largest package sharing platform
You can search for any package you need from this website, as long as you have enough patience!
So far, there are about 11 million developers around the world, and through this package sharing platform, more than 1.2 million packages have been developed and shared for our use.
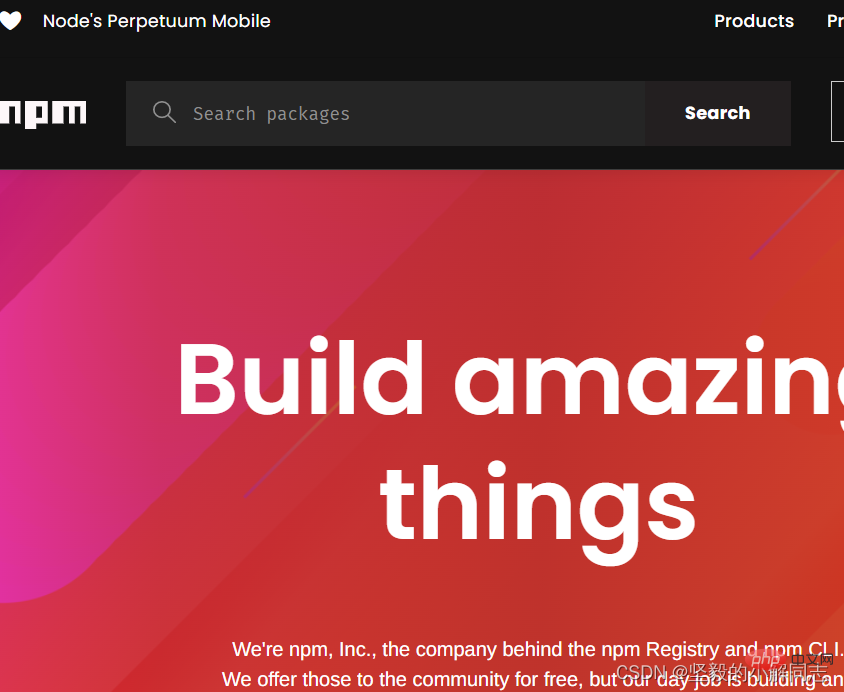
npm, lnc company provides a server with the address https://registry.npmjs.org/ to share all packages externally. We can download them from this server The package you need.
How to download the package
npm, lnc company provides a package management tool, we can use this package management tool, from https: //registry.npmjs.org/ Download the required packages on the server and use them locally.
The name of this package management tool is Node Package Manager (npm for short). This package management tool is installed on the user's computer along with the Node.js installation package.
You can Execute the npm -v command in the terminal to check the version number of the npm package management tool installed on your computer.

The traditional way of formatting time
Create a custom module for formatting events
Method of customizing formatting time
Creating a zero-padding function
Exporting a formatting time function from a custom module
Import the custom module for formatting time
Call the function for formatting time
Custom time formatting module
//定义格式化时间的方法
function dataFormat(data) {
    //接受字符串创建对象
    const dt = new Date(data);
    //年
    const Y = dt.getFullYear();
    //月
    const m = format(dt.getMonth() + 1);
    //日
    const d = format(dt.getDay());
    //时
    const hh = format(dt.getHours());
    //分
    const mm = format(dt.getMinutes());
    //秒
    const ss = format(dt.getSeconds());
    return `${Y}-${m}-${d} ${hh}:${mm}:${ss}`;

}
//补零操作
function format(data) {
    return data > 9 ? data : '0' + data;
}
//暴露对象
module.exports = { dataFormat };Please note that module.exports must be used here, because new objects are referenced here, or references are modified. To add attributes to an object, exports can be used.
exports.dataFormat = dataFormat;
Use module
//导入模块
const data = require('./自定义模块/格式化时间模块.js');
//创建未格式化对象
let olddata = new Date();
console.log(olddata);
//调用格式化模块
let newdata = data.dataFormat(olddata)
console.log(newdata);

##Use package formatting time
npm install moment
npm 包管理工具
install 安装 可简写成 i
moment 包名称
下载包之后 可以在上面提到的网站内搜索moment 查看api文档学习使用方法,网站是英文的,也可以在csdn内进行搜索一般也可以找到教学文章。
//导入包
const moment = require('moment');
//格式化事件
//单词要大写
const newdate = moment().format('YYYY-MM-DD HH:MM:SS');
console.log(newdate);
安装包后的相关文件
初次安装包完成后,在项目文件夹下会多三个文件,一个叫做node_modules的文件夹和package-lock.json的配置文件另一个是package.json。
其中
node_modules文件夹用来存放所有已安装到项目中的包,require()导入第三方包时,就是从这个目录中查找并加载的包,
package-lock.json配置文件用来记录node_modules目录下的每一个包的下载信息,例如包的名字信息,版本号等。
注意:不需要修改两个文件中的任何东西,npm包会自动维护。
安装指定版本的包
默认情况下,使用npm i命令安装包的时候,会自动安装最新版本的包。如果需要安装指定版本的包,可以在包名之后,通过@符号指定具体的版本。
npm i moment @ 1.1.12
包的语义化版本规范
包的版本号是以‘点分十进制’形式进行定义的,总共有三位数字,例如:2.24.0
期中没一位数字所代表的含义如下
第一位数字:大版本
第二位数字:功能版本
第三位数字:bug修复版本
版本号提升的规则:只要前面的版本号增长了,则后面的版本号归零。
包管理配置文件
npm规定,在项目跟目录中,必须提供一个叫做package.json的包管理配置文件,用来记录与项目有关的一些配置信息,例如:
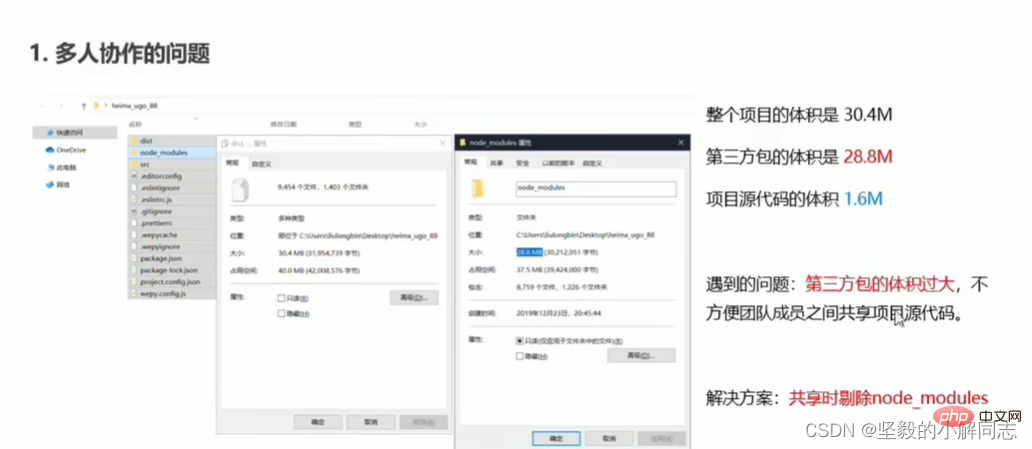
在项目根目录中,创建一个叫做package.json的配置文件,即可用来记录项目中安装了哪些包,从而方便剔除node_modules目录之后,在团队成员之间共享代码。
注意:今后在项目开发中,一定要把node_modules文件夹,添加到gitignore忽略文件中
npm包管理工具提供了一个快捷命令,可以在执行命令时所处的目录中,快速创建package.json这个包管理配置文件,在我们安装第三方包的时候 如果没有package.json也会自动生成一个(里面只有安装的包的信息)。
npm init -y
注意:上述命令只能在英文的目录下成功运行,所以需要保证项目文件所处的父级目录要是英文名。
建议 建立文件夹后 就执行此命令先创建一个package.son。
安装包的时候 会自动将相关信息写入package.json文件中。
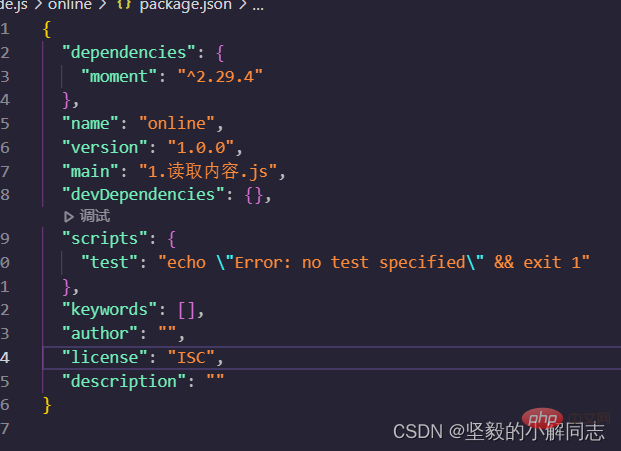
package.json文件中,有一个dependencies节点,专门用来记录您使用npm i命令安装了哪些包

当我们拿到一个提出了node_modules的项目之后,启动项目会报错,提示没有所需要的包,苏一在启动项目之前。我们应该安装所有需要的包,package.jaon中记录的包,然后才能运行起来。
npm install
我们只需要执行这个命令,执行这个命令后,会读取package.json中所有以来的包,并下载。
npm uninstall 包名
这个是不能简写的,卸载之后 也会将包名从 package.json文件中删除,
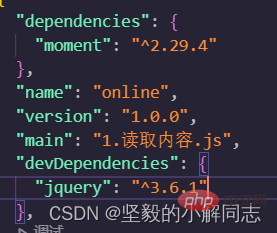
如果某些包只在项目开发阶段会用到,在项目上线之后不会用到,则建议把这些包记录到devDependencies节点中,
如果某些包在开发和项目上线都需要用到,则建议把这些包记录到dependencies节点中。
npm install 包名 -D
只需要在结尾加个-D就可以将包安装在devDependencies中
解决下包速度慢问题
在使用npm下包的时候,默认从国外的https://registry.npmjs.org/服务器进行下载,此时,网络数据的传输需要经过漫长的海底光缆,因此下包速度回很慢。
淘宝在国内搭建了一个服务器,专门把国外服务器的包同步到国内的服务器,然后我们可以再从国内的服务器上下载包,这样就可以大大提高包的下载速度。
镜像:是一种文件存储形式,一个磁盘上的数据在另一个磁盘上存在一个完全相同的副本即为镜像。
查看当前下包的服务器地址
npm config get registry

切换淘宝服务器
npm config set registry=https://registry:npm:taobao.org/

为了更方便的切换下包的镜像包,我们可以安装nrm这个小工具,利用nrm提供的终端命令,可以快速查看和切换下包的镜像源。
npm i nrm -g
-g全局下载,
查看所有可用的镜像源
nrm ls

nrm use taobao
包的分类
那些被安装到项目的node_modules目录中的包,都是项目包。
项目包分为两类,分别是:
在执行npm install 命令时,如果提供-g参数,则会把包安装为全局包。
全局包安装包查看位置命令
npm config ls
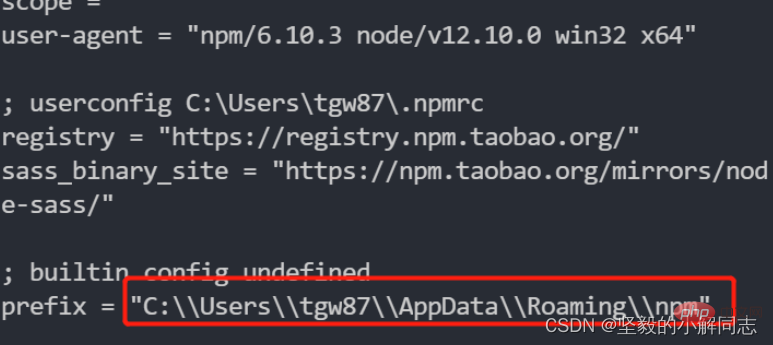
注意: 只有工具性质的包 才有全局安装的必要性。
作为程序员,md文档的编写往往是必要的,md文档编写简易快捷,是不二的笔记语言。
这是一个可以把md文档转为html页面的小工具,这种工具性质的包 就是有必要全卷装的,便于我们日后使用。
安装
npm i i5ting_toc -g
使用
i5ting_toc -f 文件路径 -o
规范的包结构
在清楚了包的概念,以及如何下载和使用包之后,接下来我们深入了解一下包的内部结构
一个规范的包,它的组成结构,必须符合以下三点要求
包必须以单独的目录而存在
包的顶级目录下要必须包含package.json这个配置文件
package.json中必须包含name,version,main这三个属性,分别代表包的名字,版本号,包的入口。
开发属于自己的包
格式化日期
转义HTML中的特殊字符
还原HTML中的特殊字符
1、新建itheima-tools文件夹,作为包的根目录
2、在itheima-tools文件夹中,新建如下三个文件
{
    "name": "itheima-tools-xiepu",
    "version": "1.0.0",
    "main": "index.js",
    "description": "提供了格式化时间。转义功能",
    "keywords": ["xiepu","tools","format"],
    "license": "ISC"
}可以直接粘贴我们之前写的自定义包函数
//定义格式化时间的方法
function dataFormat(data) {
    //接受字符串创建对象
    const dt = new Date(data);
    //年
    const Y = dt.getFullYear();
    //月
    const m = format(dt.getMonth() + 1);
    //日
    const d = format(dt.getDay());
    //时
    const hh = format(dt.getHours());
    //分
    const mm = format(dt.getMinutes());
    //秒
    const ss = format(dt.getSeconds());
    return `${Y}-${m}-${d} ${hh}:${mm}:${ss}`;

}
//补零操作
function format(data) {
    return data > 9 ? data : '0' + data;
}
//暴露对象
exports.dataFormat = dataFormat;//定义转义字符函数
function htmlstr(hstr) {
return hstr.replace(/<|>|"|&/g, data => {
switch (data) {
case '<':
return '<';
case '>':
return '>';
case '"':
return '"';
case '&':
return '&';
}
})
}
//暴露对象
exports.htmlstr = htmlstr;function htmlstr1(hstr) {
return hstr.replace(/<|>|"|&/g, data => {
switch (data) {
case '<':
return '<';
case '>':
return '>';
case '"':
return '"';
case '&':
return '&';
}
})
}
//暴露对象
exports.htmlstr1 = htmlstr1;将格式化时间的功能,拆分到src dataFormat.js中
将处理html字符串的功能,拆分到src htmlstr.js中
在index.js中,导入两个模块,得到需要向外共享的方法
在index.js中,使用module.exports把对应的方法共享出去
将格式化时间,和字符串转义各自分别放到独立的js中(创立一个src文件夹),并进行暴露。
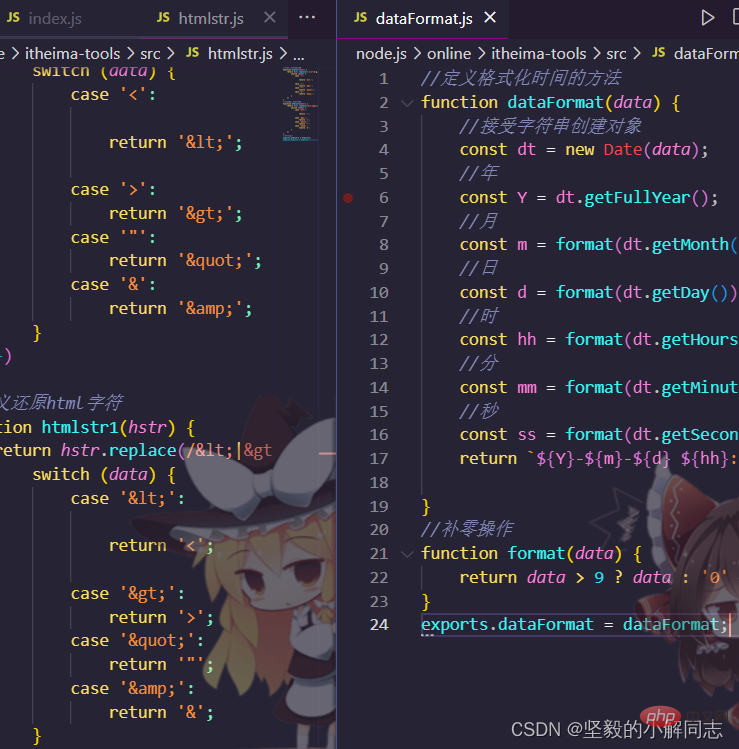
然后在主页index.js中,进行导入和曝光。
const htmlstr = require('./src/htmlstr');
const dataFormat = require('./src/dataFormat');


module.exports = {
    htmlstr,
    dataFormat
}调用测试
const itheima = require('../itheima-tools'); console.log(itheima.dataFormat.dataFormat(new Date())); const str = '<h1>232</h1>'; console.log(itheima.htmlstr.htmlstr(str)); console.log(itheima.htmlstr.htmlstr1(str));

详细说一下这里,我们首先调用的index.js这个模块,可以看到导入只写了文件夹没写index.js,这种写法同样也可以导入index.js,它会去寻找package.json里的main属性,所以会导入index.js,导入index.js之后,我们又从index.js中导入了另外两个转义和格式化时间模块,所以在使用属性时
是这样一个过程 itheima这个模块里的htmlstr模块里的htmlstr属性。
那么可不可以不写的那么复杂?
答案是可以的 我们只要在itheima这个模块里 直接曝光出所有属性就好,这里我们可以在itheima模块中使用es6的展开属性...直接将相关内容曝光在对象内。
index.js
const htmlstr = require('./src/htmlstr');
const dataFormat = require('./src/dataFormat');


module.exports = {
    ...htmlstr,
    ...dataFormat
}ceshi.js
const itheima = require('../itheima-tools'); console.log(itheima.dataFormat(new Date())); const str = '<h1>232</h1>'; console.log(itheima.htmlstr(str)); console.log(itheima.htmlstr1(str));

说明文档内容没有强制性要求,只要能清晰的包的作用,注意点写好就可以,书写内容大致有以下六点
安装方式
导入方式
格式化时间
转义html中的特殊字符
还原html中的特殊字符
开源协议
大家可以去学习一下markdown文档编写的语法 并不难
## 安装 " npm install itheima-tools-xiaoxie " ## 导入 " const name = require ('itheima-tools-xiaoxie') " ## 格式化时间 " console.log(itheima.dataFormat(new Date())); " ## 转义html字符 " const str = '<h1>232</h1>'; 这里输入内容 console.log(itheima.htmlstr(str)); " ## 还原html字符 " const str = '<h1>232</h1>'; 这里输入内容 console.log(itheima.htmlstr1(str)); " " 文件里 有ceshi.js文件 可以在里面进行测试 " ## 开源协议 " ISC "
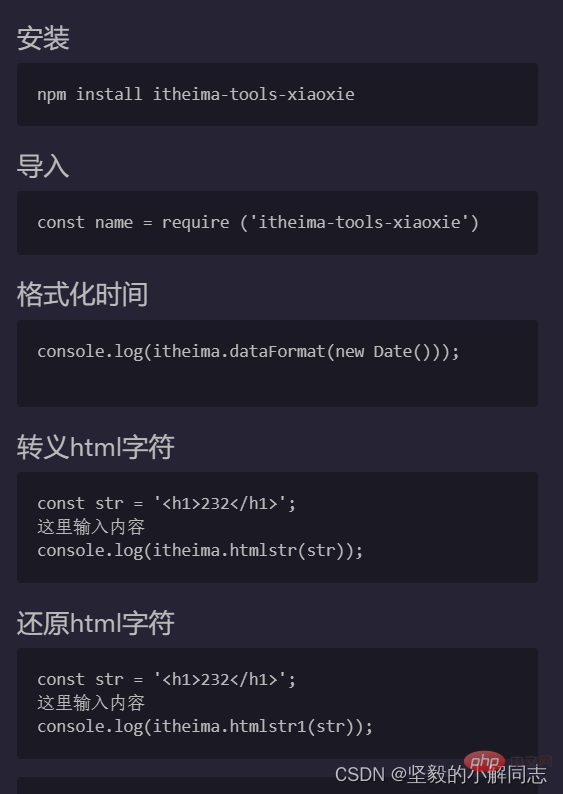
发布包
登录npm网站,点击 sign up按钮,进入注册用户界面
填写账户相关的信息,Full Name , Public Email, Username, Password
点击Create an Account按钮,注册账号
npm账号注册完成后,可以在终端中执行npm login命令,依次输入用户名,密码,邮箱后,即可登录成功。
注意:在登录npm包,发布包之前要将下载地址修改为npm官网地址,否则发布包会失败。
nrm use npm
登录
根据提示依次输入账号 密码 邮箱 验证码
会显示已登录 后面显示网站名称

可以看到 我们登录到了官网上面
将终端切换到 包的根目录 运行npm publish命令,就可以将包发不到npm上(注意 包不可以重名)
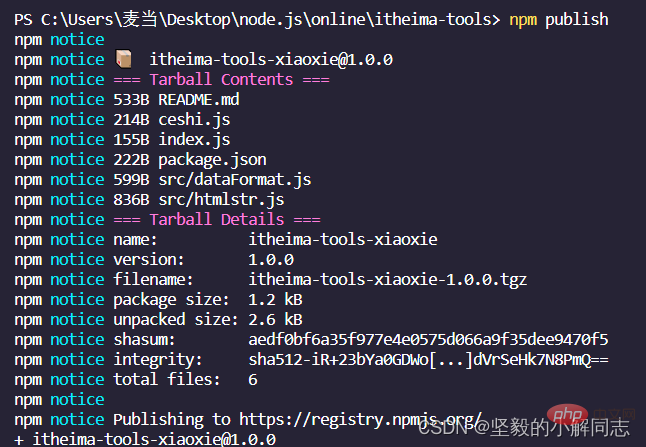
发布成功
打开网站 将账号登入 鼠标移动到头像 点击packages 就可以看到我们发布的内容
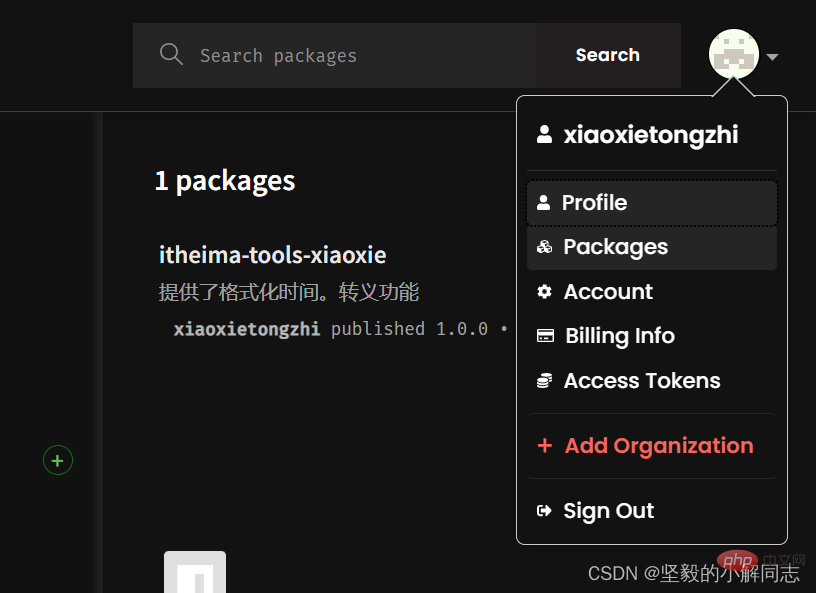
运行 这个命令就可以将npm上面的包删除掉
npm unpublish 包名--force
注意:通过此命令只可以删除发布72小时内的包
删除的包 24小时内不可以重复发布
更多node相关知识,请访问:nodejs 教程!
The above is the detailed content of One article explains npm and packages in Node.js in detail [Wanzi Tutorial]. For more information, please follow other related articles on the PHP Chinese website!