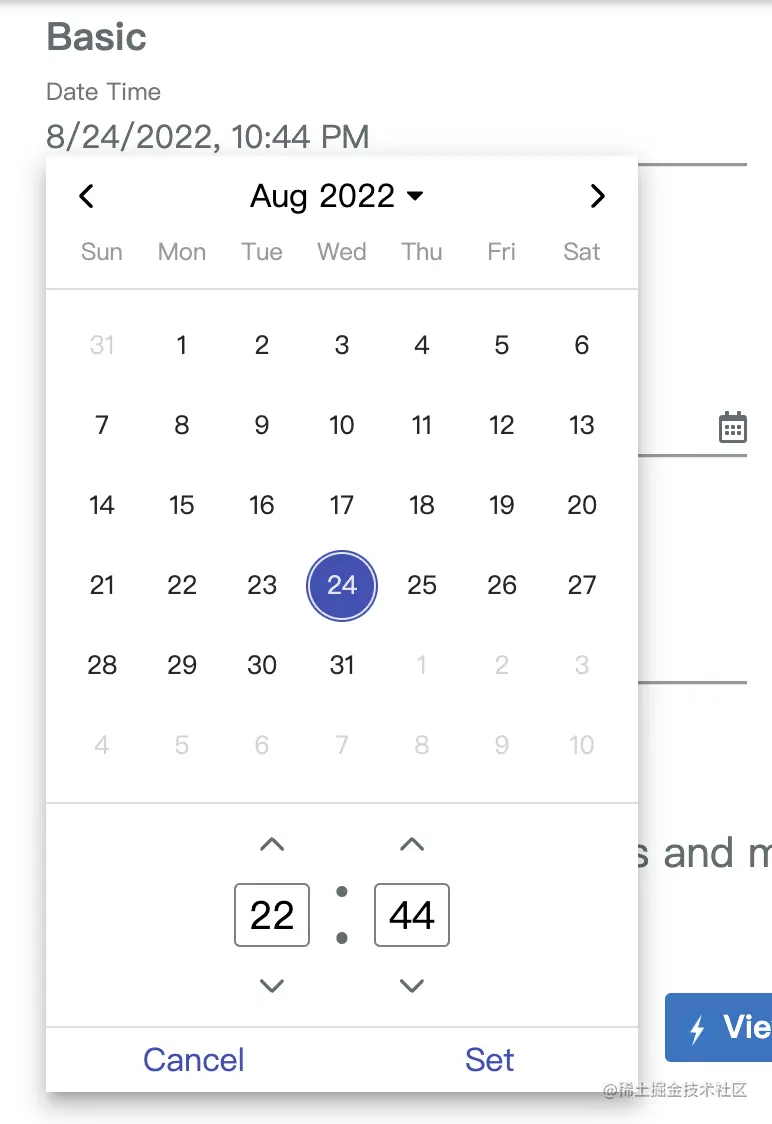
How to customize the angular-datetime-picker format? The following article talks about how to customize the format. I hope it will be helpful to everyone!

I have been using Angular recently to develop and maintain projects. I encountered a date problem, and my colleague used @danielmoncada/angular-datetime-picker.
PS: Of course, if it is a new project, it is still recommended to use the date function integrated with the framework. Although the function may not be what you expected, it is at least enough. For example, the
angularversion ofant design.
Of course, angular-datetime-picker provides many properties and events. [Related tutorial recommendations: "angularjs video tutorial"]
For example:
owl-date-time's attributes are:
| Attribute name | Type | Is it necessary | Default value |
|---|---|---|---|
| pickerType |
both, calendar, timer
|
Optional | both |
| yearOnly | Boolean value | Optional | false |
For other properties and methods, please go to the official website to view
Of course, in this article we are not discussing the need to simply change these properties and methods. Let’s discuss two points:
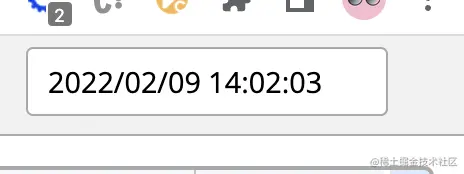
Display YYYY/MM/ HH:mm:ss in the input box Format
Translation - Change the name of the buttonCancel => Cancel, Set => Set
This :

html code as follows:
<ng-container>
  <input>
  <owl-date-time></owl-date-time>
</ng-container>
app.module.ts:
import {OwlDateTimeModule, OwlMomentDateTimeModule, OWL_DATE_TIME_FORMATS} from '@danielmoncada/angular-datetime-picker';

// https://danielykpan.github.io/date-time-picker/#locale-formats
// 自定义格式化时间
export const MY_MOMENT_FORMATS = {
    fullPickerInput: 'YYYY/MM/DD HH:mm:ss', // 指定的时间格式
    datePickerInput: 'YYYY/MM/DD',
    timePickerInput: 'HH:mm:ss',
    monthYearLabel: 'YYYY/MM',
    dateA11yLabel: 'YYYY/MM/DD',
    monthYearA11yLabel: 'YYYY/MM',
};

@NgModule({
  imports: [
    OwlDateTimeModule,
    OwlMomentDateTimeModule
  ],
  providers: [
    {provide: OWL_DATE_TIME_FORMATS, useValue: MY_MOMENT_FORMATS
  ],
})

export class AppModule {
}
Cancel into Cancel, Set Translates to Settings.
import { NgModule } from '@angular/core';
import { OwlDateTimeModule, OwlNativeDateTimeModule, OwlDateTimeIntl} from 'ng-pick-datetime';
// here is the default text string
export class DefaultIntl extends OwlDateTimeIntl = {
  /** A label for the up second button (used by screen readers). */
  upSecondLabel= 'Add a second',
  /** A label for the down second button (used by screen readers). */
  downSecondLabel= 'Minus a second',
  /** A label for the up minute button (used by screen readers). */
  upMinuteLabel= 'Add a minute',
  /** A label for the down minute button (used by screen readers). */
  downMinuteLabel= 'Minus a minute',
  /** A label for the up hour button (used by screen readers). */
  upHourLabel= 'Add a hour',
  /** A label for the down hour button (used by screen readers). */
  downHourLabel= 'Minus a hour',
  /** A label for the previous month button (used by screen readers). */
  prevMonthLabel= 'Previous month',
  /** A label for the next month button (used by screen readers). */
  nextMonthLabel= 'Next month',
  /** A label for the previous year button (used by screen readers). */
  prevYearLabel= 'Previous year',
  /** A label for the next year button (used by screen readers). */
  nextYearLabel= 'Next year',
  /** A label for the previous multi-year button (used by screen readers). */
  prevMultiYearLabel= 'Previous 21 years',
  /** A label for the next multi-year button (used by screen readers). */
  nextMultiYearLabel= 'Next 21 years',
  /** A label for the 'switch to month view' button (used by screen readers). */
  switchToMonthViewLabel= 'Change to month view',
  /** A label for the 'switch to year view' button (used by screen readers). */
  switchToMultiYearViewLabel= 'Choose month and year',
  /** A label for the cancel button */
  cancelBtnLabel= 'Cancel',
  /** A label for the set button */
  setBtnLabel= 'Set',
  /** A label for the range 'from' in picker info */
  rangeFromLabel= 'From',
  /** A label for the range 'to' in picker info */
  rangeToLabel= 'To',
  /** A label for the hour12 button (AM) */
  hour12AMLabel= 'AM',
  /** A label for the hour12 button (PM) */
  hour12PMLabel= 'PM',
};

@NgModule({
 imports: [
   OwlDateTimeModule,
   OwlNativeDateTimeModule
 ],
 providers: [
   {provide: OwlDateTimeIntl, useClass: DefaultIntl},
 ],
})

export class AppExampleModule { }owl-date-time-translator.ts
import { Injectable } from '@angular/core';
import { DefaultTranslationService } from '@services/translation.service';
import { OwlDateTimeIntl } from '@danielmoncada/angular-datetime-picker';

@Injectable()
export class OwlDateTimeTranslator extends OwlDateTimeIntl {

  constructor(protected translationService: DefaultTranslationService) {
    super();

    /** 取消按钮 */
    this.cancelBtnLabel = this.translationService.translate('action.cancel');

    /** 设置按钮 */
    this.setBtnLabel = this.translationService.translate('action.set');
  }

};translationService, which can select languages according to different regions.
app.module.ts:
import { OwlDateTimeIntl } from '@danielmoncada/angular-datetime-picker';

// 翻译 @danielmoncada/angular-datetime-picker
import { OwlDateTimeTranslator } from './path/to/owl-date-time-translator';

@NgModule({
  providers: [
    {provide: OwlDateTimeIntl, useClass: OwlDateTimeTranslator},
  ],
})

export class AppModule {
}programming video! !
The above is the detailed content of Let's talk about how to customize the angular-datetime-picker format. For more information, please follow other related articles on the PHP Chinese website!