
#PHP is a widely used open source multi-purpose scripting language that can be embedded in HTML and is especially suitable for web development.
This article mainly introduces how to use the php-mqtt/client client library in a PHP project to implement MQTT client and MQTT serverConnect, subscribe, unsubscribe, send and receive messages and other functions.
This article selects the client library with the highest download volume php-mqtt/client on composer, more The PHP-MQTT client library can be viewed in Packagist - Search MQTT.
For more usage documentation of php-mqtt/client, please refer to Packagist php-mqtt/client.
MQTT communication belongs to network communication scenarios outside the HTTP system. Due to the limitations of PHP features, using Swoole/Workerman and other extensions specifically designed for network communication in the PHP system can bring a better experience. This article uses Without going into details, the relevant MQTT client libraries are as follows:
This project uses 7.4.21 for development and testing. Readers can use the following command to confirm the PHP version.
php --version

PHP 7.4.21 (cli) (built: Jul 12 2021 11:52:30) ( NTS )
Copyright (c) The PHP Group
Zend Engine v3.4.0, Copyright (c) Zend Technologies
with Zend OPcache v7.4.21, Copyright (c), by Zend TechnologiesComposer is a dependency management tool for PHP that can manage all the dependencies required by your PHP project relation.
composer require php-mqtt/client
This article will use the free public MQTT provided by EMQ X Server, this service is created based on EMQ X's MQTT IoT cloud platform. The server access information is as follows:
require('vendor/autoload.php');

use \PhpMqtt\Client\MqttClient;
Set the MQTT Broker connection address, port and topic. At the same time, we call the PHP rand function to randomly generate the MQTT client id.
$server   = 'broker-cn.emqx.io';
$port     = 1883;
$clientId = rand(5, 15);
$username = 'emqx_user';
$password = null;
$clean_session = false;
Use the above parameters to connect, and set the connection parameters through ConnectionSettings, such as
$connectionSettings  = new ConnectionSettings();$connectionSettings
  ->setUsername($username)
  ->setPassword(null)
  ->setKeepAliveInterval(60)  // Last Will 设置
  ->setLastWillTopic('emqx/test/last-will')
  ->setLastWillMessage('client disconnect')
  ->setLastWillQualityOfService(1);复制代码
Write code to subscribe to the emqx/test topic, and configure the callback function for the subscription to process the received message. Here we will subscribe to the obtained topic And the message is printed out:
// 订阅
$mqtt->subscribe('emqx/test', function ($topic, $message) {
    printf("Received message on topic [%s]: %s\n", $topic, $message);
}, 0); Construct a payload and call the publish function to the emqx/test topic Publish the message. After the publishing is completed, the client needs to enter the polling state to process the incoming message and resend queue:
for ($i = 0; $i< 10; $i++) {
$payload = array(
'protocol' => 'tcp',
'date' => date('Y-m-d H:i:s'),
'url' => 'https://github.com/emqx/MQTT-Client-Examples'
);
$mqtt->publish(
// topic
'emqx/test',
// payload
json_encode($payload),
// qos
0,
// retain
true
);
printf("msg $i send\n");
sleep(1);
}
// 客户端轮询以处理传入消息和重发队列
$mqtt->loop(true);Server connection, message publishing with receiving code.
setUsername($username)
  ->setPassword(null)
  ->setKeepAliveInterval(60)
  // Last Will 设置
  ->setLastWillTopic('emqx/test/last-will')
  ->setLastWillMessage('client disconnect')
  ->setLastWillQualityOfService(1);


$mqtt = new MqttClient($server, $port, $clientId);

$mqtt->connect($connectionSettings, $clean_session);
printf("client connected\n");

$mqtt->subscribe('emqx/test', function ($topic, $message) {
    printf("Received message on topic [%s]: %s\n", $topic, $message);
}, 0);

for ($i = 0; $i< 10; $i++) {
  $payload = array(
    'protocol' => 'tcp',
    'date' => date('Y-m-d H:i:s'),
    'url' => 'https://github.com/emqx/MQTT-Client-Examples'
  );
  $mqtt->publish(
    // topic
    'emqx/test',
    // payload
    json_encode($payload),
    // qos
    0,
    // retain
    true
  );
  printf("msg $i send\n");
  sleep(1);
}

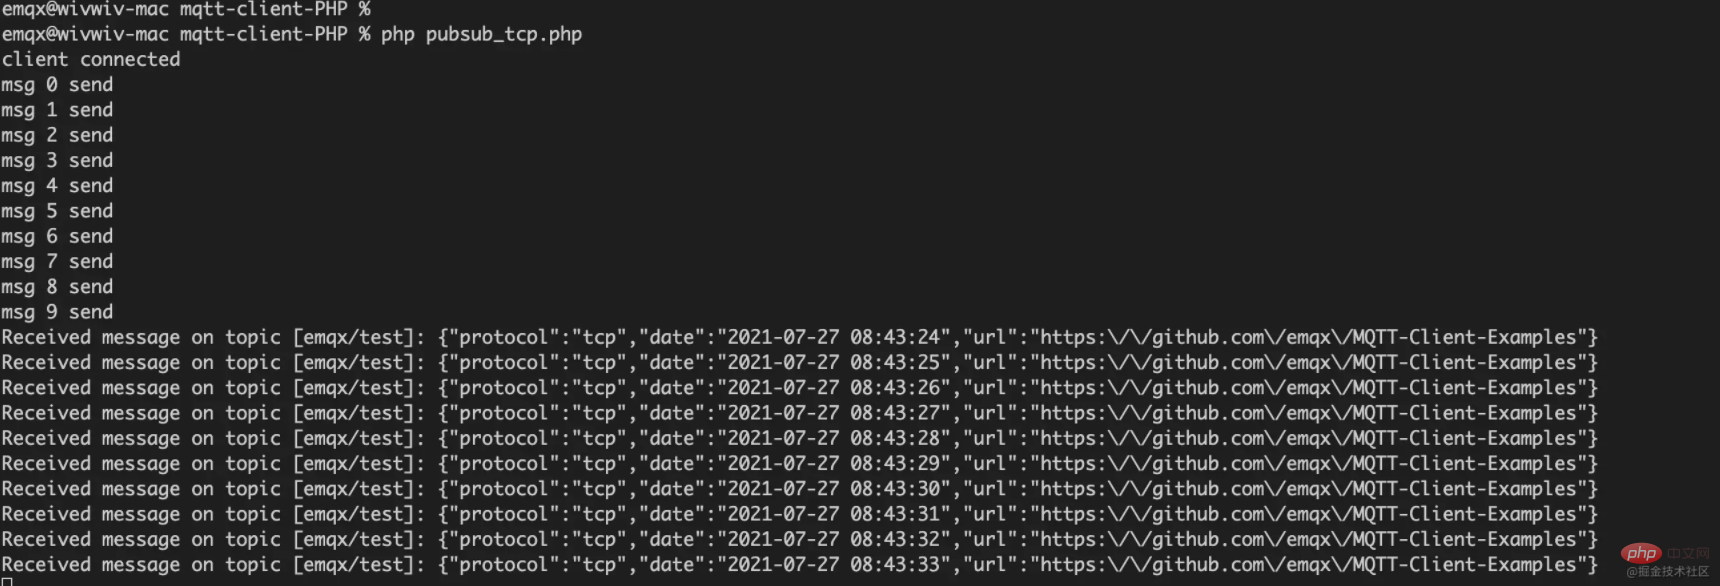
$mqtt->loop(true);Run the MQTT message publishing code, we will see that the client has successfully connected, and the messages have been published one by one and received successfully:
php pubsub_tcp.php

At this point, we have completed using the php-mqtt/client client to connect to the public MQTT Server, and implements the connection, message publishing and subscription between the test client and the MQTT server.
Original link: https://www.emqx.com/zh/blog/how-to-use-mqtt-in-php
Author: EMQ
Recommended learning: "PHP Video Tutorial"
The above is the detailed content of One article to quickly understand how to use MQTT in PHP projects. For more information, please follow other related articles on the PHP Chinese website!