The following tutorial column from laravel will introduce vue-cli4 laravel8 to use JWT login and token verification. I hope it will be helpful to friends in need!
Record all kinds of strange problems encountered during learning
I won’t write about jwt and configuration jwt now
    public function login(Request $request){
        $arr = $request->only(['email','password']);
        if(empty($arr)){
            return $this->response->array([
                'msg'=>'is null',
                'code'=>403,
                'data' => [],
            ]);
        }
        $token = Auth::guard('api')->attempt($arr); //获取token
        //未获得token时返回错误
        if(!$token){
            return $this->responseinfo('error',403,[]);
        }
        //返回当前用户
        $userAuth =Auth::guard('api')->user();
        //查找用户信息
        $user = Login::find($userAuth->id);
        $user->update([$user->updated_at = time()]);

        return $this->response->array([
            'msg'=>'success',
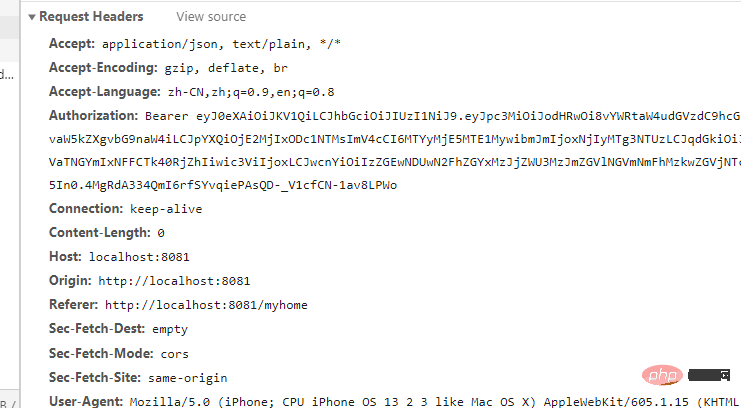
            'token' => 'Bearer '.$token,
            'code' => 200
        ]);

}axios.post('/api/index/login', {
email: this.email,
password: this.password })
.then((response) =>{
if(response.data.code === 200 ){
let token = response.data.token
Toast.success('登录成功')
window.localStorage.setItem('token',token)
this.$store.commit('setToken',token)
return this.$router.push('/myhome')
}else{
Toast.fail('账户密码错误')
}
})这里是我的前端请求登录方法,在这里需要在后端成功返回之后,将token值保存在本地(localStorage.setItem),因为我这里用的vantui框架,所以要加上windows. 另外将token保存至vuex中。import Vue from 'vue'import Vuex from 'vuex'Vue.use(Vuex)export default new Vuex.Store({
state: {
// 保存公共数据 在设置vuex中的初值时,先从本地存储中取,如果取不到,则初始为空
tokenInfo: window.localStorage.getItem('token') || {}
},
mutations: {
setToken(state, tokenObj) {
state.tokenInfo = tokenObj // 因为刷新会丢失所以进行持久化 调用storage文件里方法
window.localStorage.setItem('tokenInfo', tokenObj)
}
},
actions: {},
modules: {}})//请求头添加token_axios.interceptors.request.use(
function(config) {
let token = store.state.tokenInfo //获取token
if (token) {
config.headers.Authorization = token //在请求头中加入token
}
return config;
},
function(error) {
// Do something with request error
return Promise.reject(error);
});

<?php

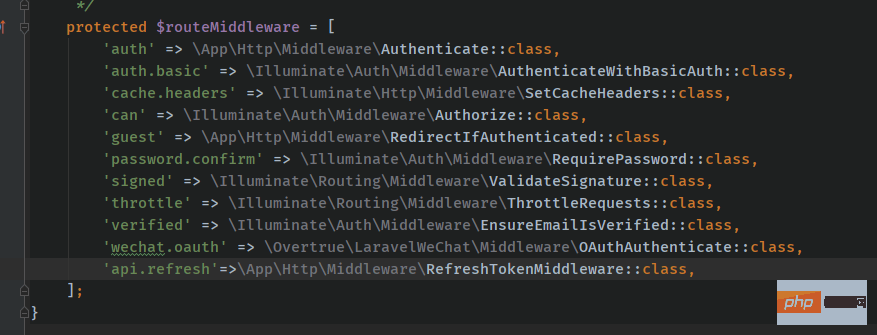
namespace App\Http\Middleware;use Closure;use Illuminate\Http\Request;use Illuminate\Support\Facades\Auth;use Tymon\JWTAuth\Exceptions\JWTException;use Tymon\JWTAuth\Facades\JWTAuth;use Tymon\JWTAuth\Http\Middleware\BaseMiddleware;use Tymon\JWTAuth\Exceptions\TokenExpiredException;use Symfony\Component\HttpKernel\Exception\UnauthorizedHttpException;class RefreshTokenMiddleware extends BaseMiddleware{
    /**
     * Handle an incoming request.
     *
     * @param  \Illuminate\Http\Request  $request
     * @param  \Closure  $next
     * @return mixed
     */
    public function handle(Request $request, Closure $next)
    {
        // 检查此次请求中是否带有 token,如果没有则抛出异常。在这里如果你的Token没有添加Bearer ,将会抛出异常检测不到token令牌
        $this->checkForToken($request);
        //         使用 try 包裹,以捕捉 token 过期所抛出的 TokenExpiredException  异常
        try {
            // 检测用户的登录状态,如果正常则通过
            if ($this->auth->parseToken()->authenticate()) {
                return $next($request);
            }
            throw new UnauthorizedHttpException('jwt-auth', '未登录');
        } catch (TokenExpiredException $exception) {
            // 此处捕获到了 token 过期所抛出的 TokenExpiredException 异常,我们在这里需要做的是刷新该用户的 token 并将它添加到响应头中
            try {
                // 刷新用户的 token
                $token = $this->auth->refresh();
                // 使用一次性登录以保证此次请求的成功
                Auth::guard('api')->onceUsingId($this->auth->manager()->getPayloadFactory()->buildClaimsCollection()->toPlainArray()['sub']);
            } catch (JWTException $exception) {
                // 如果捕获到此异常,即代表 refresh 也过期了,用户无法刷新令牌,需要重新登录。
                throw new UnauthorizedHttpException('jwt-auth', $exception->getMessage());
            }
        }

        // 在响应头中返回新的 token
        return $this->setAuthenticationHeader($next($request), $token);
    }}

Related recommendations:
The above is the detailed content of About vue-cli4+laravel8 using JWT login and token verification. For more information, please follow other related articles on the PHP Chinese website!
 Introduction to laravel components
 Introduction to laravel middleware
 What are the design patterns used by laravel?
 Which one is easier, thinkphp or laravel?
 Laravel Tutorial
 Disk scheduling algorithm
 What are the methods for restarting applications in Android?
 What are the java file transfer methods?