
How to allocate disk space in win10: 1. Right-click Start and open Computer Management; 2. Find Disk Management and select a disk; 3. Right-click and select the compressed volume, set the compression size and click Compress; 4 , find the unallocated disk, and expand the volume.

#The operating environment of this article: windows10 system, thinkpad t480 computer.
(Learning video sharing: Programming video)
Specific method:
1. Start at the bottom left corner of the computer desktop and go inside to find "This Computer" After finding the computer name, right-click and select "Manage" to pop up the "Computer Management" dialog box.
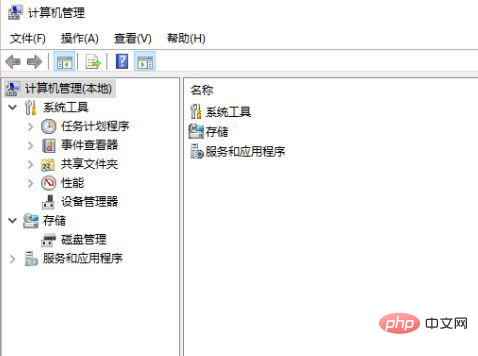
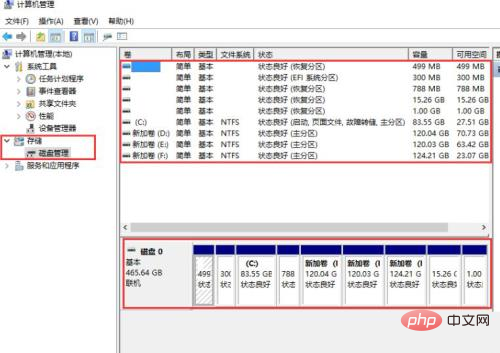
#2. After the computer management window pops up, we can see the "Disk Management" label on the left. After clicking the Disk Management label, it will be displayed on the right. The computer disk partition and volume information is as shown below;
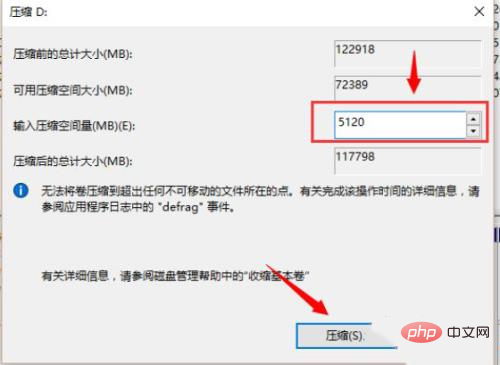
#3. After that, we can choose a disk with relatively large free space for compression. For example, we want to compress the D drive Adjust some disk space to the C drive, then we can select the D drive volume, then right-click on it, select "Compress Volume" in the pop-up menu, and then fill in the input compression space (MB) to be compressed The amount of space, if you want to compress 5G, fill in 5GX1024MB=5120M, then we can fill in 5120;
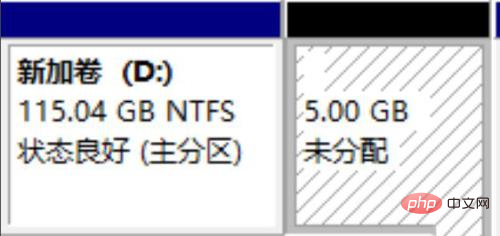
4. After the compression is completed, we can see the disk There will be an extra "unpartitioned disk" with a black partition in the volume;
5. Finally, we only need to allocate the unpartitioned disk space to the C drive. Operation The steps are: right-click the drive letter whose capacity needs to be expanded, and then select "Extend Volume (X)" in the menu that appears. The following expand volume operation wizard dialog box will pop up;
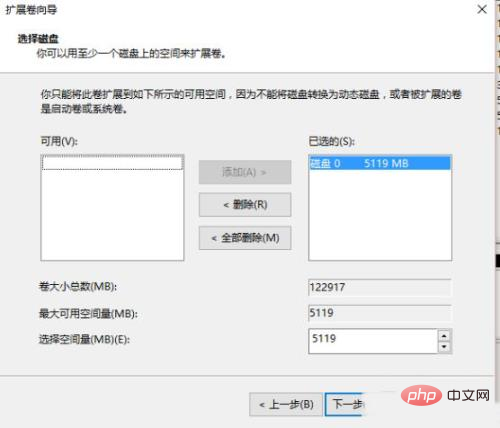
6. As shown in the picture above, we can choose to expand to the system disk (C drive), and then click Next to complete the operation.
Related recommendations: windows system
The above is the detailed content of How to allocate disk space in win10. For more information, please follow other related articles on the PHP Chinese website!
 What is disk quota
 win10 bluetooth switch is missing
 Why do all the icons in the lower right corner of win10 show up?
 The difference between win10 sleep and hibernation
 Win10 pauses updates
 What to do if the Bluetooth switch is missing in Windows 10
 win10 connect to shared printer
 Clean up junk in win10


