How to uniformly resize word pictures: First insert several pictures in word and select one of them; then right-click the mouse and click the "Size and Position" option; then set the "Layout" Set the size in the window; finally click on the next picture and press the "F4" key to repeat the picture size setting.

The operating environment of this tutorial: Windows 7 system, Microsoft Office word 2016 version, Dell G3 computer.
Recommended tutorial: "Word Tutorial"
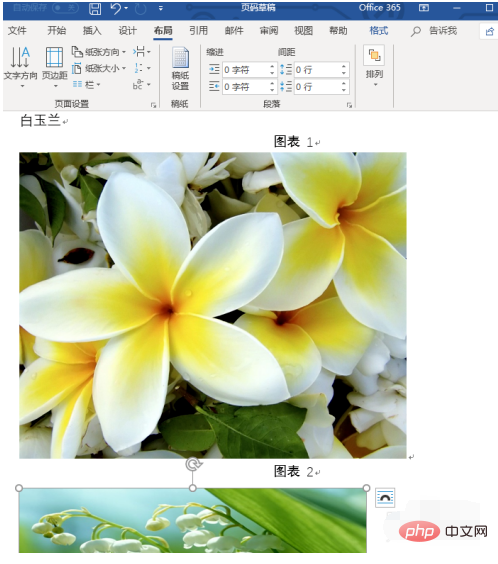
We open the word document working interface, insert several pictures in word, and select the first picture among them, as shown in the figure below Show.
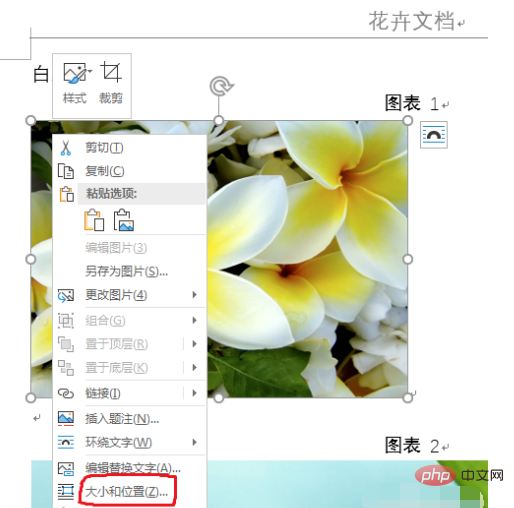
After selecting the picture, we click the right button of the mouse, and the right-click drop-down menu pops up, click the "Size and Position" option, as shown in the figure below.
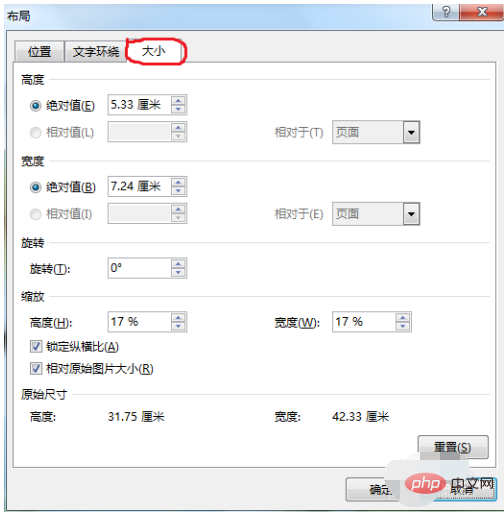
A "Layout" setting window will pop up. We click on the size setting module, as shown in the figure below.
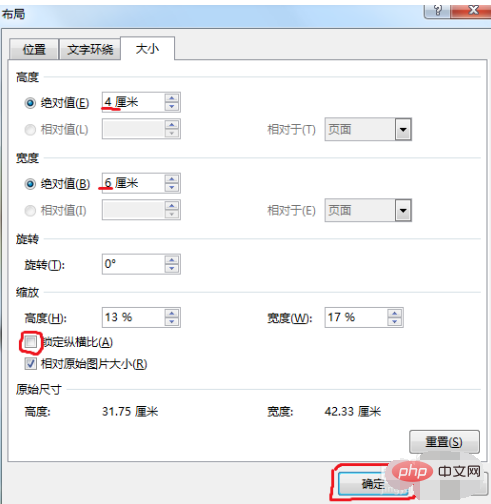
We cancel the "Lock Aspect Ratio" in the setting interface, that is, click the check mark in the box, and then reset the height and width of the picture. After setting, we click below "OK" button, as shown below.
At this time, we click on the next picture, and then press the "F4" key on the keyboard. This key is to repeat the previous step and repeat the size setting of the previous picture. , we don’t need to reset every picture.
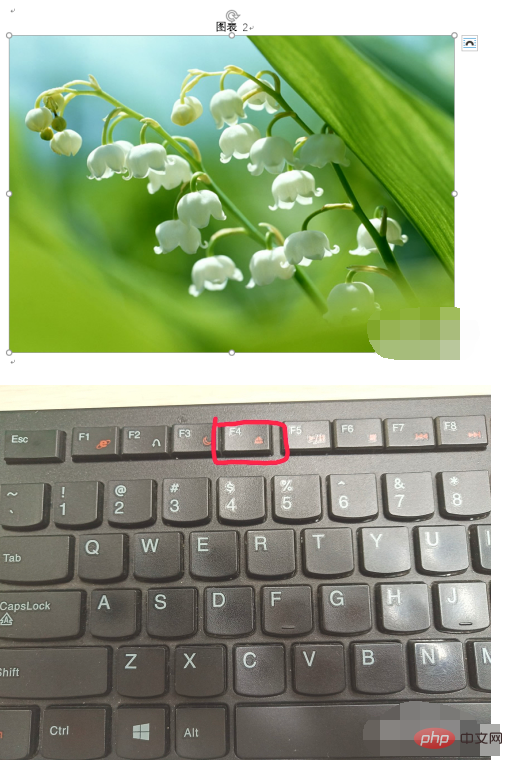
After pressing F4, we will see that the size of the selected picture is the same as the first picture. Select the picture, then press F4, and repeat the operation. Setting up multiple pictures can be done with just one click, it’s very simple.

The above is the detailed content of How to uniformly resize word pictures. For more information, please follow other related articles on the PHP Chinese website!
 How to change word background color to white
 How to delete the last blank page in word
 Why can't I delete the last blank page in word?
 Word single page changes paper orientation
 word to ppt
 Word page number starts from the third page as 1 tutorial
 Tutorial on merging multiple words into one word
 word insert table


