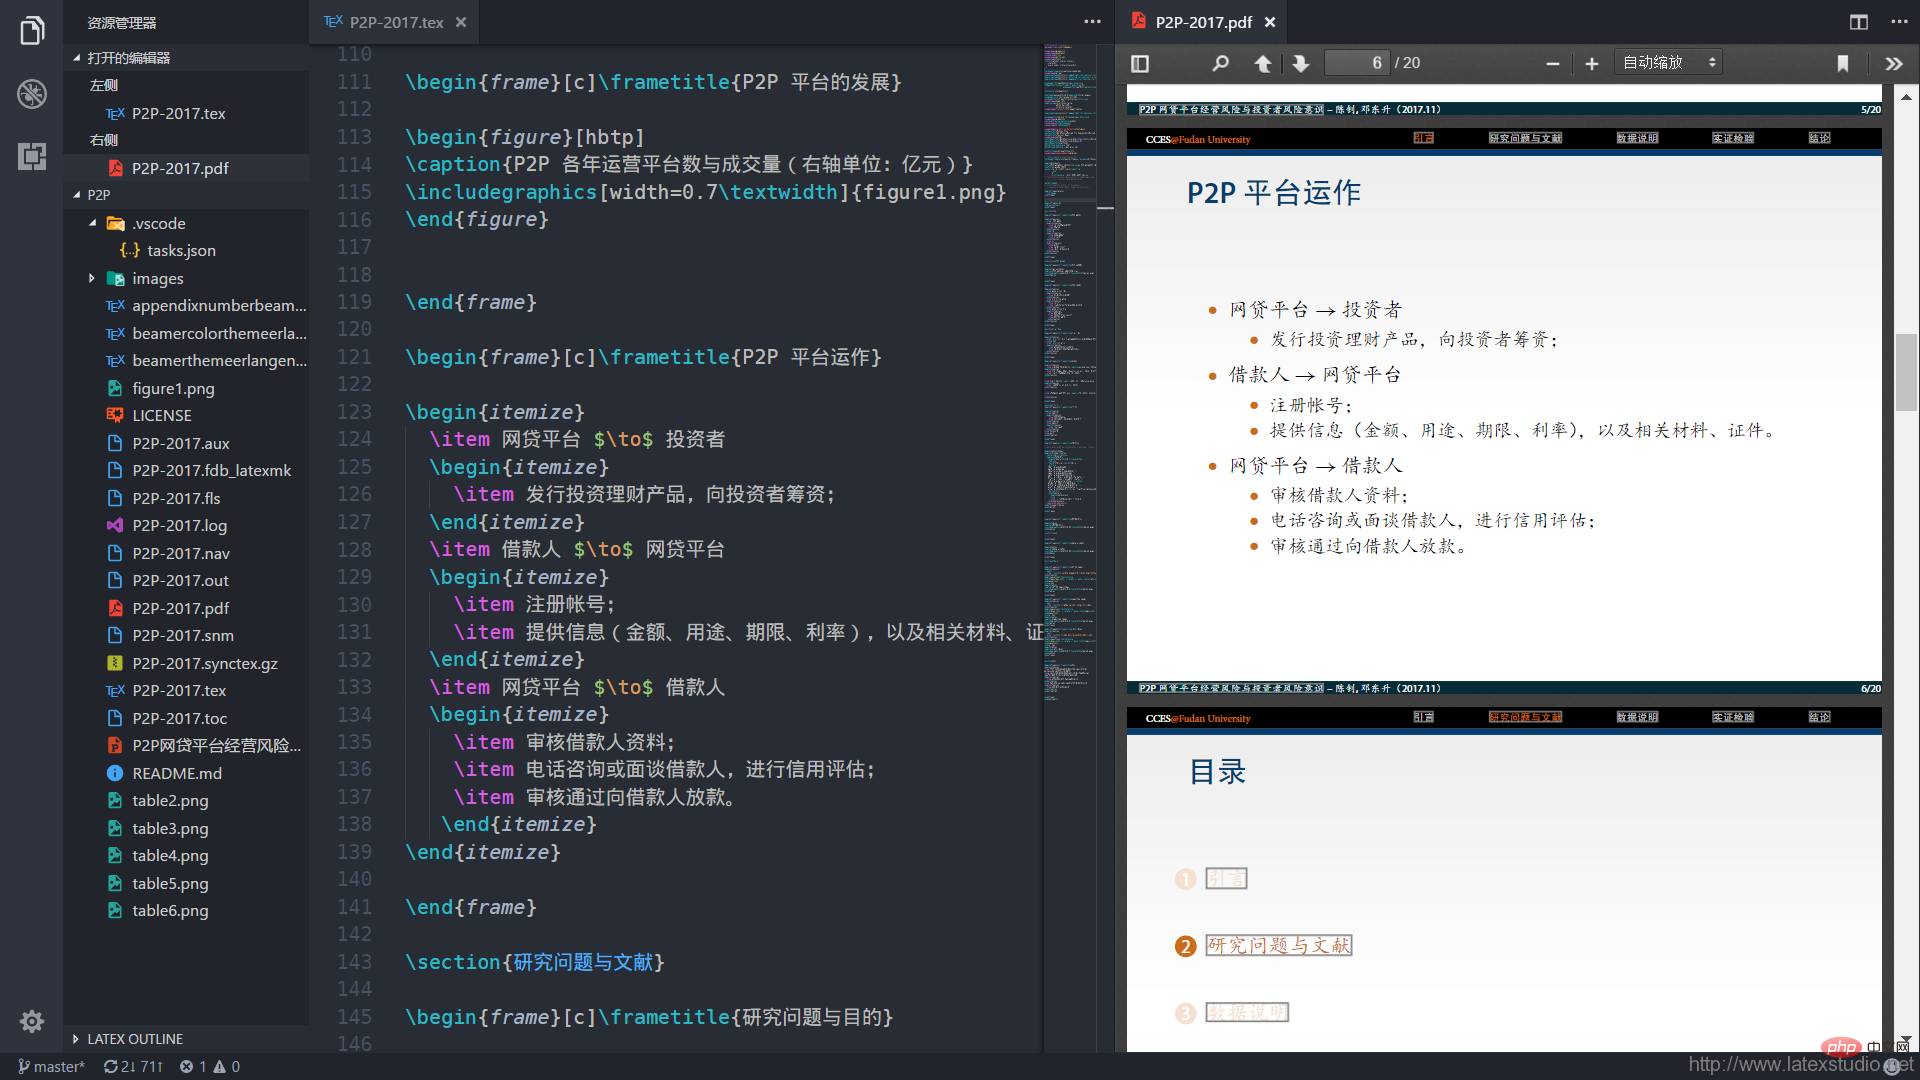
This article will introduce to you how to build a LaTeX writing environment in VSCode. It has certain reference value. Friends in need can refer to it. I hope it will be helpful to everyone.

Related recommendations: "vscode Basic Tutorial"
The installation of TeXlive and Visual Studio Code will not be described in detail here. One thing to note is that after installation, you need to change the bin directory of TeXlive (<span style="font-size:14px">C:\texlive\2015\bin\win32</span>) is added to the system’s environment variable (PATH).
After installing Visual Studio Code, open Extensions on the left (shortcut key<span style="font-size:14px">Ctrl Shift X</span> ), search for LaTeX Workshop, choose to install, and choose to restart VS Code to activate the plug-in.
When we write LaTeX documents, there are two special commands, one is <span style="font-size:14px"> %!TEX program = xelatex</span>, one is <span style="font-size:14px">% !TEX root = relative/or/absolute/path/to/root/file.tex</span>, the former is specified Compilation method, the latter specifies the main (root) file. With this, we can set different compilation methods for different documents, which simplifies the trouble during compilation. If we specify the document compilation method, we only need to follow the following configuration to compile the LaTeX document.
The specific method is to click the gear pattern button in the lower left corner of VS Code, select Settings, and add the LaTeX Workshop configuration command on the right
  "latex-workshop.latex.clean.enabled": false,
    "latex-workshop.view.pdf.hand": true,
    // 可变编译方式
    "latex-workshop.latex.toolchain": [
      {
        "command": "", // 注意这里是留空的
        "args": [
          "-synctex=1",
          "-interaction=nonstopmode",
          "-file-line-error",
          "%DOC%"
        ]
      }
],Then we choose to create a new document (the first few I saw two bloggers refer to our 2014 Sublime Text to build LaTeX writing environment blog post. Even the code below is the same, but they did not quote ours in the article, hahaha). In view of this, I decided to add some personal information.
%!TEX program = xelatex
% 使用 ctexart 文类,UTF-8 编码
\documentclass[UTF8]{ctexart}
\title{测试}
\author{ddswhu}
\date{\today}

\begin{document}
\maketitle

This is the context of the article.

这就是文章的所有内容。

\end{document}Save this file as <span style="font-size:14px">test.tex</span>, and then use the shortcut keys <span style="font-size:14px">Ctrl Alt B</span> to compile, or in In the document, right-click the mouse and select Build LaTeX Project, so that you can use <span style="font-size:14px">xelatex</span> to compile <span style="font-size:14px">test.tex</span>.
In fact, the default compilation method of LaTeX Workshop is <span style="font-size:14px">latexmk</span>, we can also imitate the TeXify command in MiKTeX, just change the configuration to
"latex-workshop.latex.toolchain": [
  {
    "command": "texify",
    "args": [
      "--synctex",
      "--pdf",
      "--tex-option=\"-interaction=nonstopmode\"",
      "--tex-option=\"-file-line-error\"",
      "%DOC%.tex"
    ]
  }
]When it comes to specifying a separate compilation method, there are still two different methods. One is to continue to modify based on the above configuration. You can change <span style="font-size:14px">command</span> to <span style="font-size:14px">xelatex</span> or <span style="font-size:14px">pdflatex</span> and <span style="font-size:14px">bibtex</span>.
The following is a complete PDFLaTeX compilation (pdflatex->bibtex->pdflatex->pdflatex)
"latex-workshop.latex.toolchain": [
  {
    "command": "pdflatex",
    "args": [
      "-synctex=1",
      "-interaction=nonstopmode",
      "-file-line-error",
      "%DOC%"
    ]
  }, {
    "command": "bibtex",
    "args": [
      "%DOCFILE%"
    ]
  }, {
    "command": "pdflatex",
    "args": [
      "-synctex=1",
      "-interaction=nonstopmode",
      "-file-line-error",
      "%DOC%"
    ]
  }, {
    "command": "pdflatex",
    "args": [
      "-synctex=1",
      "-interaction=nonstopmode",
      "-file-line-error",
      "%DOC%"
    ]
  }
]Because the specific compilation method is specified here, so in the document Some do not need to specify the compilation method. Since the configuration file is global, this method requires temporary configuration files for different files, which is a bit inconvenient.
在 VS Code 中,在操作时并不是以单个文件为依托,而是以项目或者工程为单位。对应的,在 VS Code,我们需要将这个文件夹导入到 VS Code 中,并为这个项目配置 <span style="font-size:14px">tasks.json</span> 文件,在 <span style="font-size:14px">tasks.json</span> 文件中指定编译方式等。
具体操作是,在任务栏选择 任务->运行任务,然后 VS Code 会提示没有任务,需要配置任务,然后选择使用模板创建任务,在模板选择的时候,选择 MS.build 就行。然后将 <span style="font-size:14px">tasks.json</span>文件内容修改为(filename 替换为你需要编译的文件名(主文档))。
{
    "version": "0.1.0",
    "isShellCommand": true,
    "suppressTaskName": true,
    "tasks": [{
            "taskName": "PDFLaTeX",
            "command": "pdflatex",
            "isBuildCommand": true,
            "args": [
                "-synctex=1",
                "-interaction=nonstopmode",
                "-file-line-error",
                "filename.tex"
            ]}, {
            "taskName": "BibTeX",
            "command": "bibtex",
            "isTestCommand": true,
            "args": ["filename.aux"]
            },
           {
            "taskName": "XeLaTeX",
            "command": "xelatex",
            "isBuildCommand": true,
            "args": [
                "-synctex=1",
                "-interaction=nonstopmode",
                "-file-line-error",
                "filename.tex"
            ]},
        ]
}这样,任务配置好了,接下来就只要运行就行了。依次选择 任务->运行任务,选择你所需要的编译方式,如果需要完整编译,假设文档有 bib 文件,则需要选择 PDFLaTeX->BibTeX->PDFLaTeX->PDFLaTeX,这种配置的好处是,你可以完全控制编译方式,能选择编译 bib 文件,适用于大型项目,比如论文,笔记或者书籍等(推荐)。并且只要你配置好 <span style="font-size:14px">tasks.json</span>文件之后,以后打开文件就不用管编译方式和配置了,可以直接运行任务就行。
编译的默认快捷键是 <span style="font-size:14px">Ctrl+Alt+B</span>,由于我习惯了 Sublime Text 的 <span style="font-size:14px">Ctrl+B</span>,所以这里我们再提一下 VS Code 快捷键的设置,在 VS Code 左下角,点击齿轮图案的按钮,选择 键盘快捷方式,然后再搜索栏里面选择 LaTeX Workshop,将第一个 Build LaTeX Project 的快捷键修改为 <span style="font-size:14px">Ctrl+B</span> 即可。
通过右侧的红色 PDF 按钮,我们可以打开 PDF 预览,我们在查看 PDF 的时候,可以通过快捷键 <span style="font-size:14px">Ctrl+Shift+Left</span>跳转到代码。

更多编程相关知识,请访问:编程教学!!
The above is the detailed content of A brief discussion on how to build a LaTeX writing environment with VSCode. For more information, please follow other related articles on the PHP Chinese website!