


This article will introduce you to the tutorial on installing and running Python under Windows 10Atom. It has certain reference value. Friends in need can refer to it. I hope it will be helpful to everyone.

Related recommendations: "atom tutorial"
1. Download Atom
1. Official website: Atom official website
2. Open this webpage, you can see that Atom is for the operating systemWindows7 or above version

3. Download is complete, double-click the exe

4. Loading interface

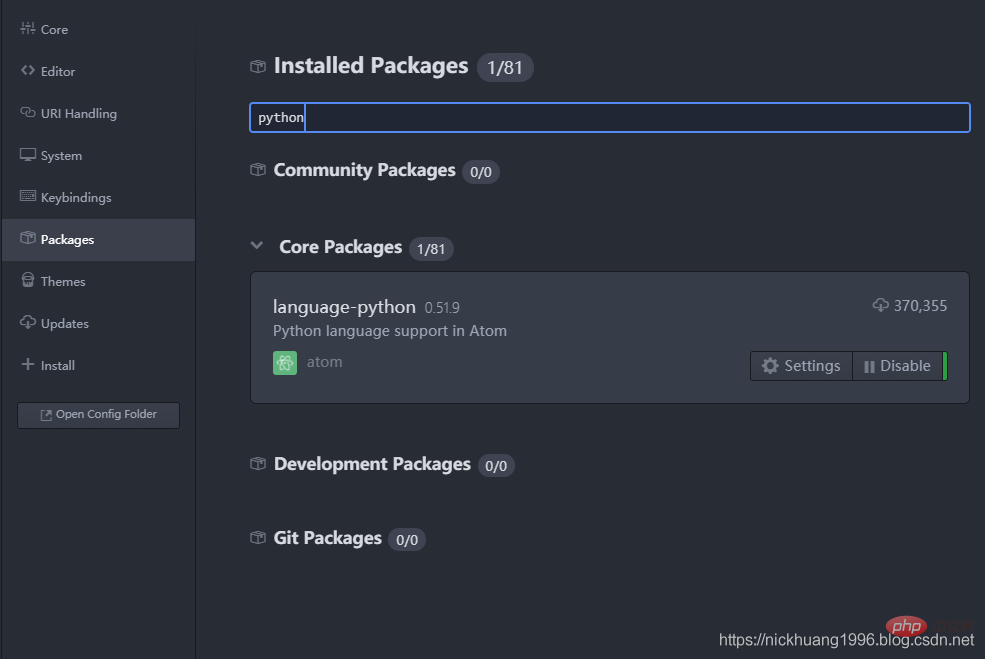
(1) First check in Settings whetherhas Python support
, blogger here Because the Python library is installed, Disable
is displayed (2) Click on the package name and we can also go to the web page to view related information about the package
2. Install Python’sIDE,
UI,# that are suitable for Atom ##Server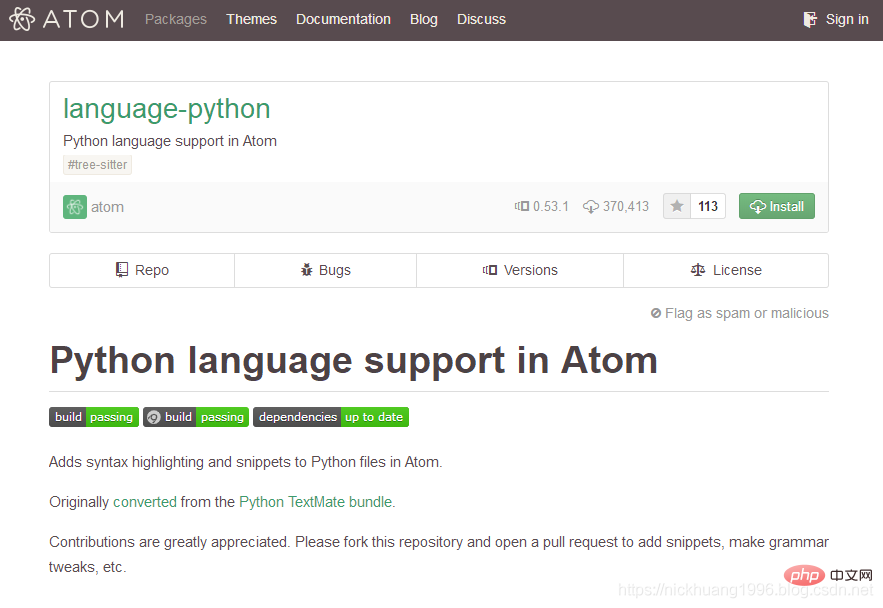 and
and
(1) Open cmd and run the following instructions to installpython-language-server
pip install python-language-server[all]
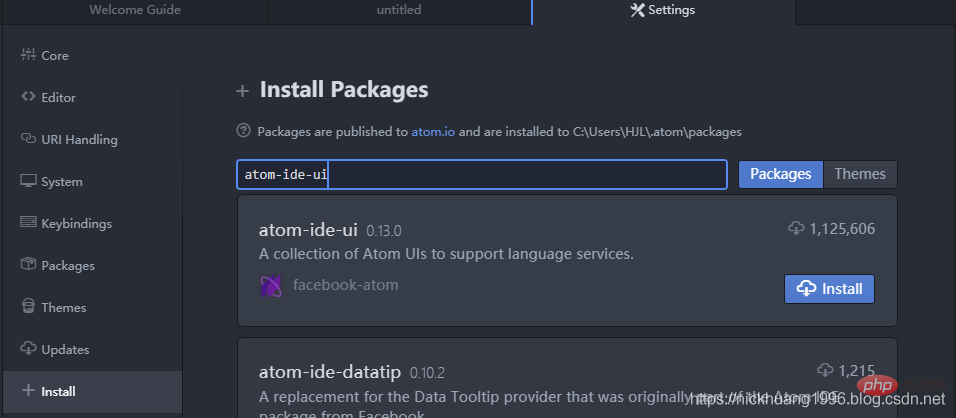
(2) Installation supports various language IDEs UI interface, searchatom-ide-ui
atom-ide-ui
Install as shown in the picture
(3) Similarly, installide-python
:
ide-python
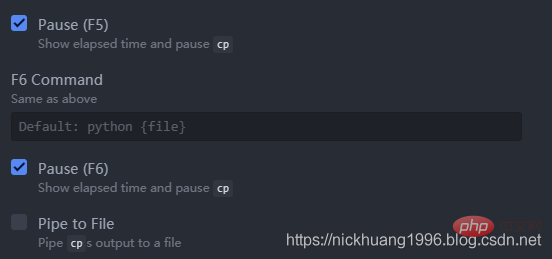
The most important, install therunning toolatom-python-run
:
PressF5 to run,F6 to pause~
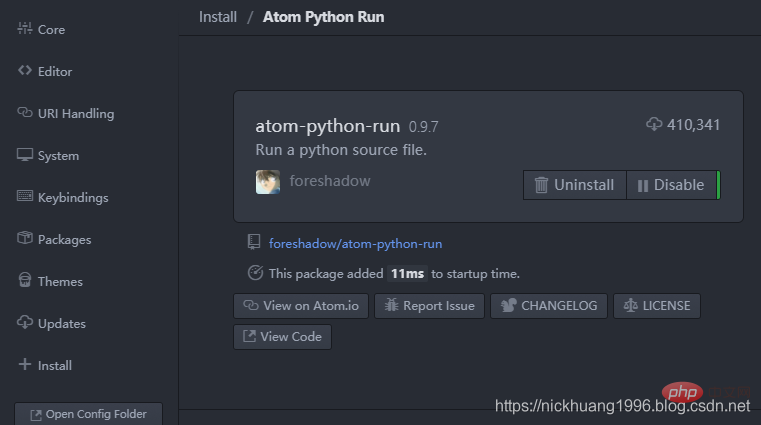
(5) The final downloaded package can be seen in this fileC:\Users\your computer username\.atom\packages
*3. Running code example
1. Here I use my Python to crawl and download Baidu pictures
2.打开这个项目,菜单栏里点击File->Add Project Folder
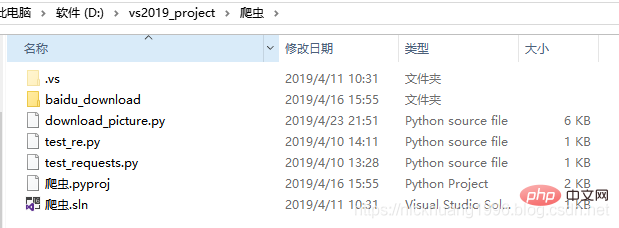
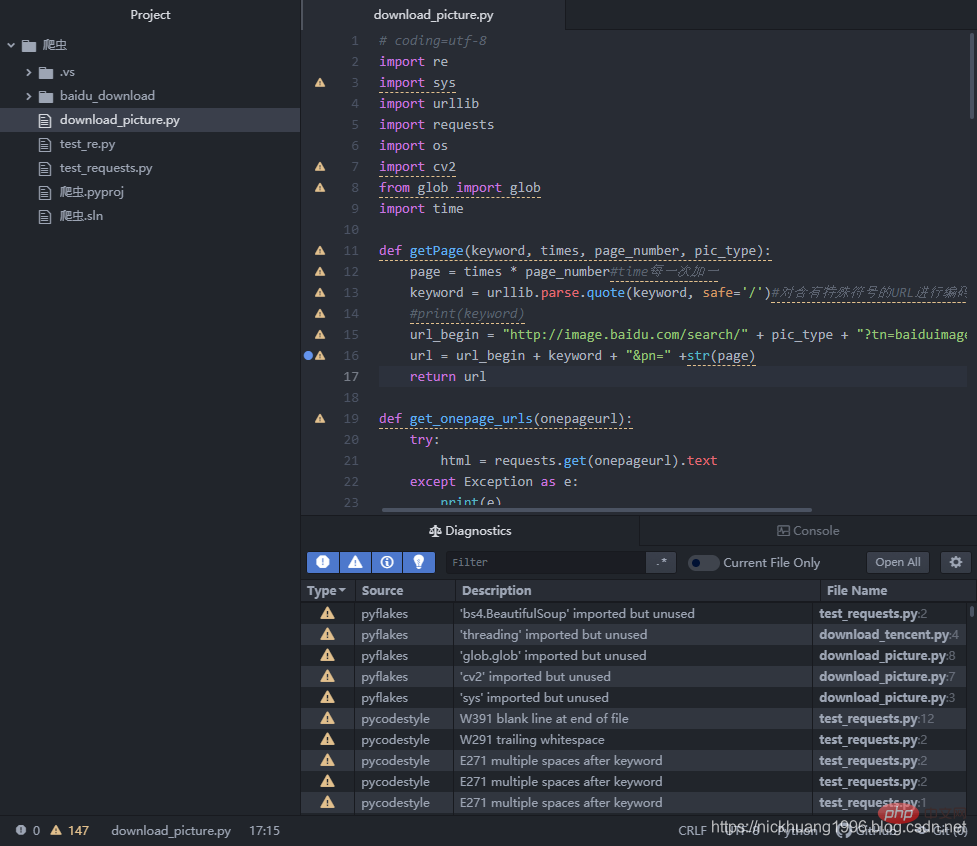
3.Atom里打开这个download_picture.py(以杉原杏璃为关键字)
# coding=utf-8 """ @author:nickhuang1996 """ import re import sys import urllib import requests import os import cv2 from glob import glob import time def getPage(keyword, times, page_number, pic_type): page = times * page_number#time每一次加一 keyword = urllib.parse.quote(keyword, safe='/')#对含有特殊符号的URL进行编码,使其转换为合法的url字符串。中文则转换为数字,符号和字母的组合 #print(keyword) url_begin = "http://image.baidu.com/search/" + pic_type + "?tn=baiduimage&ie=utf-8&word="#pic_type url = url_begin + keyword + "&pn=" +str(page) return url def get_onepage_urls(onepageurl): try: html = requests.get(onepageurl).text except Exception as e: print(e) pic_urls = [] return pic_urls pic_urls = re.findall('"objURL":"(.*?)",', html, re.S)#index是30个图片的链接,flip是60个 print("一共有{}个图片链接".format(len(pic_urls))) return pic_urls def download_pic(pic_urls, keyword, save_path): #给出图片链接列表, 下载所有图片 print("去除了重复的图片下载数量为:{}".format(len(pic_urls))) print("\n开始下载...") start_time = time.time() for i, pic_url in enumerate(pic_urls): try: pic = requests.get(pic_url, timeout=5) string = save_path + '/' + str(i + 1) + '.jpg' with open(string, 'wb') as f: f.write(pic.content) print('成功下载第%s张图片: %s' % (str(i + 1), str(pic_url))) except Exception as e: print('下载第%s张图片时失败: %s' % (str(i + 1), str(pic_url))) print(e) continue end_time = time.time()-start_time print("下载结束,耗时:{:.0f}m {:.0f}s...".format(end_time // 60, end_time % 60)) if __name__ == '__main__': keyword = '杉原杏璃' # 关键词, 改为你想输入的词即可, 相当于在百度图片里搜索一样 save_path = './baidu_download/' + keyword if not os.path.exists(save_path): os.mkdir(save_path) #参数设置 times = 0 #图片参数类型 pic_type = "flip"#"flip"/"index" print("图片链接关键字为:{}".format(pic_type)) page_number = 20#flip时为60,index时为30则不会有缓存 total_times = 3#请求总次数 """ 如果page_number为20,则百度图片每页显示20张图片,因此对于flip形式每页会多缓存(60-20=40)张,index形式每页会多缓存(30-20=10)张, 所以,请求4次的话: flip应该是 20 × 4 + (60 - 20) = 120张图片,而不是60×4 = 240 index应该是 20 × 4 + (30 - 20) = 90张图片,而不是30×4 = 120 示意图: flip index 0 ________ ______ 0 | | | | | 20 | | 20 | 10 | | | | 20 |______|______ |______|______ 20 | | | | | 20 | _|_ 20 | 30 | | | | 40 |______|______ |______|______ 40 | | | | | | | 20 | _|_ 20 | 50 | | | | | 60 _|_ |______|______ |______|______ 60 | | | | | | | 20 | _|_ 20 | 70 | | | | | 80 _|_ |______| |______| 80 | | | | | _|_ 90 | | 100 _|_ | | | | 120 _|_ 说白了,就是获取了重复的图片 可以通过调节page_number变量查看 """ all_pic_urls = [] while 1:#死循环 if times > total_times: break print("第{}次请求数据".format(times + 1)) url=getPage(keyword, times, page_number, pic_type)#输入参数:关键词,开始的页数,总页数 print(url)#打印链接 onepage_urls= get_onepage_urls(url)#index是30个图片的链接,flip是60个 times += 1#页数加1 if onepage_urls != 0: all_pic_urls.extend(onepage_urls)#列表末尾一次性追加另一个序列中的多个值 #print("将要下载的图片数量变为:{}".format(len(all_pic_urls))) print("下载的图片总量变为:{}".format(len(all_pic_urls))) download_pic(list(set(all_pic_urls)),keyword, save_path)#set去除重复的元素(链接)
效果如下(可以看到很多警告,也支持ctrl+鼠标访问函数和变量):
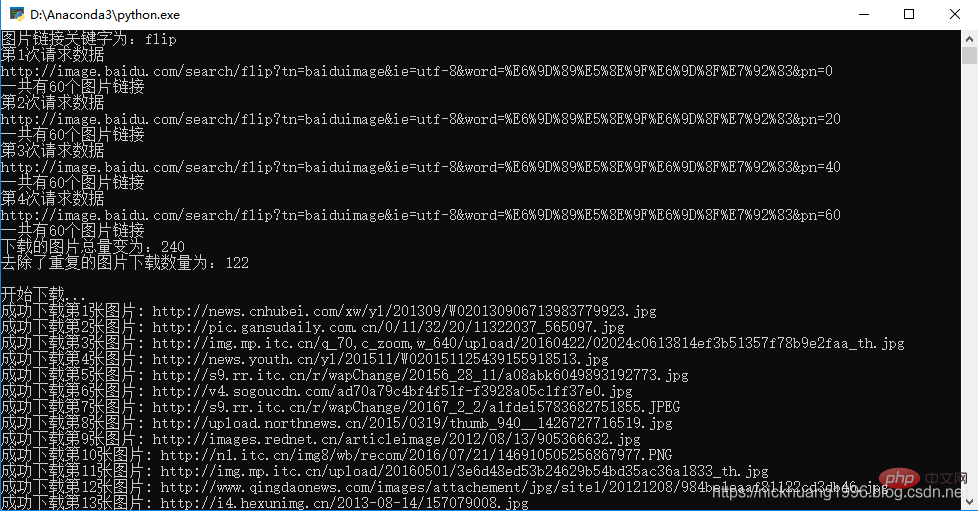
4.我们点击F5,可以看到程序运行成功!!

是不是用这个IDE也很不错呢~
更多编程相关知识,请访问:编程课程!!
The above is the detailed content of How to install and run Python in Atom under Win10 environment. For more information, please follow other related articles on the PHP Chinese website!


![[Web front-end] Node.js quick start](https://img.php.cn/upload/course/000/000/067/662b5d34ba7c0227.png)


