
1. Initial index.html
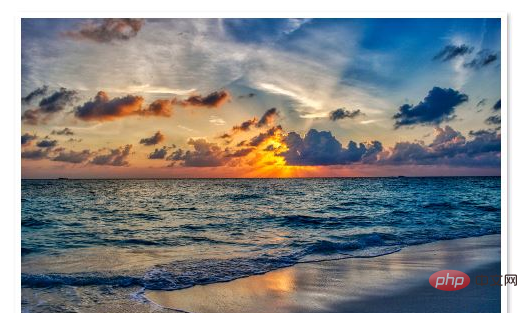
In order to create the first photo, which is the top one. We just need to add a div containing the img of the photo. That’s all, the rest of the effects are achieved through CSS. Make sure the div's class is stackone.
<!DOCTYPE html>
<html>
 <head>
  <meta charset="UTF-8" />
  <meta name="viewport" content="width=device-width, initial-scale=1.0" />
  <meta http-equiv="X-UA-Compatible" content="ie=edge" />
  <title>Photo Stack</title>
  <style>
    * {
      margin: 0;
      padding: 0;
    }
    html,
    body {
      width: 100%;
      height: 100%;
      overflow: hidden;
    }
    .stackone {
      --img-width: 480px;
      --img-height: 320px;
      border: 6px solid #fff;
      float: left;
      height:var(--img-height);
      width: var(--img-width);
      margin: 50px;
      position: relative;
      -webkit-box-shadow: 2px 2px 5px rgba(0, 0, 0, 0.3);
      -moz-box-shadow: 2px 2px 5px rgba(0, 0, 0, 0.3);
      box-shadow: 2px 2px 5px rgba(0, 0, 0, 0.3);
    }
    .stackone img {
      width: var(--img-width);
    }
  </style>
 </head>
 <body>
  <div>
   <img  src="../../../assets/image/landscape-4378548_960_720.jpg" / alt="How to achieve picture stacking effect in css" >
  </div>
 </body>
</html>The initial effect is as follows:

(Recommended tutorial: CSS Getting Started Tutorial)
2. The First Pseudo Element
Now we add a layer of negative. The effect we want is that the bottom image appears to be underneath the top photo. We can use the CSS pseudo-class: before to achieve this.
.stackone::before {
  content: "";
  height:var(--img-height);
  width: var(--img-width);
  background: #eff4de;
  border: 6px solid #fff;
  -webkit-box-shadow: 2px 2px 5px rgba(0, 0, 0, 0.3);
  -moz-box-shadow: 2px 2px 5px rgba(0, 0, 0, 0.3);
  box-shadow: 2px 2px 5px rgba(0, 0, 0, 0.3);
}3. Improve before
Add some positioning to:before, and then set z-index to put it behind.
.stackone::before {
  content: "";
  height:var(--img-height);
  width: var(--img-width);
  background: #eff4de;
  border: 6px solid #fff;

  position: absolute;
  z-index: -1;
  top: 0px;
  left: -10px;

  -webkit-box-shadow: 2px 2px 5px rgba(0, 0, 0, 0.3);
  -moz-box-shadow: 2px 2px 5px rgba(0, 0, 0, 0.3);
  box-shadow: 2px 2px 5px rgba(0, 0, 0, 0.3);

  -webkit-transform: rotate(-5deg);
  -moz-transform: rotate(-5deg);
  -o-transform: rotate(-5deg);
  -ms-transform: rotate(-5deg);
  transform: rotate(-5deg);
}4. The Second Pseudo Element
.stackone::after {
  content: "";
  height:var(--img-height);
  width: var(--img-width);
  background: lightblue;
  border: 6px solid #fff;
  position: absolute;
  z-index: -1;
  top: 5px;
  left: 0px;
  -webkit-box-shadow: 2px 2px 5px rgba(0, 0, 0, 0.3);
  -moz-box-shadow: 2px 2px 5px rgba(0, 0, 0, 0.3);
  box-shadow: 2px 2px 5px rgba(0, 0, 0, 0.3);
  -webkit-transform: rotate(4deg);
  -moz-transform: rotate(4deg);
  -o-transform: rotate(4deg);
  -ms-transform: rotate(4deg);
  transform: rotate(4deg);
}Complete picture:

Recommended related video tutorials: css Video tutorial
The above is the detailed content of How to achieve picture stacking effect in css. For more information, please follow other related articles on the PHP Chinese website!