
The content of this article is to introduce how jQuery operates HTML elements and attributes? (Detailed code explanation example), let everyone understand how jQuery operates elements and attributes. It has certain reference value. Friends in need can refer to it. I hope it will be helpful to you.
1. Get the content and attributes of the HTML element
(1) Get the content: text(), html () and val() methods
<!DOCTYPE html>
<html>
	<head>
		<meta http-equiv="Content-Type" content="text/html; charset=utf-8" />
		<title>My Test JQuery</title>
		<script type="text/javascript" src="./js/jquery-1.10.2.min.js"></script>
		<script type="text/javascript">
			$(function() {
				//text() - 设置或返回所选元素的文本内容
				$("#btnText").click(function() {
					alert($("#myp1").text());
				});
				$("#btnTextSet").click(function() {
					$("#myp1").text('这是一个美好的日子');
					alert($("#myp1").text());
				}); //html() - 设置或返回所选元素的内容(包括 HTML 标记)
				$("#btnHtml").click(function() {
					alert($("#myp1").html());
				});
				$("#btnHtmlSet").click(function() {
					$("#myp1").html('这是一个<b>神奇</b>的世界啊');
					alert($("#myp1").html());
				}); //val() - 设置或返回表单字段的值
				$("#btnVal").click(function() {
					alert($("#myInput1").val());
				});
				$("#btnValSet").click(function() {
					$("#myInput1").val('好好学习,天天向上');
					alert($("#myInput1").val());
				});
			});
		</script>
	</head>

	<body>
		<button type="button" id="btnText">text()方法获取内容</button>
		<button type="button" id="btnHtml">html()方法获取内容</button>
		<button type="button" id="btnVal">val()方法获取内容</button><br/>
		<button type="button" id="btnTextSet">text()方法设置内容</button>
		<button type="button" id="btnHtmlSet">html()方法设置内容</button>
		<button type="button" id="btnValSet">val()方法设置内容</button>
		<p id="myp1">这是一个神奇的 <b>世界</b>啊 </p>
		<input type="text" id="myInput1" value="大家好"></p>
	</body>

</html>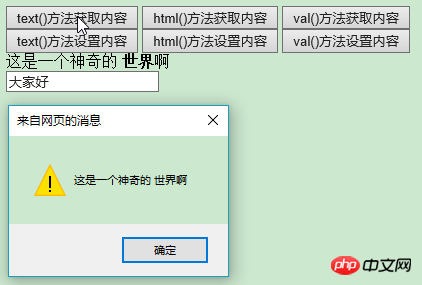
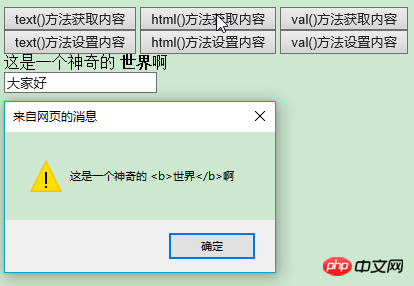
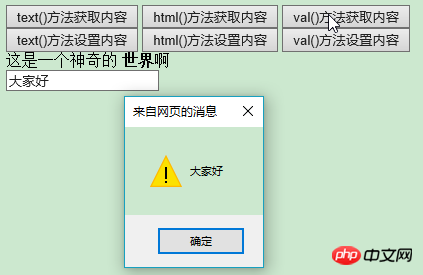
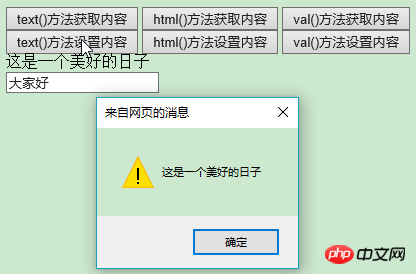
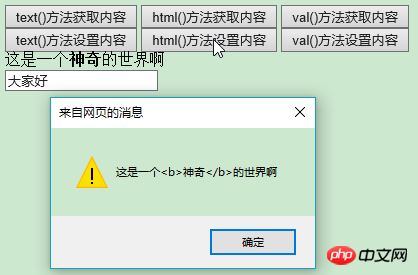
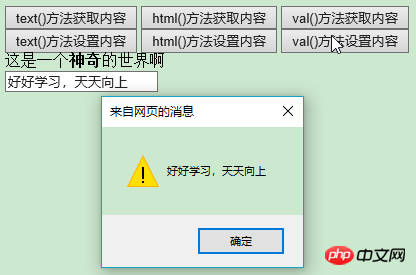
(2) Get attributes: attr() method
<!DOCTYPE html><html><head><meta http-equiv="Content-Type" content="text/html; charset=utf-8"/><title>My Test JQuery</title>
    <script type="text/javascript" src="./js/jquery-1.10.2.min.js"></script>
    <script type="text/javascript" >
        $(function(){
            //attr() 方法用于获取属性值,也用于设置/改变属性值。            $("#btn_attr1").click(function(){
                alert($("#myHref").attr("href"));
            });
            $("#btn_attr2").click(function(){
                $("#myHref").attr("href","https://www.cnblogs.com");
                alert('超链接属性设置为:'+$("#myHref").attr("href"));
            });
        });    </script></head><body>
    <button type="button" id="btn_attr1">attr()方法获取属性</button><br/>
    <button type="button" id="btn_attr2">attr()方法设置属性</button>
    <a href="https://www.baidu.com" id="myHref">超链接</a></body></html>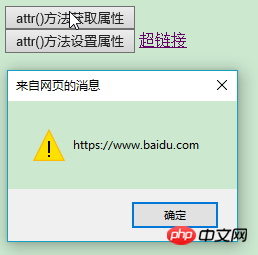
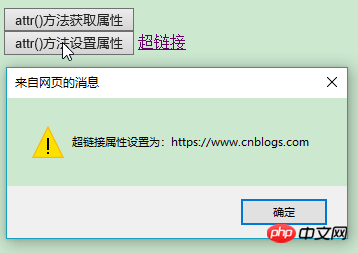
2. Add Elements:
append() and prepend() methods, after() and before() methods
<!DOCTYPE html>
<html>

	<head>
		<meta http-equiv="Content-Type" content="text/html; charset=utf-8" />
		<title>My Test JQuery</title>
		<script type="text/javascript" src="./js/jquery-1.10.2.min.js"></script>
		<script type="text/javascript">
			$(function() {
				//append() 方法在被选元素的结尾插入内容(仍然该元素的内部)
				$("#btn_append").click(function() {
					$("#myp1").append(" 是的");
				}); //prepend() 方法在被选元素的开头插入内容(仍然该元素的内部)
				$("#btn_prepend").click(function() {
					$("#myp1").prepend("我说 ");
				}); //before() 方法在被选元素的开头插入内容
				$("#btn_before").click(function() {
					$("#myInput1").before("Hello ");
				}); //after() 方法在被选元素的开头插入内容
				$("#btn_after").click(function() {
					$("#myInput1").after("World ");
				});
				//特别说明:
				//append() 和 prepend() 方法能够通过参数接收无限数量的新元素
				//after() 和 before() 方法能够通过参数接收无限数量的新元素。
				//可以通过 text/HTML、jQuery 或者 JavaScript/DOM 来创建新元素。
				//举例如下:
				/**
				$("#btn_after").click(function(){
				    var txt1="<b>程序员</b>";
				    var txt2=$("<i></i>").text("是厉害的人");
				    var txt3=document.createElement("<h1>");
				    txt3.innerHTML="好用的jQuery!";
				    $("#myInput1").after(txt1,txt2,txt3);
				});
				**/
			});
		</script>
	</head>

	<body>
		<button type="button" id="btn_append">append()方法</button>
		<button type="button" id="btn_prepend">prepend()方法</button><br/>
		<button type="button" id="btn_before">before()方法</button>
		<button type="button" id="btn_after">after()方法</button>
		<p id="myp1" style="background-color:green">这是一个神奇的 <b>世界</b>啊 </p>
		<input type="text" id="myInput1" value="大家好" /></body>

</html>


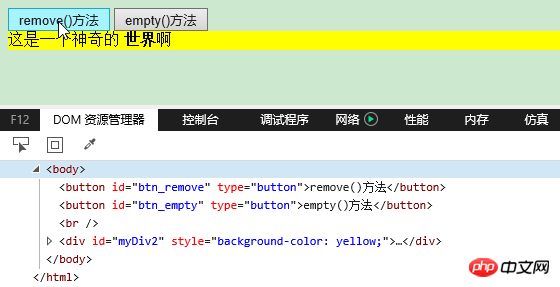
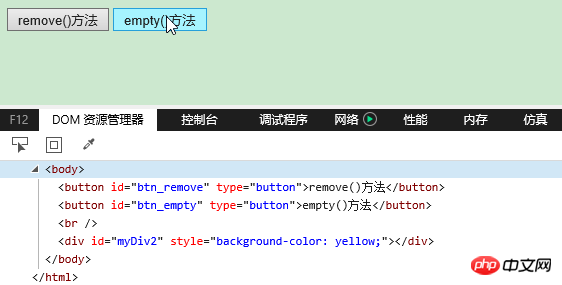
## 3. Delete elements:
remove() method, empty() method
<!DOCTYPE html>
<html>

	<head>
		<meta http-equiv="Content-Type" content="text/html; charset=utf-8" />
		<title>My Test JQuery</title>
		<script type="text/javascript" src="./js/jquery-1.10.2.min.js"></script>
		<script type="text/javascript">
			$(function() {
				//remove() 方法删除被选元素及其子元素
				$("#btn_remove").click(function() {
					$("#myp1").remove();
				}); //empty() 方法删除被选元素的子元素。
				$("#btn_empty").click(function() {
					$("#myp2").empty();
				});
			});
		</script>
	</head>

	<body>
		<button type="button" id="btn_remove">remove()方法</button>
		<button type="button" id="btn_empty">empty()方法</button><br/>
		<p id="myp1" style="background-color:green">这是一个神奇的 <b>世界</b>啊 </p>
		<p id="myp2" style="background-color:yellow">这是一个神奇的 <b>世界</b>啊 </p>
	</body>

</html>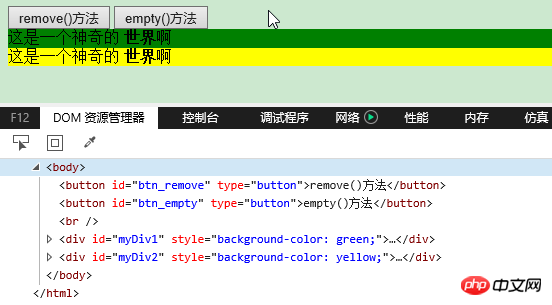
4. Get and set CSS classes:
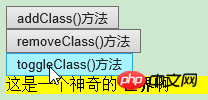
addClass() method, removeClass() method, toggleClass() method
<!DOCTYPE html>
<html>

	<head>
		<meta http-equiv="Content-Type" content="text/html; charset=utf-8" />
		<title>My Test JQuery</title>
		<script type="text/javascript" src="./js/jquery-1.10.2.min.js"></script>
		<script type="text/javascript">
			$(function() {
				//addClass() - 向被选元素添加一个或多个类
				$("#btn_addClass").click(function() {
					$("#myp1").addClass('blue');
				}); //removeClass() - 从被选元素删除一个或多个类
				$("#btn_removeClass").click(function() {
					$("#myp1").removeClass('blue');
				}); //toggleClass() - 对被选元素进行添加/删除类的切换操作
				$("#btn_toggleClass").click(function() {
					$("#myp1").toggleClass('blue');
				});
			});
		</script>
	</head>
	<style type="text/css">
		.blue {
			font-size: 16px;
			background-color: yellow;
		}
	</style>

	<body>
		<button type="button" id="btn_addClass">addClass()方法</button><br/>
		<button type="button" id="btn_removeClass">removeClass()方法</button><br/>
		<button type="button" id="btn_toggleClass">toggleClass()方法</button>
		<p id="myp1">这是一个神奇的 <b>世界</b>啊 </p>
	</body>

</html>



##5. css() method:
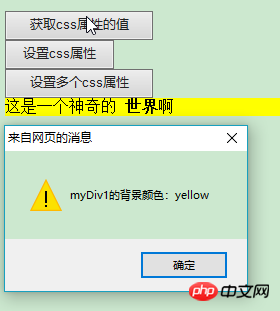
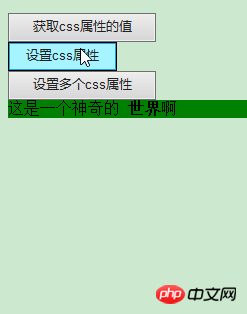
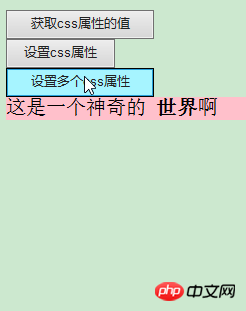
Return CSS properties, set CSS properties, set multiple CSS properties<!DOCTYPE html>
<html>
<head>
<meta http-equiv="Content-Type" content="text/html; charset=utf-8" />
<title>My Test JQuery</title>
<script type="text/javascript" src="./js/jquery-1.10.2.min.js"></script>
<script type="text/javascript">
$(function() {
//返回指定的 CSS 属性的值
$("#btn_css1").click(function() {
alert('myp1的背景颜色:' + $("#myp1").css("background-color"));
}); //设置指定的 CSS 属性
$("#btn_css2").click(function() {
$("#myp1").css("background-color", "green");
}); //设置多个 CSS 属性
$("#btn_css3").click(function() {
$("#myp1").css({
"background-color": "pink",
"font-size": "20px"
});
});
});
</script>
</head>
<body>
<button type="button" id="btn_css1">获取css属性的值</button><br/>
<button type="button" id="btn_css2">设置css属性</button><br/>
<button type="button" id="btn_css3">设置多个css属性</button><br/>
<p id="myp1" style="background-color:yellow">这是一个神奇的 <b>世界</b>啊 </p>
</body>
</html>
6. Important methods for handling size:
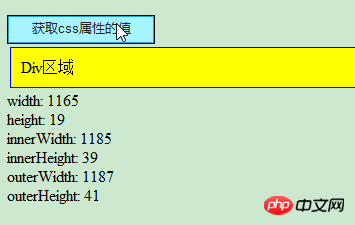
width() and height() methods, innerWidth() and innerHeight () method, outerWidth() and outerHeight() methods<!DOCTYPE html>
<html>
<head>
<meta http-equiv="Content-Type" content="text/html; charset=utf-8" />
<title>My Test JQuery</title>
<script type="text/javascript" src="./js/jquery-1.10.2.min.js"></script>
<script type="text/javascript">
$(function() {
//width() 方法设置或返回元素的宽度(不包括内边距、边框或外边距)。
//height() 方法设置或返回元素的高度(不包括内边距、边框或外边距)。
//innerWidth() 方法返回元素的宽度(包括内边距)。
//innerHeight() 方法返回元素的高度(包括内边距)。
//outerWidth() 方法返回元素的宽度(包括内边距和边框)。
//outerHeight() 方法返回元素的高度(包括内边距和边框)。
$("#btn_css1").click(function() {
$("#myp2").html("width: " + $("#myp1").width());
$("#myp2").html($("#myp2").html() + "<br/>height: " + $("#myp1").height());
$("#myp2").html($("#myp2").html() + "<br/>innerWidth: " + $("#myp1").innerWidth());
$("#myp2").html($("#myp2").html() + "<br/>innerHeight: " + $("#myp1").innerHeight());
$("#myp2").html($("#myp2").html() + "<br/>outerWidth: " + $("#myp1").outerWidth());
$("#myp2").html($("#myp2").html() + "<br/>outerHeight: " + $("#myp1").outerHeight());
});
});
</script>
</head>
<body>
<button type="button" id="btn_css1">获取css属性的值</button><br/>
<p id="myp1" style="background-color:yellow;padding:10px;margin:3px;border:1px solid blue;">p区域</p>
<p id="myp2"></p>
</body>
</html>
 Summary: The above is the entire content of this article, you can try it yourself and deepen Understand; I hope it will be helpful to everyone's learning. Recommended related video tutorials:
The above is the detailed content of How does jQuery operate on HTML elements and attributes? (Example of detailed code explanation). For more information, please follow other related articles on the PHP Chinese website!