


How to add borders in Dreamweaver? Dreamweaver wants to create a red border, how to create it? Let's take a look at how to make Dreamweaver borders. Friends who need it can refer to it. I hope it can help everyone.
When designing a web page with Dreamweaver, if you want to add a border, how should you add it? Let’s take a look at the detailed tutorial below.
Software name:
##Adobe Dreamweaver CC 2017 v17.0 Chinese cracked version ( Attached crack patch + installation tutorial) 64-bit

DW Editing Tool


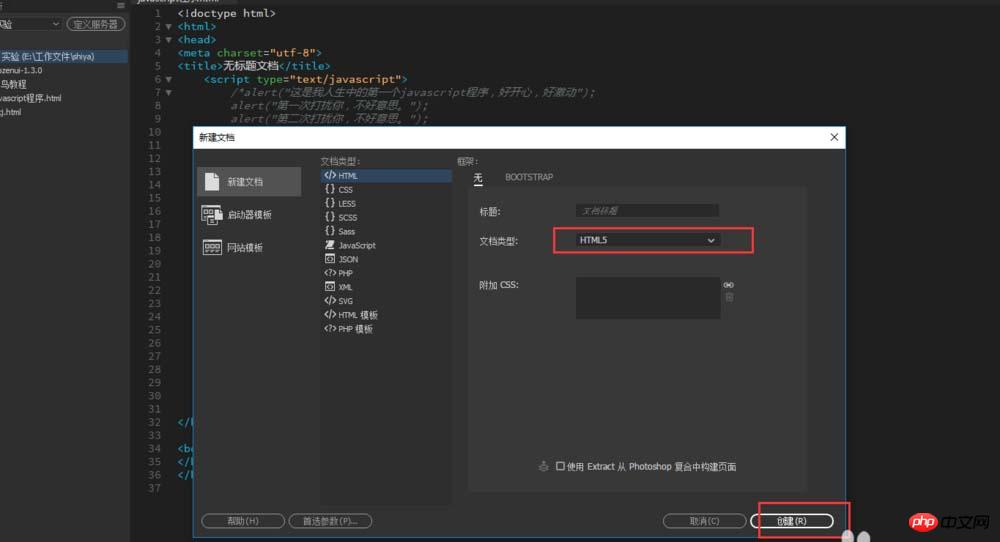
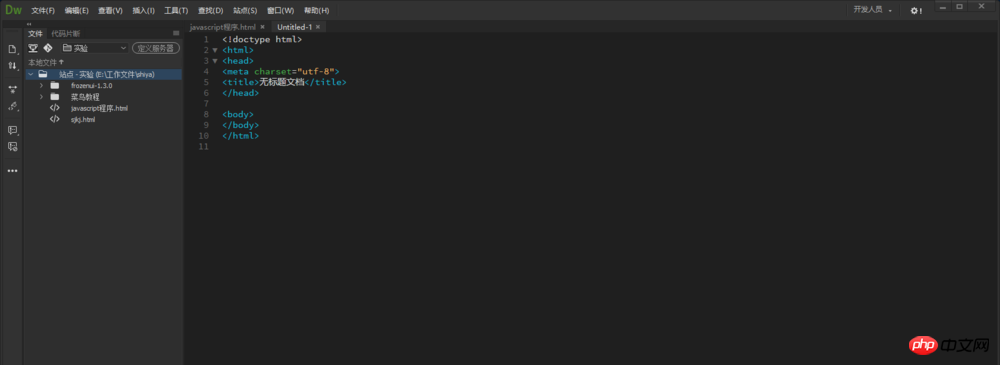
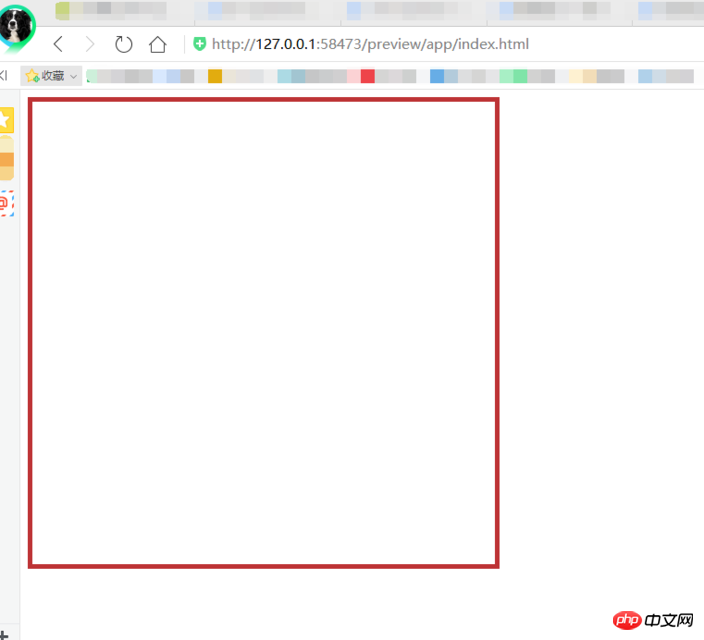
HTML file and click Create.
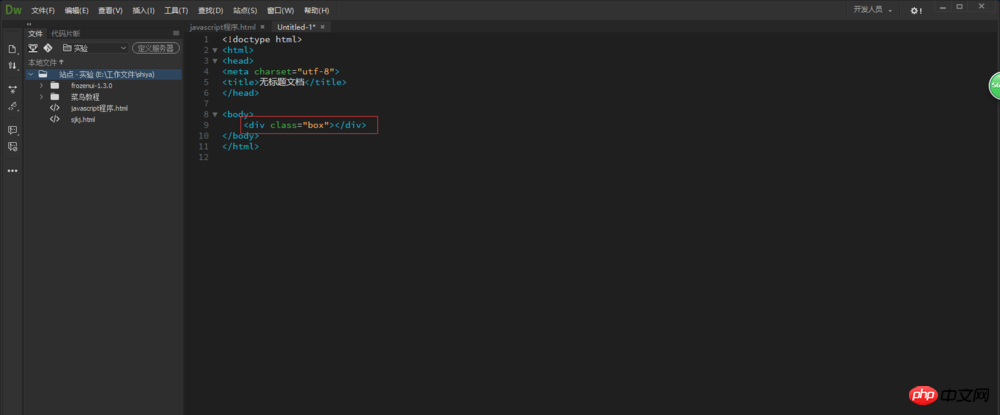
p” tag and name it box.
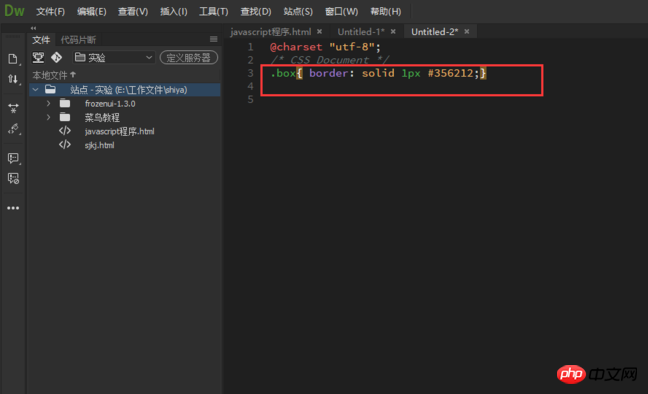
box{ }.
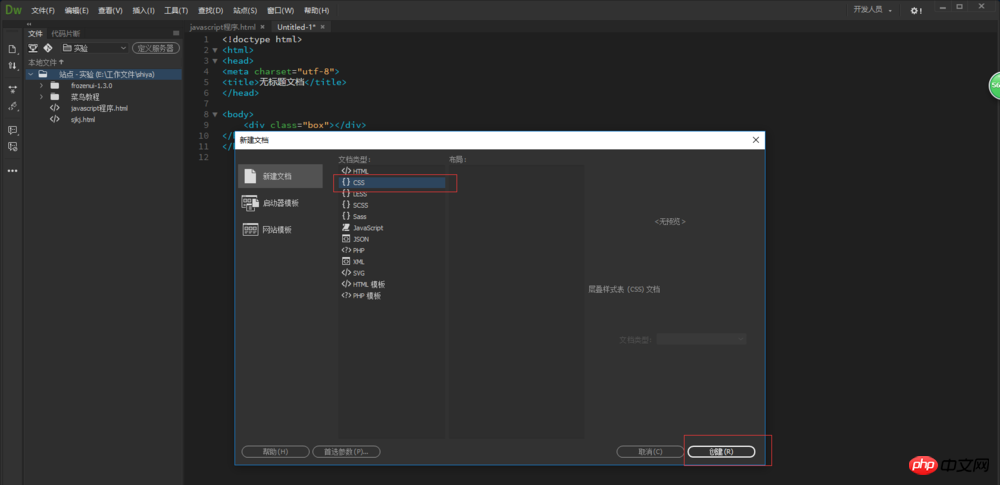
border:solid 1px #333333;" in the css style.box{ }.
CSS3 Example of Gradually Glowing Square Border
html Steps to Implement Dotted Border Line
The above is the detailed content of How to add borders in Dreamweaver. For more information, please follow other related articles on the PHP Chinese website!


![[Web front-end] Node.js quick start](https://img.php.cn/upload/course/000/000/067/662b5d34ba7c0227.png)


