Basic framework
<!DOCTYPE HTML><html><head><meta http-equiv="Content-Type" content="text/html; charset=utf-8"><title>标题标签</title></head><body><h1>了不起的盖茨比</h1><p>《了不起的盖茨比》为那个奢靡年代的缩影。盖茨比怀揣着对"美国梦"的期翼,投身到那个年代的灯红酒绿之中,却在名利场中看尽世态炎凉,以及浮华背后一切终将逝去的空虚怅惘。1925年《了不起的盖茨比》问世。</p></body></html>
Copy after login
Understand HTML code comments
<p>What are code comments? The function of code comments is to help programmers mark the purpose of the code. If you look at the code you wrote after a while, you can quickly remember the purpose of this code. Code comments not only make it easier for programmers to recall the purpose of previous code, but also help other programmers quickly understand the functions of your program, making it easier for multiple people to collaborate on developing web page code. <p>Grammar:
<code><!--Annotation text-->
Understanding tags<code><head>
<p>The header of the document describes various attributes and information of the document, including the title of the document, etc. The data contained in the header of most documents will not actually be displayed to readers as content.
<head><title>...</title><meta><link><style>...</style><script>...</script></head>
Copy after login
<li><p><code><title>tags
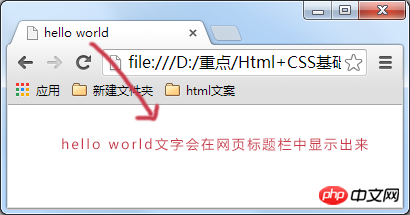
in <code><title> and <code><title> tags The text content between is the title information of the web page, which will appear in the title bar of the browser. The title tag of a web page is used to tell users and search engines what the main content of the web page is. Search engines can quickly determine the theme of the web page through the web page title. The content of each web page is different, and each web page should have a unique title. <br/>For example: <head> <title>hello world</title></head>
Copy after login
#<code> tag, the content displayed on the web page is placed here
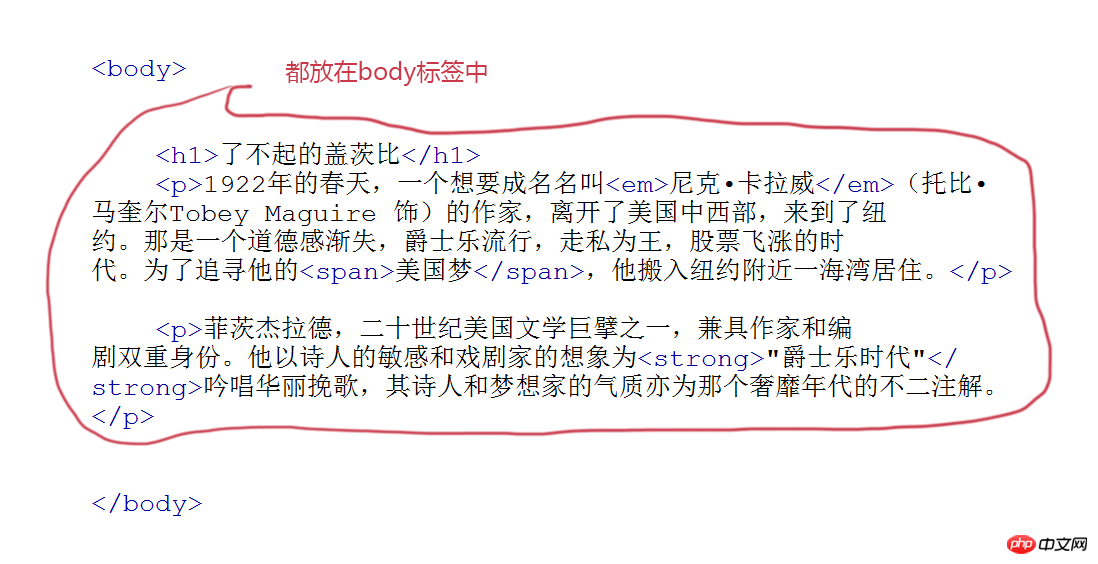
On the web page The page content to be displayed must be placed in the body tag. The picture below is a web page of a news article. <p>
##Start learning
<p>
tags, add paragraphs<code>If you want to display the article on the web page, then You need the
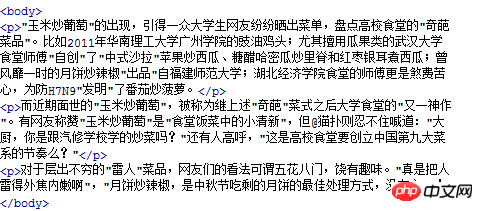
<p><p> tag, and put the paragraphs of the article in the <code><p> tag. <code>Grammar: <p>Paragraph text<p><code>Note that a paragraph of text has a <p><p> tag, such as in If there are 3 paragraphs of text in a news article, these 3 paragraphs must be placed in 3 <code><p> tags respectively. As shown below. <code>
##Understand the
tags and add titles to your web pages<code>articles The paragraphs use <p>
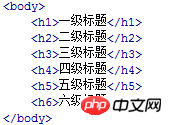
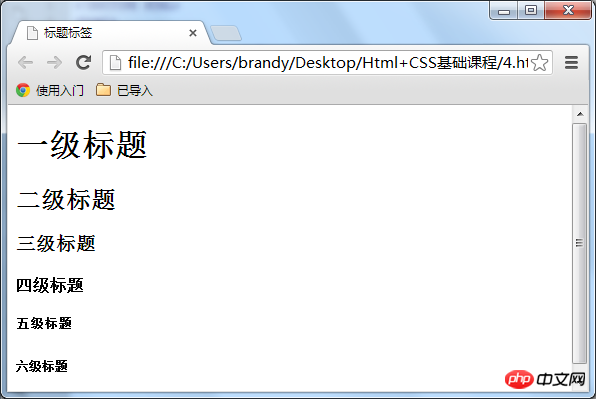
tags, so what tags should be used for the title of the article? In this section we will use the <p><code> tag to create the title of the article. There are 6 title tags in total, h1, h2, h3, h4, h5, and h6 are first-level headings, second-level headings, third-level headings, fourth-level headings, fifth-level headings, and sixth-level headings respectively. And in descending order of importance. <code><h1> is the highest level. <br/><code>Grammar:Title text x:1-6<p><code>Note: Because the h1 tag is more important in web pages, generally h1 Tags are used in website names. Tencent website does this. For example: <h1>Tencent<p><code>Default style of h1-h6 tag: Tag code: <p>
Style displayed in browser:
To add emphasis, use
and <em><code>Tags<code>With paragraphs and titles, now if you want to emphasize certain words in a paragraph, you can use or <p><strong><code>tag but there is a difference in emphasis between the two:<code>
#<em> indicates emphasis. In the browser, <li><em><p> is expressed in italics by default. <code><code><strong> indicates stronger emphasis. , <li><strong><p> is represented in bold in the browser. Compared with the two tags <code><code>##, domestic front-end programmers currently prefer to use <strong> to express emphasis. <li><p><code>The default style in the browser is different:
<p>It looks like in the browser, as shown below. <p><p>语法:
<code><em>需要强调的文本</em>
<code><strong>需要强调的文本</strong><p>栗子:
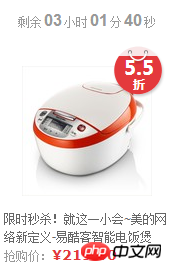
在网上商城中,某产品的打折后的价格是需要强调的。如下图。<p>
代码实现:
使用<code><span>标签为文字设置单独样式
<p>语法:<code><span>文本<p>我们对<code><em>、<code><strong>、<code><span>这三个标签进行一下总结:<li><p><code><em>和<code><strong>标签是为了强调一段话中的关键字时使用,它们的语义是强调。<li><p><code><span>标签是没有语义的,它的作用就是为了设置单独的样式用的。
<p>如果现在我们想把上一小节的第一段话“美国梦”三个字设置成blue(蓝色),但注意不是为了强调“美国梦”,而只是想为它设置和其它文字不同的样式(并不想让屏幕阅读器对“美国梦”这三个字加重音读出),所以这样情况下就可以用到<code><span>标签了。
如下面例子:<p>1922年的春天,一个想要成名名叫<em>尼克•卡拉威</em>(托比•马奎尔Tobey Maguire 饰)的作家,
离开了美国中西部,来到了纽约。那是一个道德感渐失,爵士乐流行,走私为王,<strong>股票</strong>飞涨的时代。
为了追寻他的<span>美国梦</span>,他搬入纽约附近一海湾居住。</p>
Copy after login
span{color:blue;
}
Copy after login
<code><q>标签,短文本引用
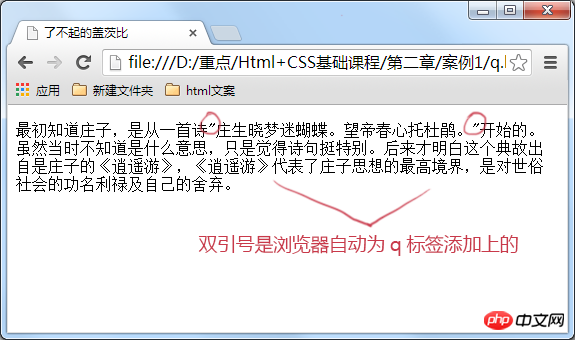
<p>想在你的html中加一段引用吗?比如在你的网页的文章里想引用某个作家的一句诗,这样会使你的文章更加出彩,那么<code><q>标签是你所需要的。<p>语法:<code><q>引用文本<p>栗子:<p>最初知道庄子,是从一首诗<q>庄生晓梦迷蝴蝶。望帝春心托杜鹃。</q>开始的。虽然当时不知道是什么意思,只是觉得诗句挺特别。
后来才明白这个典故出自是庄子的《逍遥游》,《逍遥游》代表了庄子思想的最高境界,是对世俗社会的功名利禄及自己的舍弃。</p>
Copy after login
<li><p>在上面的例子中,“庄生晓梦迷蝴蝶。望帝春心托杜鹃。” 这是一句诗歌,出自晚唐诗人李商隐的《锦瑟》 。因为不是作者自己的文字,所以需要使用实现引用。<li><p>注意要引用的文本不用加双引号,浏览器会对q标签自动添加双引号。
<p>下图是代码显示结果:<p>注意这里用标签的真正关键点不是它的默认样式双引号(如果这样我们不如自己在键盘上输入双引号就行了),而是它的语义:引用别人的话。
<code><blockquote>标签,长文本引用
<p><code><blockquote>的作用也是引用别人的文本。但它是对长文本的引用,如在文章中引入大段某知名作家的文字,这时需要这个标签。
等等,上一节<code><q>标签不是也是对文本的引用吗?不要忘记<code><q>标签是对简短文本的引用,比如说引用一句话就用到<code><q>标签。
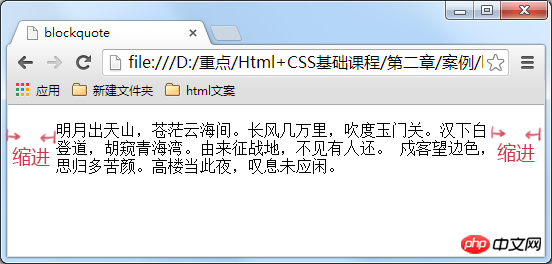
如想在我的文章中引用李白《关山月》中的诗句,因为引用文本比较长,所以使用<code><blockquote>。<p>语法:<code><blockquote>引用文本
如下面例子:<blockquote>明月出天山,苍茫云海间。长风几万里,吹度玉门关。汉下白登道,胡窥青海湾。由来征战地,不见有人还。 戍客望边色,思归多苦颜。高楼当此夜,叹息未应闲。</blockquote>
Copy after login
使用<code><br>标签分行显示文本
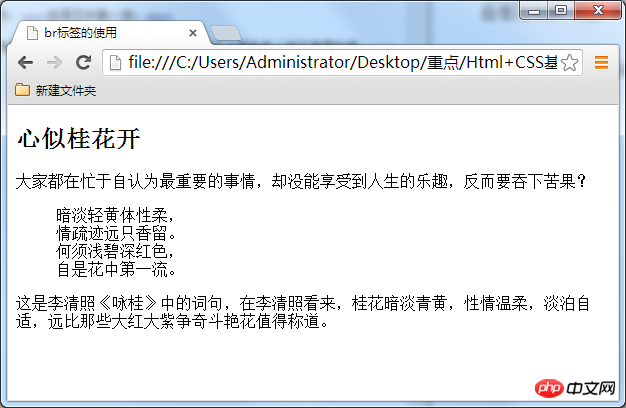
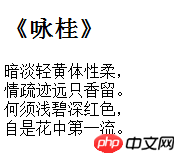
<p>例子,我们想让一首诗显示得更美观些,如显示下面效果:<p>
怎么可以让每一句诗词后面加入一个折行呢?那就可以用到<code><br />标签了,在需要加回车换行的地方加入<code><br />,<code><br />标签作用相当于word文档中的回车。
代码改为:<h2>《咏桂》</h2><p>暗淡轻黄体性柔,<br />情疏迹远只香留。<br />何须浅碧深红色,<br />自是花中第一流。
Copy after login
为你的网页中添加一些空格
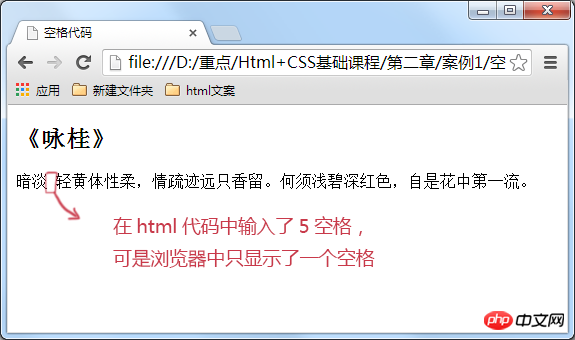
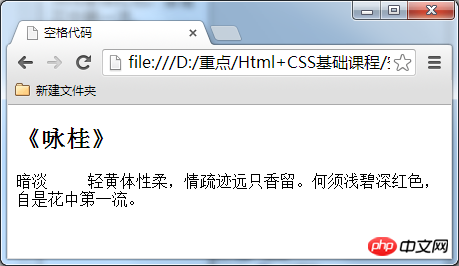
<p>在html代码中输入空格、回车都是没有作用的。要想输入空格,必须写入<code>nbsp;。不要忘了那个分号<p>在html代码中输入空格是不起作用的,如下代码。<p>在浏览中显示,还是没有空格效果。<p>输入空格的正确方法:<p>在浏览器中的显示出来的空格效果。如下图所示。
<p>学习过程中遇到什么问题或者想获取学习资源的话,欢迎加入学习交流群
343599877,我们一起学前端!认识<code><hr>标签,添加水平横线
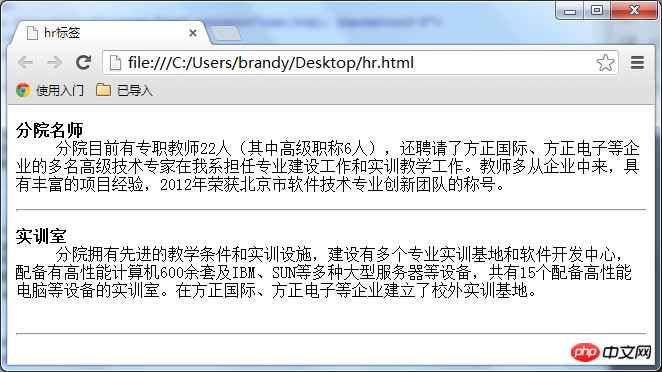
<p>在信息展示时,有时会需要加一些用于分隔的横线,这样会使文章看起来整齐些。如下图所示:<p>语法:<li><p>html4.01版本 <code><hr><li><p>xhtml1.0版本 <code><hr />
注意:<li><p><code><hr />标签和<code><br />标签一样也是一个空标签,所以只有一个开始标签,没有结束标签。<li><p><code><hr />标签的在浏览器中的默认样式线条比较粗,颜色为灰色,可能有些人觉得这种样式不美观,没有关系,这些外在样式在我们以后学习了css样式表之后,都可以对其修改。<li><p>大家注意,现在一般使用 xhtml1.0 的版本(其它标签也是),这种版本比较规范。
<code><address>标签,为网页加入地址信息
<p>一般网页中会有一些网站的联系地址信息需要在网页中展示出来,这些联系地址信息如公司的地址就可以<code><address>标签。也可以定义一个地址(比如电子邮件地址)、签名或者文档的作者身份。
栗子:<address>
本文的作者:<a href="mailto:zhaoliangsyn@163.com">zhaolion</a></address>
Copy after login
想加入一行代码吗?使用<code><code>标签
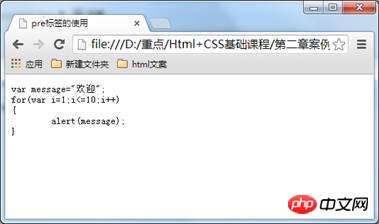
<p>在介绍语言技术的网站中,避免不了在网页中显示一些计算机专业的编程代码,当代码为一行代码时,你就可以使用<code><code>标签了,如下面例子:<p><code><code>var i = a + b;<p>注意:在文章中一般如果要插入多行代码时不能使用<code><code>标签了。如果是多行代码,可以使用<code><div class="code" style="position:relative; padding:0px; margin:0px;"><pre class="brush:php;toolbar:false"></code>标签。</p><hr/><h2>使用<code><pre class="brush:php;toolbar:false"></code>标签为你的网页加入大段代码</h2><p>在上节中介绍加入一行代码的标签为<code><code></code>,但是在大多数情况下是需要加入大段代码的,如下图:</p><div class="image-package"><img src="https://img.php.cn/upload/article/000/000/001/9a5ce712329e3462c06f976964093ef2-18.jpg" alt=""/></div><p>怎么办?不会是每一代码都加入一个<code><code></code>标签吧,没有这么复杂,这时候就可以使用<code><pre class="brush:php;toolbar:false"></code>标签。</p><p>语法:<code><pre class="brush:php;toolbar:false">语言代码段</pre><div class="contentsignin">Copy after login</div></div><p><code></code>标签的主要作用:预格式化的文本。被包围在 pre 元素中的文本通常会保留空格和换行符。<br/>如下代码:</p><pre class="hljs abnf"><pre class="brush:php;toolbar:false">
var message="欢迎";
for(var i=1;i<=10;i++)
{
alert(message);
}
Copy after login
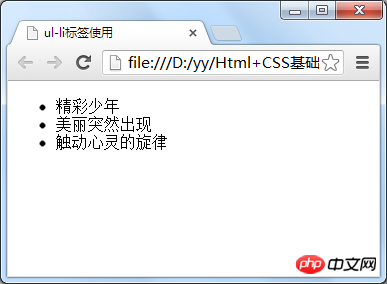
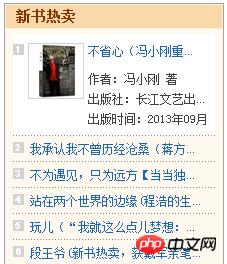
</code> 标签不只是为显示计算机的源代码时用的,在你需要在网页中预显示格式时都可以使用它,只是<code><pre class="brush:php;toolbar:false"></code>标签的一个常见应用就是用来展示计算机的源代码。</p><hr/><h2>使用<code><ul></code>,添加新闻信息列表</h2><p>在浏览网页时,你会发现网页上有很多信息的列表,如新闻列表、图片列表,如下图所示。</p><div class="image-package"><img src="https://img.php.cn/upload/article/000/000/001/0d2cef41e25fc7fbfae341155b5663f5-20.png" alt=""/></div><p>这些列表就可以使用ul-li标签来完成。ul-li是 没有前后顺序的信息列表。</p><p>语法:</p><pre class="hljs xml"><ul>  <li>信息</li>  <li>信息</li>
   ......</ul>
Copy after login
<ul> <li>精彩少年</li> <li>美丽突然出现</li> <li>触动心灵的旋律</li></ul>
Copy after login
使用<code><ol>,添加顺序列表
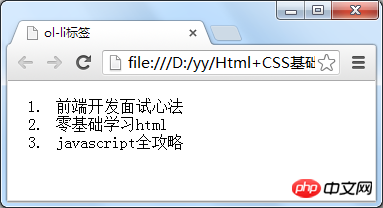
<p>如果想在网页中展示有前后顺序的信息列表,怎么办呢?如,当当网上的书籍热卖排行榜,如下图所示。这类信息展示就可以使用<code><ol>标签来制作有序列表来展示。<p>
语法:<ol> <li>信息</li> <li>信息</li>
......</ol>
Copy after login
<ol> <li>前端开发面试心法 </li> <li>零基础学习html</li> <li>JavaScript全攻略</li></ol>
Copy after login
初识<code>div
认识div在排版中的作用
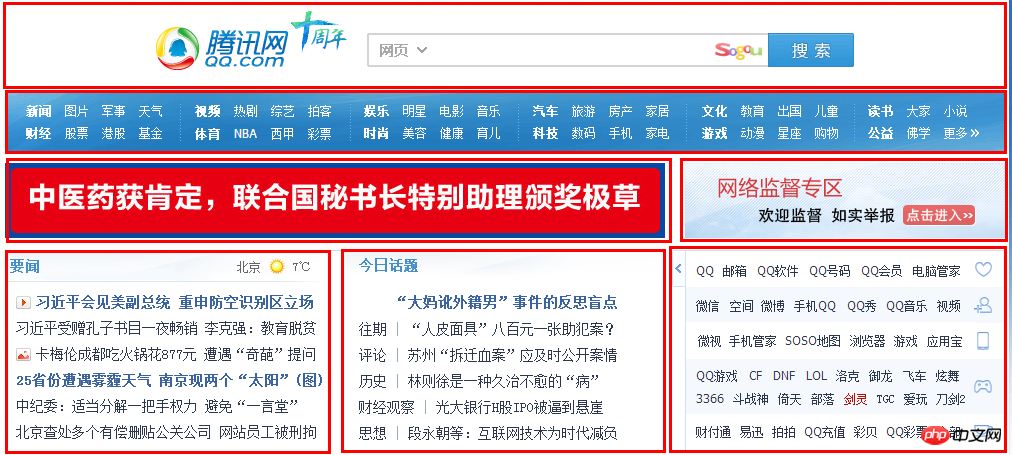
<p>在网页制作过程过中,可以把一些独立的逻辑部分划分出来,放在一个<div>标签中,这个<div>标签的作用就相当于一个容器。<p>语法:<code><div>…</div><p>确定逻辑部分:
什么是逻辑部分?它是页面上相互关联的一组元素。如网页中的独立的栏目版块,就是一个典型的逻辑部分。如下图所示:图中用红色边框标出的部分就是一个逻辑部分,就可以使用<div>标签作为容器。给div命名,使逻辑更加清晰
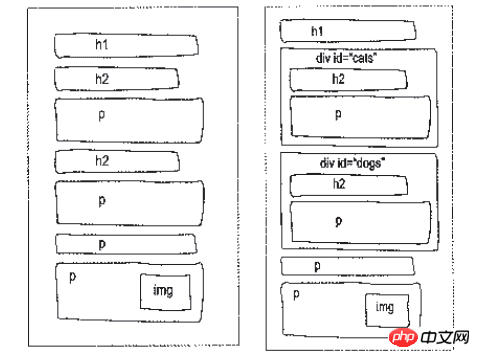
<p>在上一小节中,我们把一些标签放进<code><div>里,划分出一个独立的逻辑部分。为了使逻辑更加清晰,我们可以为这一个独立的逻辑部分设置一个名称,用id属性来为<code><div>提供唯一的名称,这个就像我们每个人都有一个身份证号,这个身份证号是唯一标识我们的身份的,也是必须唯一的。<p>如下两图进行比较,如果设计师把两个图给你,哪个图你看上去能更快的理解呢?是不是右边的那幅图呢。<p>语法:<code><div id="版块名称">…</div>
table标签,认识网页上的表格
table标签 = 我们平时看到到表格
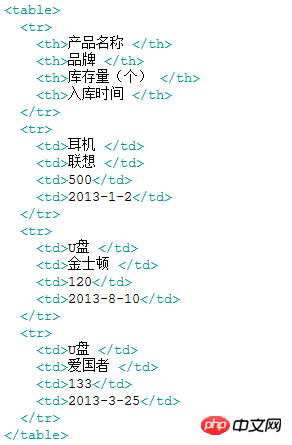
<p>有时候我们需要在网页上展示一些数据,如某公司想在网页上展示公司的库存清单。如下表:<p>
想在网页上展示上述表格效果可以使用以下代码:<p>创建表格的四个元素: <code>table、tbody、tr、th、td<li><p><code><table>…</table>:整个表格以<code><table>标记开始、<code></table>标记结束。<li><p><code><tbody>…</tbody>:当表格内容非常多时,表格会下载一点显示一点,但如果加上<code><tbody>标签后,这个表格就要等表格内容全部下载完才会显示。<li><p><code><tr>…</tr>:表格的一行,所以有几对tr 表格就有几行。<li><p><code><td>…</td>:表格的一个单元格,一行中包含几对<code><td>...</td>,说明一行中就有几列。<li><p><code><th>…</th>:表格的头部的一个单元格,表格表头。<li><p>表格中列的个数,取决于一行中数据单元格的个数。
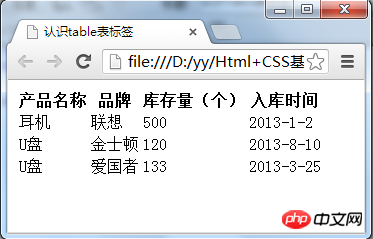
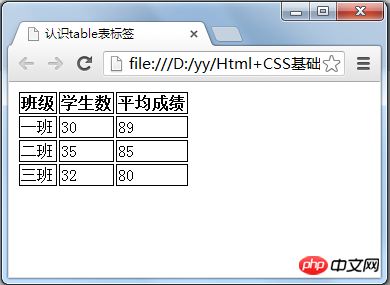
<p>上述代码在浏览器中显示的默认的样式为:<p>总结:<li><p>table表格在没有添加css样式之前,在浏览器中显示是没有表格线的<li><p>表头,也就是th标签中的文本默认为粗体并且居中显示
用css样式,为表格加入边框
<p>Table 表格在没有添加 css 样式之前,是没有边框的。这样不便于我们后期合并单元格知识点的讲解,所以在这一节中我们为表格添加一些样式,为它添加边框。
代码中加入:<style type="text/css">table tr td,th{border:1px solid #000;}</style>Copy after login
caption标签,为表格添加标题和摘要
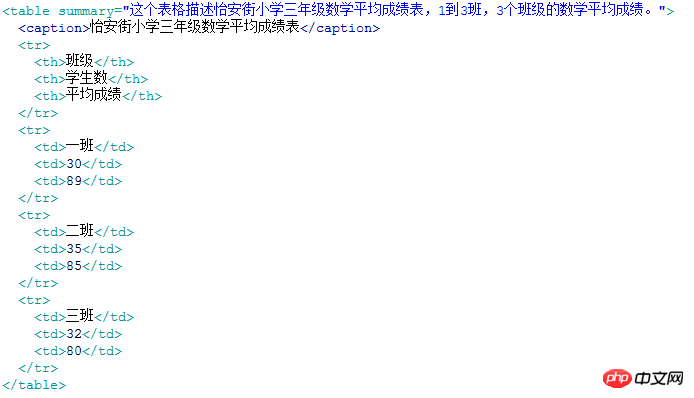
<p>表格还是需要添加一些标签进行优化,可以添加标题和摘要。代码如下<p>
摘要 摘要的内容是不会在浏览器中显示出来的。它的作用是增加表格的可读性(语义化),使搜索引擎更好的读懂表格内容,还可以使屏幕阅读器更好的帮助特殊用户读取表格内容。
语法:<code><table summary="表格简介文本"><p>标题 用以描述表格内容,标题的显示位置:表格上方。
语法:<table><caption>标题文本</caption><tr><td>…</td><td>…</td>
…</tr>
…</table>Copy after login
初识<code><a>标签
使用<code><a>标签,链接到另一个页面
<p>使用<code><a>标签可实现超链接,它在网页制作中可以说是无处不在,只要有链接的地方,就会有这个标签。<p>语法 :
<code><a href="目标网址" title="鼠标滑过显示的文本">链接显示的文本</a><p>例如:
<code><a href="http://www.zhaolion.com" title="点击进入我的博客">click here!</a><p>上面例子作用是单击click here!文字,网页链接到这个网页。<p>title属性的作用,鼠标滑过链接文字时会显示这个属性的文本内容。这个属性在实际网页开发中作用很大,主要方便搜索引擎了解链接地址的内容(语义化更友好)
提醒
还有一个有趣的现象不知道小伙伴们发现了没有,只要为文本加入a标签后,文字的颜色就会自动变为蓝色(被点击过的文本颜色为紫色),颜色很难看吧,不过没有关系后面我们学习了css样子就可以设置过来(a{color:#000}),后面会详细讲解。在新建浏览器窗口中打开链接
<p><code><a>标签在默认情况下,链接的网页是在当前浏览器窗口中打开,有时我们需要在新的浏览器窗口中打开。只需要添加一个属性 <code>target="_blank"
如下代码:
<code>click here!使用mailto在网页中链接Email地址
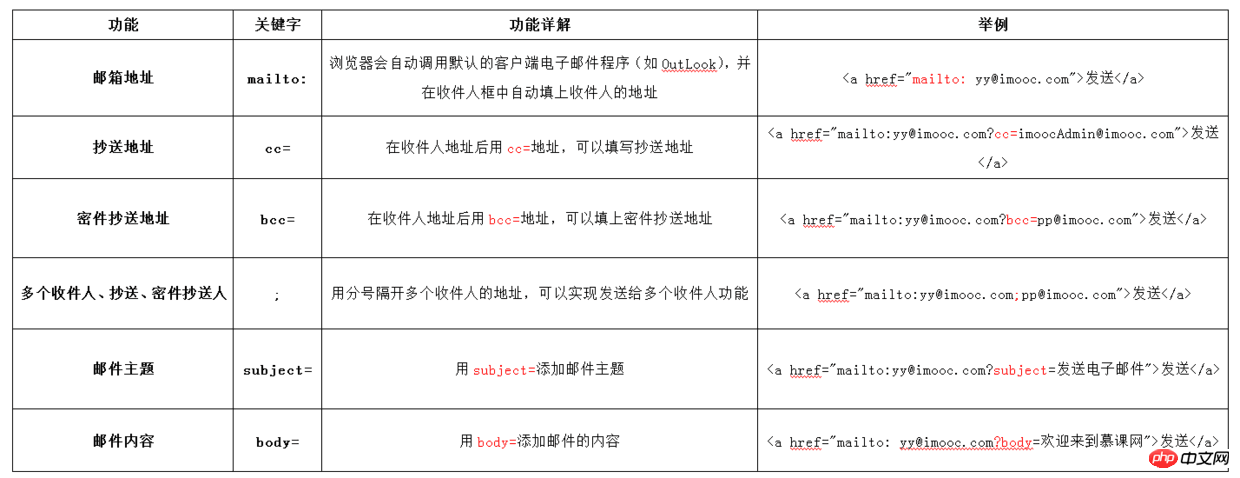
<p><code><a>标签还有一个作用是可以链接Email地址,使用mailto能让访问者便捷向网站管理者发送电子邮件。我们还可以利用mailto做许多其它事情。下面一一进行讲解,请看详细图示:<p>提醒:如果mailto后面同时有多个参数的话,第一个参数必须以“?”开头,后面的参数每一个都以“&”分隔。
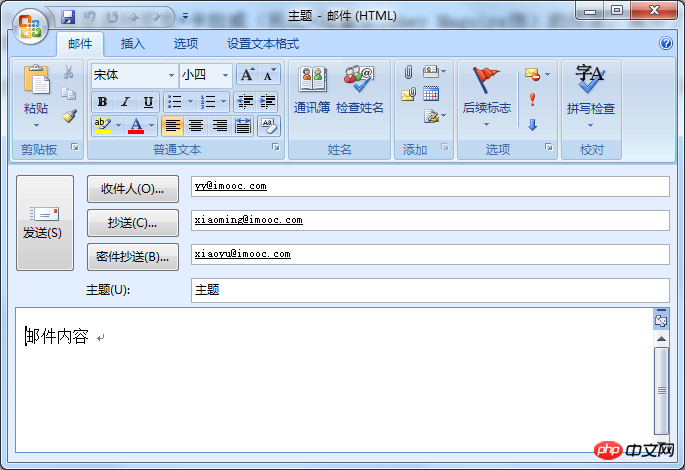
下面是一个完整的实例: 在浏览器中显示的一个发送按钮<p>点击链接会打开电子邮件应用,并自动填写收件人等设置好的信息,如下图:
认识<code><img alt="Summarize what knowledge points are needed to learn HTML?" >标签,为网页插入图片
<p>在网页的制作中为使网页炫丽美观,肯定是缺少不了图片,可以使用<code><img alt="Summarize what knowledge points are needed to learn HTML?" >标签来插入图片。
语法: <code>[站外图片上传中……(48)]<p>举例: <code><img src = "myimage.gif" alt = "My Image" title = "My Image" /><p>讲解:<li><p>src:标识图像的位置;<li><p>alt:指定图像的描述性文本,当图像不可见时(下载不成功时),可看到该属性指定的文本;<li><p>title:提供在图像可见时对图像的描述(鼠标滑过图片时显示的文本);<li><p>图像可以是GIF,PNG,JPEG格式的图像文件。
认识表单
使用表单标签,与用户交互
<p>网站怎样与用户进行交互?答案是使用HTML表单(form)。表单是可以把浏览者输入的数据传送到服务器端,这样服务器端程序就可以处理表单传过来的数据。<p>语法: <code><form method="传送方式" action="服务器文件"><p>讲解:<li><p><code><form> :<code><form>标签是成对出现的,以<code><form>开始,以<code></form>结束。<li><p>action :浏览者输入的数据被传送到的地方,比如一个PHP页面(save.php)。<li><p>method : 数据传送的方式(get/post)。<form method="post" action="save.php">
<label for="username">用户名:</label>
<input type="text" name="username" />
<label for="pass">密码:</label>
<input type="password" name="pass" />
</form>Copy after login
<p>注意<li><p>所有表单控件(文本框、文本域、按钮、单选框、复选框等)都必须放在<code><form></form>标签之间(否则用户输入的信息可提交不到服务器上哦!)。<li><p>method:post/get的区别这一部分内容属于后端程序员考虑的问题。感兴趣的小伙伴可以问谷哥
文本输入框、密码输入框
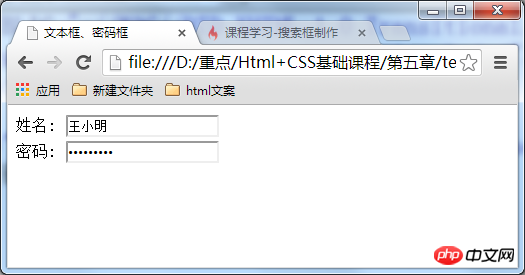
<p>当用户要在表单中键入字母、数字等内容时,就会用到文本输入框。文本框也可以转化为密码输入框。<p>语法:<form>
<input type="text/password" name="名称" value="文本" />
</form>
Copy after login
<li><p>type:<li><p>当type="text"时,输入框为文本输入框;<li><p>当type="password"时, 输入框为密码输入框。
<li><p>name:为文本框命名,以备后台程序ASP 、PHP使用。<li><p>value:为文本输入框设置默认值。(一般起到提示作用)
<p>举例:<form>
姓名:
<input type="text" name="myName">
<br/>
密码:
<input type="password" name="pass">
</form>
Copy after login
文本域,支持多行文本输入
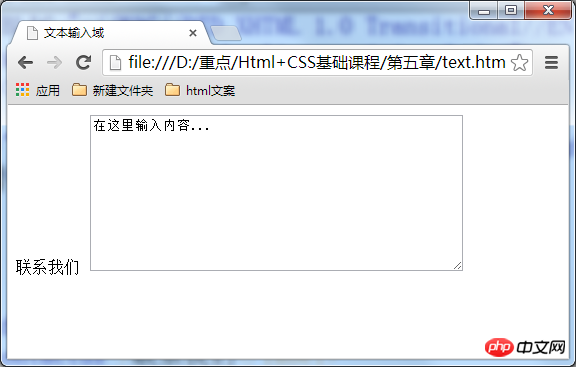
<p>当用户需要在表单中输入大段文字时,需要用到文本输入域。<p>语法: <code><textarea rows="行数" cols="列数">文本</textarea><li><p><code><textarea>标签是成对出现的,以<code><textarea>开始,以<code></textarea>结束。<li><p>cols :多行输入域的列数。<li><p>rows :多行输入域的行数。<li><p>在<code><textarea></textarea>标签之间可以输入默认值。
<p>举例:<form method="post" action="save.php"><label>联系我们</label><textarea cols="50" rows="10" >在这里输入内容...</textarea></form>
Copy after login
Use radio buttons and check boxes to let users choose
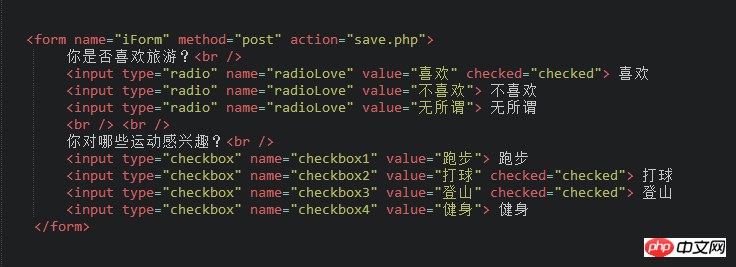
<p>When using forms to design questionnaires, in order to reduce user operations, it is a good idea to use select boxes. There are two types of select boxes in HTML , that is, radio button and check box. The difference between the two is that the user can only select one option in the radio button box, while the user can select multiple or even all options in the check box. Please see the following example: <br/> Syntax: <code><input type="radio/checkbox" value="value" name="name" checked="checked"/><li><p>type:<li><p>When type="radio", the control is a radio button<li><p>When When type="checkbox", the control is a check box
<li><p>value: the value of submitting data to the server (used by background program PHP)<li> <p>name: Name the control for use by background programs ASP and PHP <li><p>checked: When checked="checked" is set, this option is selected by default
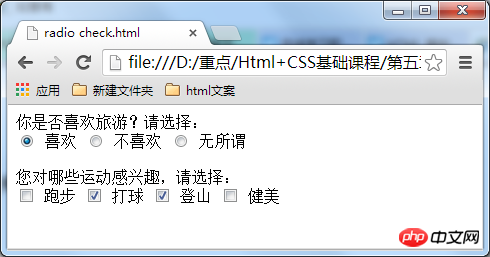
<p>For example, the following code: <p>The result displayed in the browser: <p>Note :The name values of radio buttons in the same group must be consistent. For example, the above example has the same name "radioLove", so that the radio buttons in the same group can function as radio selections. Use drop-down list box to save space
<p>Drop-down list is also often used in web pages, it can effectively save web page space. You can select both single and multiple selections. The following code: 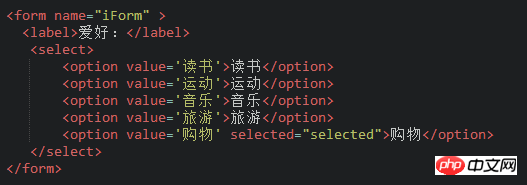
Explanation: <li><p>value: <br/>
Use the drop-down list box for multiple selections
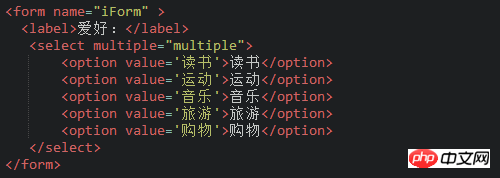
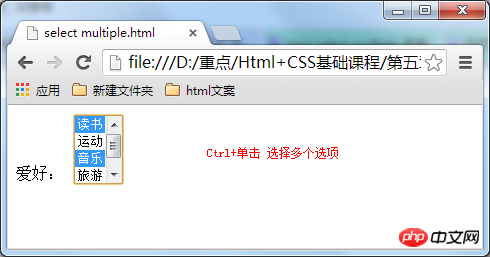
<p>The drop-down list can also perform multiple selection operations, set in the <code><select> tag<code>multiple="multiple" attribute, you can realize the multi-selection function. Under the Widows operating system, press the Ctrl key and click at the same time when making multiple selections (use Command + click under Mac), you can select multiple options. The following code:
<p>The results displayed in the browser:
Use the submit button to submit the data
<p>There are two kinds of buttons that can be used in the form, namely: submit button and reset. This section explains the submit button: when the user needs to submit form information to the server, the submit button needs to be used. <br/>Syntax: <code><input type="submit" value="Submit">
<li><p>type: Only when the type value is set to submit, the button Only then can the submission function<li><p>value: the text displayed on the button
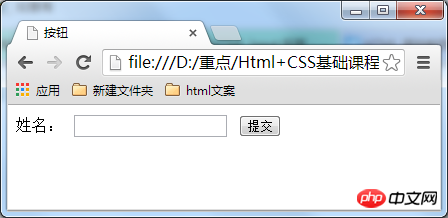
<p>Example:
<p>Results displayed in the browser:
Use the reset button to reset the form information
<p>When the user needs to reset the form information to the initial state state, for example, after the user enters "user name" and finds a writing error, the reset button can be used to restore the input box to its initial state. Just set type to "reset". <br/>Syntax: <code><input type="reset" value="Reset">
<li><p>type: Only when the type value is set to reset, Only buttons have a reset function<li><p>value: the text displayed on the button
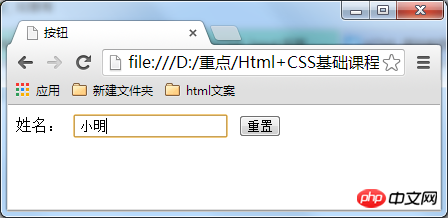
<p>Example:
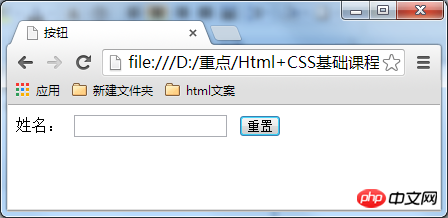
<p>Results displayed in the browser: <br/>Enter account number
<p>
Click the reset button
form表单中的label标签
<p>小伙伴们,你们在前面学习表单各种控件的时候,有没有发现一个标签--label,这一小节就来揭晓它的作用。
label标签不会向用户呈现任何特殊效果,它的作用是为鼠标用户改进了可用性。如果你在 label 标签内点击文本,就会触发此控件。就是说,当用户单击选中该label标签时,浏览器就会自动将焦点转到和标签相关的表单控件上(就自动选中和该label标签相关连的表单控件上)。
语法: <code><label for="控件id名称">
注意 标签的 for 属性中的值应当与相关控件的 id 属性值一定要相同。 这样你会在点慢跑标签,即使没有点checkbox 也能选中
例子:
<code class="stata"><<span class="hljs-keyword">form>
  <a>你对什么运动感兴趣:</a> <<span class="hljs-keyword">br />
  <<span class="hljs-keyword">label <span class="hljs-keyword">for=<span class="hljs-string">"1">慢跑</<span class="hljs-keyword">label><<span class="hljs-keyword">input <span class="hljs-keyword">type=<span class="hljs-string">"checkbox" name=<span class="hljs-string">"manpao" id=<span class="hljs-string">"1"><<span class="hljs-keyword">br />
  <<span class="hljs-keyword">label <span class="hljs-keyword">for=<span class="hljs-string">"2">登山</<span class="hljs-keyword">label><<span class="hljs-keyword">input <span class="hljs-keyword">type=<span class="hljs-string">"checkbox" name=<span class="hljs-string">"dengshan" id=<span class="hljs-string">"2"><<span class="hljs-keyword">br />
  <<span class="hljs-keyword">label <span class="hljs-keyword">for=<span class="hljs-string">"3">篮球</<span class="hljs-keyword">label><<span class="hljs-keyword">input <span class="hljs-keyword">type=<span class="hljs-string">"checkbox" name=<span class="hljs-string">"lanqiu" id=<span class="hljs-string">"3"><<span class="hljs-keyword">br />
</<span class="hljs-keyword">form><br/><br/></span></span></span></span></span></span></span></span></span></span></span></span></span></span></span></span></span></span></span></span></span></span></span></span></span></span></span></span></span></span></span></span></span></code>
Copy after login
<p>学习过程中遇到什么问题或者想获取学习资源的话,欢迎加入学习交流群
343599877,我们一起学前端!
The above is the detailed content of Summarize what knowledge points are needed to learn HTML?. For more information, please follow other related articles on the PHP Chinese website!
Statement of this Website
The content of this article is voluntarily contributed by netizens, and the copyright belongs to the original author. This site does not assume corresponding legal responsibility. If you find any content suspected of plagiarism or infringement, please contact admin@php.cn

 ##Understand the
  Style displayed in browser:
  To add emphasis, use
