


Windows 10 and Windows 11 come with an advanced setting, called Hardware-Accelerated GPU Scheduling, which can boost gaming and video performance using your PC's GPU. We'll show you how to enable the feature and thereby potentially get a performance increase.
Usually, your computer's processor offloads some visual and graphics-intensive data to the GPU to render so that games, multimedia, and other apps run smoothly. The CPU gathers the frame data, assigns commands, and prioritizes them one by one so that the GPU can render the frame.
With the Hardware-Accelerated GPU Scheduling feature, the GPU's scheduling processor and memory (VRAM) take over the same work and runs it in batches to render the frames. This allows your GPU to reduce the load on your CPU and improve latency, potentially making your PC run better.
If you have a supported graphics card, it's a good idea to enable GPU scheduling as it helps improve your computer's overall performance. You'll likely see performance improvements when you're running resource-intensive tasks, such as video editing or gaming.
The only reason you shouldn't use this feature is if you experience any issues after enabling it. If your apps suddenly stop working or you have graphics-related problems after turning it on, then GPU scheduling is best left disabled. Fortunately, disabling the feature after testing it is as easy as turning it on.
Though this feature debuted with Windows 10 May 2020 Update, it still comes disabled in Windows 10 and Windows 11. Also, your computer needs to have an NVIDIA (GTX 10-series and later) or AMD (5600 series or later) graphics card with the latest graphics driver.
Unfortunately, there is not yet any specific hardware combination (CPU and GPU) known to eke out the best performance using the feature. So, your mileage may vary depending on the CPU, GPU, and graphics drivers on your PC.
Here's how you can enable it on your Windows 10 and 11 PC. It's a good idea to update the graphics drivers on your PC before you begin.
There are two ways to enable Hardware-Accelerated GPU Scheduling on Windows 10: use the Settings app or the Registry Editor. Both accomplish the same thing, though the Settings app is much easier.
Start by launching the Settings app on your PC. You can do this by pressing Windows+i.
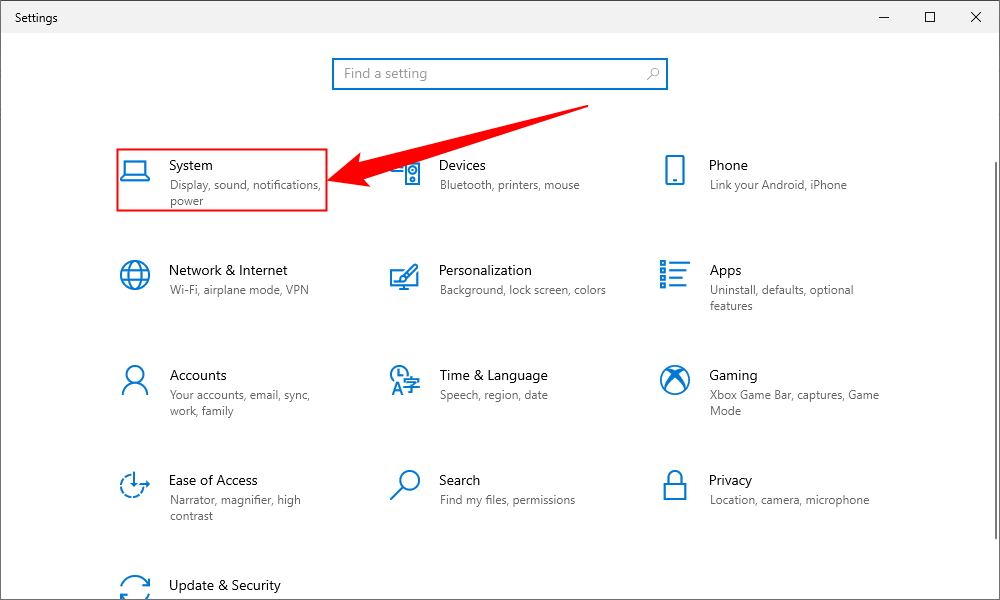
In Settings, select "System."
In the sidebar on the left, click "Display."

On the right pane, at the bottom, choose "Graphics Settings."

On the following screen, toggle on the "Hardware-Accelerated GPU Scheduling" option.
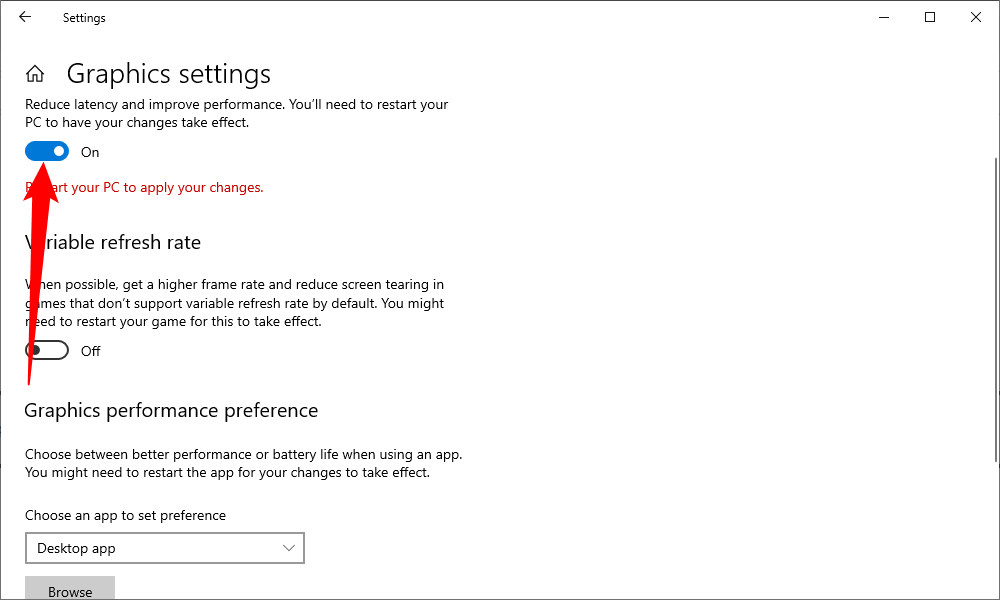
To disable the feature in the future, simply toggle off the "Hardware-Accelerated GPU Scheduling" option again.
Close the Settings app and reboot your PC to bring your changes into effect.
To enable Hardware-Accelerated GPU Scheduling via the Registry Editor, open the Run box by pressing Windows+R, then type the following and press Enter:
regedit
In the User Account Control prompt that opens, select "Yes," since it's necessary to make changes to the registry.
When the Registry Editor opens, in the path box at the top, type the following and press Enter:
ComputerHKEY_LOCAL_MACHINESYSTEMCurrentControlSetControlGraphicsDrivers
In the pane on the right, double-click "HwSchMode."

在条目编辑框中,选择“值数据”字段并输入2。在“基数”部分中,选择“十六进制”。然后,选择“确定”。

以后要禁用该功能,请在“值数据”字段中输入 1,选择“十六进制”,然后选择“确定”。
关闭注册表编辑器,重新启动您的电脑,然后您的计算机上就启用了硬件加速 GPU 调度。享受!
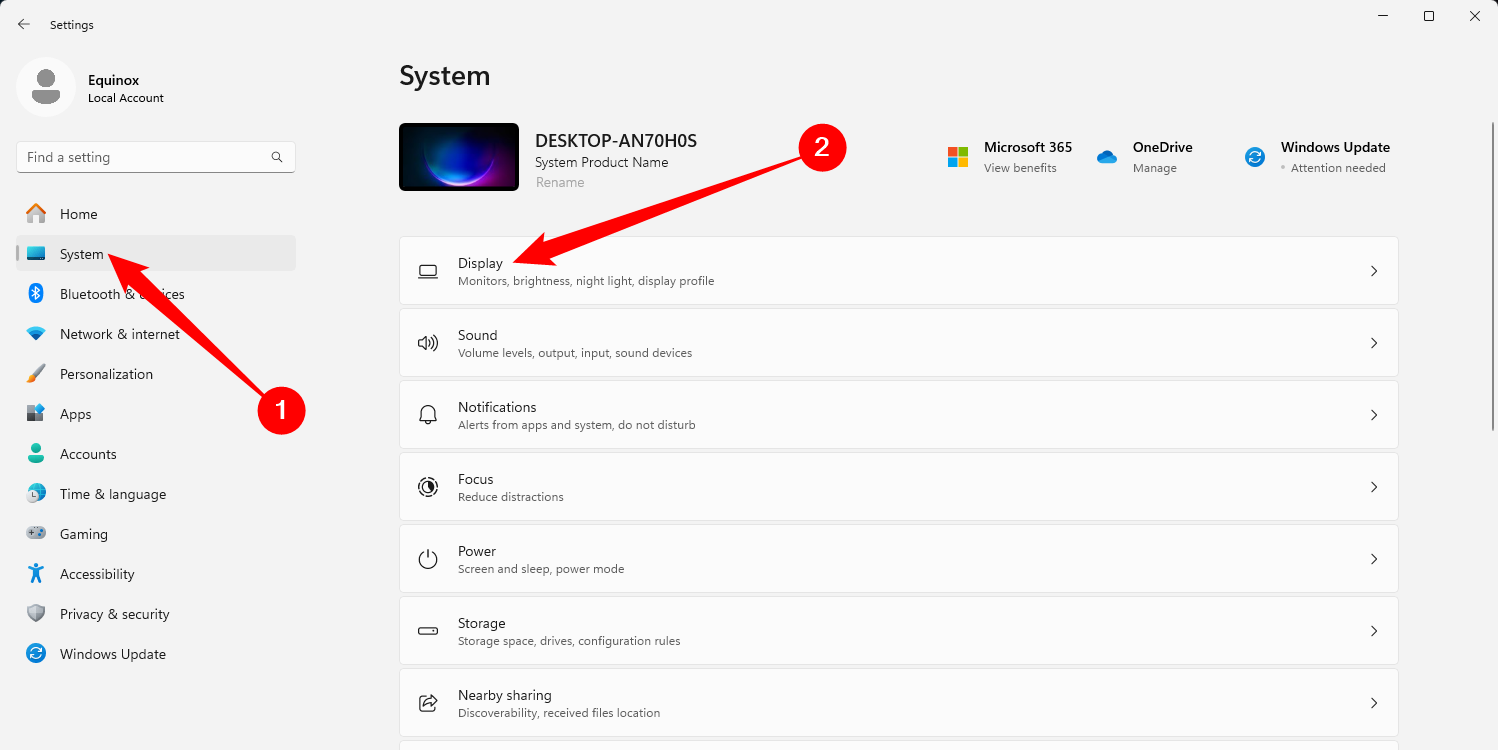
要在 Windows 11 中启用 GPU 调度,请按 Windows+i 打开“设置”应用程序。转到“系统”部分,然后从右侧选择“显示”选项。
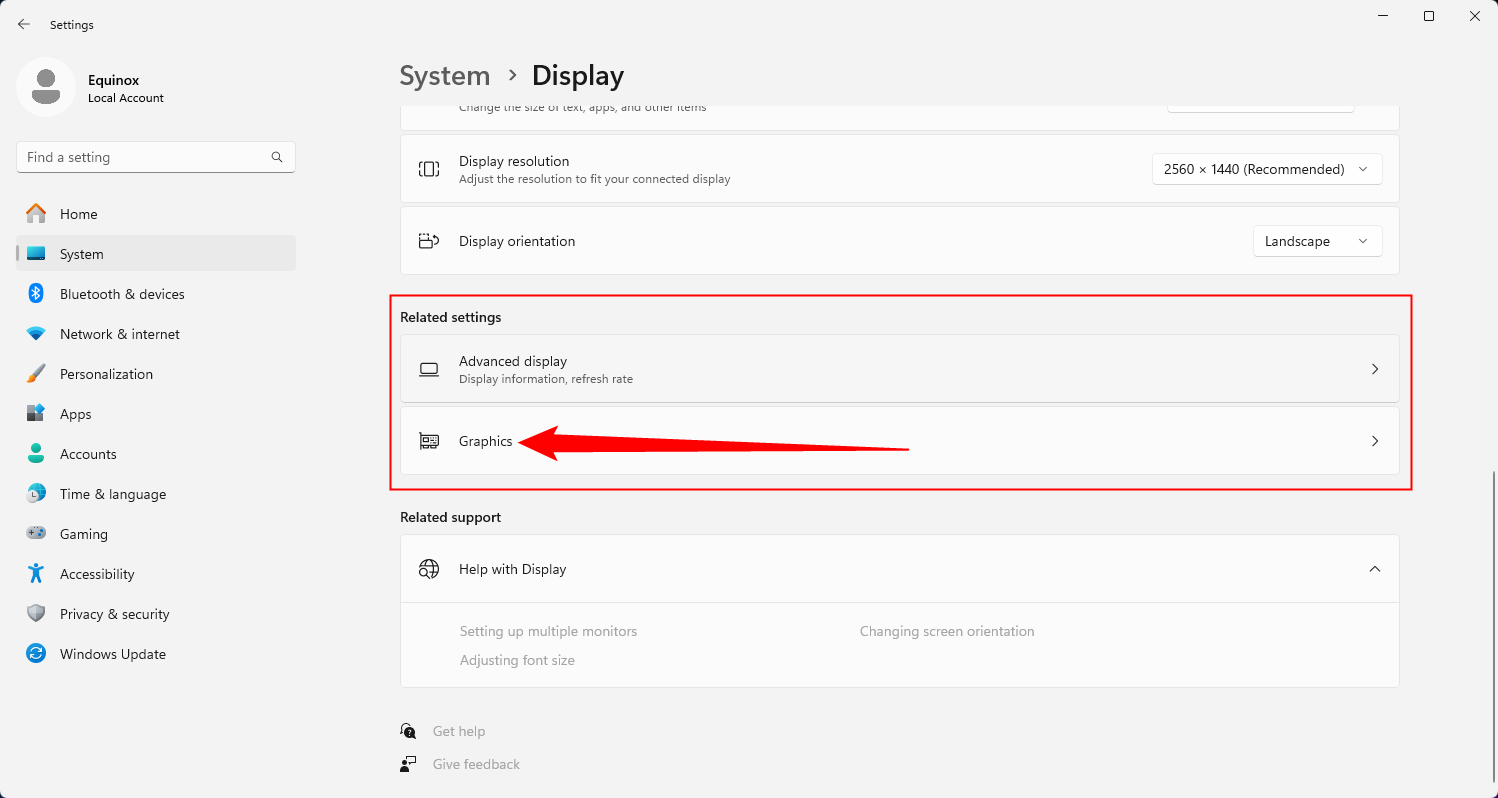
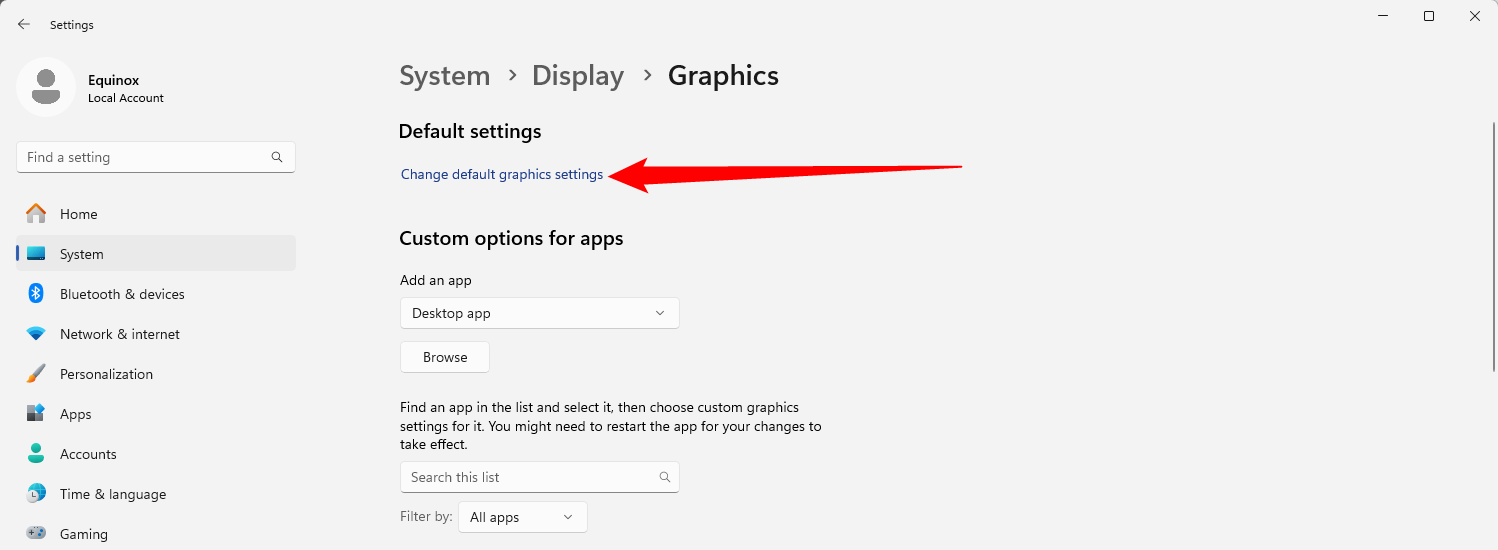
从“相关设置”部分中,选择“图形”。
选择“更改默认图形设置”。
然后,打开“硬件加速 GPU 调度”下的开关,并在出现的用户访问控制提示中选择“是”。
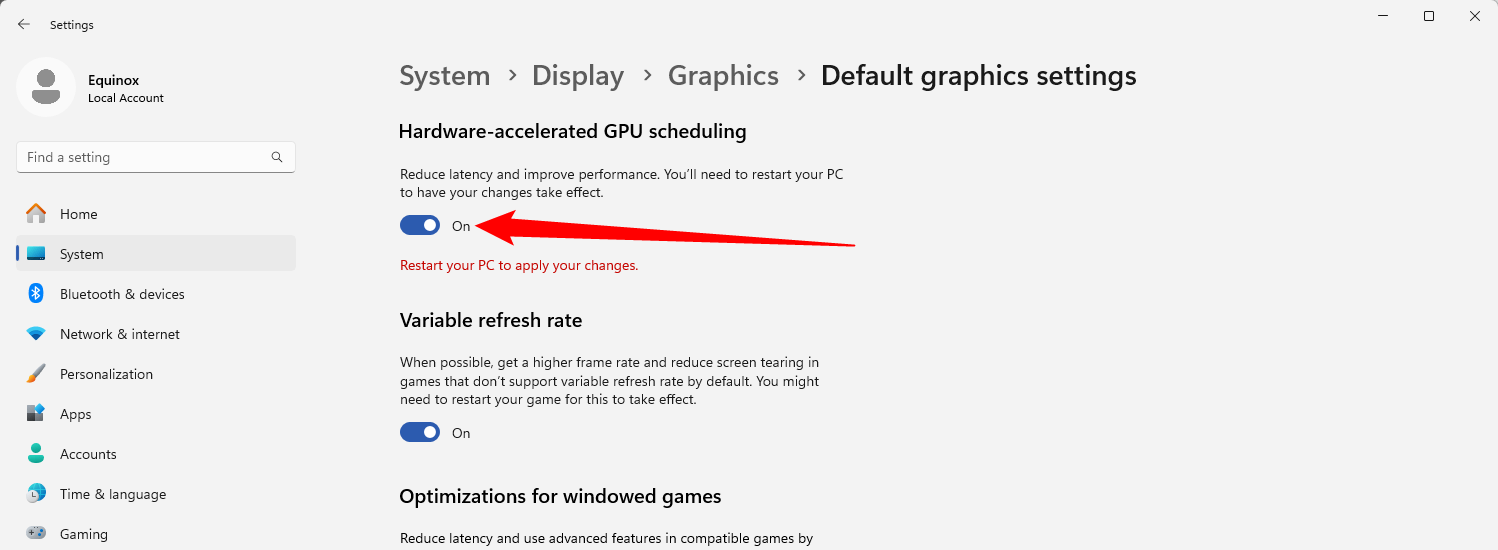
如果您决定稍后要禁用 GPU 调度,只需关闭“硬件加速 GPU 调度”选项即可。
之后,您可以关闭“设置”应用程序并重新启动电脑以应用更改。
Microsoft 声明您可能不会立即看到任何重大变化。但是,如果此功能非但没有提高,反而阻碍了 PC 的性能,您可以将其禁用。 ###### 就是这样!您可以检查它是否改善了 Windows 11 电脑上的游戏和应用程序体验。
The above is the detailed content of How to Enable Hardware-Accelerated GPU Scheduling in Windows 10 and Windows 11. For more information, please follow other related articles on the PHP Chinese website!


![[Web front-end] Node.js quick start](https://img.php.cn/upload/course/000/000/067/662b5d34ba7c0227.png)


