Found a total of 10000 related content

How to insert flash animation into wps file_How to quickly insert flash animation into wps file
Article Introduction:1. First start the wps demo and create a new blank document. 2. Execute the insert command and select the flash logo from the toolbar. 3. Select the flash file from the pop-up Insert Flash Animation dialog box and click the Open button. 4. Then the file is automatically inserted and the word downloading is displayed until it is completed. 5. Adjust the size of the document to make the layout more beautiful and harmonious. 6. Press the f5 key to play and view the effect, so that the flash file will be played automatically.
2024-03-27
comment 0
476
ppt2013 steps to fill pictures into graphics
Article Introduction:Open the software and create a new ppt document. Set the document to be blank, or you can choose to cut out the text boxes. Insert - Shape - a drop-down box will pop up. Select an icon shape in the pop-up drop-down box. Draw the icon in a blank document. Right-click the icon you just drew and click Format Object in the pop-up dialog box. In the pop-up object format box, select the fill color item and click the small triangle behind it. In the popup dialog box below, select the picture option. Select the image you want to set and click OK. The final effect is shown in the figure.
2024-04-17
comment 0
820

Detailed process of making text animation that pops up in PPT
Article Introduction:Insert - text box - horizontal text box, write three sentences into three text boxes respectively. Click on the first sentence and add effects to it: Custom Animation Panel - Add Effect - Enter - Other Effects - Stretch. Because the entire paragraph is part of the lyrics, after the song starts, as each line of singing is sung, the same line of lyrics will also appear, so the text box starts with [after the previous item] (it is impossible to sing the entire song It will appear again after finishing), choose the direction to cross, and the speed to medium speed. In the rendering, you can see that each letter is executing this animation. This effect is completed in the effect options: right-click on the effect in the animation panel - Effect Options - Animated Text - Press the letter. After selection, the entire sentence will no longer be used as an object to perform stretch actions.
2024-04-17
comment 0
1090

How to design movie countdown animation using PPT
Article Introduction:Insert a horizontal text box into the PPT page, enter the number 321, set the text size and color, etc. (You can also insert a background for the page). Select the text box, click the [Font Spacing] button in the [Start]-[Font] group, select the [Other Spacing] option, open the [Font] dialog box, set [Spacing] to [Compact], and the measurement value to [180] . Select the text box, click [Animation]-[Animation Style]-[Appear], and then click [Add Animation]-[Disappear]. At this time, click the [Animation Pane] button to open the animation pane, and you can see the two animations just added. Select animation 1, right-click the mouse, select [Effect Options], and in the [Appear] dialog box that opens, set [Animation Text] to [By Letter], [Delay Between Letters]
2024-04-17
comment 0
568

How to set several continuous animations in PPT_How to set several continuous animations for an object in PPT
Article Introduction:Step 1: Draw a rectangular table and a diagonally placed wooden board in PPT, insert a circle on the table, set the filling and other formats as a small ball. Step 2: Select the ball, click the [Animation] tab, click the [Add Animation] button in the [Advanced Animation] group, select [Fly In] in the [Enter] type, and click in the [Animation] group Click [Effect Options], select [From Top] in the pop-up drop-down list, and keep the [Start: On Click] setting unchanged in the [Timing] group. Step 3: Click the [Animation Pane] button in the [Advanced Animation] group to open the animation pane, right-click the animation effect in the animation pane, select [Effect Options] in the drop-down list, and then select Set [Bounce End: 0.25] in the box and click [OK]. fourth
2024-04-17
comment 0
731

How to connect wireless network card to desktop computer
Article Introduction:How to connect a wireless network card to a desktop computer The method to connect a wireless network card to a desktop computer is as follows: Find the USB socket on the computer and insert the wireless network card into the USB socket. At that time, the computer will automatically recognize the driver of the wireless network card. After inserting the USB, the run dialog box will automatically pop up, click on the dialog box to run. Just insert the wireless network card first, update the driver software, and then connect the SSID in the Network and Sharing Center. First, insert the USB wireless network card into the computer USB interface. The system will detect the new hardware, and then select the wireless network card in the device manager. , right-click, update driver software, and select driver installation. Find the computer USB interface and insert the wireless network card into the interface. Click Run and it will automatically enter the installation interface. If it does not automatically pop up,
2024-05-04
comment 0
771
How to create file labels using Founder Xiaobiao Song simplified font_How to create file labels using Founder Xiaobiao Song simplified font
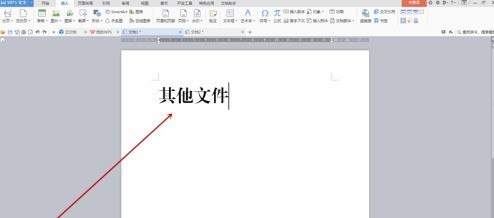
Article Introduction:First, use Founder's small standard Simplified Song to input the label content in a blank document, adjust the font size, and then move the cursor to the middle of every two words and press the Enter key to make the text vertical. Select all vertical text, click the [Table] drop-down menu button in the [Insert] tab of the toolbar, and select [Convert Text to Table] in the pop-up menu. After the dialog box pops up, there is no need to change the settings. Click the OK button to close the dialog box. You can see the effect in Figure 2 below. Right-click on the selection to pop up the menu and select [Borders and Shading]. After the dialog box pops up, use the mouse to click on the center line border pointed by the red arrow in Figure 1 below. When the center line disappears, click the OK button to close the dialog box. At this time, the center line of the table has completely disappeared, leaving only a large border. Move mouse to right
2024-06-10
comment 0
490

Operation content of making complex heart-shaped demonstration animation in wps2019
Article Introduction:1. For simple animation settings, click the [Animation] menu to select settings. 2. First draw a [Heart Shape] in the editing area, click [Insert] → Shape → Heart Shape, draw it and change it to red. 3. Select [Heart Shape] to set animation, click [Octagon] in the animation menu, and the animation will automatically run once. 4. Change the size of [Octagon]. After selecting the octagon, drag the small circle to change the size. 5. Click [Play] in the lower right corner to view the animation effect. 6. Set the effect of the animation to always play, click [Effect Options], and select [Timing], [Repeat], [Until the next click] in the dialog box. Press F5 to see the playback effect.
2024-03-27
comment 0
970
How to set audio file icon in ppt2013
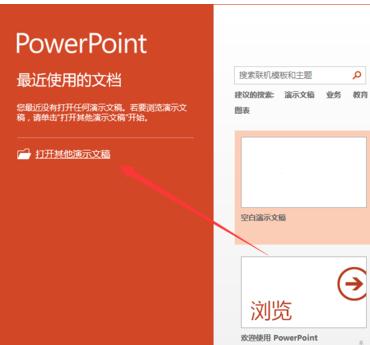
Article Introduction:Open and run ppt2013. Click [Open other presentations] to open the PPT slide file that needs to be edited or modified. In the open PowerPoint program window, select the audio file icon, right-click the mouse, select the [Change Picture] option in the pop-up option box and click it. After clicking the [Change Picture] option, the [Insert Picture] dialog box will open. In the [Insert Picture] dialog box, click the [Browse] option button from the file options. In the [Insert Picture] dialog box, find the folder where the pictures are stored, select the picture file you want to insert, and then click the [Insert] button. After the picture is inserted, the effect of changing the icon can be seen on the audio file.
2024-04-17
comment 0
936
The method of extending the model to the entity in UG8.0 software
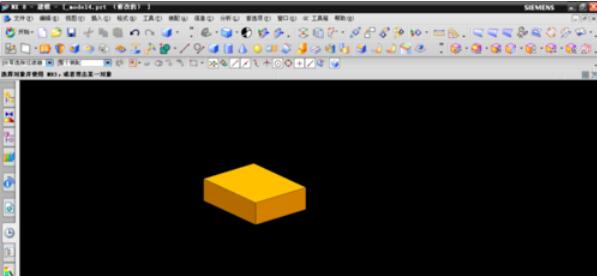
Article Introduction:Open the ug main program and create a new file. Draw a cuboid and click the start button - click [All Application Modules] at the bottom - find [Electrode Design] and click the third icon from the bottom as shown below [Extended Entity] to pop up the Extended Entity dialog box. Select a surface on the body at random, as shown in the picture, enter the distance in the second line of the dialog box [Offset Value], for example, 100, click the OK button in the dialog box to get the effect as shown in the picture below.
2024-06-04
comment 0
1010
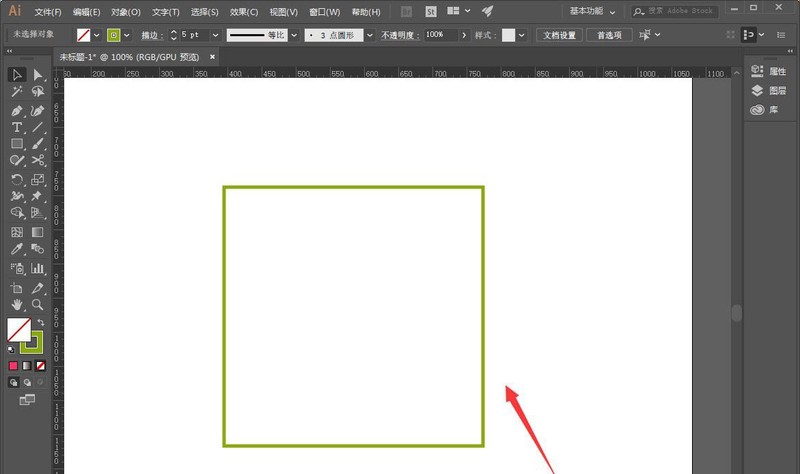
How to convert ai tables into gorgeous patterns_How to design ai patterns
Article Introduction:Open the software, create a new blank canvas, and then use the rectangle tool to draw a square. Then select the square, click Object--Path--Split into grids. At this time, a dialog box will pop up. We can set it as needed and click OK. Then select the mesh, click Effects--Distort and Transform--Shrink and Expand. At this time, a dialog box pops up again, check Preview, adjust parameters, and click OK. Finally, you will get a gorgeous pattern, as shown in the picture below.
2024-04-23
comment 0
662

Graphic method for recording explanation videos in ppt2013
Article Introduction:Open the presentation you are using, switch the tab on the upper ribbon to the Slide Show tab, click Record Slide Show in the Settings group, open the drop-down box, click Record from the Beginning, and click in the pop-up dialog box Start recording, enter the slideshow playback interface, and a timing dialog box will appear in the upper left corner. Use the microphone to start speaking and recording explanations. Just use the next button in the upper left corner to switch the slides and animation effects of the slides. After the recording is completed, It will automatically exit the show interface and enter the outline view. At this time, the recording time will appear in the lower left corner of each slide. Switch back to the file tab, select the Save and Send button on the left, select Create Video on the right, and click The Create Video button in the rightmost column pops up the save dialog box and select the video save location.
2024-04-17
comment 0
345

How to insert excel table link in ppt2013
Article Introduction:Open ppt, locate the place where you want to insert the excel table, click Insert -----Object on the common toolbar. In the [Insert Object] dialog box that pops up, select [Create from File] and click Browse to find the object you want to place. In order to display the excel table file in the form of an icon in PPT, you need to select [Display as Picture] here. The final effect is as shown in the figure. You can drag the excel icon to change its position.
2024-04-17
comment 0
1099
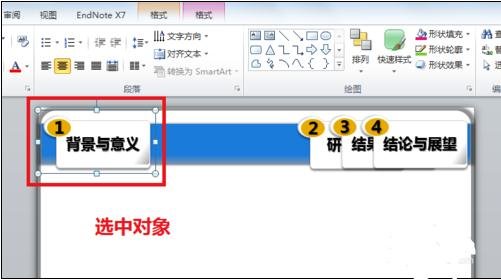
ppt2013 graphic method of drawing animated flight path
Article Introduction:Open the PPT document that needs to be edited, find the slide that needs to be edited, select the object that needs to be animated, click Animation in the menu bar, and select the [Fly In] animation effect. At this time, click the effect option on the right, and there will be many options to choose from. Flying direction, but if these directions cannot meet our needs, we need to customize the drop-down arrow menu next to the animation option. A large dialog box will pop up. Select the custom animation path below. When the mouse clicks, it will turn into a cross. Press and hold the left button. After drawing the path for the animation to play on the screen, click enter. At this time, you can see that the selected object will move according to the drawn path. Click the drawn path, you can see a series of small circles appearing on the edge of the path. At this time, you can modify the path.
2024-04-17
comment 0
797

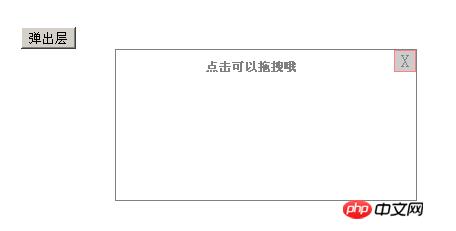
Dreamweaver cs6 operation tutorial for adding drop-down banners to web pages
Article Introduction:We first open the dreamweavercs6 software, create an AP layer where the banner is to be placed, and insert the content to be displayed. Here we only set the background color of the layer and name it an id. Then click on the body to open the behavior window, click on Add Behavior Effect Shade, select the layer just now in the pop-up dialog box, and select the properties according to your needs. Adjust the event to onload, that is, the effect will disappear as soon as it is opened. Then set the close button, create a new nested layer in the AP layer added above, and enter the x number. Then select the newly created layer, open the behavior window, click Add Behavior, select Show or Hide Elements, and select the parent layer in the pop-up dialog box. Adjust the event to onclick, which means click to close
2024-06-01
comment 0
860
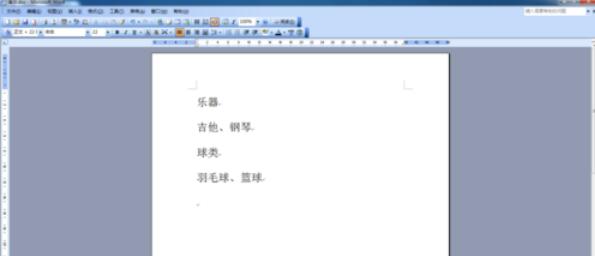
How to generate a table of contents in word2003
Article Introduction:Open the word2003 document and set the text you want to generate a table of contents as a unified title, as shown in the figure. 2. Click the mouse where you want to insert the table of contents and select the menu bar [Insert] - [Reference] - [Index and Table of Contents] , as shown in the figure. In the pop-up dialog box, select [Directory Tab], select the symbol before the tab character..., and then click OK, as shown in the figure. View the effect of automatically generating a directory.
2024-06-05
comment 0
940

Detailed method of setting startup view in Revit
Article Introduction:Click the Start View command in the Manage Project column of the Management tab. Then the startup view dialog box will pop up, and the drop-down dialog box displays the current settings (recently viewed). Select the set startup page and click OK. After the setting is completed, it is as shown in the figure. Significance: During the presentation process to the owner after the project is completed, it is necessary to set up a beautiful startup interface. Through the above explanation, you can select a view as the startup view of the project. At the same time, you can insert renderings or add text as the project in the corresponding view of the project. The startup page makes the project more beautiful.
2024-04-25
comment 0
672
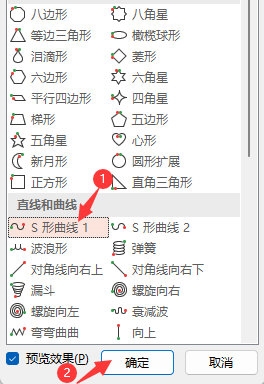
How to set the S-shaped curve 1 animation effect in PPT2021 How to operate
Article Introduction:PPT2021 is a professional office software launched by Microsoft. The software is simple to operate and can help users easily edit slides. So how to set the S-shaped curve 1 animation effect? If you don’t know how to operate, you can take a look at the tutorial below. [Operation method] 1. Open [PPT2021 software] and create a new [Slideshow] document. Insert an [icon]. 2. Then select [Icon], click the [Animation] menu, and click [More Settings]. 3. Click [Other Action Paths]. 4. When [Change Action Path] pops up, click [S-shaped Curve 1] to set, and click [OK].
2024-02-09
comment 0
1251
How to make ppt What is the process of making ppt
Article Introduction:Click the insert option in the software, create a new blank presentation, enter the subject and text, and set the display order of text and objects. Applicable model of the tutorial: Lenovo AIO520C System: Windows 10 Professional Edition: PowerPoint 2022 Analysis 1 After opening the PPT, click the file option and select New Blank Presentation. 2Input the topic and text, and add audio, picture, video and other effects. 3Finally, set the display order and animation effects of text and objects as required. Supplement: How to insert a video into ppt 1. First click to open the PowerPoint software, and after entering, click the insert option in the upper left corner. 2 Then click the video option in the upper right corner. 3. A pop-up box will appear, click on the video from the file. 4Then select
2024-02-22
comment 0
1554


